Online exams are now the new normal in recent years. It is used in university entrance exams or simply taking tests. It makes it easier to answer as you don’t need paper but just a device and Wi-Fi, and it also makes it easier to share with a large group of people.
With this, there are many ways to create an online exam for its benefits. Some upload their exam in excel and online; the most popular one used by many is Google Classroom.
Here, we will tell you what google classroom is and show you the process of how to take an online exam. As a bonus, we will show you the most convenient way to create an online exam!
- What Is Google Classroom?
- An All-in-One Solution – OnlineExamMaker
- How to Create An Exam in Google Classroom?
What Is Google Classroom?
Google Classroom is like a virtual classroom where students do all their schooling online, from studying to taking tests. And google classroom is the most used software as this can almost replace a school environment.
Google Classroom has all the necessary features that you need. And since it is made by google, it is connected to other software google has, like, google docs. Google Classroom helps students and teachers do assignments, join meetings and track grades.
Another feature is that parents or guardians may track grades and contact teachers by email connected to their children’s Google Classroom. This feature makes it easy to interact with parents and inquire about their schools.
An All-in-One Solution – OnlineExamMaker
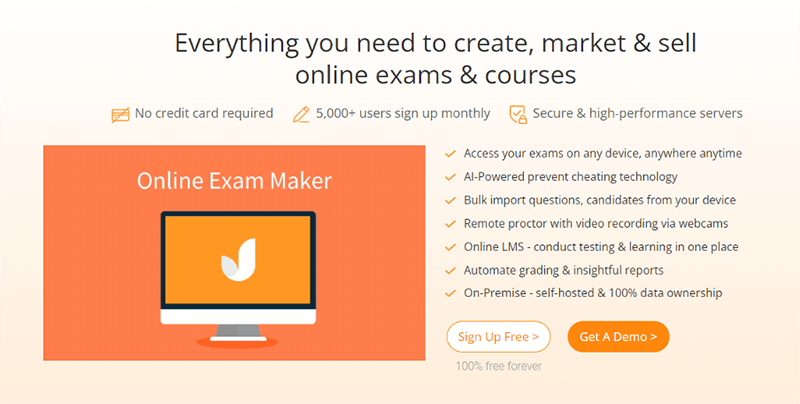
A new popular way of making online Exams is by using online exam platform like OnlineExamMaker. It is one of the best choices for online exam software as it has all the necessary features with advanced AI plus an additional part to improve it.
An example is automated reporting, which has additional analytics and statistics, making it more accurate to track the student’s progress and current knowledge. The software also helps you adjust lesson plans based on the Exam result.
The additional feature that is to look for is the anti-cheating system. The software has id verification, screen, mic recording, and an AI proctoring system. The anti-cheating system makes the Exam secure and maintains its integrity.
There are still many more features in the OnlineExamMaker to improve teaching so consider buying one to help you give the best education possible!
Create Your Next Quiz/Exam with OnlineExamMaker
How to Create An Exam in Google Classroom?
Google Classroom has a neat way of creating and sharing exams online. You can create, schedule, and assign a student to take the Exam.
Below is how you create an exam and also schedule it!
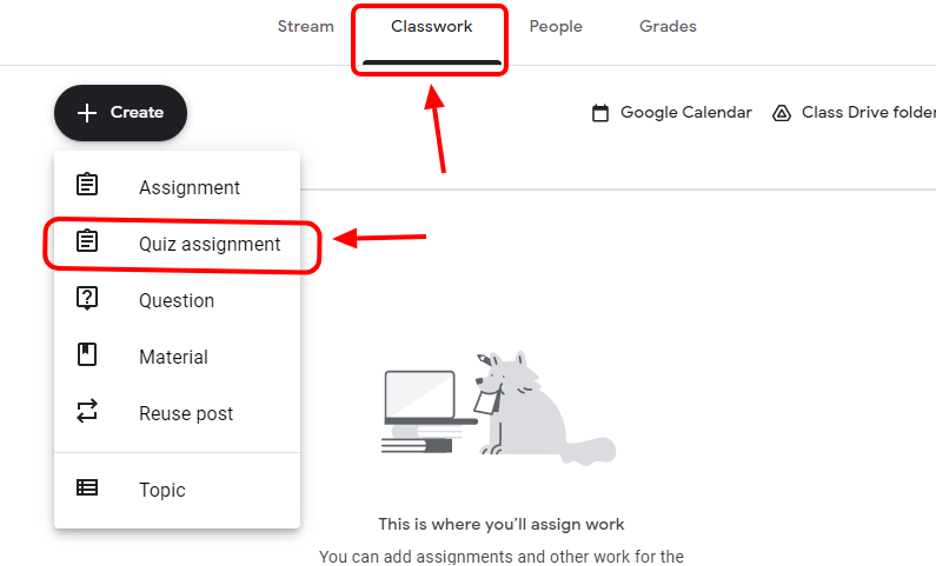
Step 1: Navigating Google Classroom
To start creating an exam, head on to the dashboard. Click on the Classwork tab, and on the tab, you can press create, and on the choices, click on the quiz assignment.
Step 2: Setting up Your Exam
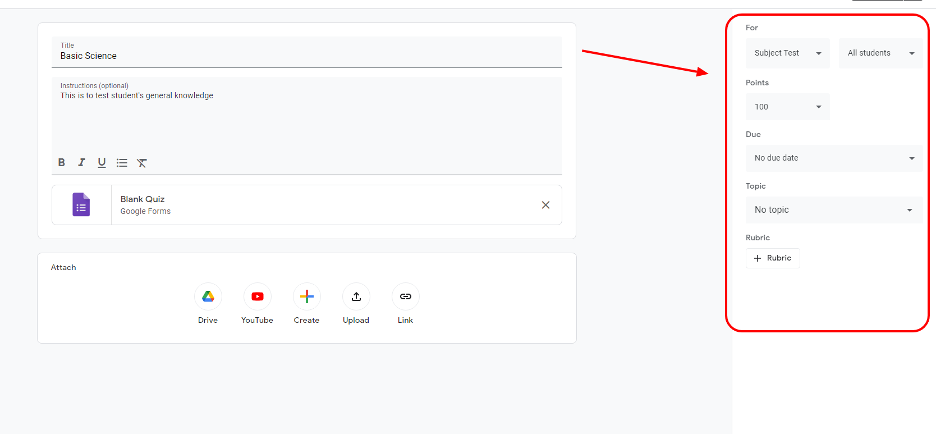
Upon choosing the quiz assignment option, you will fill out the title and have the option to add the instructions. Another thing you will observe is that a blank google form will automatically be created.
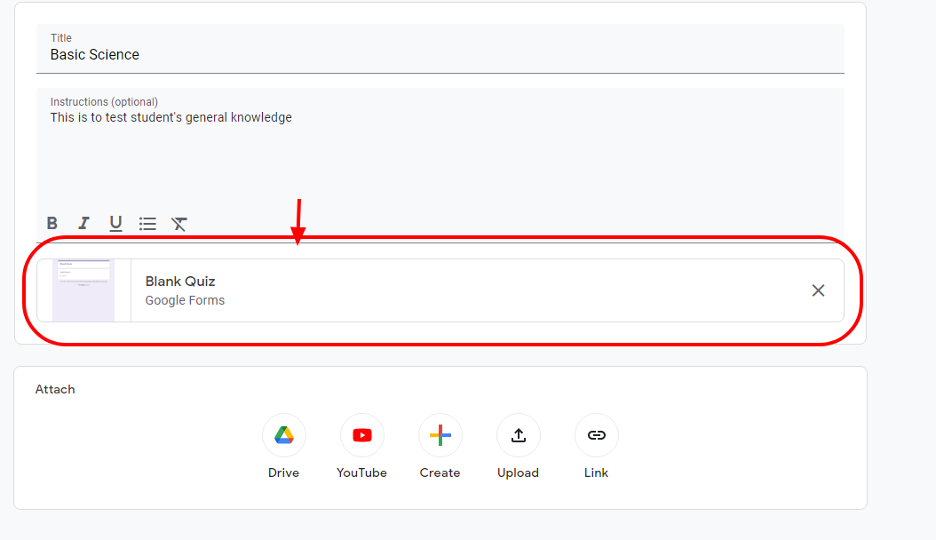
In this tab also, you can link websites, add documents, and link YouTube videos. If you want to add, press the create or drag the document to the space provided.

Step 3: Creating Exam
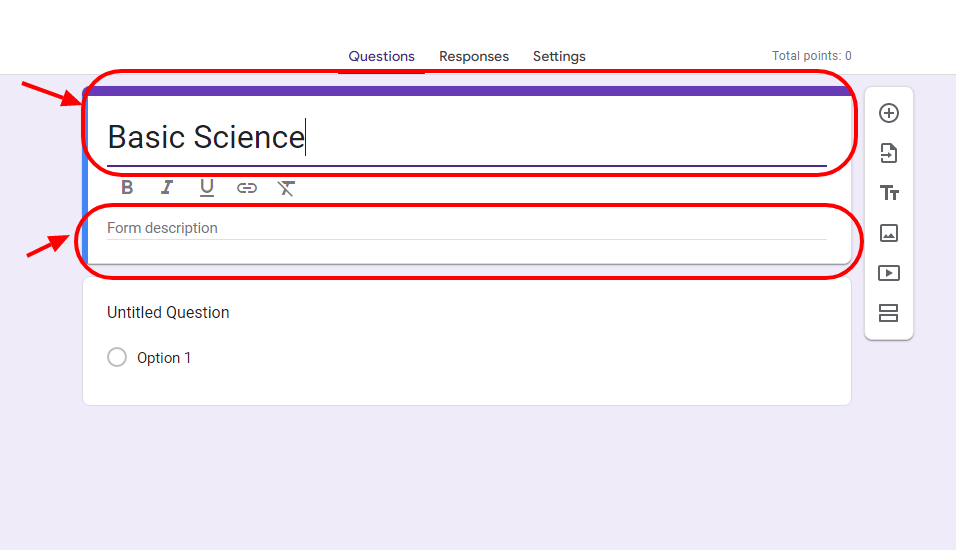
You can now head on to the google Form named blank quiz to create your Exam. Here you will now create your Exam for the student. You can edit the exam name, add a description or introduction, and more.
Step 4: Editing and Adding Questions
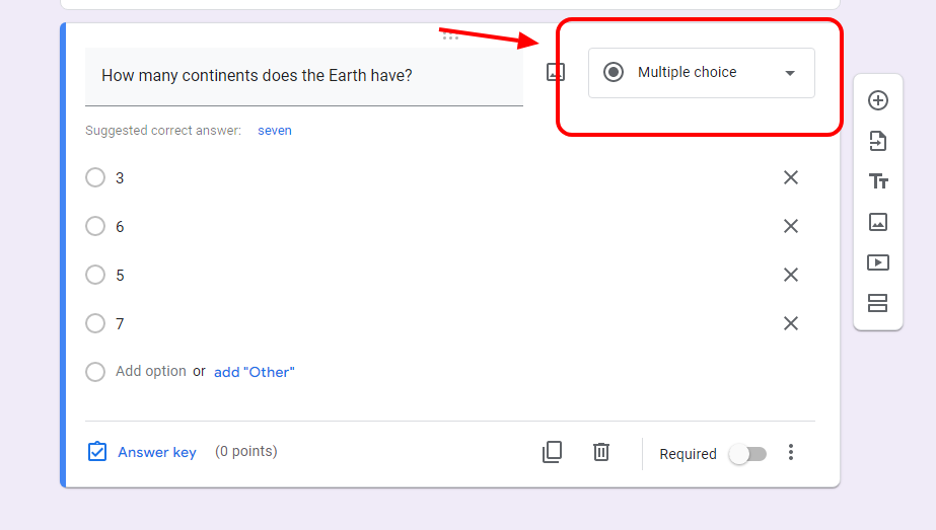
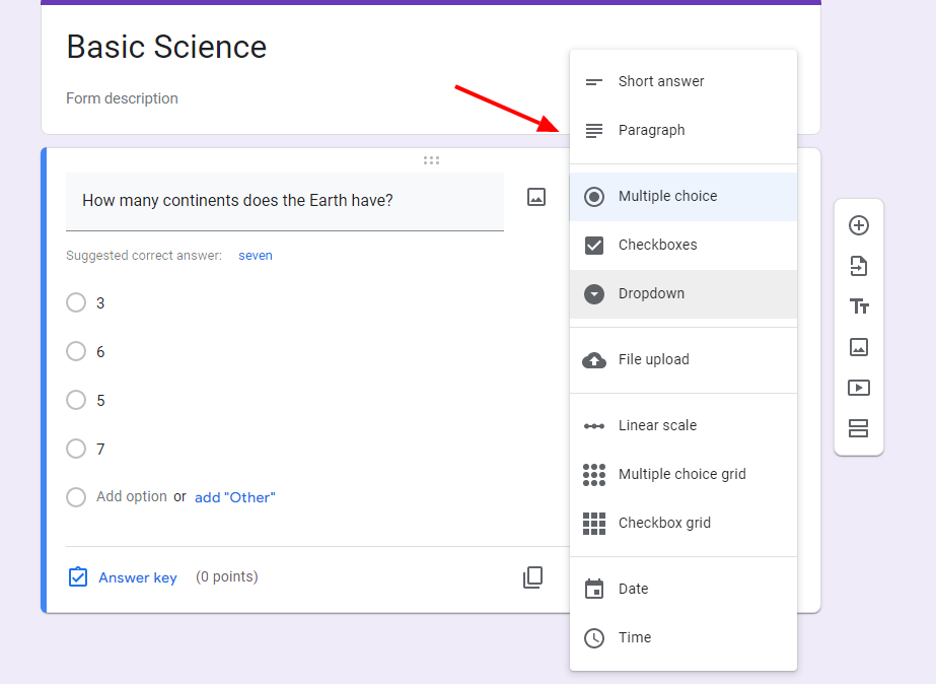
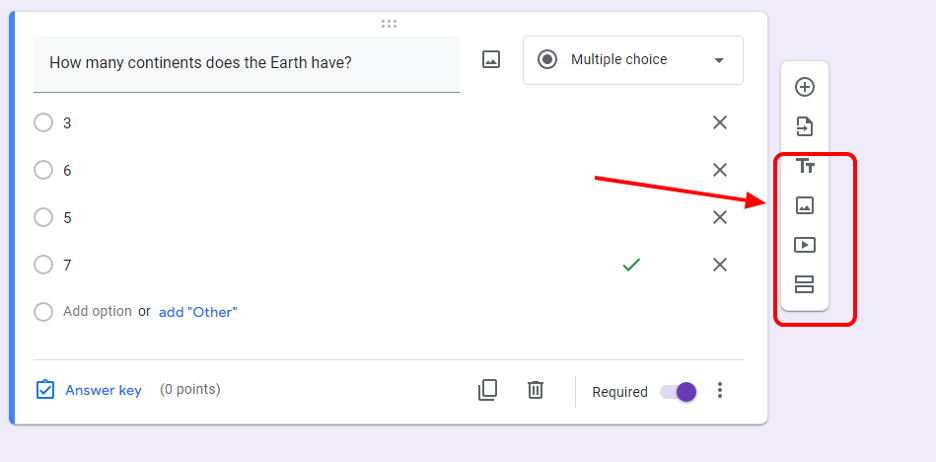
In Google Forms, you have the option to add more questions and also have them take different forms. The choice includes multiple-choice, an essay, a checkbox, or a file upload. To do this, click the arrow-down menu beside the question and pick from the choices.
In adding questions, press the plus at the sidebar or duplicate the question at the bottom. You could also import some questions from other google forms you have created.

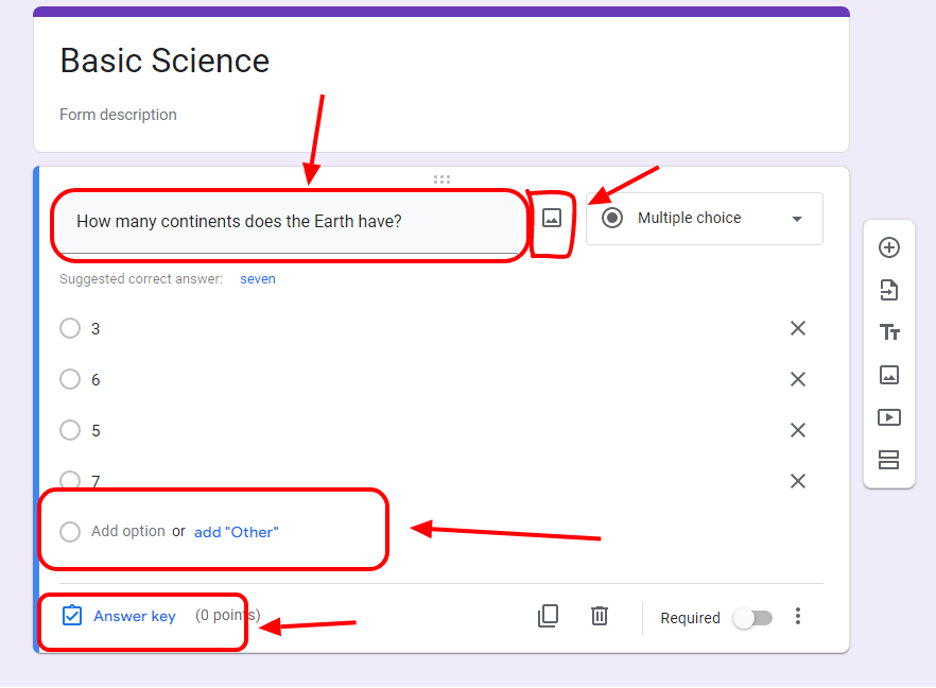
Now for the question, you can put the question on the question tab, then input the possible answers in the choices. Then, click the answer key, where you will pick the correct answer and the points it will have. You could also add an image to your question by clicking the image icon beside the question.

At the bottom of the question, you will see a three-dot option and a required slider. The required slider lets your question be unskippable. As for the three-dot option, you can add a description and make the option shuffle every time a new student takes the Exam.

Step 5: Customizing your Exam
Google forms let you customize your layout by allowing you to add a picture, more description, sections, and video to your Exam. To do this, you can click the option you want at the sidebar beside the question.
You can insert a file for a picture, add links for a YouTube video, and edit titles to add instructions or just sectioning of the Exam.
The sections option in the sidebar also lets you have multiple pages in your form. This section option makes it easy to categorize the type of question or subject per page.
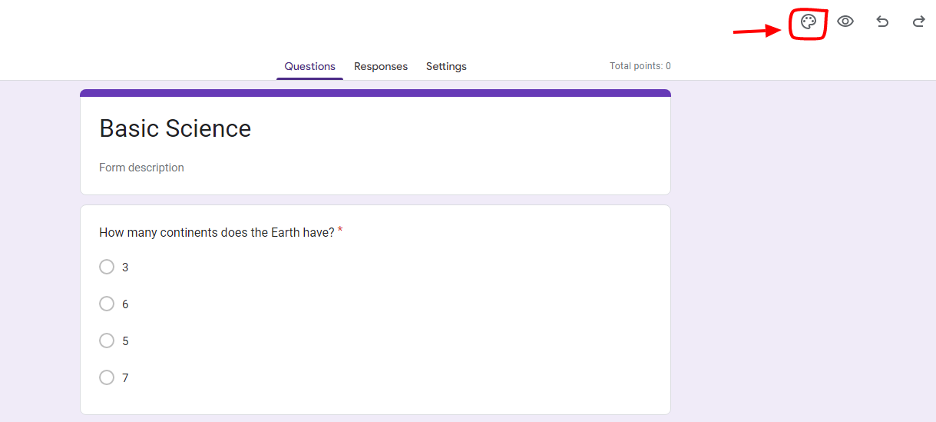
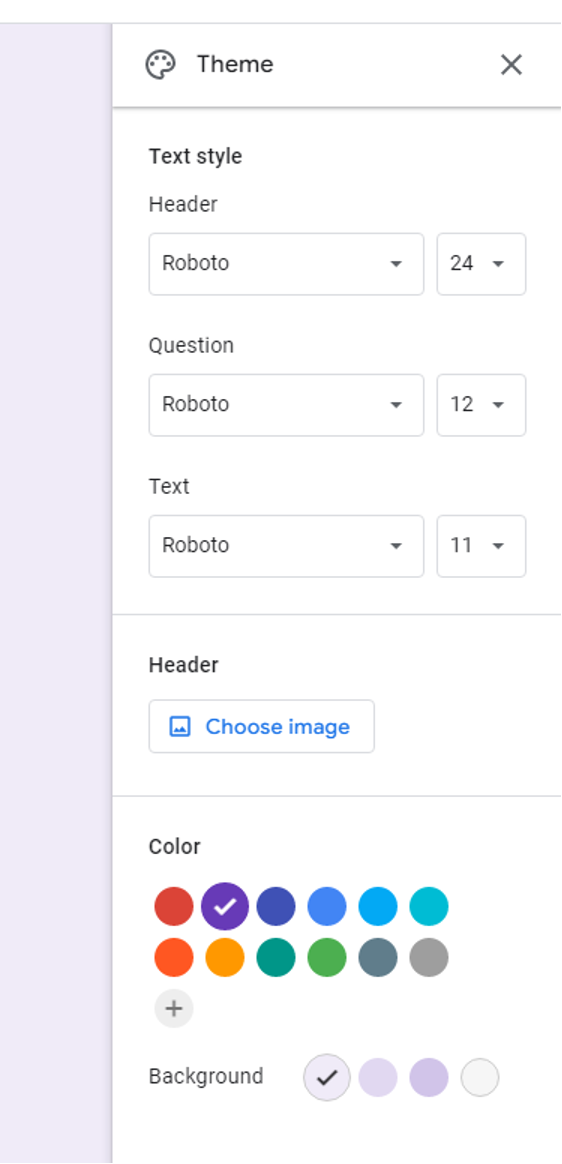
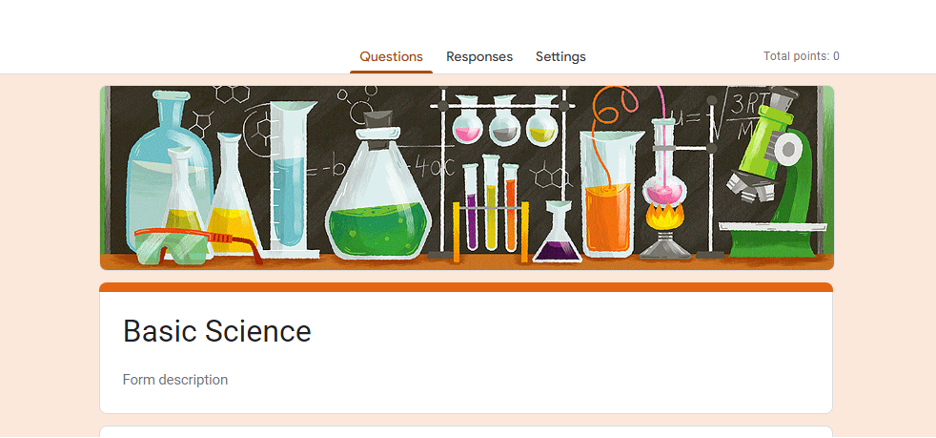
Step 6: Adding your touch!
You can personalize your Exam by changing the color and having the option to add a logo to your Exam. Do this by pressing the paint icon at the top of the google form and there you can insert your logo and change the exam theme color to match your logo.

Step 7: Scheduling the Exam
The final step in creating an online exam is to schedule it. First, save and exit the google form and head on to the classwork again, where the quiz is accessible.
Then at the right side of the page, you can see the different drop-down options where you will pick what class is for and the student who will take the Exam. You can change the due date and how many points the Exam will have, and you are done creating the Exam!
Create Your Next Quiz/Exam with OnlineExamMaker