Every University, School, and Company uses different types of quiz testing their students or employees. A quiz is used to test the employee’s knowledge about their job and for the students to know if they understand the lesson.
So creating quizzes is essential, and there are a lot of ways for you to create a quiz. You could generate quizzes using paper, which is the old way, a word document, which is now digitalized but almost the same as paper or Excel. Yes, you can use Excel to create quizzes thanks to its versatile tools, and this has also been the most common and popular way of making one!
- Excel Can Be Used to Create A Quiz
- OnlineExamMaker: An Easier Way to Create Online Quiz Using AI
- Step-by-step Guide to Create A Quiz Using Excel
Excel Can Be Used to Create A Quiz
As stated, Excel has so many versatile uses that you can use in any field. The most common way of using Excel is in accounting. Thanks to its built-in codes, you can keep track of records and automatically calculate them.
You can also use Excel in data management and analysis. Excel can hold large amounts of data, and because of sheets, they can also categorize the data correctly. With the code also, Excel automatically analyzes the given data.
So how can Excel be used in creating quizzes? Because of the excel coding feature, you can easily create quizzes and automatically compute the total scores even with many questions. Excel’s vast storage also helps you create as many questions as possible. You can even categorize your quizzes by using different sheets or just putting all the examinations in separate sheets. Because of these features, it makes it easier and more convenient for teachers as they can easily record vast amounts of scores instantly.
OnlineExamMaker: An Easier Way to Create Online Quiz Using AI

Creating quizzes has never been easier now, thanks to advances in technology. You can easily create a quiz and automatically get the result fast, and it comes with a detailed report. And because of the past year, schools and universities need to conduct exams online, and they can do this with the help of online exam software.
One particular in mind is the best software called OnlineExamMaker software. This software advances exam creation by making it more secure thanks to its anti-cheating system, making quizzes more interactive and fun using different media and comprehensive questions, and its automated reports system reports detailed and analyzed results.
Create a responsive quiz using AI
By using OnlineExamMaker AI Question Generator, creating quizzes has never been easier. You can easily generate professional questions by keywords or texts in seconds. More over, their AI Exam Grader can calculate the quiz score automatically once the student submit the exam.
In the software dashboard, you click exam list, press new exam, and then quickly create one. Their user-friendly interface also makes it easy to create a test templates, and the option for different questions, as well as handy in making comprehensive exams.
Create Your Next Quiz/Exam with OnlineExamMaker
The automated reports, as stated, are also one of the best in this online test genetator software; you can get detailed information on how well the student has done in a particular question and the overall results of the class. The automated report also includes analyzed and statistical reports to precisely show what needs to improve.
One handy feature is that you can also monetize your quiz for other teachers and the university. It is an excellent way to earn additional income while making your own quiz. Overall, this handy online Exam software makes your life easier with its many features and tools to help you create quizzes for your students.
Step-by-step Guide to Create A Quiz Using Excel
You can use any Excel to make a quiz. It could be word excel, an online excel, or any other app that can open and use excel. Below is the easiest method for creating a quiz
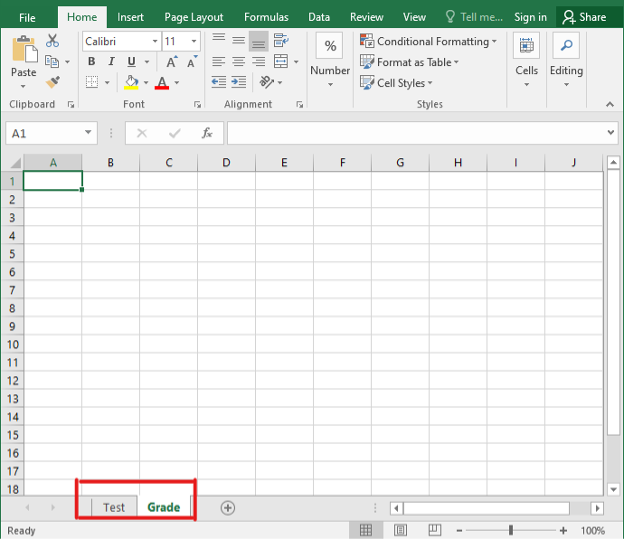
Step 1: Setting up the Sheet
In the first part, create two sheets by pressing the plus sign beside sheet1, which is found on the bottom side. Name sheet1 and sheet2 into Test and Grade, respectively.
Click the plus sign to create another sheet:

Right click sheet1 and click rename to change into test and same procedure with sheet2:

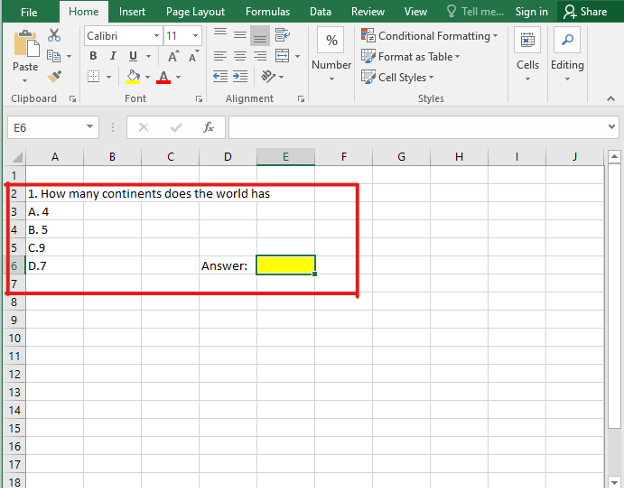
Step 2: Formulate your question
In the Test sheet, put your question in any row and column. You can leave a cell blank for takers to input their answers and highlight it so that the takers can easily see where they will answer. You can input as many questions as possible and leave directions if needed.
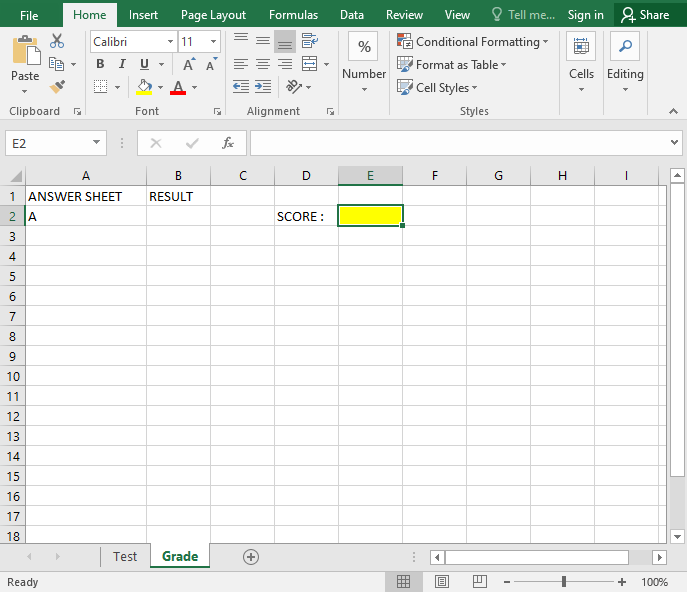
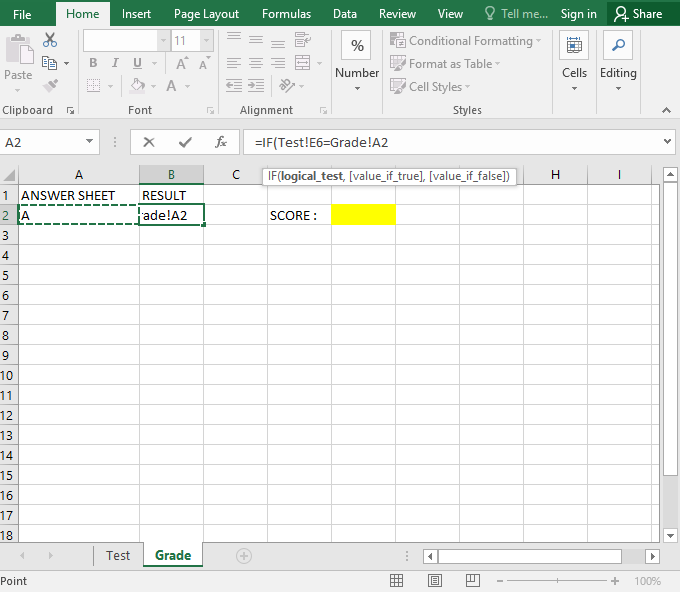
Step 3: Setup the Grade Sheet
In this part, go ahead in the Grade Sheet beside the Test sheet. Make column A for the answer sheet, Column B for the result, and any cell for the total Score. Then input all the answers in this Grade sheet as well.
Just to let you know
Sign up for a free OnlineExamMaker account to create an interactive online quiz in minutes – automatic grading & mobile friendly.
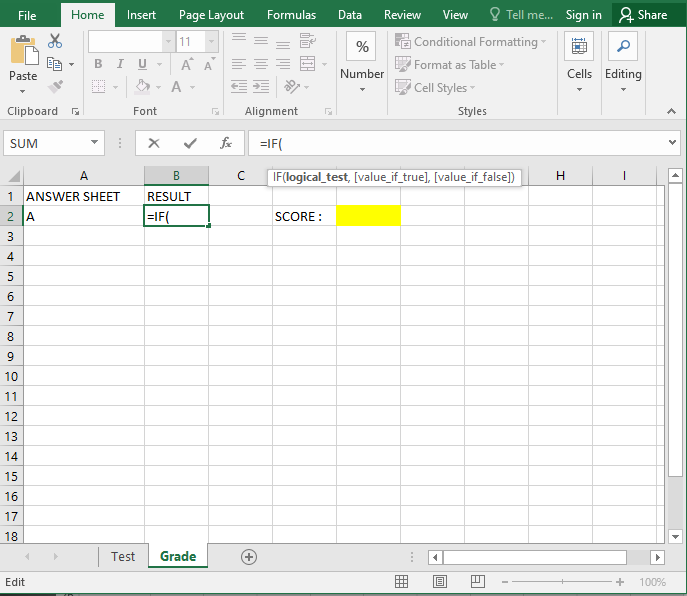
Step 4: Make the Code
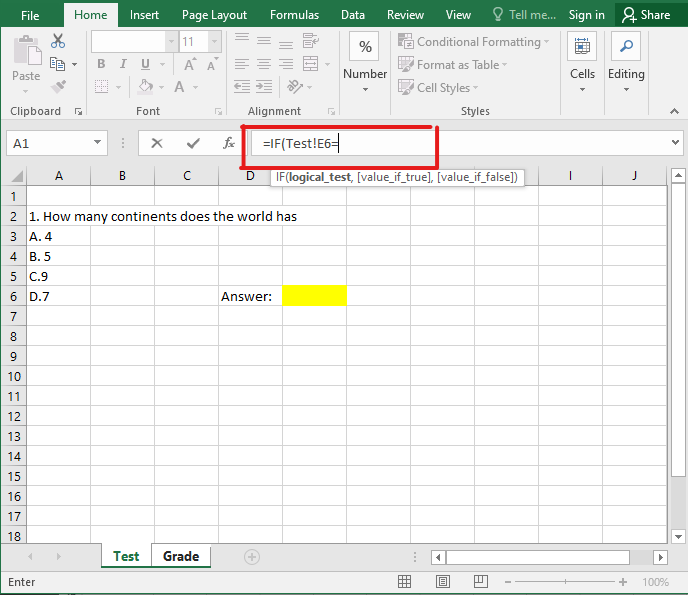
Head on to the Score sheet, under the result column, select the first cell, write “=IF( “then go to Test sheet, then click the answer cell, then press =, then go to Grade Sheet and click the answer under answer sheet, after that write “Correct”,” Incorrect”).
In Grades Tab write =IF(:
Go to test and click the answer:
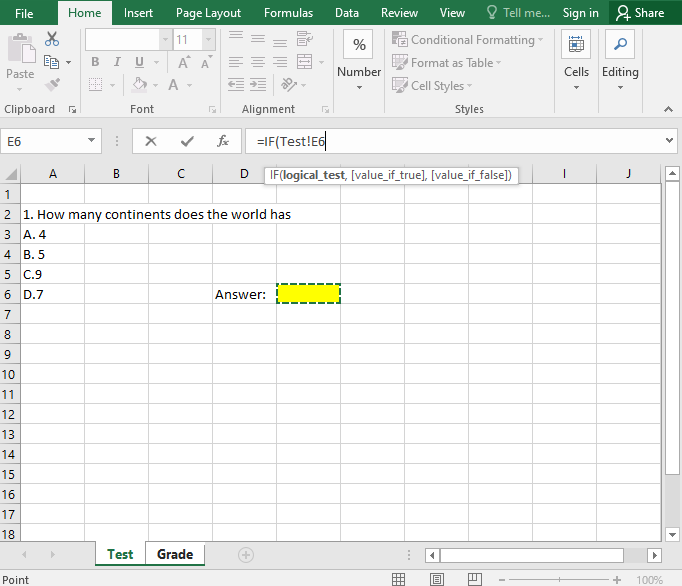
Type the = at formula bar:
Then click the Answer:
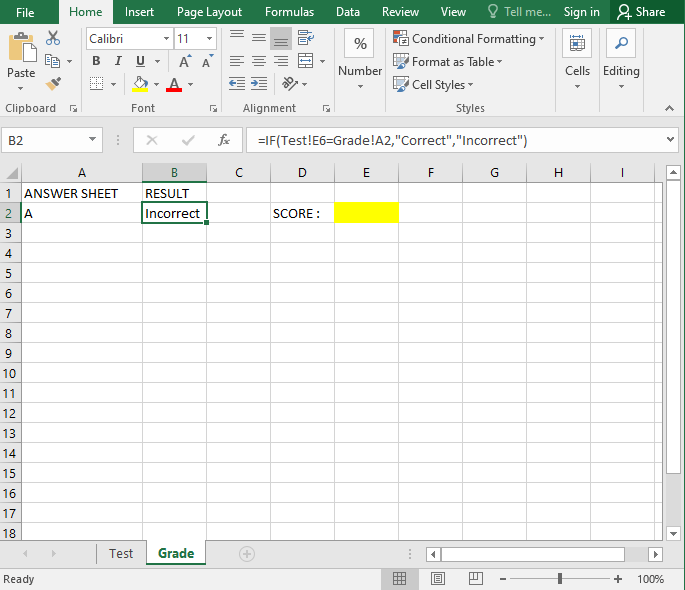
Then continue the code “Correct”, “Incorrect”):

The code would generally look like this =IF(Test!Cell=Score!Cell,” Correct”,” Incorrect”) where the cell is the place the answer and answer sheet is in
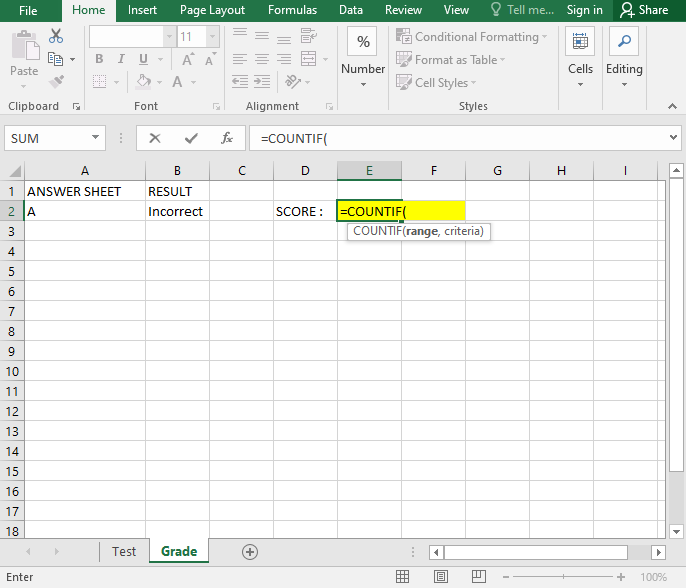
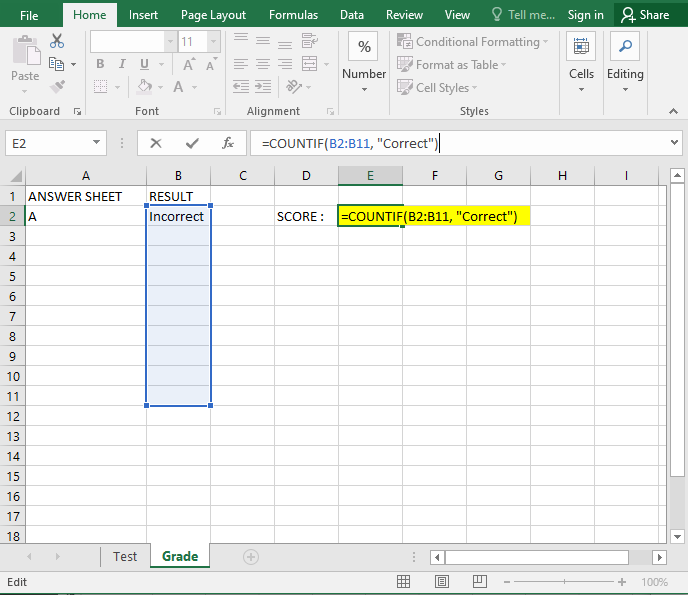
Next is the total Score in the Score sheet. Click the cell where the total Score would be, then type “=COUNTIF(“then drag the cursor through column B where the result would be, then type in “correct”. The whole code would generally look like this “=COUNTIF(Cell:Cell,” Correct”)” where the cell is the range of the result.
Type COUNTIF:
Drag the range:

Complete the code:
The finished code:

Step 5 Locking and Hiding the Grade Sheet
The most important part is this step as this help prevent students from knowing the answer and their Score.
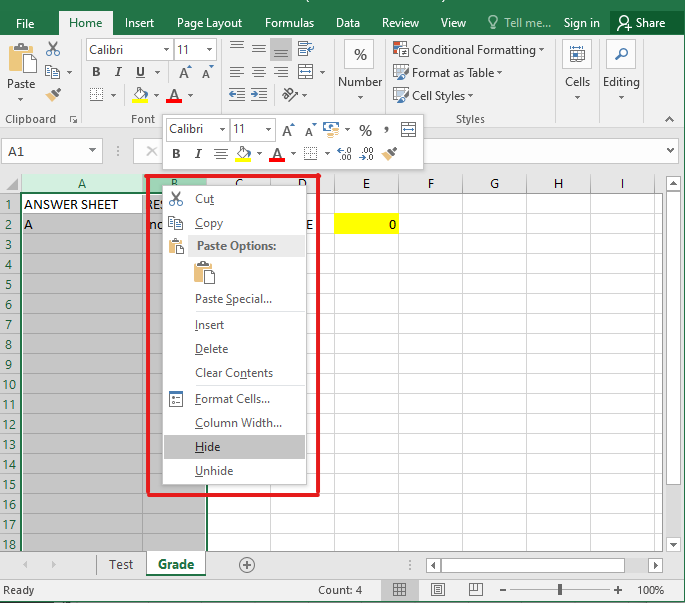
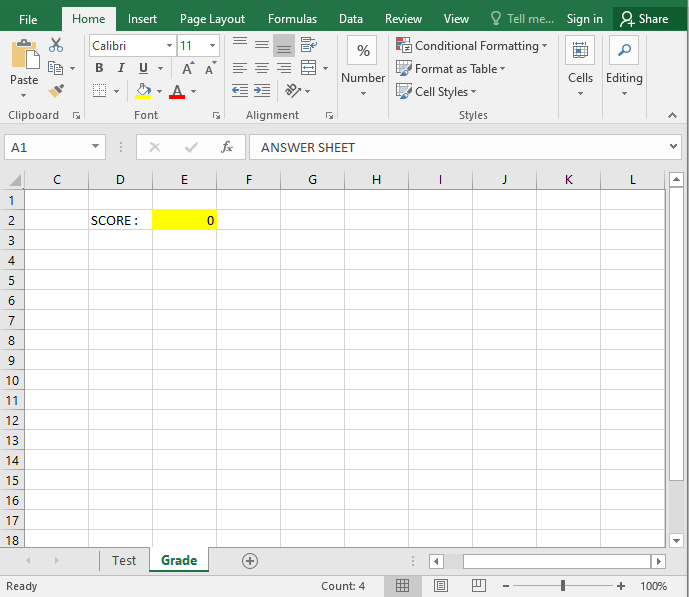
Do this by simply selecting the column by dragging the cursor through the answer sheet and results and pressing right-click, then in the menu, select Hide. This makes the whole column hidden, and you can unhide them by simply pressing ctrl + A, then right click and select unhide
Dragging the answer sheet and result:

Right click to hide:
After hiding:
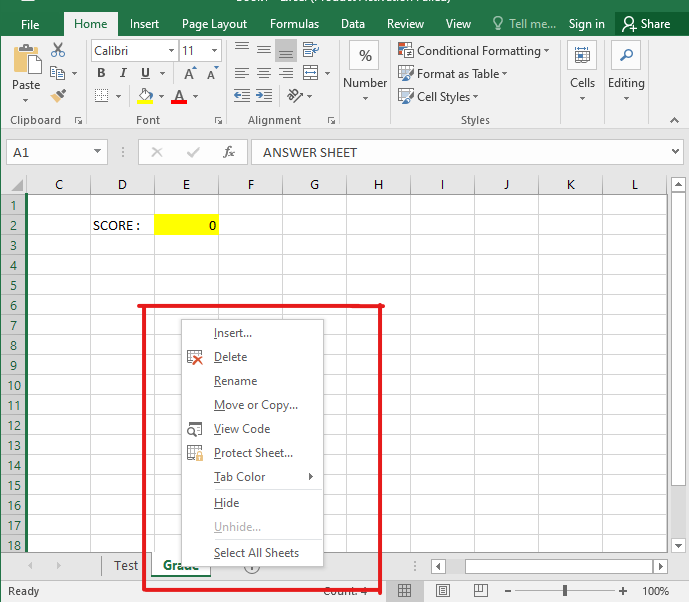
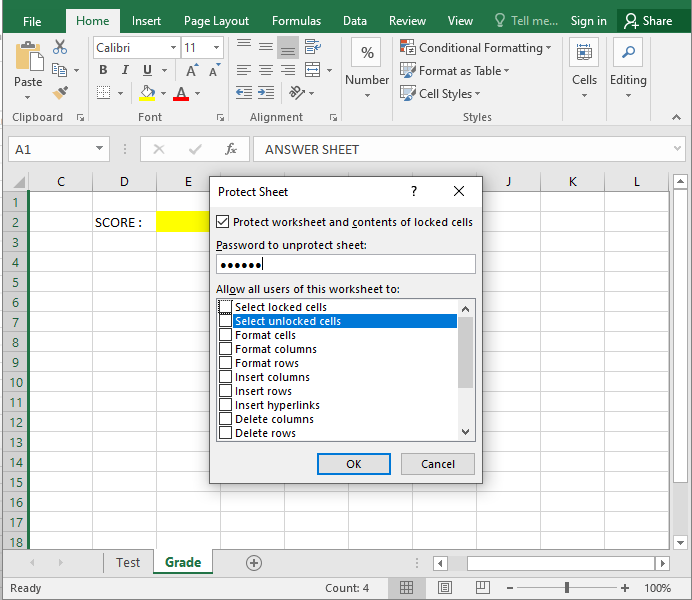
As for locking the sheet itself to prevent any access, you can press the right-click on the Grade Sheet tab, then select protect in the menu; a pop will open, and then uncheck all the access there is to prevent any people from seeing this sheet, lastly input the password to lock the Grade sheet.
Right clicking the grade sheet:
When selecting protect:

Remove the access and add a password:
Create Your Next Quiz/Exam with OnlineExamMaker