When schools shifted to online or hybrid models, many teachers made the mistake of trying to replicate every minute of their in-person class. Full lectures via video. Multiple assignments. Discussion boards. The works. And you know what happened? Everyone—students, teachers, parents—burned out fast.
Here’s the truth that took me a while to accept: there’s no eye contact, no real-time discussion, no immediate feedback on whether students actually get it. You’re teaching through a screen to students who might be juggling WiFi issues, younger siblings, or just the overwhelming weirdness of learning from their kitchen table.
- Set Up Your Virtual Office Hours: The Anchor Point
- Ditch the Email Chaos: Why Schoology Messaging Changes Everything
- The 75% Class Philosophy: Less But Better
- Structuring Your Two-Task Virtual Day
- Going Asynchronous: Freedom Within Structure
- Smart Tools for Smarter Assessment: Enter OnlineExamMaker
- Quick Wins for Managing Virtual Workflow
Set Up Your Virtual Office Hours: The Anchor Point
Before you post a single assignment, you need to establish something crucial: virtual office hours. Think of these as your lighthouse in the storm—a fixed point where students know they can find you.
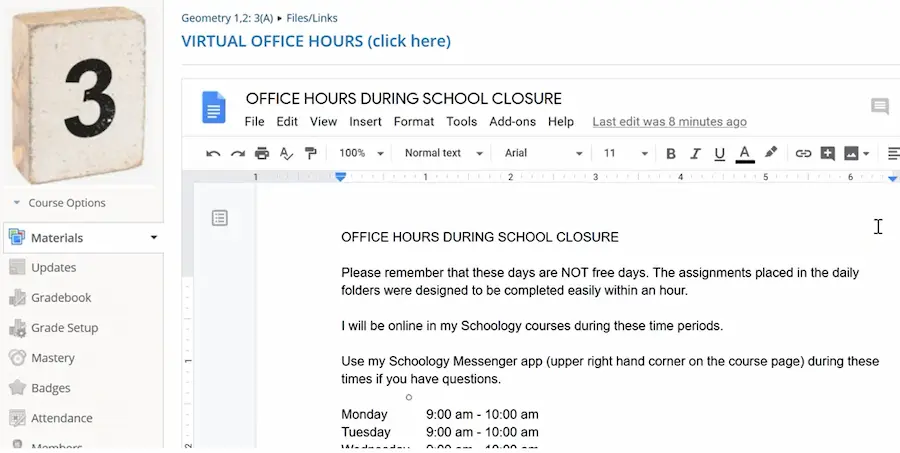
Here’s what I do: I create a Google Doc and pin it to the very top of my Schoology course. Inside, I include:
- A reality check: “These are not free days.” Students need to hear this directly. Virtual learning days require actual work—just not the same volume as in-person days.
- Time expectations: “Assignments are designed to be completed within one hour.” Be specific. Vague expectations create anxiety.
- Your availability window: For example, “I’ll be online between 9-10 a.m.” You don’t need to be available all day. Pick a consistent block and stick to it.
- How to reach you: More on this in a second, but clarity here prevents dozens of “Where do I send this?” messages.
Pro tip: Update these hours as you learn what works. Maybe mornings don’t fit your schedule, or you find students need afternoon support. The key is consistency once you choose your window.
Why does this matter so much? Because visible, predictable office hours reduce student anxiety and eliminate the “Is my teacher even there?” panic. Students know exactly when they can get help, and you get to protect your own sanity by setting boundaries.
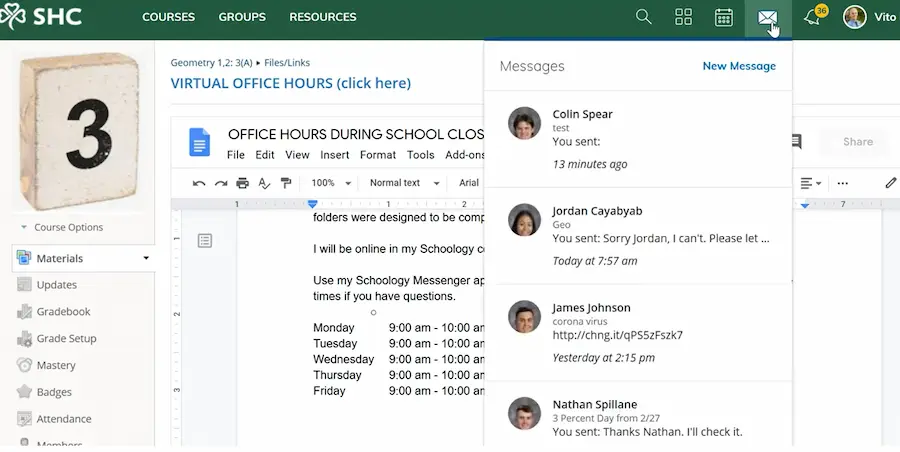
Ditch the Email Chaos: Why Schoology Messaging Changes Everything
Here’s where I’m going to be blunt: stop using email for daily student communication.
Emails get buried under:
- Spam about car insurance you don’t need
- Newsletter subscriptions you forgot about
- Administrative updates that may or may not be urgent
- That one promotional email from 2019 you still haven’t unsubscribed from
Meanwhile, your student’s genuine question about quadratic equations? Lost in the noise.
Schoology’s messaging feature solves this. It’s right there in the upper right corner—a dedicated communication channel for school stuff only. Click it, and you get a clean thread with each student. No spam. No clutter. Just teaching.
I tell my students on Day One: “Don’t email me. Use the Schoology messenger.” It keeps everything organized, searchable, and tied directly to the course. When a student asks about an assignment, I can see their work right there in the same platform. It’s like having your classroom, gradebook, and office hours all in one spot.
Plus, here’s the secret benefit: you can do quick, individual tutoring through these messages. A student stuck on problem 3? Screenshot your explanation. Need to clarify instructions? Send a voice note. The informality makes it feel less intimidating than emailing a teacher, which means students actually reach out when they need help.
The 75% Class Philosophy: Less But Better
Let’s talk about what “75% class” actually means in practice. It’s not about doing less work—it’s about doing better work with realistic expectations.
In a regular classroom, you might plan:
- A 10-minute warm-up
- 15 minutes of direct instruction
- 20 minutes of guided practice
- 15 minutes of independent work
- 5 minutes of closure/exit ticket
That’s a full, robust 65-minute lesson. But online? Everything takes longer. Logging in takes time. Finding the assignment takes time. Troubleshooting a video that won’t play takes time. Students get distracted more easily at home. You can’t circulate the room to re-focus them.
So here’s the shift: design for one hour of focused work, not 75 minutes of scattered effort. On a full in-person day, I might assign three or four different tasks. On virtual days? Two tasks. That’s it.
This isn’t about lowering standards. It’s about prioritizing ruthlessly. What absolutely must move forward today? What’s the one skill they need to practice? What’s the one concept that unlocks the next topic?
Answer those questions, and you’ve got your virtual day planned.
Structuring Your Two-Task Virtual Day
Alright, let’s get tactical. Here’s the structure I use for every virtual learning day, and it works beautifully.
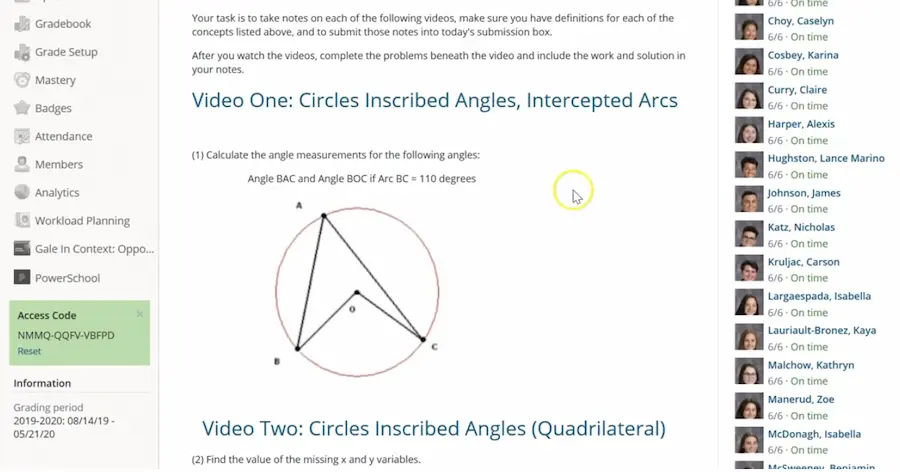
Task 1: The Instructional Activity
This is where students learn something new or review a concept. For me, this usually means a teacher-created video hosted on YouTube. I know video creation sounds intimidating, but hear me out—it doesn’t need to be fancy.
Here’s my formula:
- Record a short explanation video (8-12 minutes max—any longer and attention drops off a cliff)
- Include worked examples so students see the process, not just the answer
- Ask students to take guided notes while watching
- Have them submit their notes or a short product in Schoology for credit
The beauty of this approach? Students can pause, rewind, and rewatch as needed. That kid who spaces out during in-person lectures? Now they can actually learn at their own pace.
You can keep it dead simple: “Watch the video. Take notes. Complete the practice problems shown in the video. Submit your work.” That’s it. No complicated rubric. No essay on what they learned. Just clear, doable steps.
Don’t have time to make videos? Use screencasting tools like Loom or Screencast-O-Matic. Open your notes, hit record, and talk through the material like you would in class. Five takes and you’re done. Students care more about understanding than production quality.
Task 2: The Practice Activity
Learning without practice is like reading about swimming and never getting in the pool. Task 2 is where students apply what they just learned.
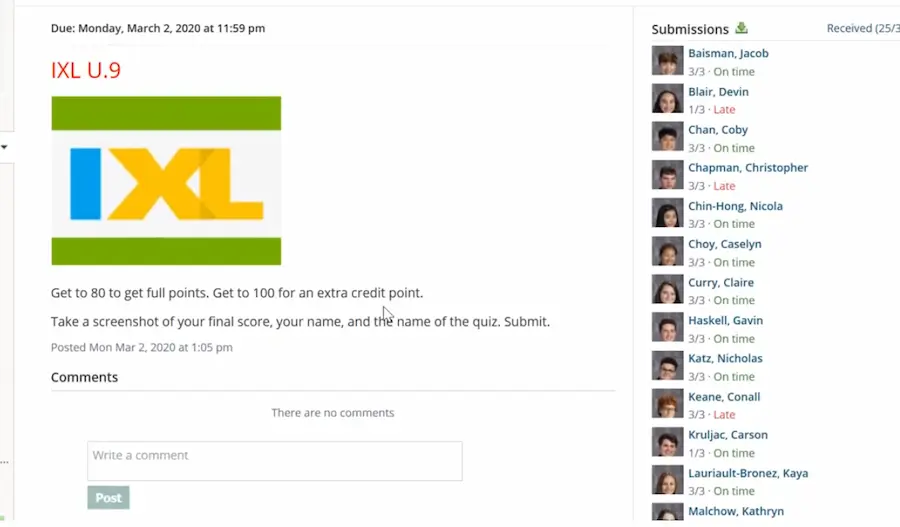
We use IXL for math, which provides interactive, adaptive practice. But the principle works for any subject:
- Choose a platform with immediate feedback (IXL, Quizlet, Khan Academy, etc.)
- Set clear completion goals: “Reach a SmartScore of 80” or “Complete 15 questions”
- Make sure it reinforces the video lesson—not new material
The key here is alignment. Task 1 introduces the concept; Task 2 reinforces it. Students shouldn’t feel like they’re tackling two unrelated things. It’s one cohesive learning experience split into two manageable chunks.
Going Asynchronous: Freedom Within Structure
Here’s where virtual learning can actually be better than traditional class: asynchronous work gives students flexibility while maintaining accountability.
“Asynchronous” just means students don’t have to be online at the exact class time. Neither do you. You’re not running a live Zoom session where everyone logs in at 10:15 a.m. and sits through a lecture together.
Instead, here’s the expectation structure I use:
- Task 1 is due during the class period (or by end of day—your choice)
- Task 2 is due by the next class meeting
This setup gives students breathing room while keeping them accountable. Maybe they watch the video during class time but do the practice later. Maybe they knock out both tasks in the morning. As long as deadlines are met, it’s their call.
Why this works: Students aren’t fighting tech issues during a live session. They can work when their WiFi is most stable. They can ask better questions because they’ve had time to think. And you? You’re not performing live while troubleshooting 12 students’ login problems simultaneously.
Plus, asynchronous learning means you can respond thoughtfully to student questions rather than in real-time pressure. That Schoology message about factoring polynomials? You can send a detailed explanation with examples, not a rushed “Um, try multiplying it out” during a chaotic Zoom call.
Smart Tools for Smarter Assessment: Enter OnlineExamMaker
Now, let’s talk about something that makes or breaks virtual teaching: assessment. You need to know if students are actually learning, but you also can’t spend four hours every night grading.
This is where modern assessment tools like OnlineExamMaker become game-changers for teachers running virtual or hybrid classes.
Here’s why it matters: traditional tests don’t translate well online. Students can Google answers. You can’t watch them work. Grading takes forever. But OnlineExamMaker’s AI-powered features solve these exact problems:
Create Your Next Quiz/Exam with OnlineExamMaker
The Features That Actually Help Teachers
Creating quality quiz questions is time-consuming. OnlineExamMaker’s AI can generate questions based on your content—whether that’s a textbook chapter, your video transcript, or a set of learning objectives. You review, adjust, and you’ve got an assessment ready in minutes instead of hours.
Multiple choice, true/false, fill-in-the-blank—all graded instantly. But here’s the impressive part: the AI can even grade short answer and essay questions based on rubrics you define. That’s time back in your day that you can spend actually teaching instead of drowning in paperwork.
Look, academic integrity online is tricky. OnlineExamMaker’s proctoring features monitor for suspicious behavior—multiple faces on camera, extended time away from screen, switching tabs. It’s not about catching students; it’s about maintaining the value of the assessment so the data you get actually means something.
Build a library of questions organized by topic, difficulty, and standard. Next semester when you teach the same unit? Pull from your bank. No starting from scratch. It’s like having a filing cabinet that actually stays organized.
OnlineExamMaker integrates with platforms like Schoology or can function as a standalone LMS. Track student progress, identify which concepts are causing trouble across the class, and adjust your instruction accordingly. Data-driven teaching without a statistics degree.
Real talk: You don’t need every bell and whistle for every assessment. But having tools that can adapt to what you need—quick formative checks, formal summative tests, practice quizzes—makes virtual teaching sustainable long-term.
Quick Wins for Managing Virtual Workflow
Let’s wrap up with some tactical tips that make day-to-day virtual teaching smoother:
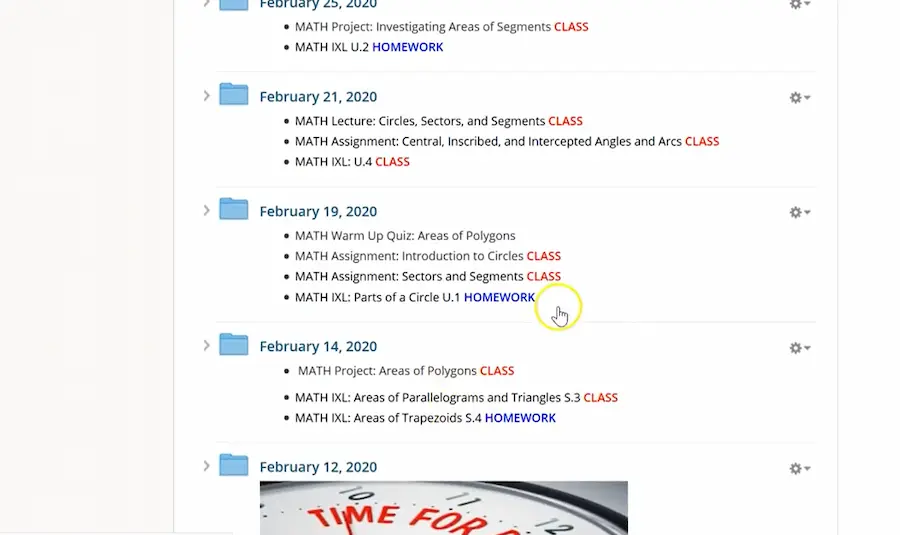
Create a predictable folder structure. I use daily folders labeled by date: “March 2nd,” “March 4th,” etc. Students always know where to look for “today’s work.” No hunting through tabs or scrolling endlessly.
Use completion grades for practice work. Not everything needs a detailed rubric. Task 1 submitted? Full points. This encourages participation without creating a grading avalanche.
Give short, targeted feedback. Instead of paragraph-long comments, try: “Great work on #1-5. Review your notes on problem 6—you switched a sign.” Specific, quick, helpful.
Name things obviously. “Today’s Video” and “Today’s Practice” beat “Assignment 47B” every time. Reduce cognitive load wherever possible.
Batch your grading. Set aside one 30-minute block to grade all Task 1 submissions instead of checking Schoology every 20 minutes. Your focus (and sanity) will thank you.
Virtual learning isn’t perfect. It never will replace the energy of a real classroom, the spontaneous “aha!” moment during group work, or the relationship-building that happens organically face-to-face.
But with realistic expectations, clear structure, and smart use of tools, you can make online class days actually work—for your students and for you. The 75% approach isn’t about settling for less. It’s about focusing on what matters most and doing that well.
Start small. Pick one virtual day. Try the two-task structure. Post your office hours. Use Schoology messaging. See what happens.
Then adjust, refine, and keep going. You’ve got this.