An essential process to know how much a student has learned is by doing quizzes, and this has been the chosen method for as long as we remember. They have been there to test if the student can pass a subject or a test to see how intelligent a person is before hiring into a job. And quizzes have changed through the years from paper to know online, which is now the new standard.
Now that quizzes have been digitalized, thanks to ever-innovating technology, people create quizzes through different methods. The various methods could be made from Word, by manually typing and checking, by Excel, which is better than Word, or the most widely used process, which is through Google Forms.
Through this article, we will talk about how google Forms has been a go-to for schools and universities, and we will show you step-by-step how to create a quiz in Google Forms for free. This article will also state a bonus platform, which is a new and innovative way to create a quiz.
- What Is Google Forms?
- A Better Way to Delive Quizzes Online – OnlineExamMaker
- Step-by-Step Tutorial in Making A Quiz in Google Forms
What Is Google Forms?
As stated, Google Forms has been a go-to platform since the pandemic affected us, forcing students and teachers to continue their lessons at home. And google Forms succeeded in delivering a school-like quiz to students and teachers.
Google Forms has many features that help teachers provide better quizzes to students, and they continuously update the platform to have the latest feature readily available. The features include customizing a quiz, adding YouTube links, and adding other media. Since it was created by google, the platform is connected to other apps google has, like, google Word, Excel, and much more.
Thanks to the continuous update of google Forms, the added features can make parents or guardians keep track of their children’s grades and have an instant connection to their teacher. The multiple features are why google classroom is widely used and popular in universities and schools.
A Better Way to Delive Quizzes Online – OnlineExamMaker

Since the quizzes can now be created and done online, a new platform has emerged in popularity and stand beside Google Forms, and one of the best is the OnlineExamMaker.
OnlineExamMaker provides new and innovative ways of making and sharing quizzes online. They offer multiple tools and features that make things convenient and easy for the teacher and student. They also provide one of a kind proctoring and anti-cheating system, which is an innovative way to ensure the integrity of the quiz. They also offer monetization on quizzes to earn extra income.
You might like to know
Create an auto-grading quiz/assessment without any coding – try OnlineExamMaker today!
Another feature of OnlineExamMaker includes the innovative quiz experience and the automated reports system. The system does not just record the correct answer but also provides analytics and statistics of the quiz. This system provides teachers with a detailed report to adjust the teachers’ lesson plan to the students learning.
These features and tools are why universities and schools now prefer a dedicated platform for their schooling needs to improve their performance. The OnlineExamMaker web examination system is the best choice for an online quiz tool for the teacher and students.
Step-by-Step Tutorial in Making A Quiz in Google Forms
Google Form now offers a convenient way to create and share quizzes all in one sitting, and its tools help it adjust to any question. They also provide customization to organize your quiz and personalization to represent the school or university.
The following is the step-by-step process to make a quiz in Google Forms.
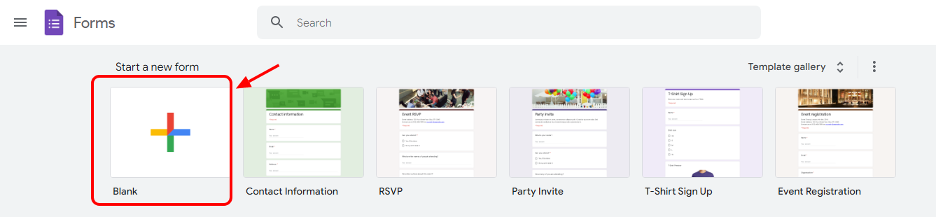
Step 1. Creating a Google Form
In the Google Forms dashboard, you can easily create a google form by clicking the create option. There are also multiple types of pre-made layouts you can choose from.
Creating a Google Form:
Step 2. Adding your title and instructions
Upon creating a blank google form, the web refresh and make a new google Forms. The new form is the google form on which the quiz will be created and shared with your student. To start, you can edit the name of the google form by clicking the title area and adding a description to it.
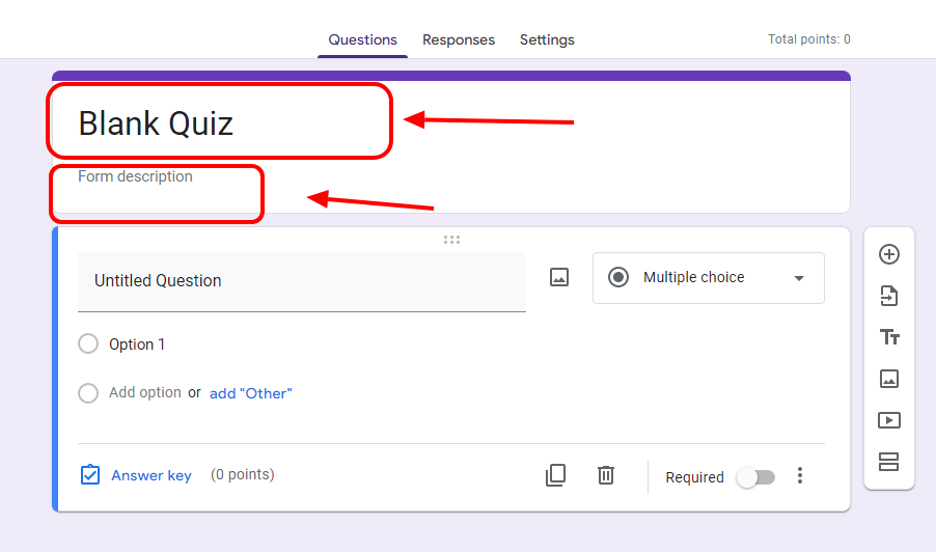
Step 3. Start Making the Questions
You can now start editing the google form as a quiz. Google forms let you change what type of question it is. The default will be multiple choice, but you can change it to short or long essays, check box type, and drop-down type.
You can add multiple choice to your quiz, add an “other option,” and add a picture to make the test more complex.
Other options for making the quiz are making it required and shuffling the option. It is located at the bottom part of the question.
You can click the add question in the sidebar option to add more questions. The sidebar is also where you can import questions from other google forms.
Adding questions and importing questions:

Changing the question type:

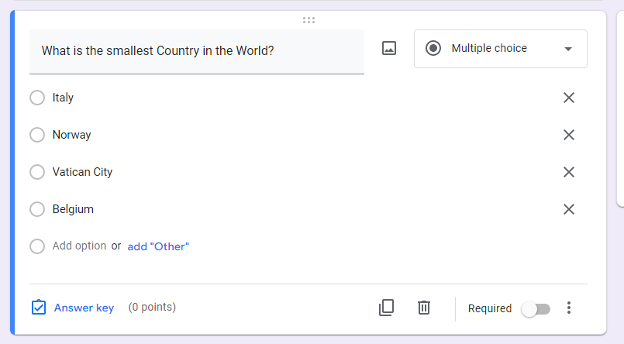
Multiple choice:
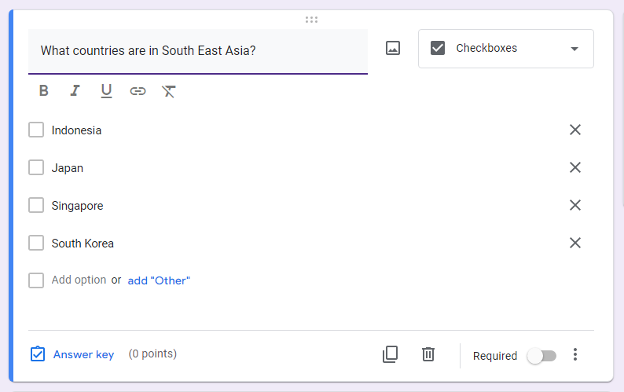
Check Box:
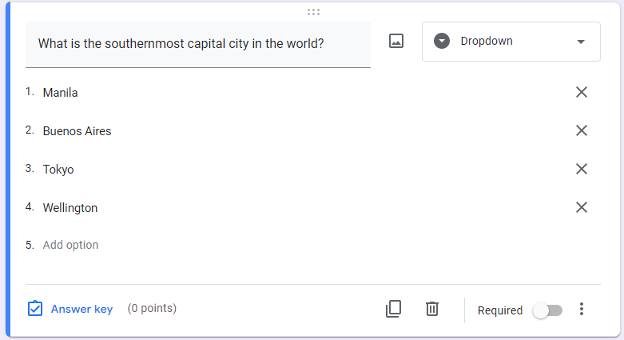
Drop Down:
Short Essay:

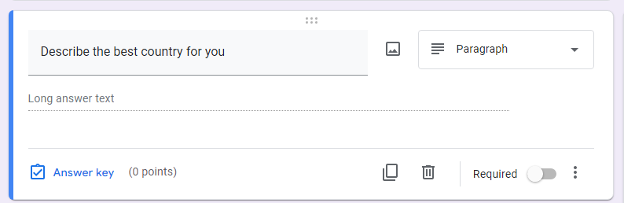
Long Essay:
Required and option shuffling:

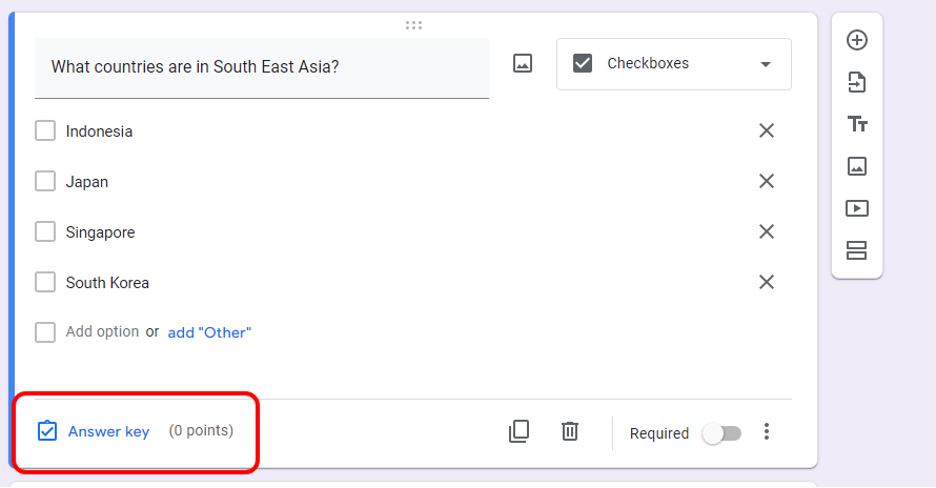
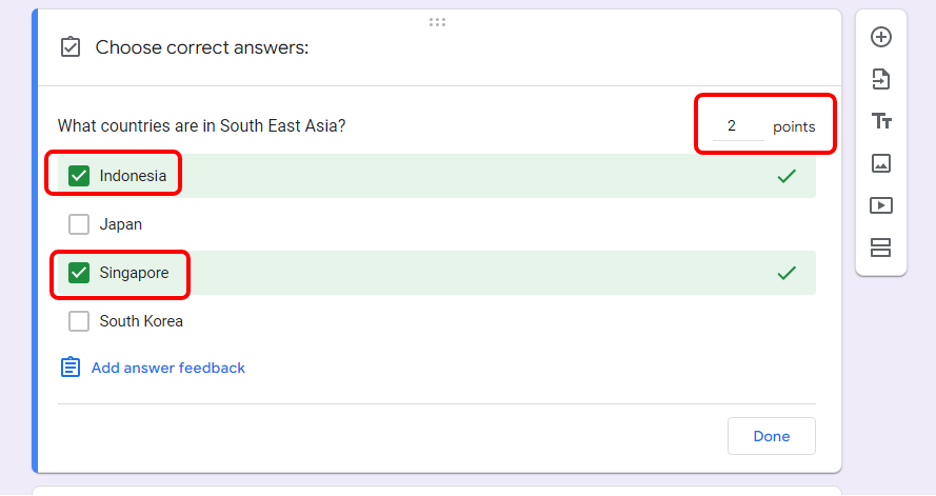
Step 4. Adding the answer and points
You can edit the number of points they will have and the answer to the question. This can be done by pressing the Answer key below the question.
Clicking the answer key:
Choosing the right answer and the number of points:
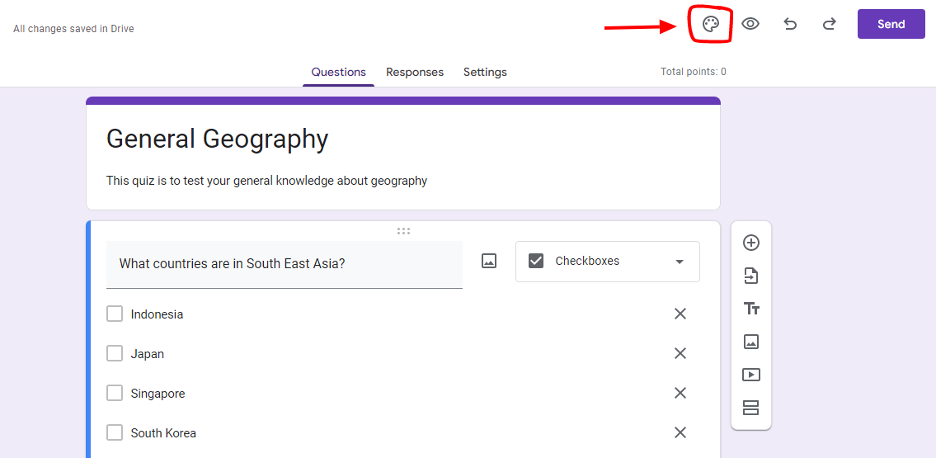
Step 5. Customizing your Quiz
Google Form lets you add a section, pictures, files, YouTube links, and another page to make your quiz customize and easy to understand. You can do this by clicking the option you want in the sidebar.

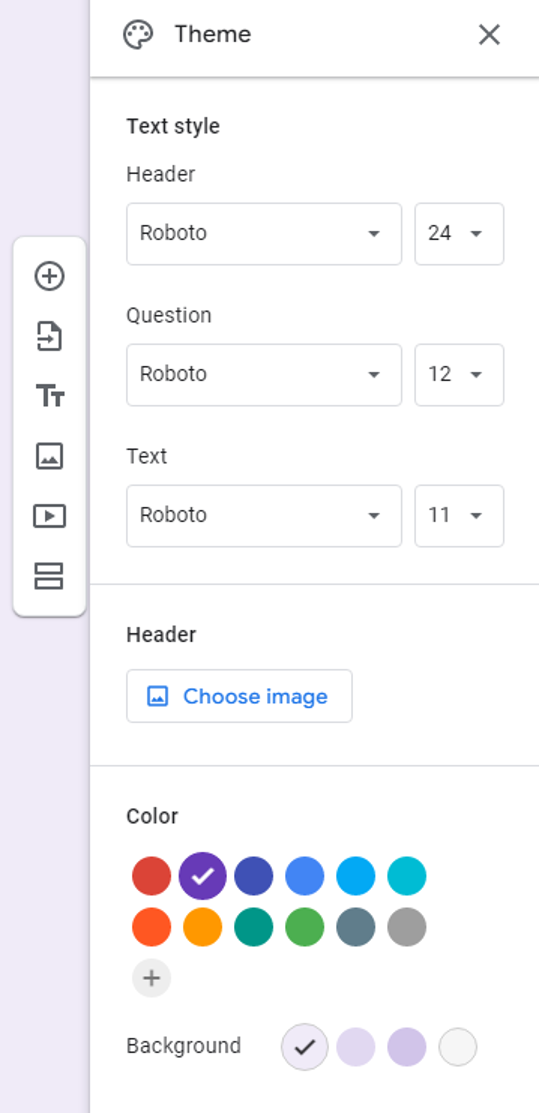
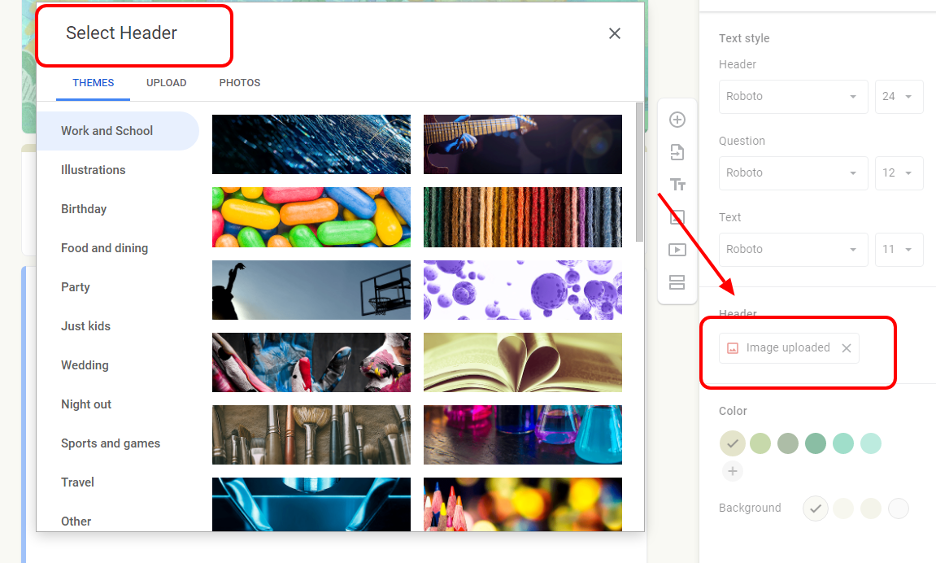
Step 6. Personalizing your Quiz!
You can add pictures and change the color theme of the quiz to match the theme of your university and school, change the font, and add the logo to make it official.
You can do this at the top of the section of google forms.

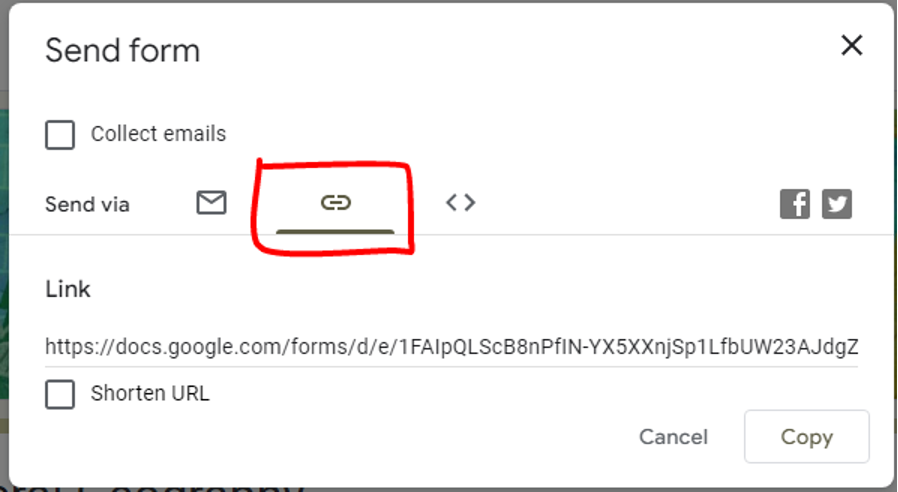
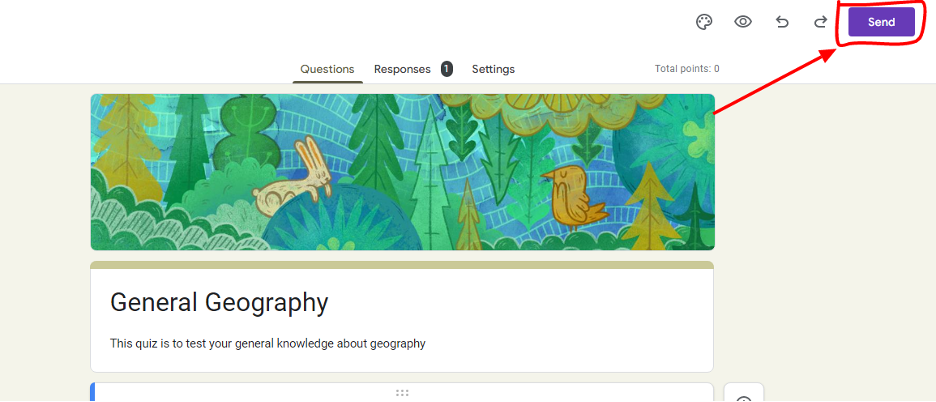
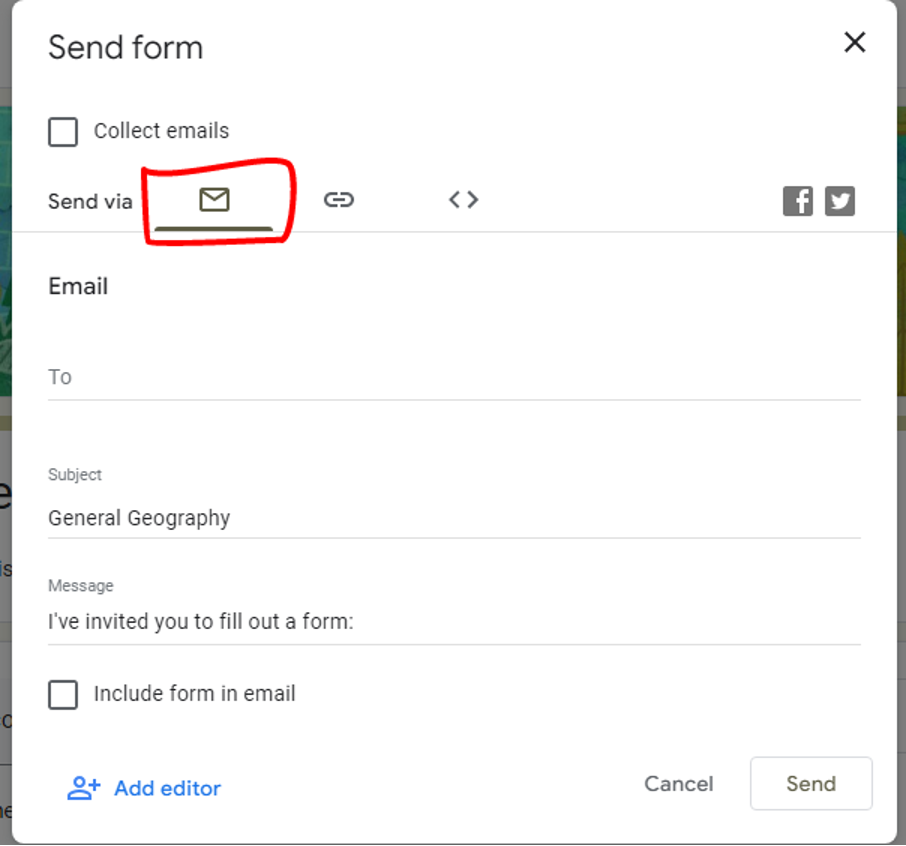
Step 7. Share your quiz with your student
The last step is to share your quiz with your student. You can share by pressing the send button at the top of the google form. A pop-up will appear, and you can choose how to share your quiz. You can share it by link or by email.
Selecting Send:
Choosing Email:
Choosing Link: