Remember the last training session where half your audience dozed off during that bullet-point marathon? Yeah, we’ve all been there. But here’s the thing—quizzes don’t have to be boring Word documents or clunky online forms. PowerPoint, that trusty presentation tool gathering dust in your taskbar, can transform into a surprisingly powerful quiz-making machine.
The secret? A clever cocktail of hyperlinks, action buttons, and rich media that turns your presentation into something that feels more like a game than a test. Whether you’re a teacher crafting pop quizzes, an HR manager building training assessments, or a trainer creating certification exams, this guide will walk you through everything—from basic question slides to advanced navigation tricks that’ll make your colleagues wonder if you secretly moonlight as a developer.
- Why PowerPoint for Interactive Quizzes?
- Planning Your Quiz Structure
- Adding Rich Media: Images, Audio, and Video
- Using Action Buttons for Navigation
- Locking Down Your Quiz with Kiosk Mode
- Advanced Techniques: Animations and Triggers
- Alternative: Creating Quizzes with OnlineExamMaker
- Testing and Troubleshooting Your Quiz
- Frequently Asked Questions
Why PowerPoint for Interactive Quizzes?
Before we dive into the technical stuff, let’s address the elephant in the room: why use PowerPoint when there are dedicated quiz platforms? Simple. You already have it. Your colleagues have it. Your students have it. There’s no learning curve for a brand-new platform, no monthly subscription fees, and no “Sorry, the internet’s down so we can’t take the quiz today” excuses.
PowerPoint’s hidden superpower lies in its flexibility. You can embed videos directly into question slides, add voiceover narration to explain complex concepts, insert diagrams and charts as visual aids, and create branching scenarios where different answers lead to different paths. It’s like Choose Your Own Adventure meets assessment tool—and it’s sitting right
there in your Microsoft Office suite.

Plus, there’s something deeply satisfying about watching learners engage with content instead of passively clicking through slides. When an answer button turns green with a satisfying swoosh animation, or when they hear applause after nailing a tough question, that little dopamine hit makes learning stick.
Planning Your Quiz Structure
Here’s where most people stumble—they jump straight into slide design without thinking through the flow. Don’t be that person. Grab a napkin, open a notes app, whatever works, and sketch out your quiz structure first.
Choose Your Quiz Type
You’ve got options:
- Multiple choice: The classic. Four options, one correct answer. Safe, predictable, gets the job done.
- True/False: Quick and dirty. Perfect for knowledge checks or when you’re short on time.
- Branching scenarios: Now we’re talking. Different answers lead to different follow-up questions or consequences. Great for soft skills training or complex
decision-making.
Map the Flow
A typical quiz structure looks like this:
- Title/Welcome slide: Sets the tone, explains the rules
- Instructions slide: How to navigate, how many questions, what happens when they click
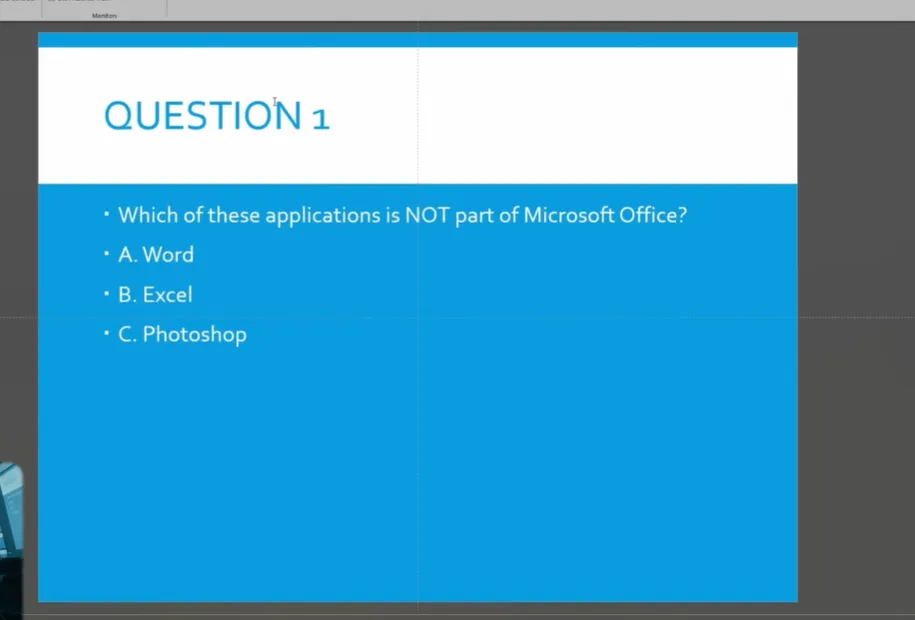
- Question slides: One per question (we’ll get fancy with these)
- Feedback slides: “Correct!” or “Try again” with explanations
- Results/Score slide: The grand finale with confetti (yes, really)
Pro tip: For self-paced quizzes, add a home/menu slide that lets learners jump to specific sections. It’s like giving them a table of contents—they feel more in control, and control equals engagement.
Adding Rich Media: Images, Audio, and Video
Text-only quizzes are so 2005. Let’s make this multimedia.
Inserting Images
Go to Insert > Pictures and choose your image. Position it next to the question or use images as answer options—great for visual identification questions like “Which planet is this?” or “What’s this tool called?”
Keep images under 1MB to avoid bloating your file size. PowerPoint gets cranky with huge files, and nobody wants a 200MB quiz presentation.
Adding Audio
Sound effects transform the experience. Here’s what works:
- Correct answer: Applause, chime, or “ding” sound
- Wrong answer: Buzzer or gentle “whoops” tone
- Navigation buttons: Click or swoosh sounds
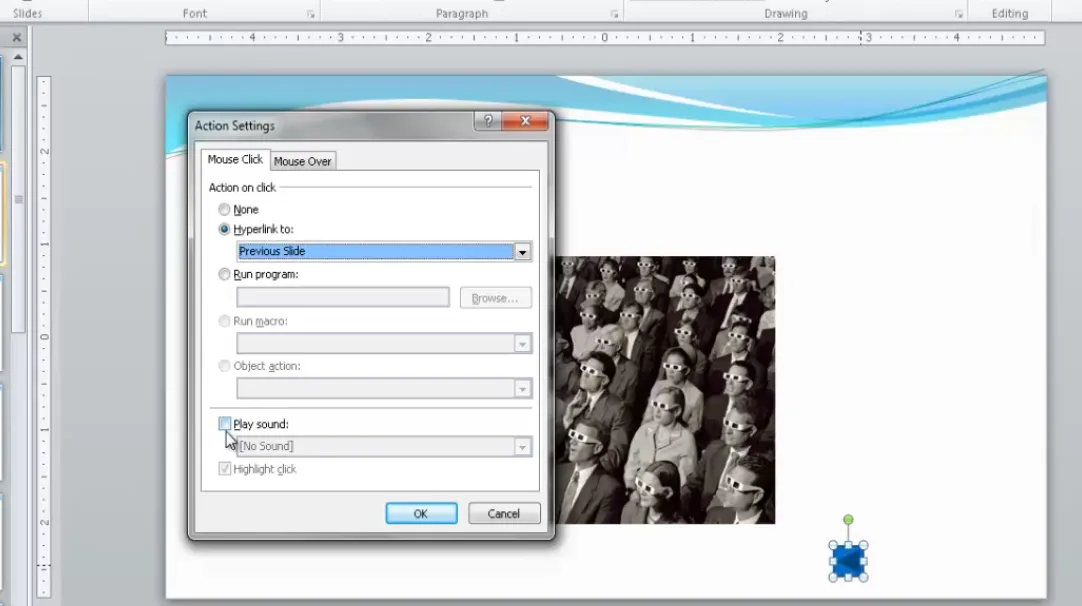
To add audio:
- Select your button or shape
- Go to Insert > Action
- Check Play sound
- Choose from built-in sounds or upload your own
PowerPoint includes sounds like “Applause,” “Camera,” and “Cash Register.” The cash register works hilariously well for quizzes about business or finance.
Embedding Video
Video questions are next-level. Imagine: “Watch this customer interaction. What should the employee do next?”
- Go to Insert > Video > This Device
- Select your video file (MP4 works best)
- Resize and position on your slide
- In Playback options, set to Start: On Click or Automatically
Pro tip: Don’t set videos to play automatically unless you’re sure about your timing. Give learners control—they’ll appreciate it.
You can also use YouTube videos. Go to Insert > Video > Online Video, paste the YouTube URL, and boom—embedded content without worrying about file sizes.
Using Action Buttons for Navigation
Action buttons are PowerPoint’s secret weapon for creating professional-looking navigation systems. They’re pre-built shapes with hyperlink functionality baked in.
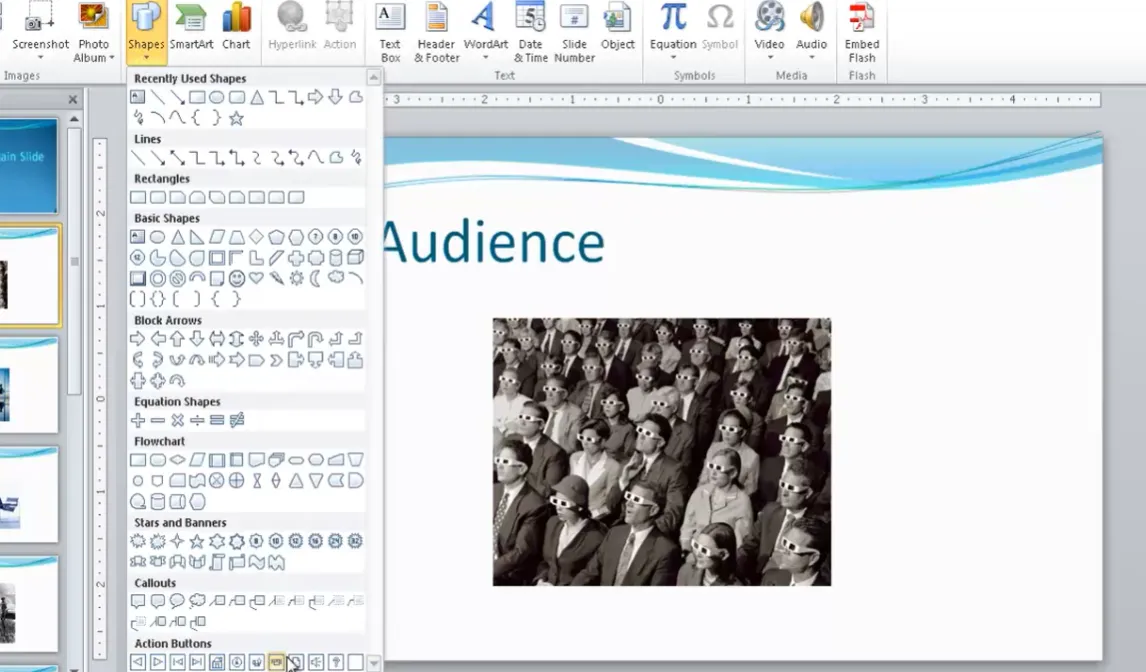
Insert Action Buttons
Go to Insert > Shapes and scroll to the bottom—you’ll see action buttons with icons:
- Back/Forward arrows: Previous/next slide navigation
- Home icon: Returns to first slide or menu
- Information icon: Links to help or instructions
- Return icon: Goes back to last viewed slide
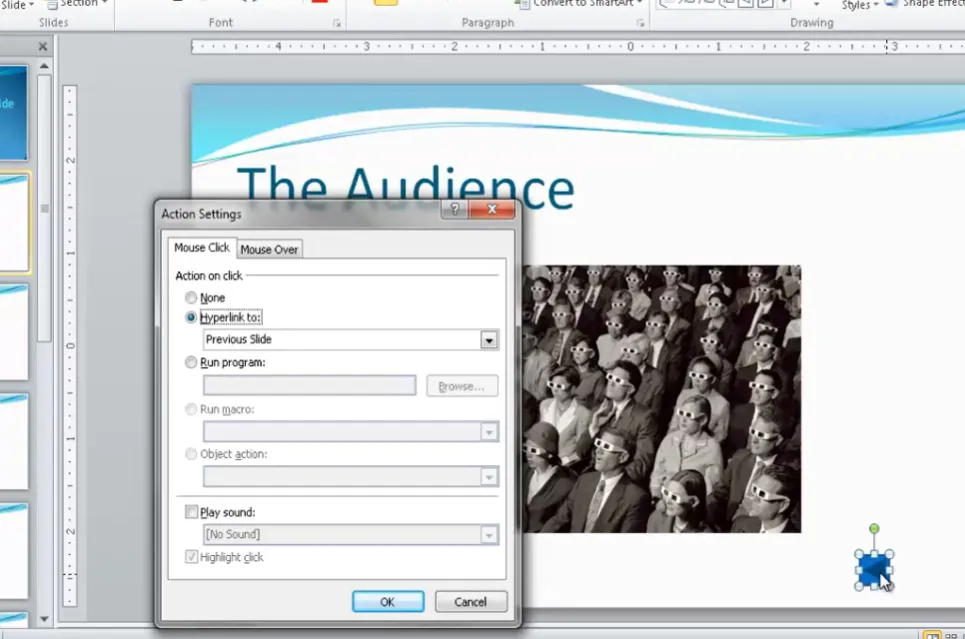
When you draw an action button on your slide, the Action Settings dialog automatically pops up. PowerPoint is smart enough to pre-select the logical hyperlink (forward arrow links to next slide, back arrow to previous slide, etc.).
Customize Action Button Behavior
You can override default settings:
- Hyperlink to: Choose any slide, first slide, last slide, or even external files
- Run program: Launch another application (advanced users only)
- Play sound: Add audio feedback when clicked
Create Persistent Navigation with Slide Master
Here’s a time-saver: instead of adding navigation buttons to every single slide, put them on the Slide Master. Then they appear automatically on all slides.
- Go to View > Slide Master
- Select the main master slide (top of the hierarchy)
- Add your action buttons (Home, Back, Forward)
- Close Master View
Now every slide in your quiz has consistent navigation. Position buttons in a corner where they won’t interfere with content—top-right or bottom-left usually works.
Action Button Best Practices
- Keep them small but tappable: 0.5 inch minimum for touchscreen kiosks
- Use consistent placement: Don’t make people hunt for navigation
- Add hover effects: Right-click button > Action Settings > Mouse Over tab for extra interactivity
One clever trick: use the “Mouse Over” tab to play sounds when someone hovers over an image or button. It’s subtle feedback that makes the experience feel polished.
Locking Down Your Quiz with Kiosk Mode
We touched on this earlier, but it deserves its own section because it’s that important. Kiosk mode transforms your presentation from “accidental click advances slide” chaos into a controlled assessment environment.
Why Kiosk Mode Matters
In default presentation mode, clicking anywhere on a slide advances to the next slide. For regular presentations, that’s convenient. For quizzes? Disaster. Learners accidentally skip questions, bypass feedback, and end up confused.
Kiosk mode disables all those default behaviors. The only way to navigate is through your hyperlinks and action buttons. You’re in complete control.
Kiosk Mode Settings
Beyond the basic “Browsed at a kiosk” checkbox, explore other options in Set Up Slide Show:
- Loop continuously: Great for unattended kiosks in lobbies or trade shows
- Show without narration/animation: Useful if you want to strip out extras for accessibility
- Pen color: Set a color if you want presenters to annotate during live sessions
For self-study quizzes, stick with basic kiosk mode without looping—let learners exit when they’re done.
Testing Navigation
Before unleashing your quiz on actual humans, test every single hyperlink. Click through as if you’re the world’s most mischievous learner:
- Try clicking random areas (nothing should happen)
- Test all answer buttons (correct and incorrect)
- Verify feedback slides link to proper destinations
- Check that “Home” button actually goes home
Better to find broken links during testing than mid-assessment with 30 confused trainees staring at you.
Advanced Techniques: Animations and Triggers
Ready to level up? Animations and triggers add visual polish that makes your quiz feel like a professional app, not a slideshow.
Color-Change Animations
When learners click a wrong answer, make it turn red. Correct answer? Green. Here’s how:
- Select the answer button
- Go to Animations > Object Color
- Set duration to 0.25 seconds (fast and snappy)
- Double-click the animation, choose More Colors, select red for wrong or green for correct
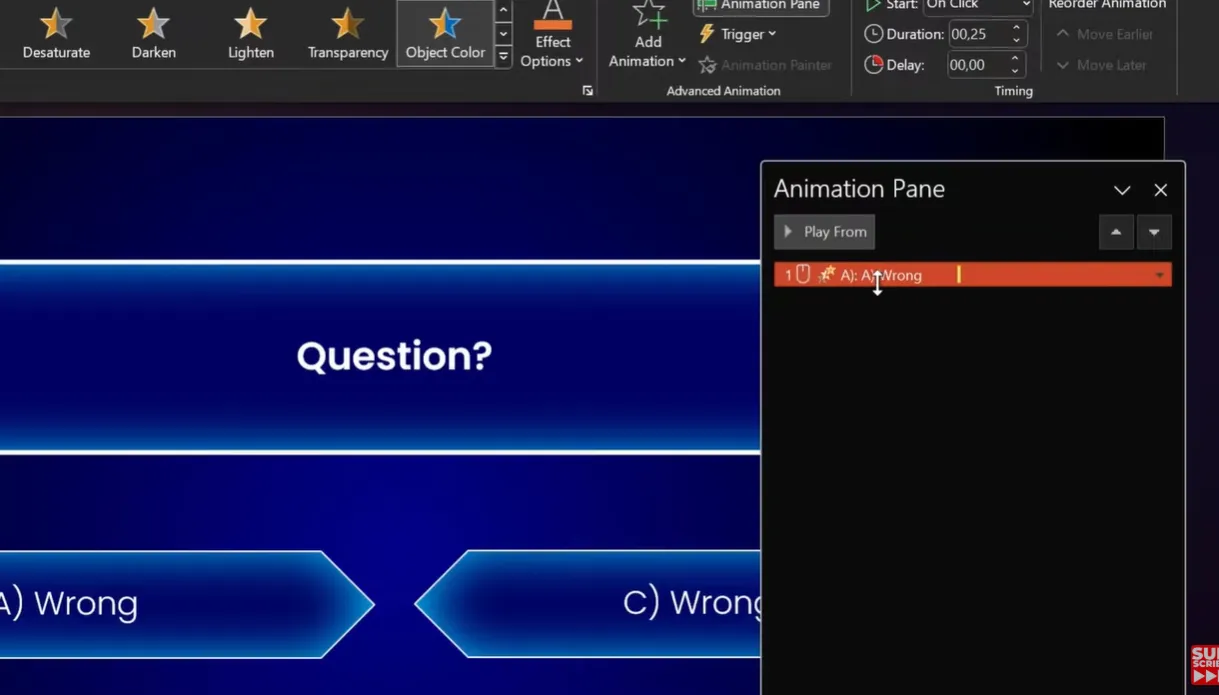
But here’s the trick: you need a second animation to keep the text white (otherwise it disappears). Add Font Color animation, set it to “With Previous,” and select
white.
Animation Triggers
This is where it gets wizardly. Instead of animations playing automatically, tie them to specific objects. When someone clicks answer B, only answer B animates—not the whole slide.
- Select your animation in the Animation Pane
- Click Trigger
- Choose On Click of and select your answer button shape
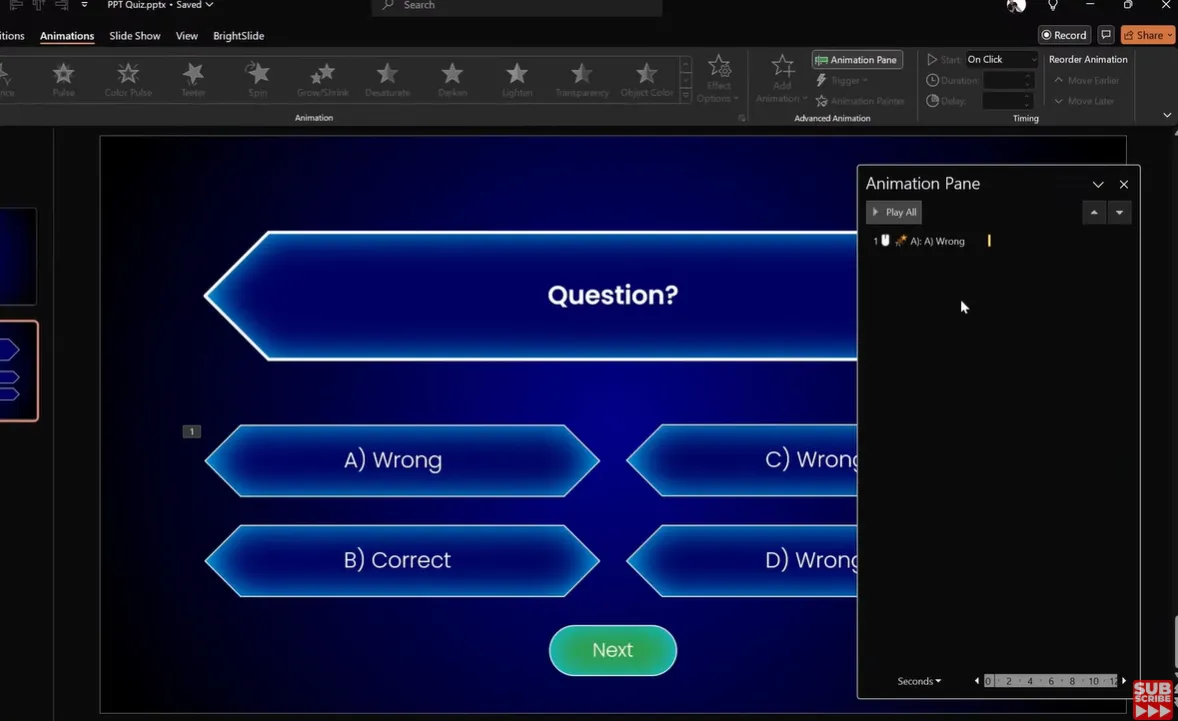
Now create a “Next” button that only appears after the correct answer is clicked:
- Insert an arrow shape with “Next” text
- Add Wipe animation (from bottom, 0.50 seconds)
- Set to “After Previous”
- Move it into the trigger group for the correct answer
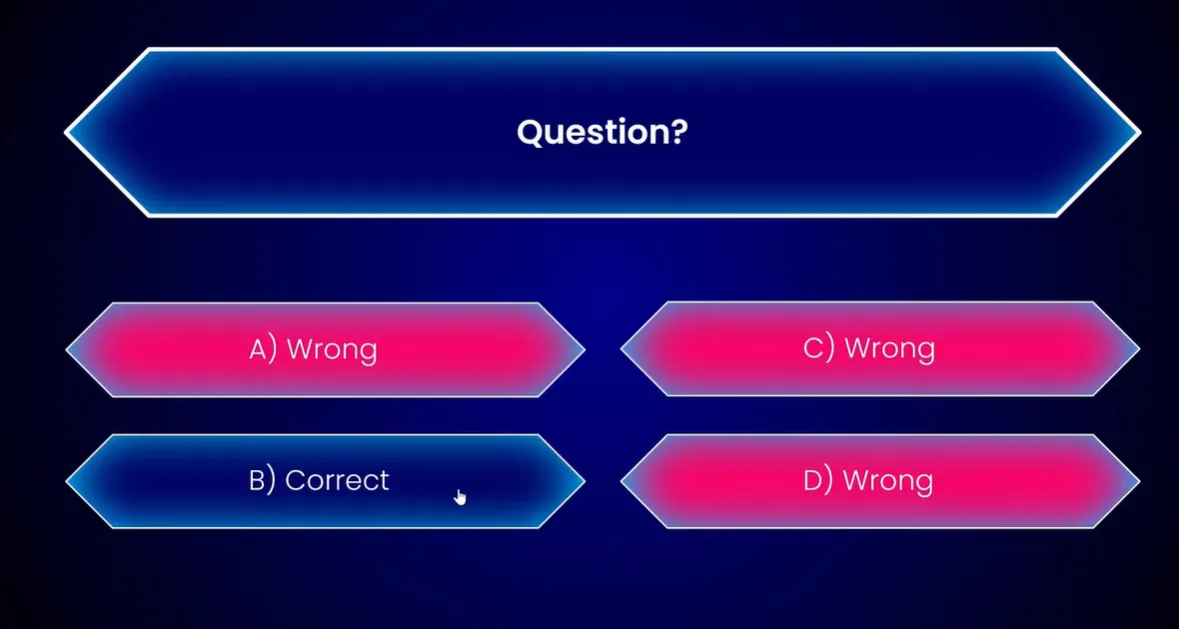
The result: click wrong answers, they turn red, nothing else happens. Click the correct answer, it turns green, and suddenly a “Next” button swooshes up from the bottom. It’s like magic, except you’re the wizard.
Confetti Finale
On your final results slide, add a confetti animation. Go to Insert > Icons, search “confetti,” insert multiple confetti icons scattered across the slide, then add staggered Spin and Float Down animations. Set them to play automatically when the slide appears.
It’s cheesy? Maybe. But learners love it, and that’s what matters.
Alternative: Creating Quizzes with OnlineExamMaker
Look, PowerPoint is powerful, but let’s be honest—it’s also time-consuming. If you need to create quizzes regularly, or if you want features like automatic grading, detailed analytics, and mobile compatibility without doing PowerPoint gymnastics, dedicated quiz software might be worth exploring.
What is OnlineExamMaker?
OnlineExamMaker is an AI-powered exam and quiz creation platform designed for educators, trainers, and HR professionals. It combines the simplicity of form builders with the sophistication of learning management systems—without the complexity or cost.
The standout feature? Rich media support that doesn’t require hyperlink wizardry. You can embed videos, images, and audio directly into questions with drag-and-drop simplicity.
Create Your Next Quiz/Exam Using AI in OnlineExamMaker
Creating a Quiz with Video/Images in OnlineExamMaker
Here’s the streamlined workflow:
- Sign up and create a new exam: Choose “Quiz” from templates
- Add questions: Click “Add Question,” type your prompt
- Insert media: Click the image/video icon, upload files or paste YouTube URLs
- Configure answer options: Mark correct answers, add explanations
- Set quiz parameters: Time limits, randomization, passing score
- Publish: Get a shareable link or embed code
The AI assistant can even generate questions from uploaded documents or topics—useful when you’re staring at a blank screen at 11 PM wondering why you volunteered to create this
quiz.
Advantages Over PowerPoint
- Automatic grading: Scores calculated instantly, no manual checking
- Analytics dashboard: See which questions trip people up, average scores, completion rates
- Mobile-friendly: Works on phones and tablets without weird formatting issues
- Question banks: Reuse questions across multiple quizzes
- Anti-cheating features: Randomize question order, lock down browsers, time restrictions
When to Use Each Tool
| Scenario | Use PowerPoint | Use OnlineExamMaker |
|---|---|---|
| One-time quiz for in-person training | ✓ | |
| Regular assessments with tracking | ✓ | |
| Kiosk/trade show interactive display | ✓ | |
| Remote learning with auto-grading | ✓ | |
| Highly customized visual design | ✓ | |
| Need detailed analytics | ✓ |
Bottom line: PowerPoint excels at creative, one-off, highly visual quizzes where you control every pixel. OnlineExamMaker shines for scalable, repeatable assessments where data matters more than design flourishes.
Testing and Troubleshooting Your Quiz
You’ve built your quiz. It looks gorgeous. Time to test it before real people discover all the ways it can break.
Pre-Launch Checklist
- Hyperlink audit: Every link goes to the right slide?
- Spelling check: Typos undermine credibility fast
- Media playback: All videos and audio files work?
- Animation timing: Nothing too slow or seizure-inducingly fast?
- Exit strategy: Can learners actually finish and exit the quiz?
Common Issues and Fixes
Problem: Clicks anywhere advance the slide
Fix: You forgot to enable kiosk mode. Go back to Slide Show > Set Up Slide Show.
Problem: Animations play in wrong order
Fix: Check Animation Pane. Drag animations to correct sequence. Make sure triggers are set properly.
Problem: Text disappears after color animation
Fix: Add Font Color animation set to “With Previous” to maintain text visibility.
Problem: Video won’t play
Fix: Convert to MP4 format. PowerPoint is picky about codecs. HandBrake is a free tool that fixes most video compatibility
issues.
Problem: File size is massive
Fix: Compress images before inserting. Go to File > Info > Compress Media for videos. PowerPoint can optimize without noticeable quality loss.
User Testing
Grab a colleague—preferably someone who had nothing to do with building the quiz. Watch them take it without explaining anything. You’ll be amazed what breaks when someone doesn’t
know your intentions.
Pay attention to:
- Where they try to click (did you miss an intuitive navigation spot?)
- How long they spend per question (too long = confusing)
- Their facial expressions (confusion, frustration, or satisfaction?)
Frequently Asked Questions
Can I track quiz scores in PowerPoint?
Not automatically. PowerPoint doesn’t have built-in scoring or data collection. You’d need to manually record results or use a screen-sharing tool to observe learners. For automatic scoring, consider OnlineExamMaker or similar platforms.
How many questions should my quiz have?
Depends on context. For knowledge checks during training, 5-10 questions work well. Certification exams might need 20-50. Rule of thumb: one question per major concept you’re assessing. More isn’t always better—cognitive fatigue is real.
Can learners take the quiz on phones or tablets?
PowerPoint works on mobile via the PowerPoint app, but kiosk mode and hyperlinks can be finicky on touchscreens. Test thoroughly. For guaranteed mobile compatibility, use a dedicated platform like OnlineExamMaker.
What if I need to update quiz questions later?
That’s actually PowerPoint’s strength—direct editing. Just open the file, change the text or media, save. No waiting for web platforms to sync or dealing with content management systems. Version control is your responsibility, though. Save backup copies with dates in the filename.
Can I reuse quiz components across multiple presentations?
Absolutely. Save your question slide layouts as custom templates. Copy entire slide groups to new presentations. Build a library of answer button designs. The more you build, the faster future quizzes come together.
How do I make my quiz accessible for learners with disabilities?
- Use high contrast colors (dark text on light background)
- Add alt text to all images (right-click image > Edit Alt Text)
- Include closed captions on videos
- Ensure buttons are large enough for motor impairments
- Test with a screen reader to verify navigation makes sense
PowerPoint has a built-in accessibility checker: File > Info > Check for Issues > Check Accessibility.
What’s the maximum number of slides before PowerPoint gets sluggish?
Depends on media. Text-only quizzes? Hundreds of slides, no problem. Quizzes with high-res images and videos? Performance degrades around 50-75 slides. Keep individual file size under 100MB if possible. Split into multiple files if needed.
Can I password-protect my quiz?
Yes. Go to File > Info > Protect Presentation > Encrypt with Password. Choose a strong password. Write it down somewhere—Microsoft can’t recover lost PowerPoint passwords.
How do I stop people from editing my quiz?
Save as PowerPoint Show (.ppsx) instead of Presentation (.pptx). Double-clicking a .ppsx file opens directly in presentation mode, not editing mode. Not foolproof (determined folks can still open it in PowerPoint), but stops casual tampering.