Google Forms has become an indispensable tool for educators, businesses, and organizations looking to gather information and assess knowledge in an interactive and user-friendly manner. One of its most valuable features is the ability to create multi-response quizzes, which allow respondents to select multiple answers for a single question.
In this article
- Part 1: Step-by-step Guide on Making A Multi-Response Quiz with Google Forms
- Part 2: How to Make A Multi-Response Quiz with OnlineExamMaker
- Part 3: How to Make A Multi-Response Quiz with OnlineExamMaker

Step-by-step Guide on Making A Multi-Response Quiz with Google Forms
Setting Up Your Google Form
Before diving into the creation of a multi-response quiz, you need to set up your Google Form correctly to ensure it serves your purposes effectively.
1. Create a New Google Form
To get started, access Google Forms through your Google account. Once you’re in, click on “Blank” to initiate the creation of a new form.
2. Title and Description
Give your quiz a clear and descriptive title that reflects its purpose. Additionally, add a brief description or set of instructions to guide participants on how to complete the quiz.
Just to let you know
Sign up for a free OnlineExamMaker account to create an interactive online quiz in minutes – automatic grading & mobile friendly.
3. Form Settings
Before proceeding, it’s essential to adjust the form settings to match your requirements. Here are some key settings to consider:
• Collect email addresses: Decide whether you want to collect email addresses from respondents. This can be useful for tracking and follow-up.
• Allow respondents to edit after submission: Choose whether respondents can make changes to their responses after submitting the form.
• Limit to one response: Determine whether you want to restrict respondents to submitting only one response. This is important for preventing multiple submissions from the same person.
Adding Questions
With the basic form structure in place, it’s time to start adding questions to your multi-response quiz.
1. Multiple-Choice Questions
Multiple-choice questions are the foundation of many quizzes. To create one:
• Click on the “+” button to add a question.
• Choose “Multiple choice.”
• Enter your question in the “Question Title” field.
• List the answer choices in the options below, marking the correct answers with checkboxes.
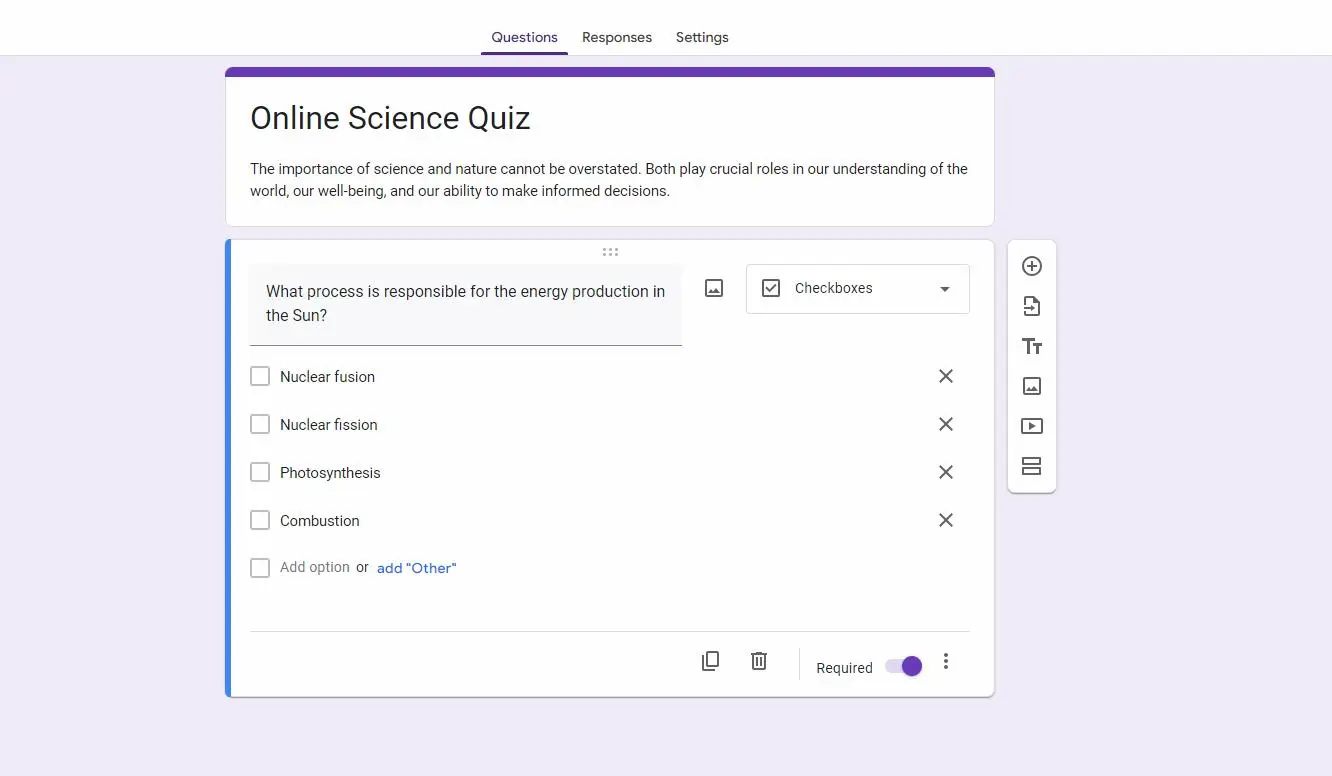
2. Checkbox Questions
To make a question multi-response, use checkbox questions:
• Add a new question.
• Select “Checkbox.”
• Pose your question.
• Provide multiple answer choices, allowing respondents to select more than one.
Making Questions Multi-Response
Creating multi-response questions is straightforward when using checkbox questions. By their nature, respondents can select multiple answers. However, you can take additional steps to tailor these questions to your specific needs.
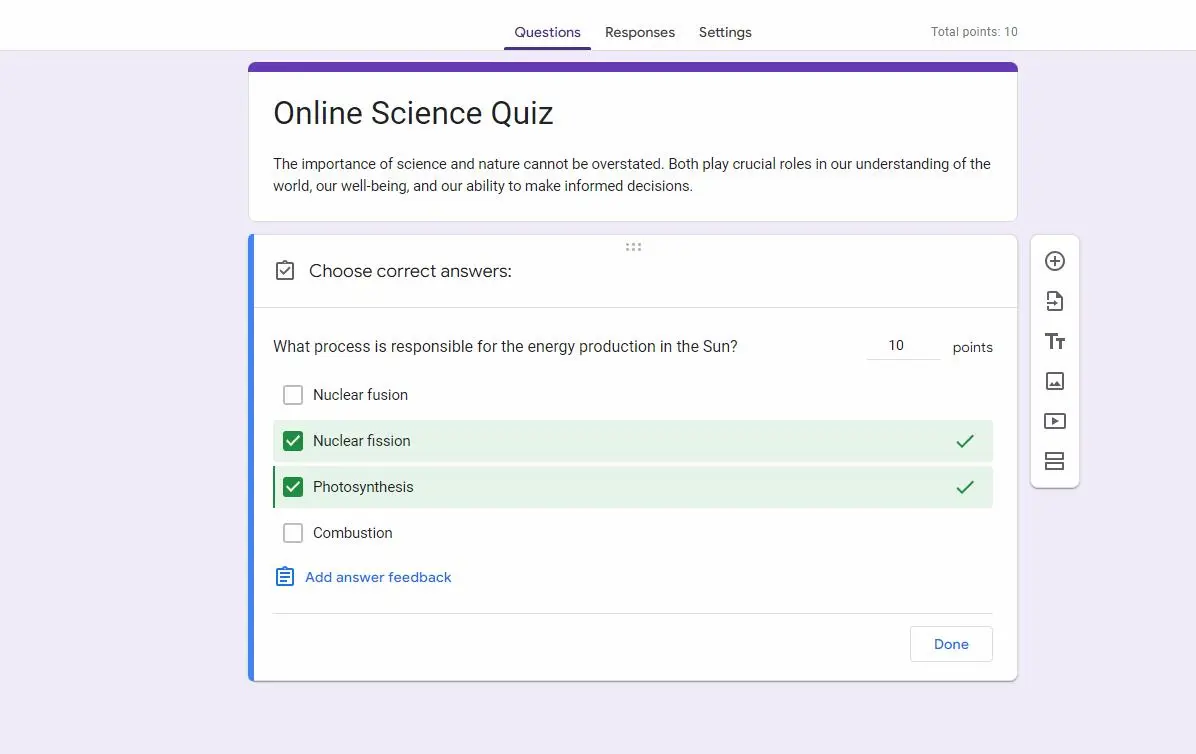
1. Limiting and Validating Responses
Depending on your requirements, you may want to limit the number of responses allowed or ensure that respondents select a minimum number of choices. Google Forms offers the option to add data validation, which lets you define specific criteria for each response. For example, you can specify that a minimum of two options must be selected for a question to be considered complete.
Adding Additional Question Types
While multiple-choice and checkbox questions are commonly used, Google Forms offers a variety of question types to suit different needs.
1. Text and Paragraph Questions
To gather open-ended responses or opinions, consider using text and paragraph questions. These question types allow respondents to type their answers freely and are particularly useful for qualitative data collection.
2. File Upload Questions
For scenarios where you need respondents to submit documents, images, or other attachments, the file upload question type can be invaluable. Respondents can attach files directly to their responses.
Organizing and Customizing Your Quiz
A well-organized quiz is easier for respondents to navigate and for you to analyze. Google Forms offers several tools for structuring and customizing your quiz.
1. Section Breaks
If your quiz is lengthy or covers multiple topics, you can use section breaks to divide it into distinct sections. This not only makes the quiz more manageable for respondents but also allows for easier analysis of results.
2. Themes and Customization
Google Forms provides options for customizing the appearance of your quiz. You can apply themes to match your brand or add personal touches to make the quiz visually appealing. Customization also helps create a more engaging experience for participants.
Review and Testing
Before sharing your multi-response quiz with others, it’s crucial to thoroughly review and test it to ensure it functions as intended.
1. Preview Your Quiz
Take the time to preview your quiz as a respondent would see it. This step allows you to identify any errors or areas that might need improvement in terms of clarity and usability.
2. Test Responses
To ensure the quiz functions correctly, test it with sample responses. Confirm that the multi-response questions behave as expected and that answers are recorded accurately. Testing helps you catch any issues before your quiz goes live.
Sharing and Collecting Responses
Once you’re satisfied with your multi-response quiz, it’s time to share it and start collecting responses.
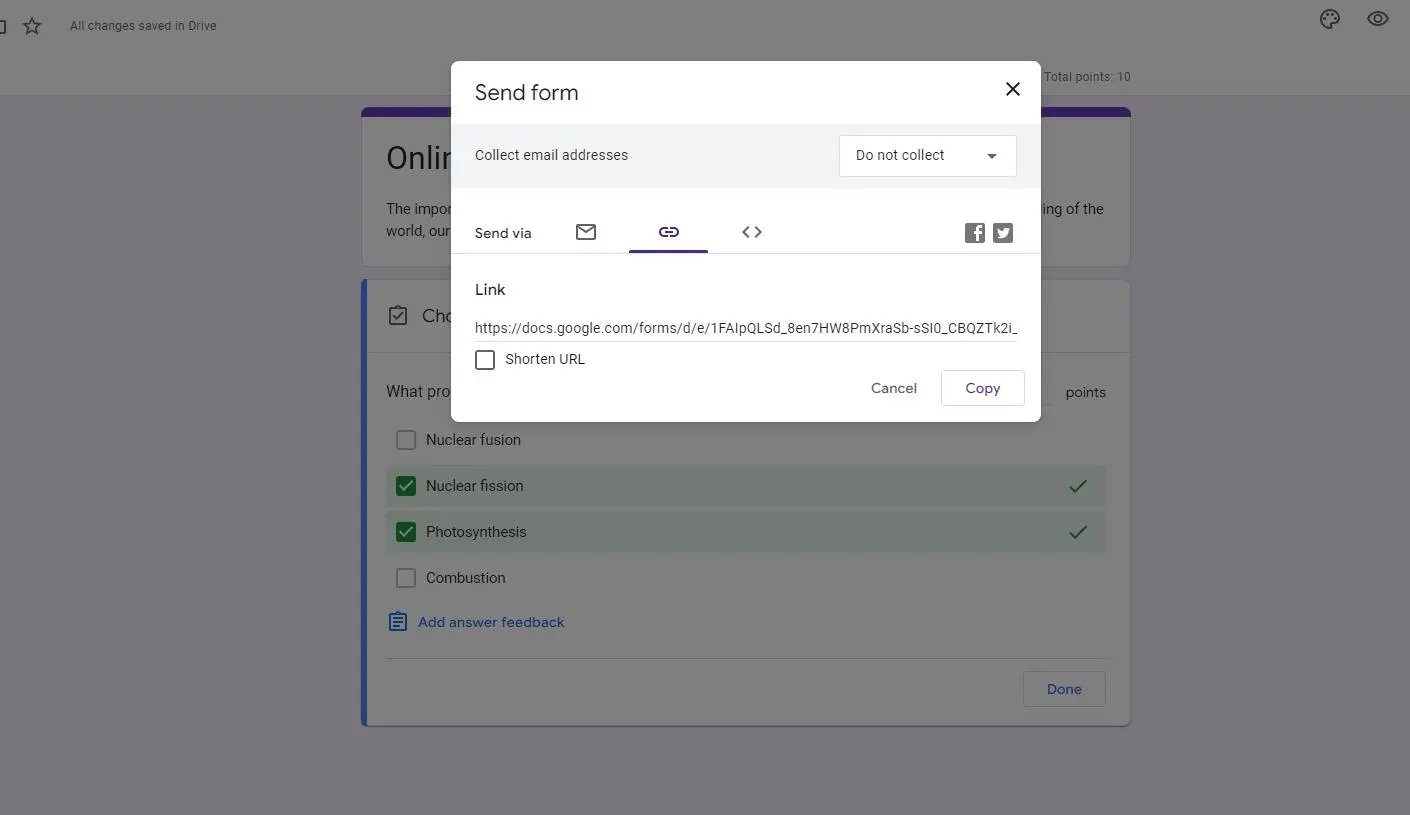
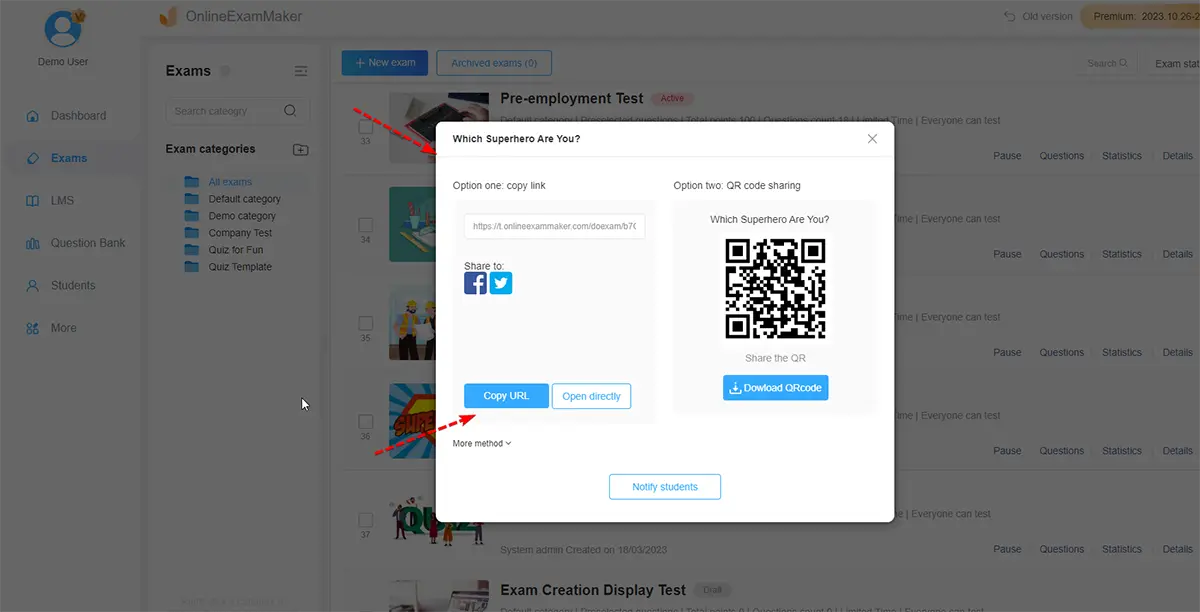
1. Share Your Quiz
Google Forms offers various methods for sharing your quiz:
• Email: You can send the quiz directly to respondents via email.
• Link sharing: Generate a link to the quiz that can be shared on websites, social media, or through other channels.
• Embedding: If you have a website or a blog, you can embed the quiz directly into your web page.
When sharing, consider the privacy and access settings to ensure that your quiz reaches the right audience.
2. Collecting and Analyzing Responses
As participants start responding to your quiz, you can view and analyze the collected data directly within Google Forms. For more in-depth analysis, you can export the data to Google Sheets or other spreadsheet software.
OnlineExamMaker: Best Google Forms Multi-Response Quiz Maker Alternative
OnlineExamMaker’s secure, powerful web-based multi-response quiz maker is an easy-to-use, intelligent online testing software tool for business, training & educational to create exams & quizzes with ease. The intuitive interface provides a range of question types, including multiple-response, multiple-choice, true or false, fill in the blank, and open-ended questions, enabling users to make professional assessments that suit their specific needs.
Create Your Next Quiz/Exam with OnlineExamMaker
How to Make A Multi-Response Quiz with OnlineExamMaker
Step 1: Sign up & login to OnlineExamMaker >
Step 2: Bulk import questions from a Word or Excel file, or create questions from scratch.
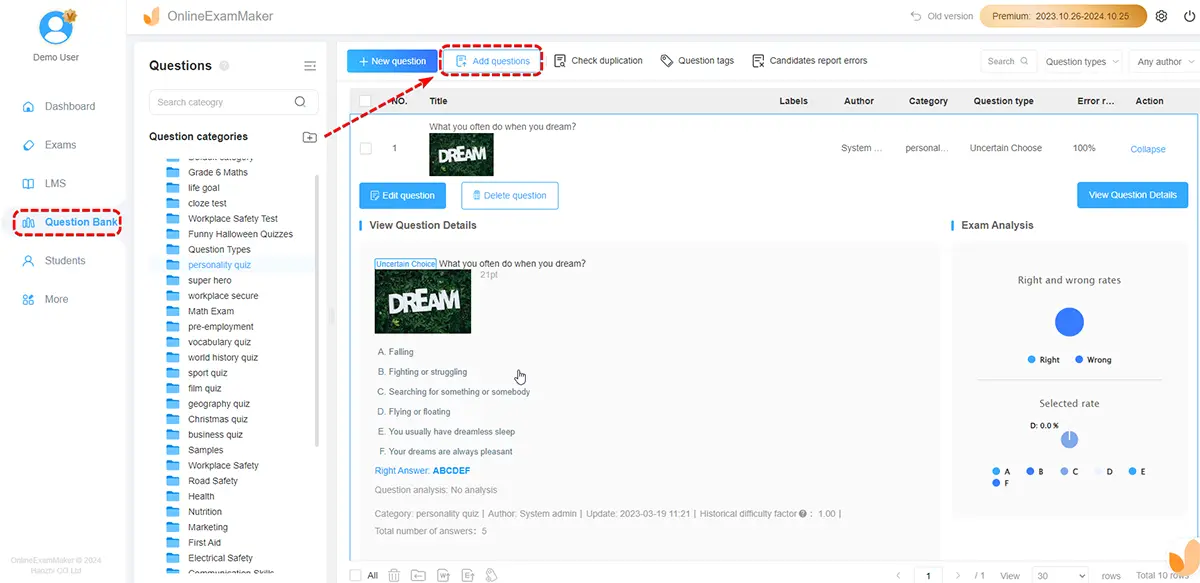
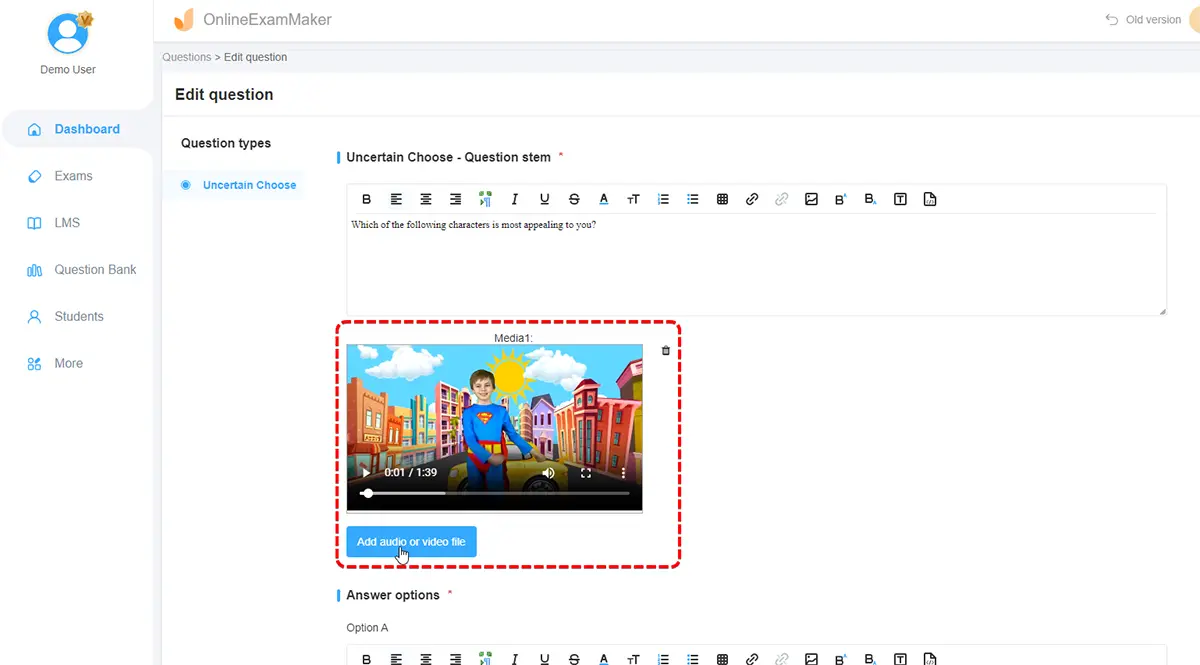
Step 3: Enrich your questions with video, audio, or images
Step 4: Once you’ve finished setting up your quiz, you can then choose to publish the quiz, making it accessible to participants.
Creating a multi-response quiz in Google Forms offers a versatile way to engage your audience, gather valuable data, and assess knowledge effectively. By following the steps outlined in this guide, you’ll be well-equipped to craft engaging multi-response quizzes tailored to your specific needs. So, why wait? Start creating your own interactive quizzes today and harness the power of Google Forms for your assessments and data collection.