PowerPoint isn’t just for bullet points and corporate monotony anymore. With a few clever tricks, some strategic hyperlinks, and maybe a dash of animation magic, you can turn Microsoft’s workhorse presentation tool into an engaging game show that would make even game show hosts jealous. And the best part? You don’t need to be a tech wizard or spend hours coding.
- Why Quiz Games Actually Work And Why Your Audience Will Love Them
- Method 1: Building Your Quiz with Navigation Links
- Method 2: Adding Interactive Elements with Animations
- Method 3: Using ClassPoint for Live Responses and Leaderboards
- Creating A Funny Quiz Game with OnlineExamMaker
- Pro Tips for Making Your Quiz Actually Funny
Why Quiz Games Actually Work And Why Your Audience Will Love Them
Let’s be honest: passive learning is about as exciting as watching paint dry. But gamification? That’s where the magic happens. When you transform a standard quiz into an interactive game, you’re tapping into something primal—our competitive spirit, our desire for instant feedback, and yes, our need for a little fun in the middle of a Tuesday afternoon training session.
Research shows that interactive content boosts engagement by up to 70% compared to static presentations. And quiz games? They’re the perfect blend of learning and entertainment—what educators lovingly call “edutainment” (yes, that’s actually a word, and no, we’re not apologizing for using it).
Method 1: Building Your Quiz with Navigation Links
Think of hyperlinks as the secret passages in your PowerPoint mansion. They’re what turn a linear slideshow into a choose-your-own-adventure experience. Here’s how to build the foundation of your quiz game using nothing but PowerPoint’s built-in navigation features.
Setting Up Your Basic Structure
Start with a clean slate—or in PowerPoint terms, a blank slide. Your quiz needs at least three types of slides:
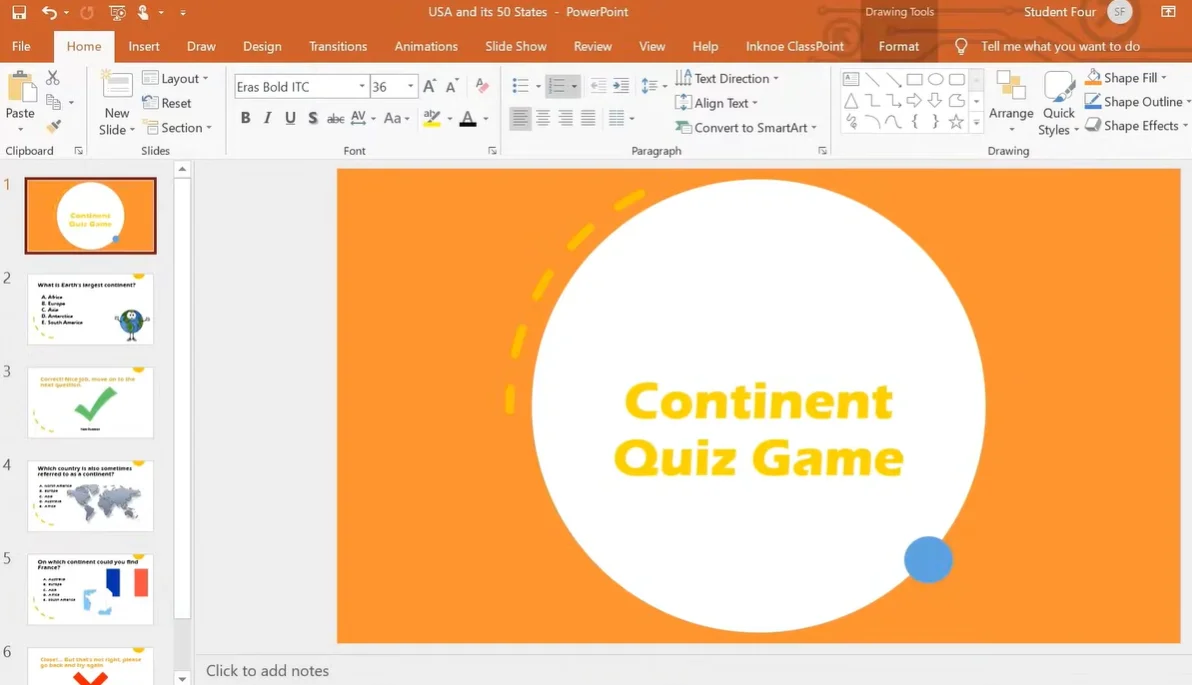
- The Title Slide: Your grand entrance. This is where you hook your audience with a catchy title like “Are You Smarter Than Your Boss?” or “The Ultimate Office Trivia Showdown”
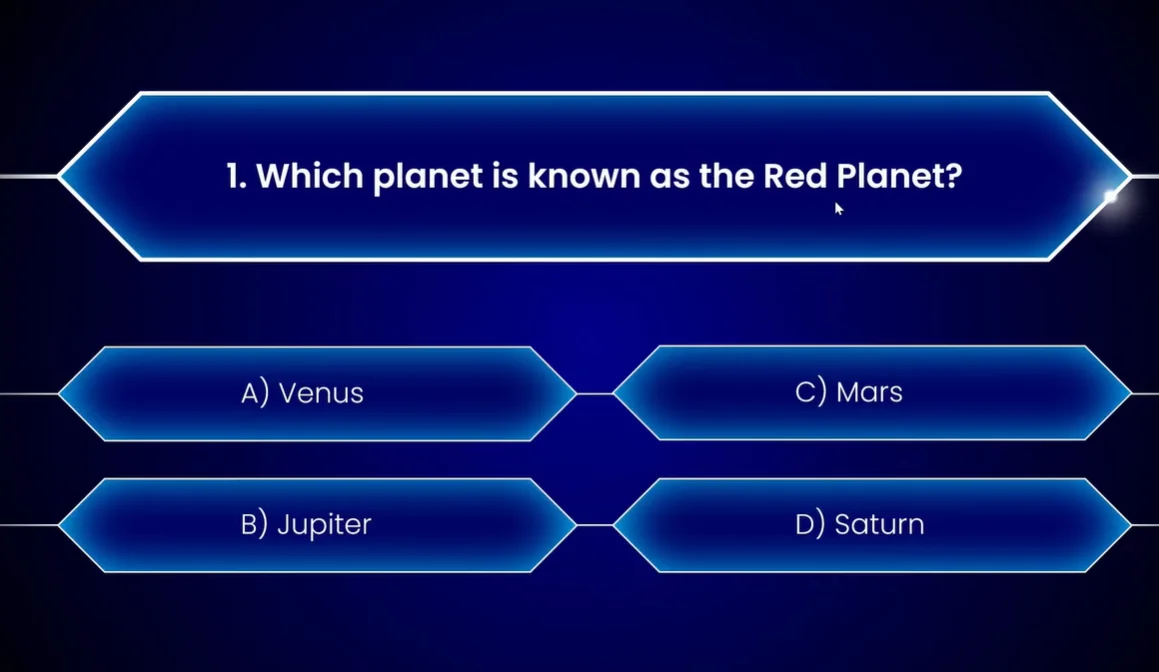
- Question Slides: One per question, featuring your question text and answer options
- Feedback Slides: At minimum, you need two—one for correct answers (“Nailed it!”) and one for incorrect ones (“Oops, try again!”)
Creating Your Start Button
Here’s where things get interesting. On your title slide, insert a shape—maybe a rounded rectangle or a fun call-to-action button. Type something inviting like “Start the Quiz” or “Let’s Do This!” Now comes the magic:
- Select your button shape
- Head to the Insert tab
- Click on Link
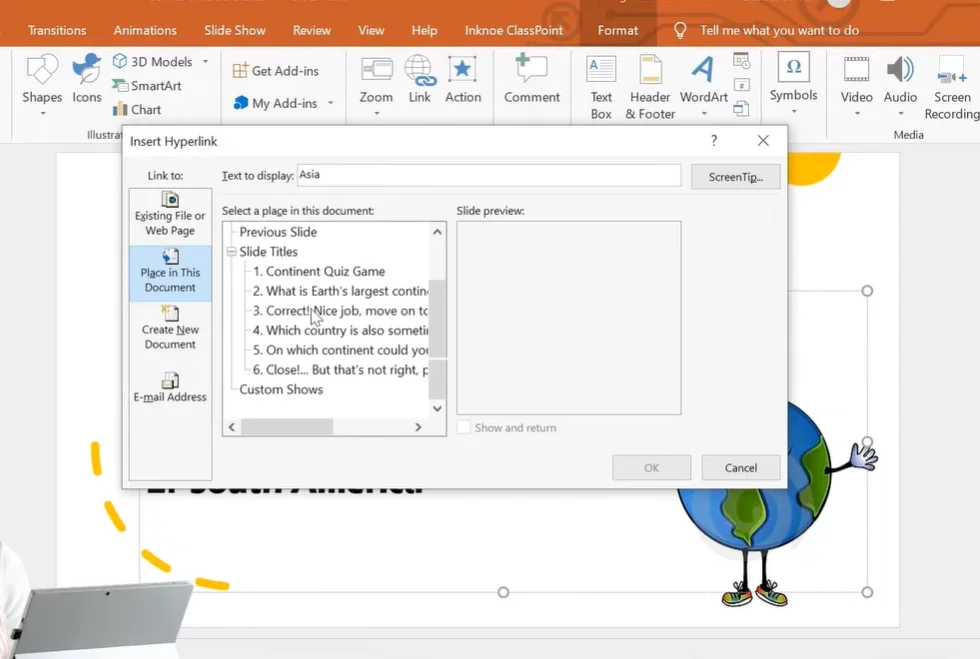
- Choose “Place in This Document” and select your first question slide
- Click OK
Boom. You’ve just created your first interactive element. When someone clicks that button during your presentation, they’ll jump straight to question one. No more clicking through slides like it’s 1995.
Linking Your Answer Choices
Now for the real game-changer. On each question slide, you need to turn your answer options into clickable navigation points. Here’s the process:
For the correct answer:
- Highlight the correct answer text or shape
- Go to Insert → Link
- Link it to your “Correct Answer” feedback slide
For incorrect answers:
- Select each wrong answer
- Link them to your “Incorrect Answer” feedback slide
Pro tip: On your “Incorrect” slide, add a “Go Back” button that uses the Action feature (Insert → Action → Hyperlink to “Last Slide Viewed”). This lets players retry the question without breaking the flow.
The Kiosk Mode Secret
Here’s something most people don’t know: if you don’t set up your presentation correctly, people can accidentally skip questions by pressing the spacebar or arrow keys. That’s where Kiosk Mode comes in—it’s like putting training wheels on your quiz.
Navigate to Slide Show → Set Up Show and select “Browsed at a kiosk (full screen).” This locks down your presentation so the only way to move forward is by clicking your carefully crafted hyperlinks. Game integrity: preserved.
Method 2: Adding Interactive Elements with Animations
If Method 1 is like building with LEGO blocks, Method 2 is like adding motors and lights to make everything move. Animations transform your quiz from functional to fabulous—and they’re surprisingly easy to implement.
Designing Eye-Catching Question Slides
First, let’s talk aesthetics. Nobody wants to look at a plain white slide with Times New Roman text. Here’s how to make your quiz visually appealing:
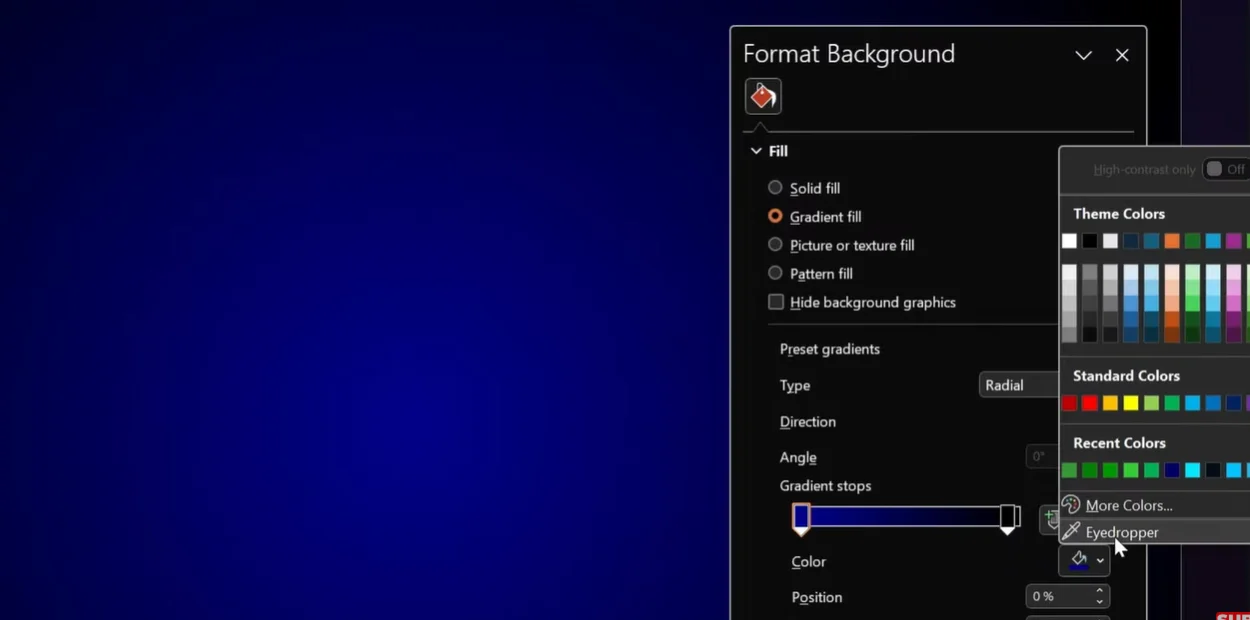
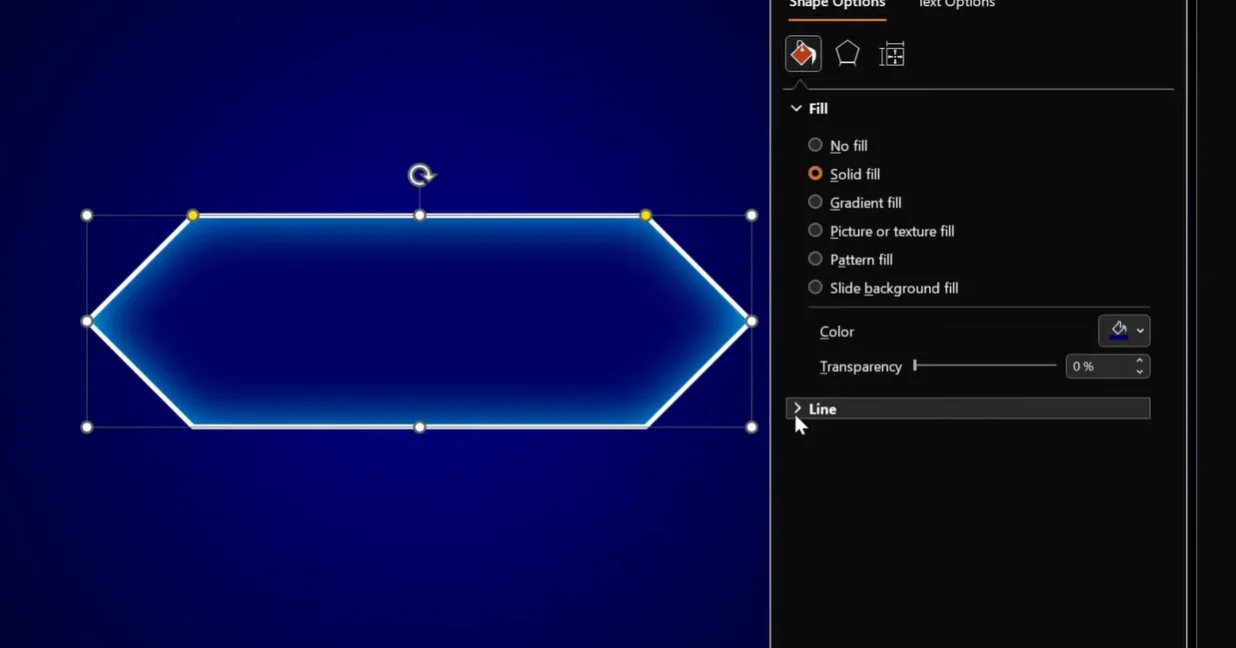
Background Magic: Right-click your slide background and select “Format Background.” Choose “Gradient fill” and play with colors. A dark blue fading to black creates that game-show vibe. The secret? Set your second color stop to 95% position for a subtle, sophisticated look.
Shape Selection: Forget boring rectangles. Use PowerPoint’s “Rectangle: Diagonal Corners Snipped” shape for a modern, diamond-like appearance. Adjust the yellow handles to create perfect diamond shapes that scream “clickable game element.”
The Animation Trigger Technique
This is where things get deliciously technical—but stick with me, because this is what separates amateur quizzes from professional-looking games.
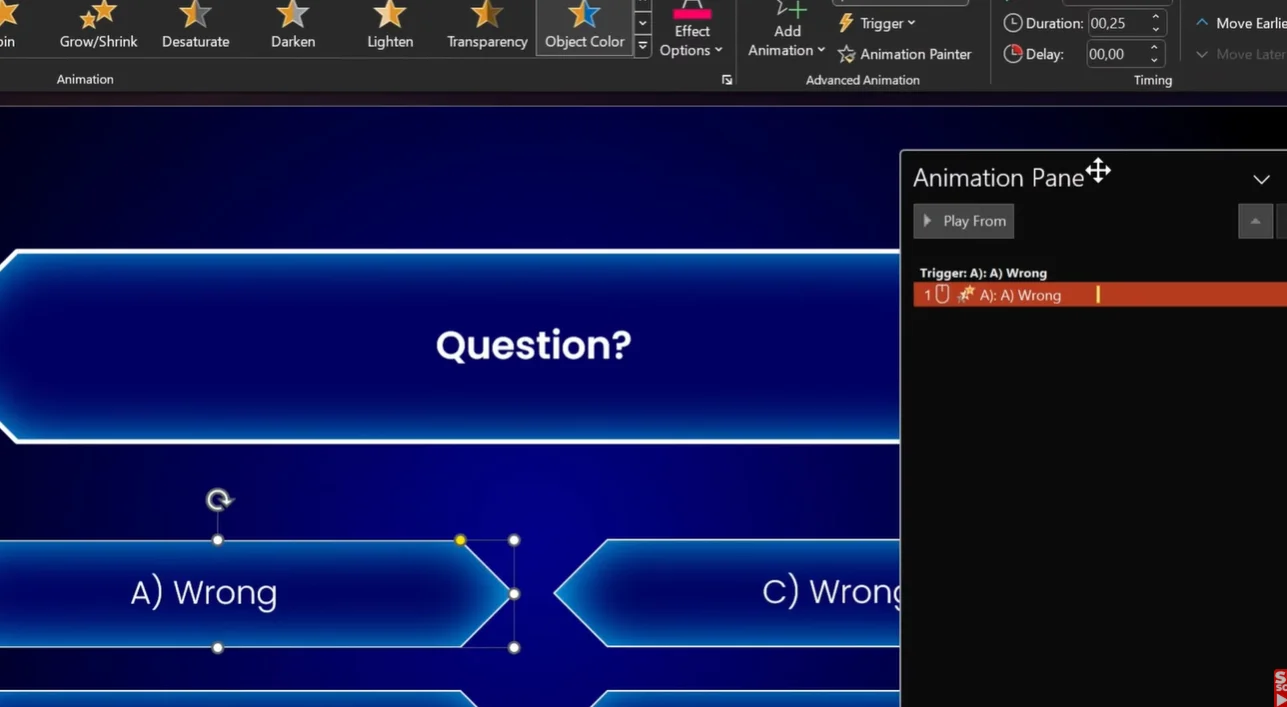
Setting Up Wrong Answer Animations:
- Select your wrong answer shape
- Go to Animations tab
- Add the “Object Color” animation
- Change the color to red (or a pinkish-purple for that “oops” feeling)
- Set duration to 0.25 seconds for a snappy response
- Here’s the crucial part: Click Trigger → On Click Of → [Your answer shape name]
But wait—there’s more! Add a second animation:
- Add “Font Color” animation to the same shape
- Set it to start “With Previous”
- Change the font color to white so the text stays readable
Now when someone clicks a wrong answer, the background turns red while the text stays white. It’s professional, it’s smooth, and it screams “I know what I’m doing.”
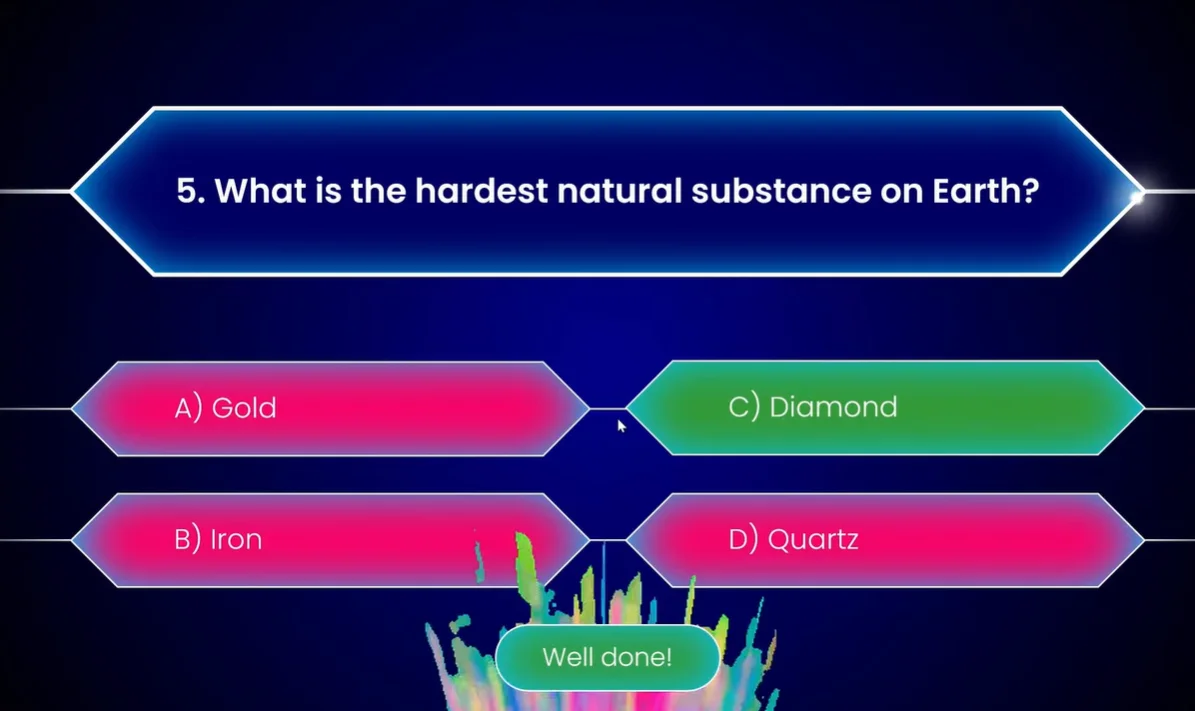
Animating Correct Answers (The Satisfying Part)
Use the same technique, but change the “Object Color” animation to a victorious green. Add a “Wipe Up” animation to make a “Next Question” button slide up from the bottom. The timing matters—make it appear after the color change, not during. We want that moment of “Yes! I got it!” before moving on.
Adding Confetti (Because Why Not?)
For the final question, throw in a confetti animation. It’s celebratory, it’s fun, and it signals “You did it!” louder than any text could. Use PowerPoint’s built-in animation effects or search for confetti GIFs online for extra pizzazz.
Method 3: Using ClassPoint for Live Responses and Leaderboards
Now we’re getting into serious territory. If Methods 1 and 2 are like playing a board game, Method 3 is like launching a full-scale game show complete with buzzers, scoreboards, and real-time competition.
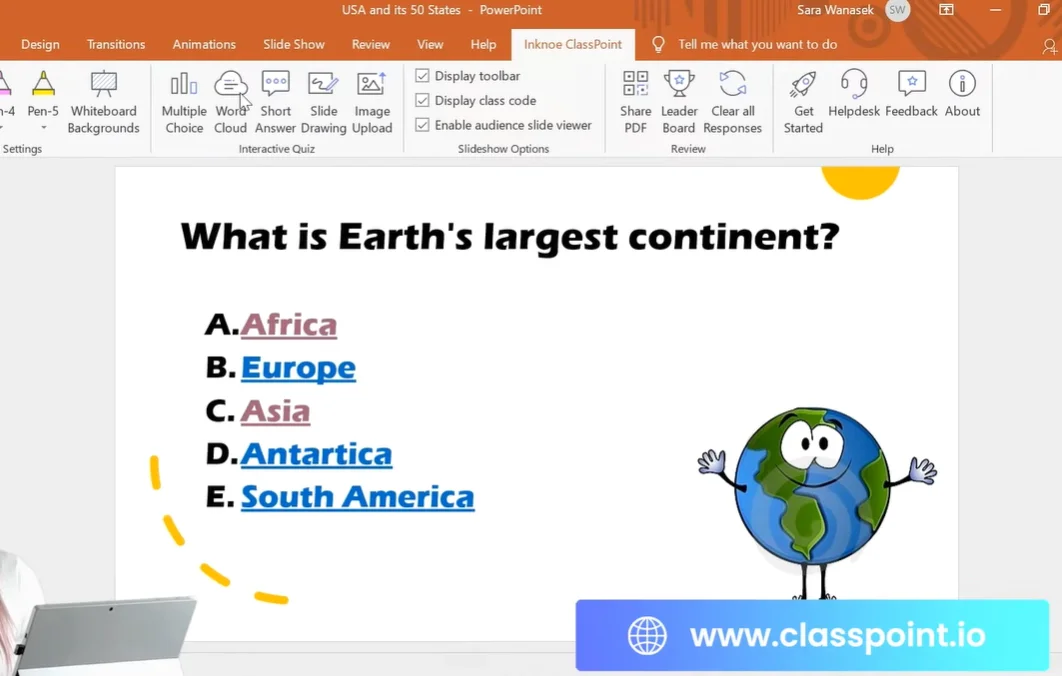
ClassPoint is a free PowerPoint add-in that transforms your presentation into an interactive platform where participants can submit answers from their own devices. Think Kahoot, but without leaving PowerPoint.
Setting Up ClassPoint
Once you’ve downloaded and installed ClassPoint (available at classpoint.io), you’ll see a new toolbar appear in your PowerPoint ribbon. From here, you can:
- Insert interactive question buttons directly onto slides
- Set correct answers and difficulty levels
- Enable competition mode with automatic scoring
- Display live leaderboards
Creating Interactive Multiple Choice Questions
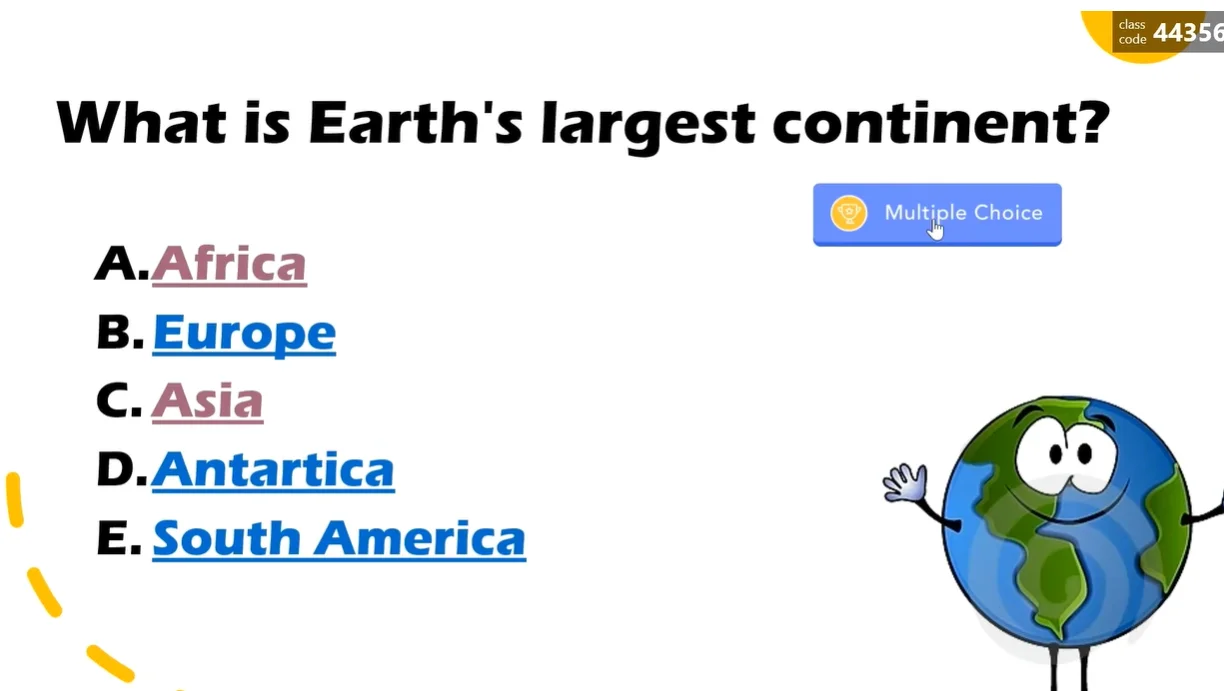
Instead of manually creating answer shapes and hyperlinks, simply click the “Multiple Choice” button on your ClassPoint toolbar. A side panel opens where you can:
- Select the number of answer choices
- Mark the correct answer
- Set competition mode (this adds a trophy icon to your question)
- Configure play options like countdown timers
The countdown timer? That’s clutch. Nothing creates urgency like watching 30 seconds tick down while you’re trying to remember the capital of Lithuania.
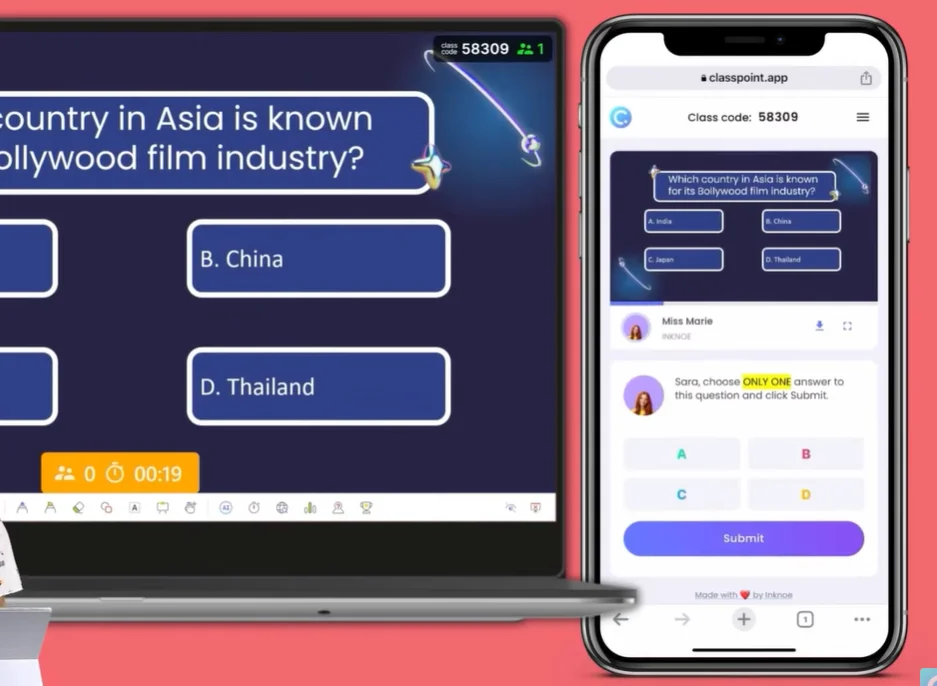
The Leaderboard Effect
Here’s where ClassPoint really shines: automatic scoring based on speed and accuracy. Students (or coworkers, or whoever you’ve roped into your quiz) join using a class code displayed on screen. They answer from their phones or laptops, and ClassPoint calculates who’s fastest and most accurate.
After each question, you can display the leaderboard. Suddenly, Bob from Accounting is neck-and-neck with Sarah from HR, and everyone’s paying attention. That’s the power of gamification—it turns learning into sport.
Data Collection and Analysis
Unlike the manual methods, ClassPoint tracks everything:
- How many students answered correctly
- Response time for each participant
- Overall performance trends
- Individual student results
Export this data as a CSV file and you’ve got instant assessment data. No grading papers, no manual tallying—just pure, automated efficiency.
Creating a Funny Quiz Game with OnlineExamMaker
While PowerPoint is fantastic for in-person presentations, sometimes you need a quiz that lives online, works asynchronously, and includes rich media like videos, audio clips, and interactive elements that PowerPoint can’t quite handle. Enter OnlineExamMaker—a powerful AI-driven exam and quiz creation platform that takes your quiz game to the next level.
Why OnlineExamMaker for Quiz Games?
OnlineExamMaker isn’t just another quiz tool—it’s a comprehensive platform designed specifically for educators, trainers, and HR professionals who need more than basic multiple-choice questions. Here’s what makes it special:
Create Your Next Quiz/Exam with OnlineExamMaker
- AI-Powered Question Generation: Upload your content and let AI create questions automatically
- Rich Media Support: Embed videos, audio files, images, and interactive elements seamlessly
- Advanced Question Types: Beyond multiple choice—think fill-in-the-blanks, matching, hotspot questions, and essay responses
- Instant Grading and Analytics: Get detailed reports on performance, time spent, and knowledge gaps
- Customizable Branding: Add your logo, colors, and custom themes to make quizzes on-brand
How to Create a Rich Media Quiz in OnlineExamMaker?
Step 1: Sign Up and Access the Dashboard
Head to OnlineExamMaker’s website and create a free account. The dashboard is intuitive—you’ll see options to create exams, quizzes, or assessments right from the home screen.
Step 2: Choose Your Creation Method
OnlineExamMaker offers three ways to build your quiz:
- Manual Creation: Add questions one by one with full customization
- Bulk Import: Upload a Word document or Excel file with pre-written questions
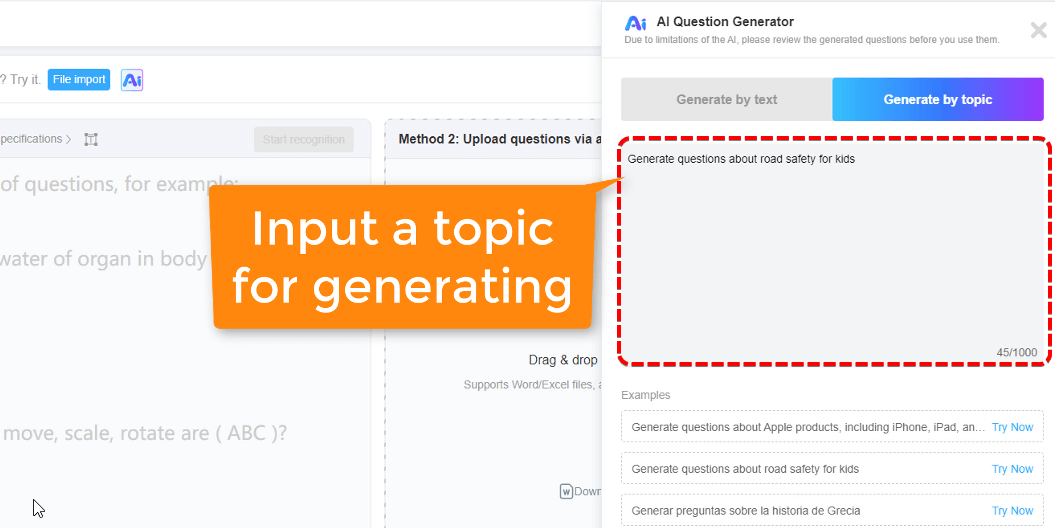
- AI Generation: Upload learning materials (PDFs, documents, presentations) and let AI extract and create questions
For a funny quiz game, the AI generation feature is a game-changer. Upload a document about, say, “Office Culture Fails” or “Historical Pranks,” and watch as the AI creates relevant, engaging questions in seconds.
Step 3: Add Rich Media Elements
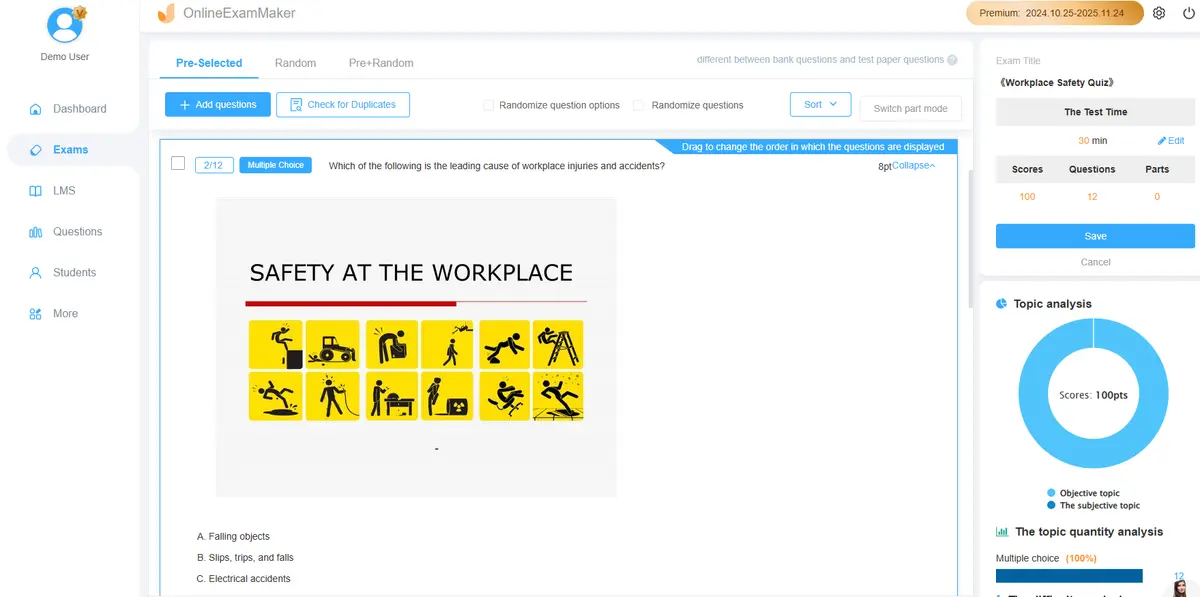
This is where OnlineExamMaker outshines PowerPoint for online quizzes. For each question, you can:
- Embed YouTube videos or upload video files directly
- Add audio clips (perfect for music quizzes or language learning)
- Insert high-quality images with hotspot functionality (click the correct area to answer)
- Include GIFs and memes to keep things light and funny
Imagine a question like: “Watch this 10-second clip from ‘The Office.’ What management principle is being violated?” Participants watch the video embedded right in the quiz, then select from multiple-choice answers. That’s engagement on steroids.
Step 4: Configure Quiz Settings
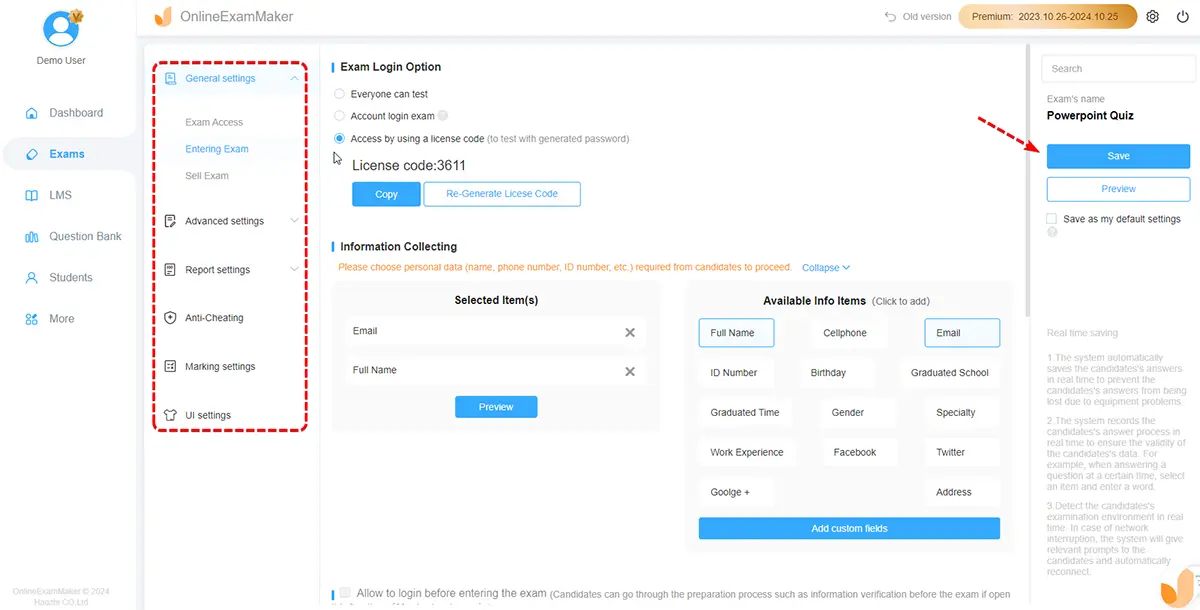
OnlineExamMaker gives you granular control over how your quiz functions:
- Time Limits: Set overall quiz time or per-question timers
- Question Randomization: Prevent cheating by shuffling questions and answer order
- Pass/Fail Thresholds: Set minimum scores for “passing”
- Feedback Options: Show correct answers immediately or after submission
- Certificate Generation: Auto-generate completion certificates for participants
Step 5: Add Personality and Humor
Here’s where you make your quiz actually funny. In the feedback section for each answer, don’t just write “Correct” or “Incorrect.” Get creative:
- Wrong answer: “Ooh, so close! That’s what everyone thinks until they actually Google it.”
- Correct answer: “Yes! You’re officially smarter than 85% of people who took this quiz. Wear that badge proudly.”
- Time out: “Tick tock! Don’t worry, even Einstein needed more than 10 seconds sometimes.”
Add funny memes or reaction GIFs to feedback messages. OnlineExamMaker supports image uploads in feedback sections, so a well-placed “Success Kid” meme or “Confused Math Lady” image can turn a standard quiz into a memorable experience.
Step 6: Share Your Quiz
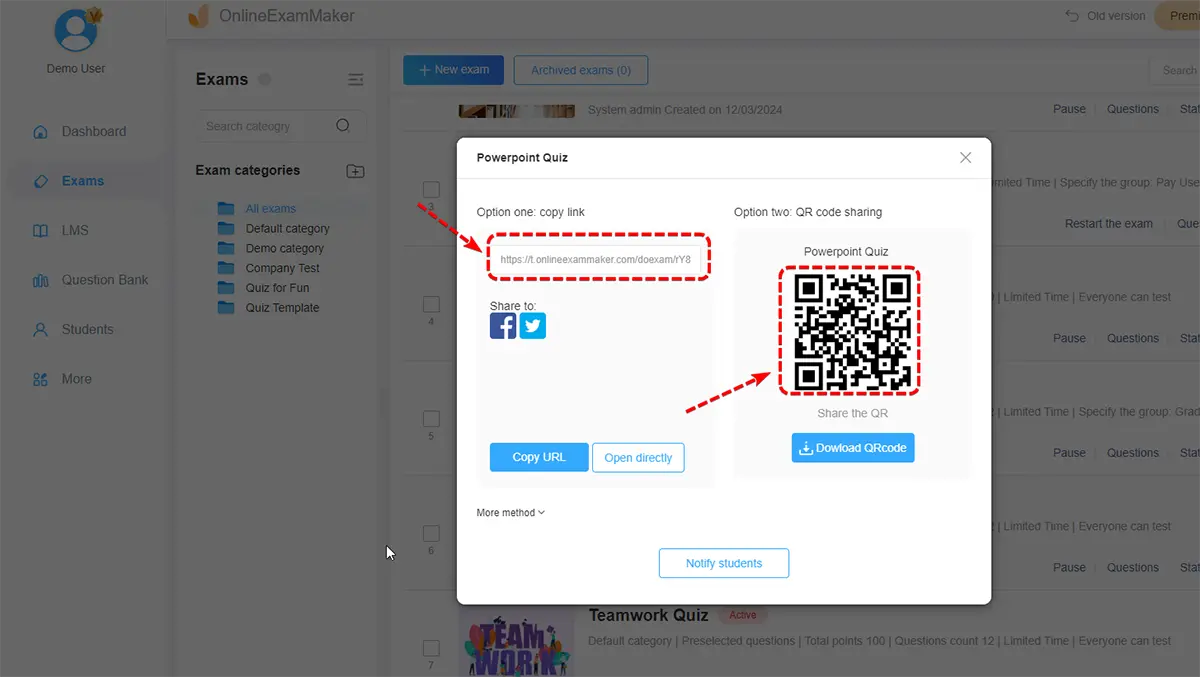
Once published, OnlineExamMaker generates a shareable link. Participants don’t need accounts—they just click the link and start. You can also:
- Embed the quiz on your website or learning management system
- Share via QR code (print it on flyers or display on screen)
- Schedule automatic release times
- Set access restrictions (password-protected or IP-limited)
Step 7: Analyze Results in Real-Time
As participants complete your quiz, OnlineExamMaker tracks everything:
- Individual scores and time taken
- Question-by-question breakdown of performance
- Most-missed questions (shows you where confusion lies)
- Completion rates and drop-off points
Export comprehensive reports as PDF or Excel files, perfect for training documentation or student records.
Example: Building “The Ultimate 90s Pop Culture Quiz” in OnlineExamMaker
Let’s walk through a real example. You want to create a hilarious quiz about 90s nostalgia:
- Upload Content: Add a PDF about 90s TV shows, music, and fashion trends
- AI Question Generation: Let OnlineExamMaker’s AI create 20 questions automatically
- Enhance with Media:
- Question 1: Embed a YouTube clip of the “Fresh Prince of Bel-Air” theme song (no audio) and ask “What TV show is this from?”
- Question 5: Upload an image of cargo pants and ask “What fashion crime is this?”
- Question 10: Add an audio clip of a dial-up modem and ask “What sound is this?”
- Add Humor: Write funny wrong-answer feedback like “If you think that’s Nirvana, we need to have a serious conversation about your childhood.”
- Enable Leaderboard: Turn on competition mode to show top scorers
- Share: Post the link in your company Slack or class group chat
The result? A quiz that’s actually fun, educational, and memorable—something people will voluntarily share with friends.
Pro Tips for Making Your Quiz Actually Funny
Creating a functional quiz is one thing. Making it funny? That’s an art form. Here are some insider tips:
Embrace Absurdity in Your Wrong Answers
Don’t just make wrong answers plausible—make some of them hilariously implausible. For a question like “What year did World War II end?” throw in options like “1492” or “Next Tuesday.” The ridiculousness adds levity.
Use Pop Culture References
Questions about historical facts? Boring. Questions framed as “Who said it: Shakespeare or Kanye West?”? Now we’re talking. Mix high and low culture for unexpected combinations.
Write Personality into Your Feedback
Instead of “Correct!” try:
- “Boom! You’re on fire! (Figuratively. Please don’t actually light anything on fire.)”
- “Wrong, but we admire your confidence. That’s the kind of energy we need in this world.”
Add Visual Humor
Insert meme images, funny GIFs, or unexpected photos. A question about economics paired with a picture of a confused dog? Comedy gold.
Include a “Wild Card” Question
Throw in one completely random question that has nothing to do with your topic. In a history quiz, suddenly ask “What’s the best flavor of ice cream?” It keeps people on their toes and lightens the mood.
Whether you’re using PowerPoint’s native tools, animations, ClassPoint’s live features, or OnlineExamMaker’s rich media capabilities, the goal is the same: transform passive consumption into active participation. Turn “I have to sit through this presentation” into “I want to beat everyone else in this quiz.”
So go ahead—build that trivia game about your company’s weird policies. Create that impossible quiz about 80s hair metal bands. Design that interactive assessment that has people laughing while they learn. Because at the end of the day, if your audience is engaged, they’re learning. And if they’re laughing? Well, you’ve just become the most popular presenter in the building.