Ever found yourself staring at a Google Form, wondering where all those quiz responses disappeared to? You’re not alone. Teachers everywhere struggle with the same question: how do I actually see what my students answered?
Here’s the truth—Google Forms hides its treasures pretty well. But once you know where to look, viewing quiz answers becomes surprisingly straightforward. Let’s dig into the nitty-gritty of accessing, analyzing, and making sense of your quiz data.
- Accessing Quiz Responses in Google Forms
- Understanding Different Response Views
- Exporting and Analyzing Quiz Data
- Controlling Student Access to Answers
- A Smarter Alternative: OnlineExamMaker Quiz Making Software
- Creating Quizzes with OnlineExamMaker AI

Accessing Quiz Responses in Google Forms
The first step is simple, but easy to miss if you’re new to Forms. Open your quiz as the owner—not as a respondent, mind you—and look for the Responses tab sitting right at the top of your screen.
Click it. That’s your gateway.
This tab reveals everything: submitted responses, student scores, and if you’ve set up an answer key, the correct answers too. Think of it as your quiz command center, where all the magic (or chaos, depending on how your students did) lives.
But here’s where it gets interesting. Google Forms doesn’t just dump data on you—it organizes it in three distinct ways, each serving a different purpose.
Understanding Different Response Views
Google Forms offers three lenses through which you can examine your quiz results. Let’s break them down:
Summary View: The Big Picture
This is where you land first. Charts, graphs, response counts, average scores—it’s data visualization at its finest. Want to know how many students aced question five? Or which question stumped everyone? The Summary view shows you patterns and trends at a glance.
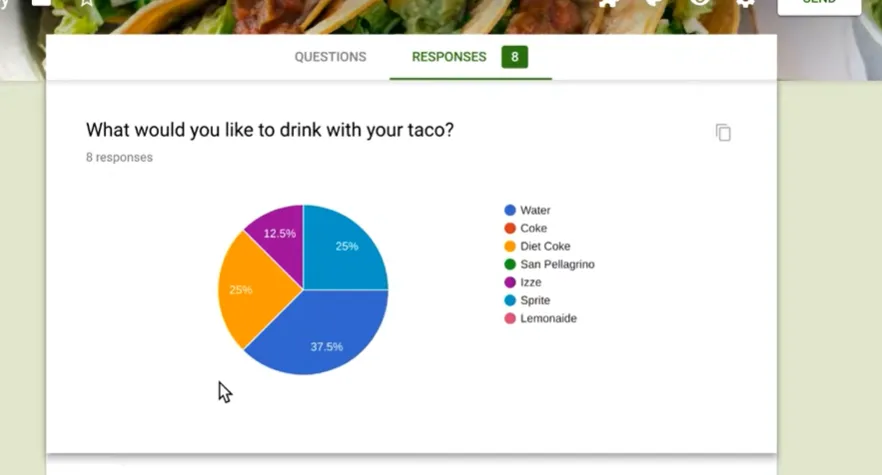
Perfect for when you need the 30,000-foot view before diving into specifics.
Question View: Per-Question Breakdown
Switch to this view when you want to analyze how students performed on individual questions. Did everyone bomb the same question? Maybe it’s time to revisit that lesson plan.
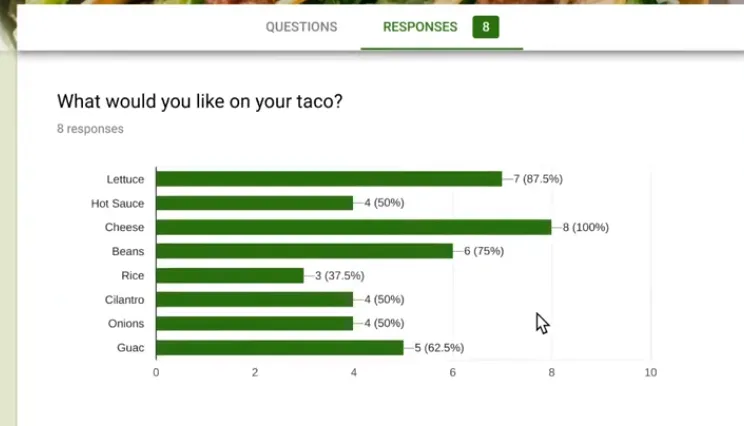
This view helps you identify knowledge gaps across your entire class, making it invaluable for targeted instruction.
Individual View: Student-by-Student Analysis
Here’s where you get personal. Click through individual student submissions, one at a time. See exactly what each student answered, which questions they nailed, and where they stumbled.
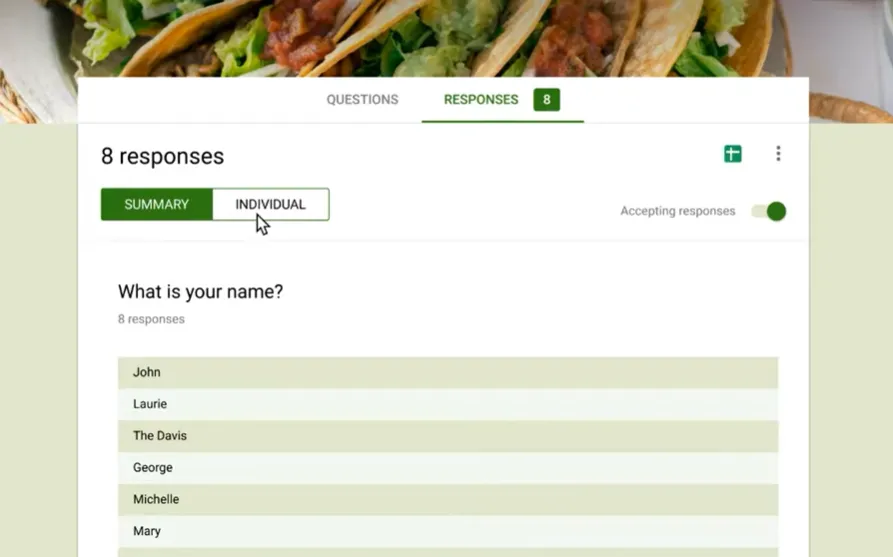
Correct answers appear highlighted if you’ve configured your answer key properly. Use the Previous and Next arrows—or the dropdown menu—to cycle through submissions without getting lost in a sea of data.
This view transforms you from data analyst to detective, uncovering each student’s unique learning journey.
How to Export and Analyze Quiz Data
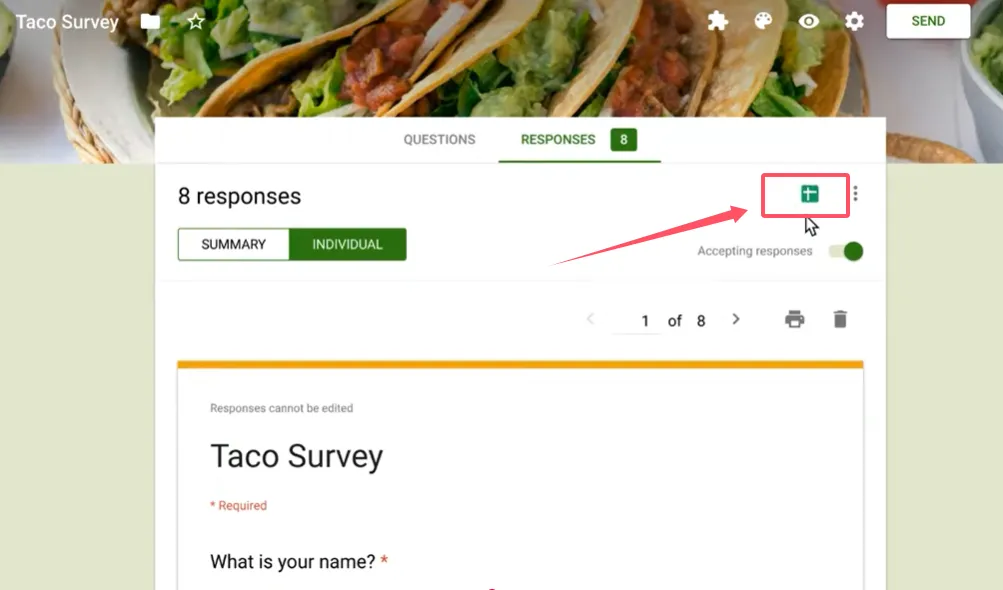
Sometimes you need more power than Google Forms provides. Enter spreadsheets.
Look for that little green Sheets icon in the Responses tab. Click it, and watch the magic happen. Google Forms creates a linked Google Sheet containing all your raw data: timestamps, scores, individual answers—everything.
The best part? This sheet auto-updates with new submissions. No manual exports, no outdated data. It’s alive, breathing, and growing with every student who hits submit.
Why does this matter? Because now you can:
- Create custom charts and graphs
- Calculate advanced statistics
- Filter and sort data however you want
- Share results with colleagues or administrators
- Track student progress over multiple quizzes
It’s like upgrading from a tricycle to a sports car.
Controlling Student Access to Answers
Here’s a question that keeps teachers up at night: should students see the correct answers after they submit?
By default, only you—the owner—can view full responses. Students finish the quiz and… crickets. They see their score (maybe), but not what they got wrong or why.
Want to change that? Navigate to Settings > Quizzes > Release grade and select Immediately after each submission. Then enable Respondents can see: Correct answers.
Now students get instant feedback. They see their mistakes, learn from them, and (hopefully) don’t repeat them on the next assessment.
But be warned—this transparency cuts both ways. Some students might share answers with classmates who haven’t taken the quiz yet. Choose wisely based on your classroom culture and quiz security needs.
A Smarter Alternative: OnlineExamMaker Quiz Making Software
Look, Google Forms works. It’s free, it’s familiar, and it gets the job done. But let’s be honest—it was built for surveys, not sophisticated educational assessments.
Enter OnlineExamMaker AI, an exam creation software designed specifically for educators who want more than just basic quiz functionality.
Create Your Next Quiz/Exam Using AI in OnlineExamMaker
What makes it different? Intelligence. Actual, built-in AI that transforms how you create, deliver, and analyze assessments.
Unlike Google Forms’ one-size-fits-all approach, OnlineExamMaker understands that modern education demands:
- Advanced question types beyond multiple choice and short answer
- Automatic grading that handles complex responses
- Detailed analytics that reveal learning patterns you’d miss in spreadsheets
- Security features that prevent cheating without turning your quiz into Fort Knox
- AI-powered question generation that creates quality assessments in minutes, not hours
The platform doesn’t just collect answers—it helps you understand what those answers mean for each student’s learning journey.
How to Make a Quiz with OnlineExamMaker AI?
Ready to upgrade your assessment game? Here’s how to create an online quiz with OnlineExamMaker AI:
Step 1: Sign Up and Log In
Create your free account at OnlineExamMaker. The interface welcomes you with a clean dashboard—no clutter, no confusion.
Step 2: Start a New Quiz
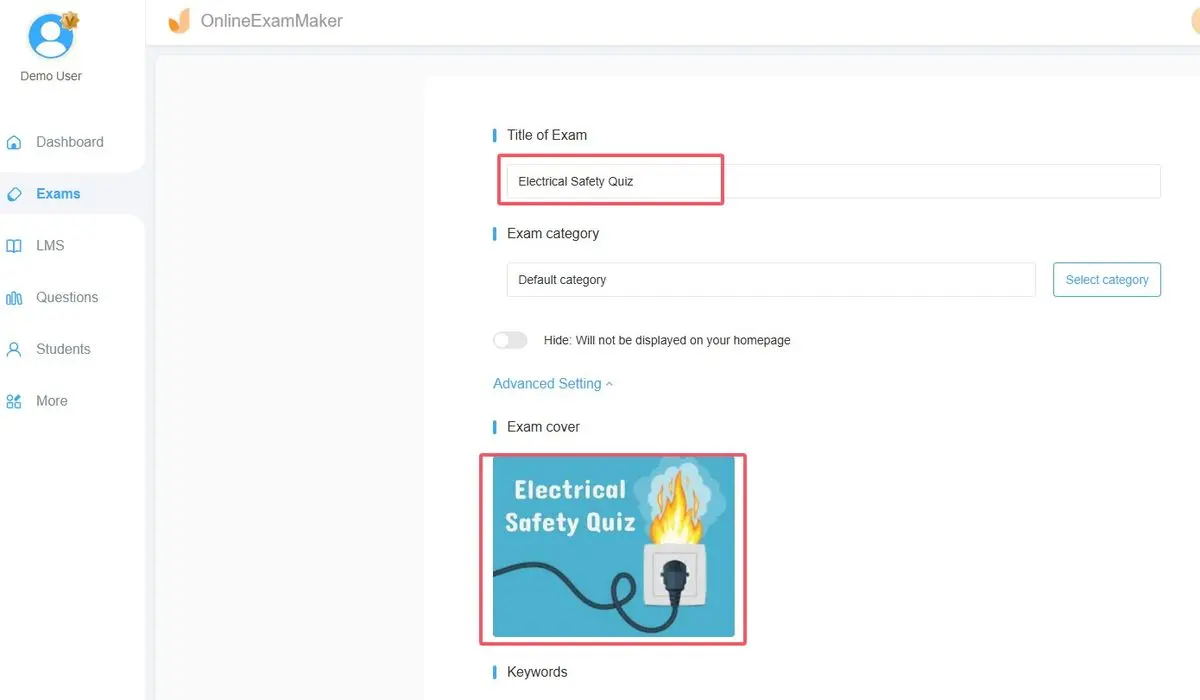
Click “New Exam” and choose your quiz type. Want a timed test? An adaptive assessment? A practice quiz? OnlineExamMaker handles them all.
Step 3: Leverage AI Question Generation
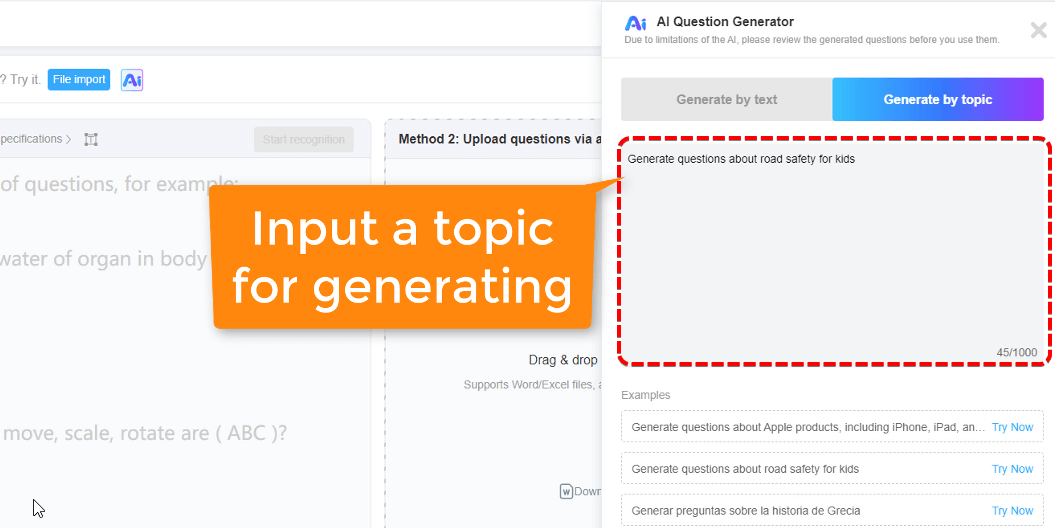
Here’s where things get interesting. Instead of manually typing every question, use the AI generator. Upload your lesson materials, specify your learning objectives, and watch the software create relevant, high-quality questions automatically.
No more spending hours crafting questions. The AI does the heavy lifting while you focus on fine-tuning.
Step 4: Customize Your Quiz Settings
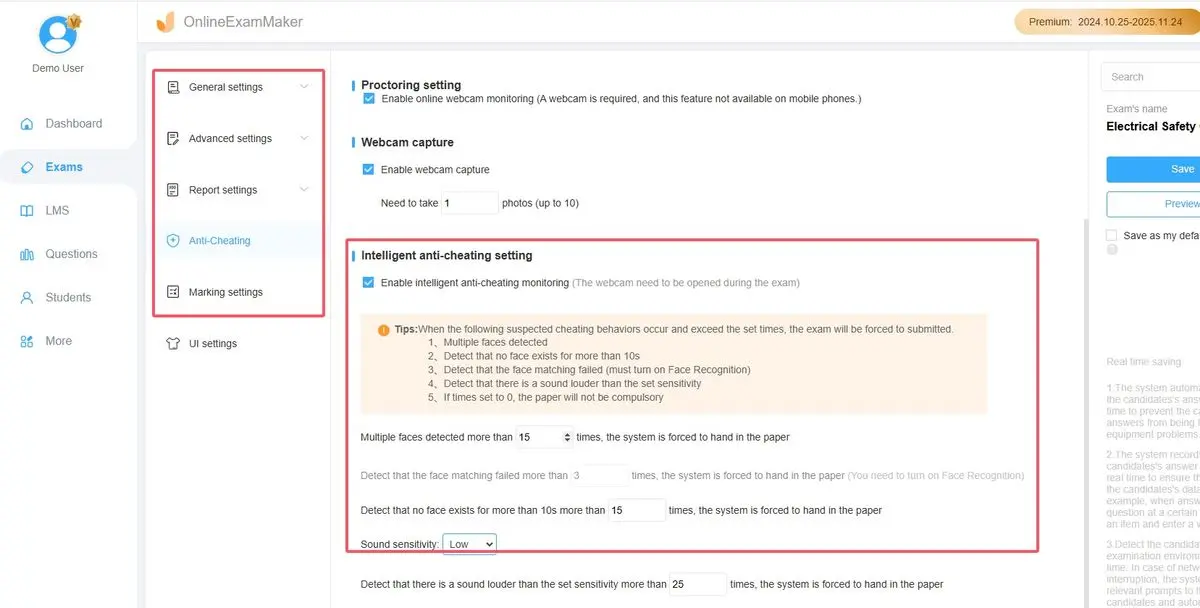
Set time limits, randomize question order, enable or disable backtracking—customize everything to match your pedagogical goals. Want to prevent students from opening new tabs? There’s a setting for that. Need to allow multiple attempts? Easy.
Step 5: Review and Publish
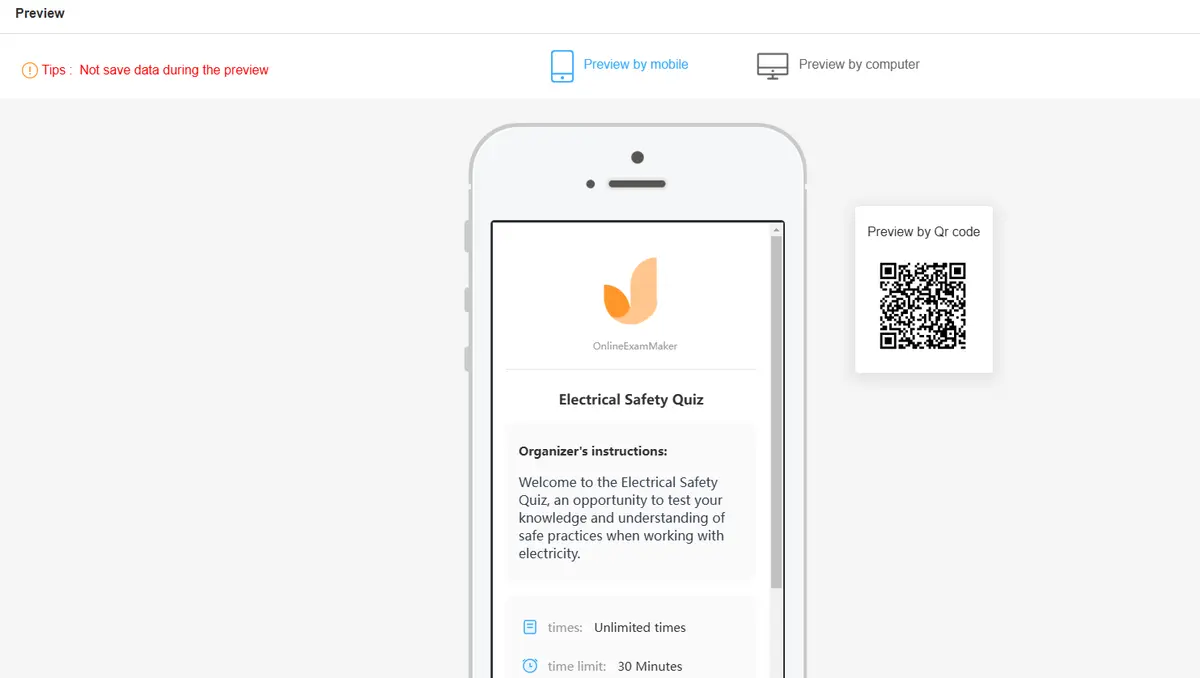
Preview your quiz from a student’s perspective, make final adjustments, and publish. OnlineExamMaker generates a unique link you can share via email, learning management systems, or social media.
Step 6: Monitor and Analyze
As students complete your quiz, watch real-time analytics roll in. See who’s struggling, which questions prove most challenging, and how class performance compares to your expectations.
The AI analyzes patterns you’d never spot manually, suggesting which topics need reteaching and which students might benefit from additional support.
Step 7: Export and Share Results
Generate detailed reports for parents, administrators, or your own records. Unlike Google Forms’ basic spreadsheet export, OnlineExamMaker provides actionable insights formatted for different audiences.
Why Teachers Are Making the Switch
Google Forms served us well during the emergency pivot to online learning. But education has evolved, and so should our tools.
OnlineExamMaker AI doesn’t replace your teaching—it amplifies it. Less time creating assessments means more time actually teaching. Better analytics mean more targeted interventions. Enhanced security means more reliable data.
The question isn’t whether you can see answers on Google Forms (you can, we’ve covered that). The question is whether you’re settling for basic visibility when you could have genuine insight.
Your students deserve assessments that do more than just collect data—they deserve tools that illuminate learning pathways and guide instruction.
Ready to see the difference? Your next quiz awaits.