Remember when quizzes meant printing out dozens of paper copies and spending your evening hunched over a red pen? Yeah, those days are thankfully behind us. Now, creating interactive quizzes is as simple as dragging, dropping, and clicking—no coding degree required.
Canva, the design platform that’s already sitting in your bookmarks bar, just rolled out a feature that’s about to change how you think about quizzes. Whether you’re a teacher testing knowledge, a trainer assessing skills, or an HR manager evaluating candidates, this tool puts professional quiz creation right at your fingertips.
- What is Canva Quiz Maker?
- Why Create a Quiz in Canva? The Benefits You Can’t Ignore
- Step-by-Step: Creating Your First Interactive Quiz in Canva
- Going Live: How to Share Your Quiz
- Understanding Quiz Responses and Analytics
- OnlineExamMaker: A Powerful Alternative for Advanced Quiz Creation
- Canva vs. OnlineExamMaker: Which Should You Choose?
- Final Thoughts
What is Canva Quiz Maker?
Canva’s quiz maker is a relatively new addition to the platform’s arsenal of features, launched during their “Create Together” event. It’s not a standalone app—it lives right inside the Canva editor you already know.
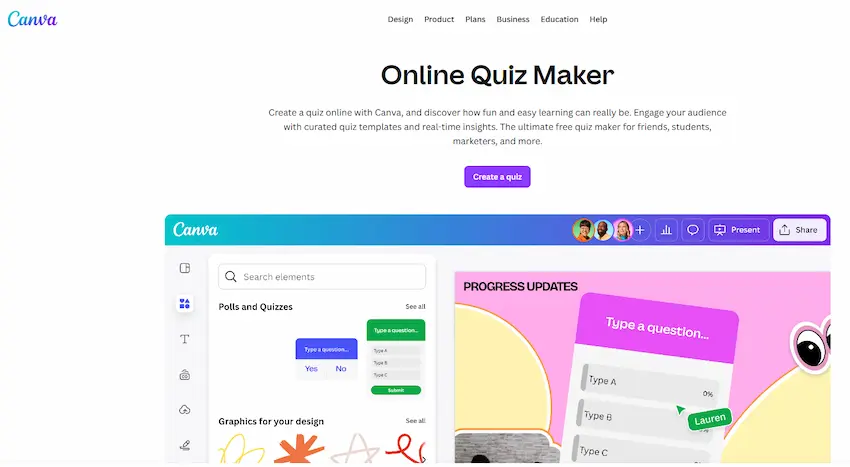
Think of it as the natural evolution of Canva’s mission: making design accessible to everyone. Instead of just creating static presentations or documents, you can now build interactive experiences that people can click through, respond to, and engage with in real-time.
The feature supports both polls (for gathering opinions) and quizzes (with correct and incorrect answers). It’s embedded directly into your designs, which means your quiz doesn’t look like it was cobbled together from three different platforms. Everything—from fonts to colors to layouts—stays on brand.
Why Create a Quiz in Canva? The Benefits You Can’t Ignore
Let’s be honest: there are dozens of quiz-making tools out there. So why use Canva? Here’s what makes it compelling.
All-in-One Platform
You’re probably already using Canva for presentations, worksheets, or marketing materials. Adding quizzes to your workflow means one less login to remember, one less subscription to justify, and one less tool to learn from scratch.
Design Freedom Without the Complexity
Most quiz platforms give you templates that look like they were designed in 2010. Canva lets you create something that actually looks good—fonts, colors, images, all customizable. Your quiz can match your brand identity without requiring a graphic design degree.
Real-Time Interaction
The moment someone completes your quiz, you see their response. No downloading CSV files, no waiting for data to sync. Just instant feedback that lets you adjust on the fly.
Engagement Metrics That Matter
When participants are logged into Canva, you can see who responded and what they answered. It’s not just data—it’s actionable insight into how your audience thinks.
Seamless Sharing
One link. That’s all you need. No downloads, no special software, no “make sure you enable pop-ups” nonsense. Just a clean URL that works on any device.
Pro Tip: Canva’s quiz feature works best for straightforward assessments and audience engagement. If you need advanced features like question banks, randomization, or proctoring, you might want to explore dedicated exam platforms.
Step-by-Step: Creating Your First Interactive Quiz in Canva
Alright, enough theory. Let’s build something.
Step 1: Open Your Design and Navigate to Elements
Start by opening any Canva design—or create a new one. On the left sidebar, you’ll see the Elements tab. Click it.
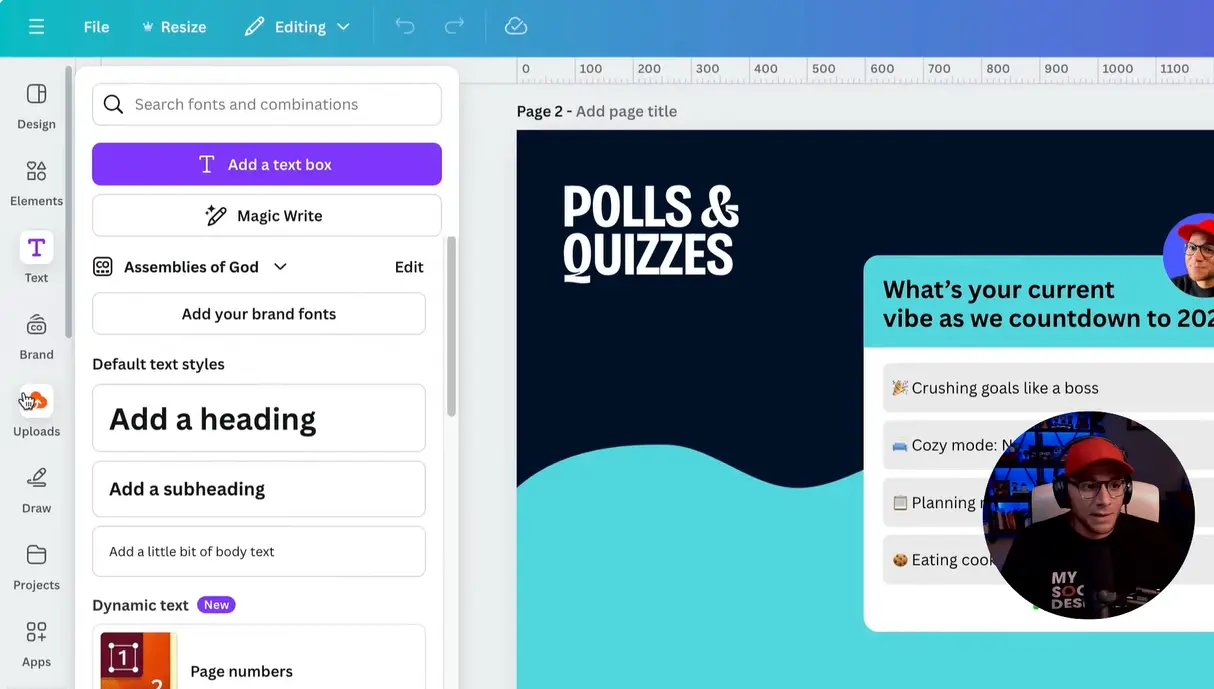
Step 2: Find the Polls and Quizzes Section
Scroll down through the elements menu. You’ll see categories like Lines, Shapes, Graphics—keep going until you spot Polls and Quizzes. It’s usually toward the bottom.
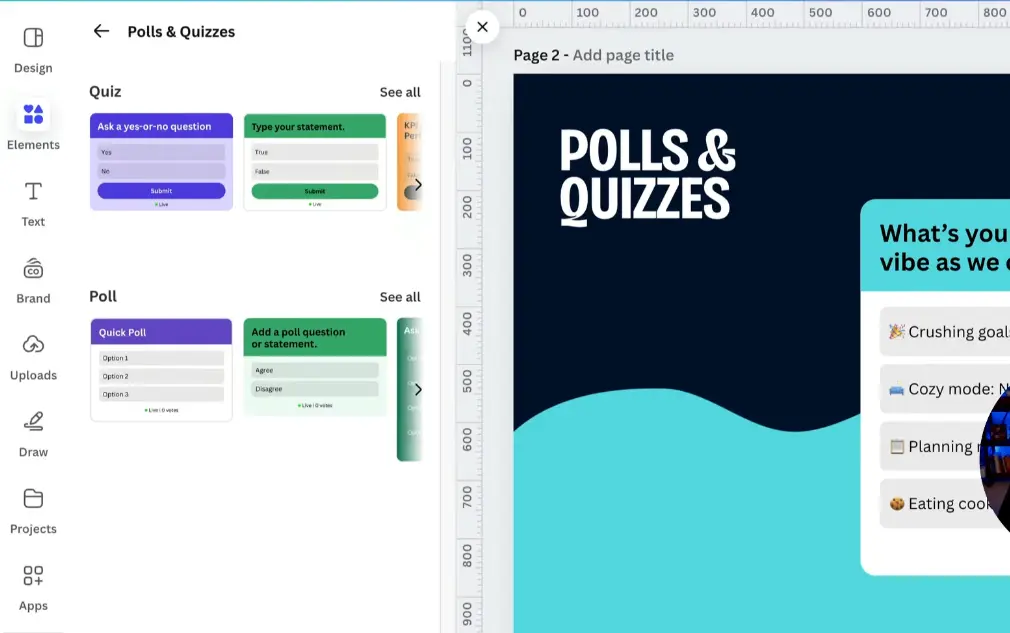
Step 3: Add a Quiz Element to Your Canvas
Click on a quiz template. It’ll automatically appear on your canvas. Don’t worry about placement right now—you can move it around later.
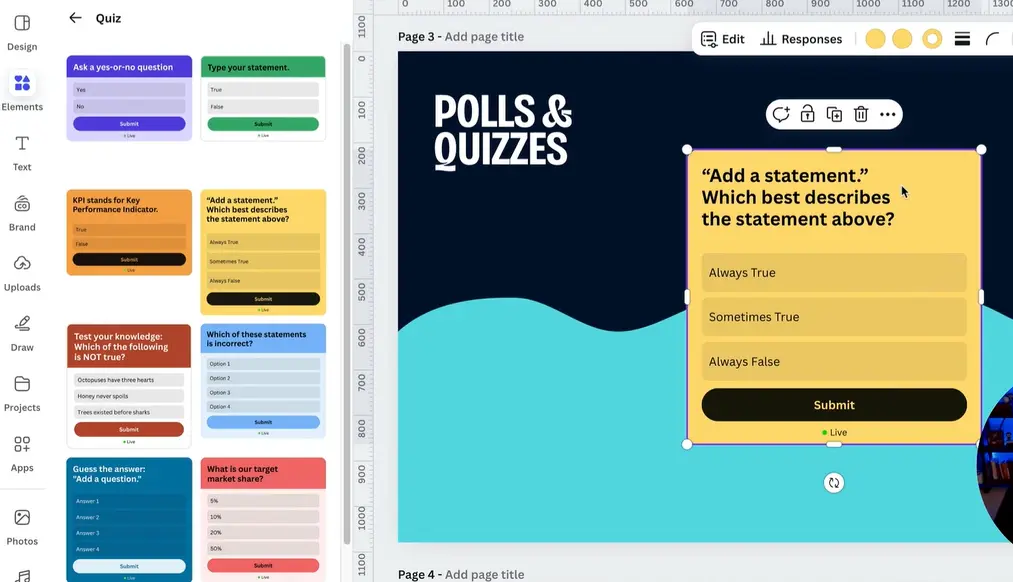
Step 4: Edit Your Quiz Question
With the quiz selected, look at the top toolbar. You’ll see an Edit button. Click it.
Now you can customize everything: the header, the question text, and the answer options. Want to skip the header entirely? Just toggle it off.
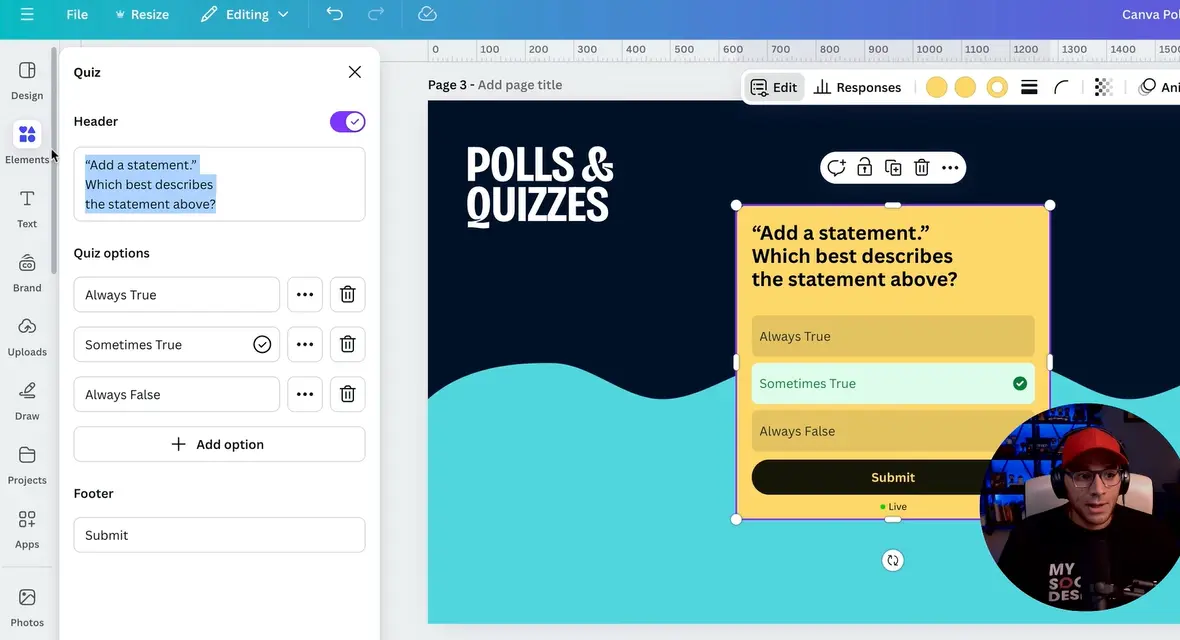
Step 5: Customize Your Answer Options
You’ll see default answer choices. Click on each one to edit the text. You can add as many options as you need—just keep in mind that too many choices can overwhelm participants.
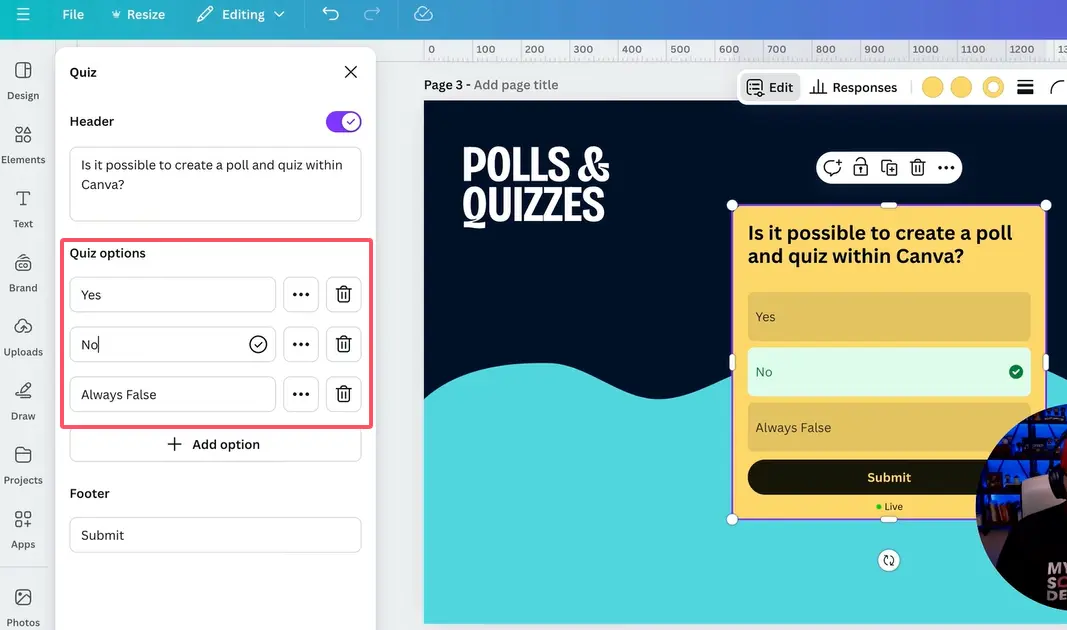
Step 6: Mark the Correct Answer
Here’s where it gets good. See those three dots next to each answer? Click them, then select Mark as Correct. A little checkmark will appear, indicating this is the right answer.
When participants submit their responses, they’ll get instant feedback—green for correct, red for incorrect. It’s like having an automated grading assistant.

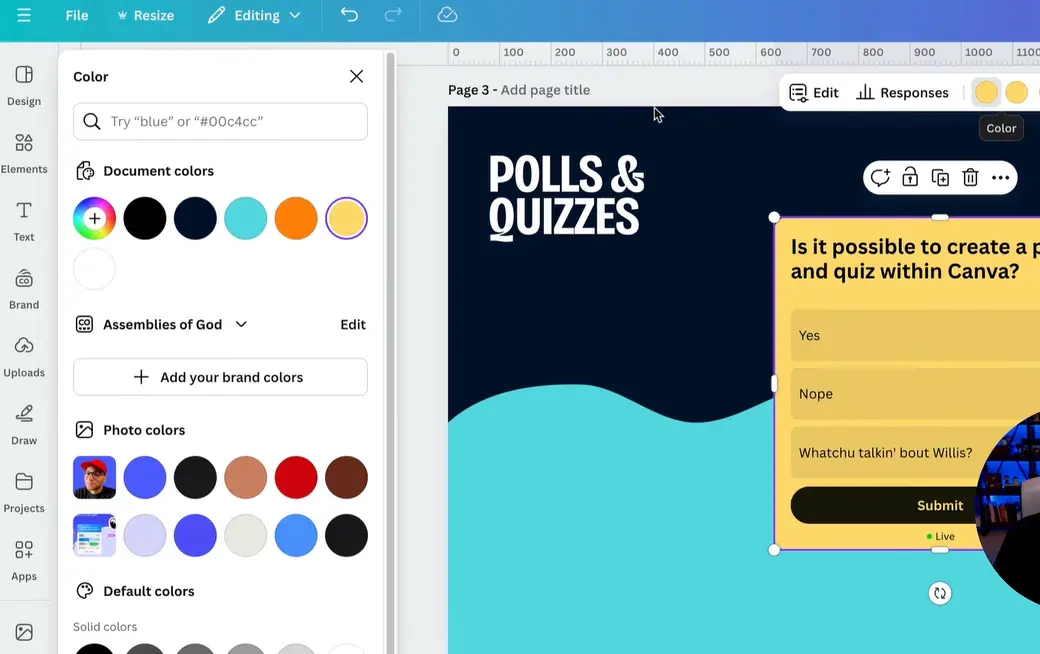
Step 7: Customize the Appearance
This is where Canva shines. You can adjust colors, fonts, button styles—everything. Make it match your brand, or just make it look less boring than a standard quiz form.
Going Live: How to Share Your Quiz
You’ve built your quiz. Now what?
Generate a Public View Link
Click the Share button in the top-right corner. You’ll see several sharing options. Choose Public View Link.
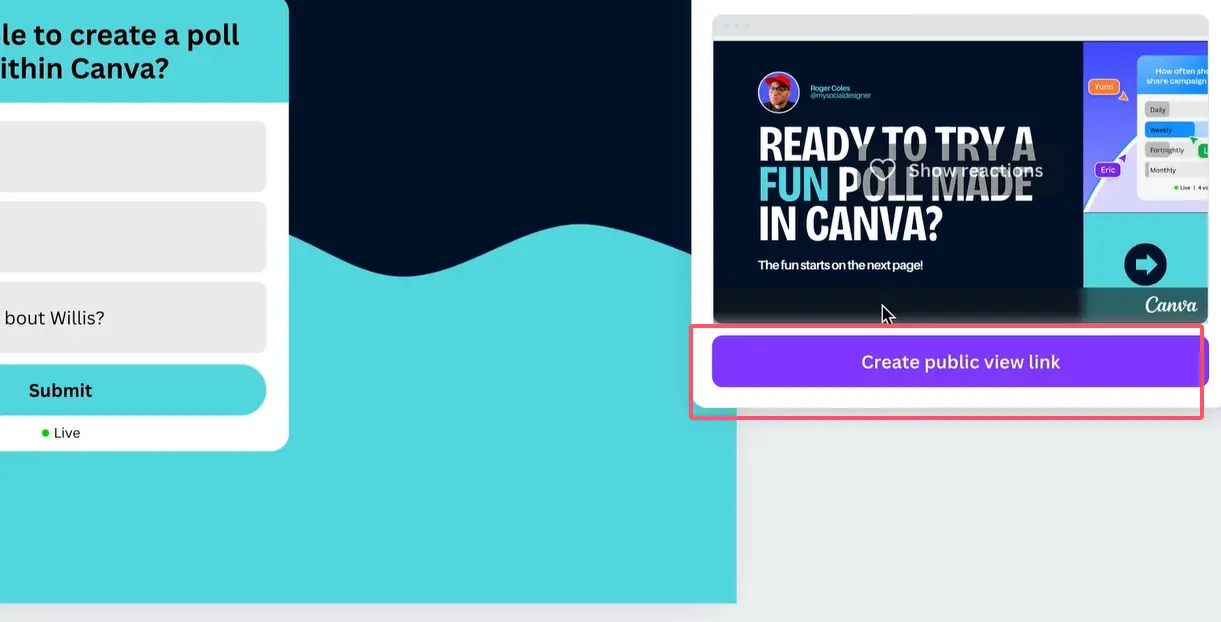
Canva will generate a unique URL. Copy it. That’s your quiz link. Send it via email, post it on social media, embed it in your learning management system—whatever works for you.
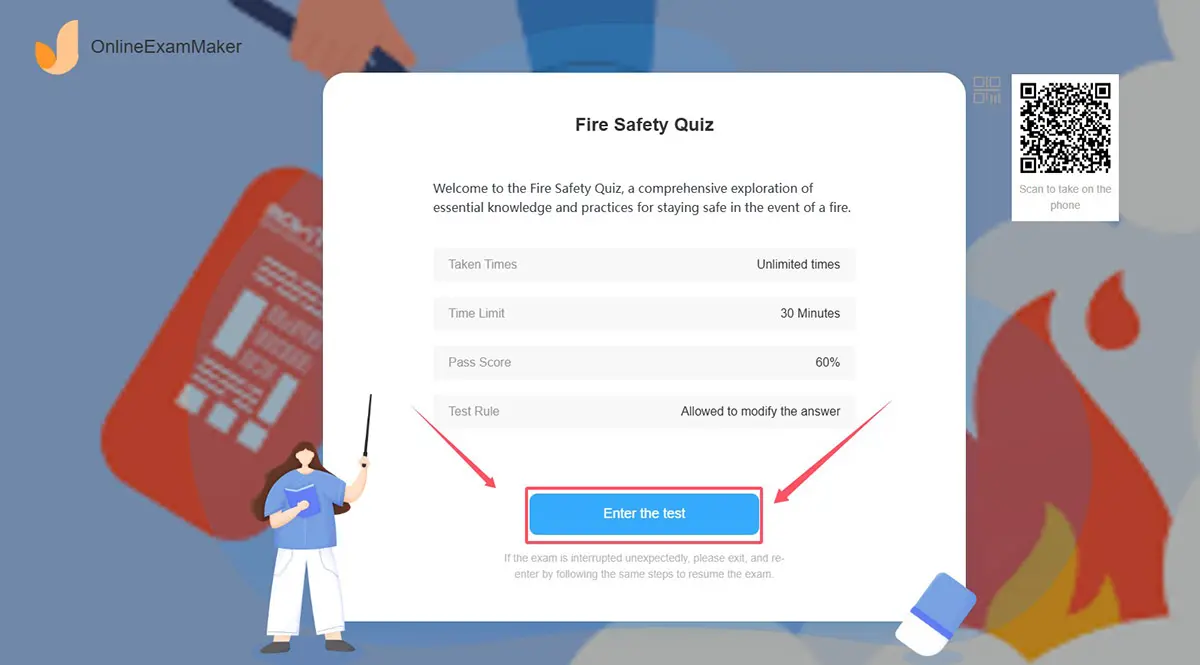
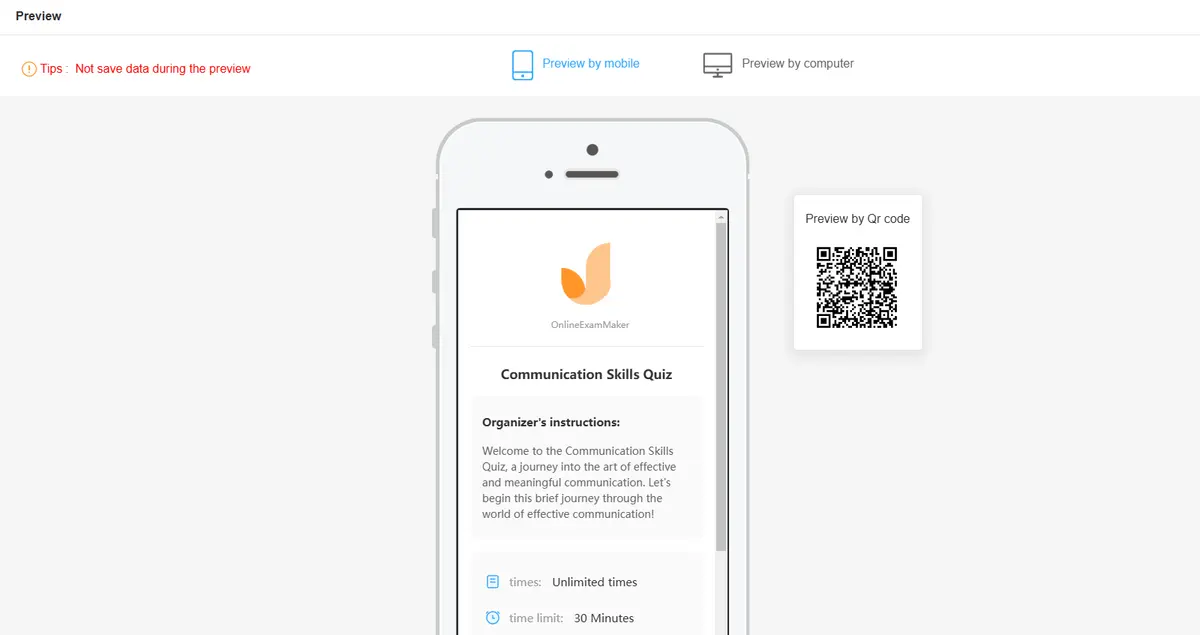
What Participants Will See
When someone clicks your link, they’ll see your beautifully designed quiz. No downloads, no account creation required. They select their answer, hit submit, and boom—instant feedback.
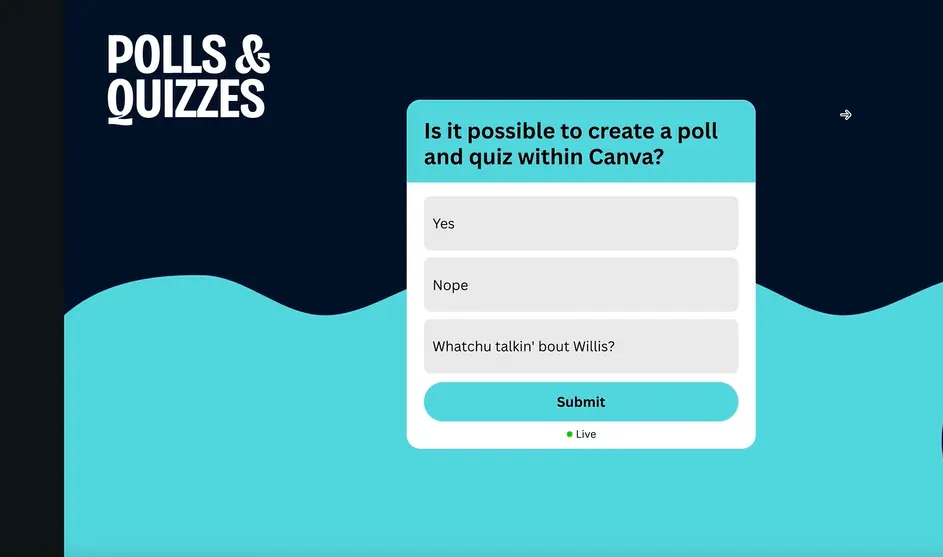
If they answer correctly, the button turns green. If they mess up, it turns red and shows them the correct answer. It’s simple, clear, and surprisingly satisfying.
Understanding Quiz Responses and Analytics
Here’s where things get interesting. As people start taking your quiz, you’ll want to see how they’re doing.
Accessing Response Data
Go back to your Canva editor. Click on your quiz element. In the top toolbar, you’ll see a Responses button. Click it.
You’ll see a breakdown of every answer submitted. If someone was logged into Canva when they took the quiz, you’ll even see their name. Otherwise, it’ll show as anonymous.
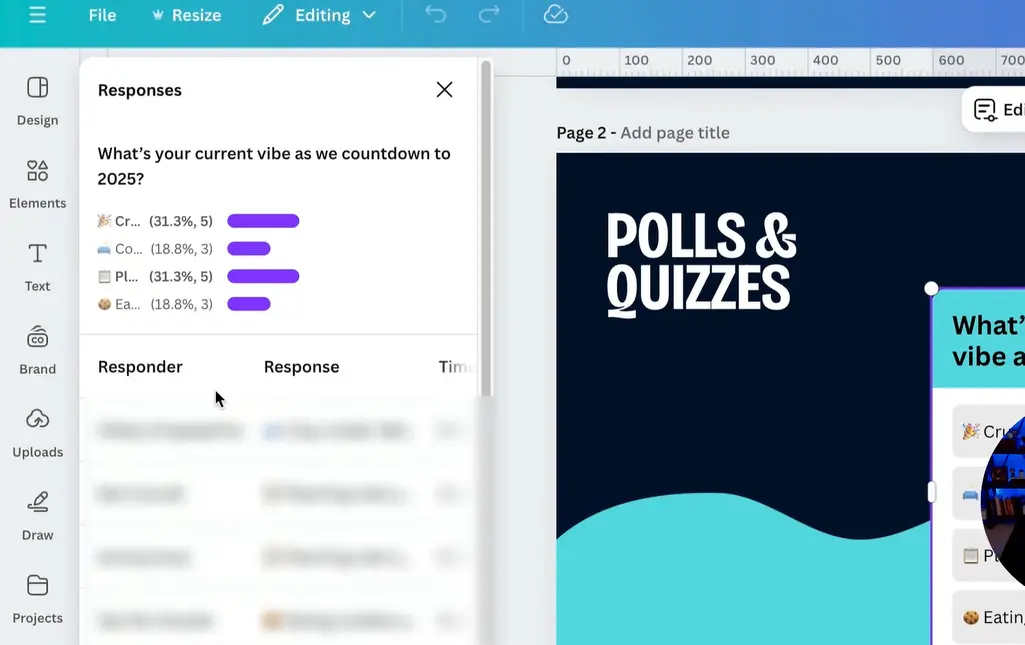
Live Quizzes Show Real-Time Data
When a quiz is active, you’ll see a green dot next to it and a vote count. This is gold for workshops, webinars, or live training sessions—you can gauge understanding in real time and adjust your teaching on the fly.
| Feature | Canva Quiz Maker | Traditional Paper Quizzes |
|---|---|---|
| Response Time | Instant | Hours to days |
| Grading | Automatic | Manual |
| Accessibility | Any device with internet | Physical presence required |
| Data Analysis | Built-in dashboard | Manual tabulation |
| Environmental Impact | Zero paper waste | High paper usage |
OnlineExamMaker: A Powerful Alternative for Advanced Quiz Creation
Canva’s great for quick, visual quizzes, but what if you need something more robust? Enter OnlineExamMaker.
What is OnlineExamMaker?
OnlineExamMaker is AI-powered exam creation software designed specifically for educators, trainers, and HR professionals who need advanced assessment tools. While Canva handles simple quizzes elegantly, OnlineExamMaker brings enterprise-level features to the table.
Key Features That Stand Out
- AI-Powered Question Generation: Upload your study materials, and the AI generates relevant questions automatically. No more staring at a blank screen wondering what to ask.
- Massive Question Banks: Store thousands of questions, organize them by topic, and randomly pull from them to create unique exams every time.
- Advanced Question Types: Multiple choice, true/false, fill-in-the-blank, essay questions, matching, ordering—you name it.
- Proctoring Options: Webcam monitoring, screen recording, browser lockdown. Perfect for high-stakes assessments.
- Detailed Analytics: See not just who got what right, but how long they spent on each question, where they struggled, and overall performance trends.
- White-Label Branding: Make the exam platform look like it’s yours, not theirs.
Create Your Next Quiz/Exam with OnlineExamMaker
Step-by-Step: Creating a Quiz in OnlineExamMaker
Let’s walk through the process.
Step 1: Sign Up and Access the Dashboard
Go to OnlineExamMaker’s website and create a free account. Once you’re in, you’ll land on a clean dashboard with options to create exams, manage question banks, and view reports.
Step 2: Create a New Exam
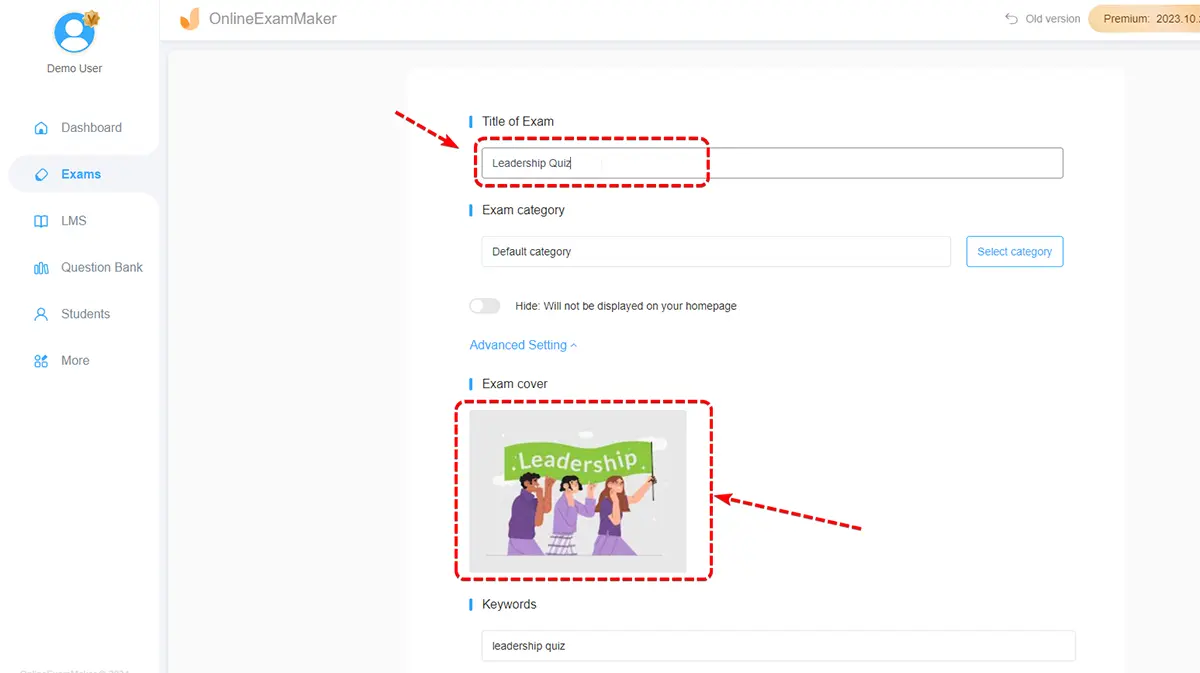
Click Create New Exam. You’ll be prompted to name your exam and add a description. This is where you can also set parameters like time limits, passing scores, and whether the exam is public or private.
Step 3: Add Questions
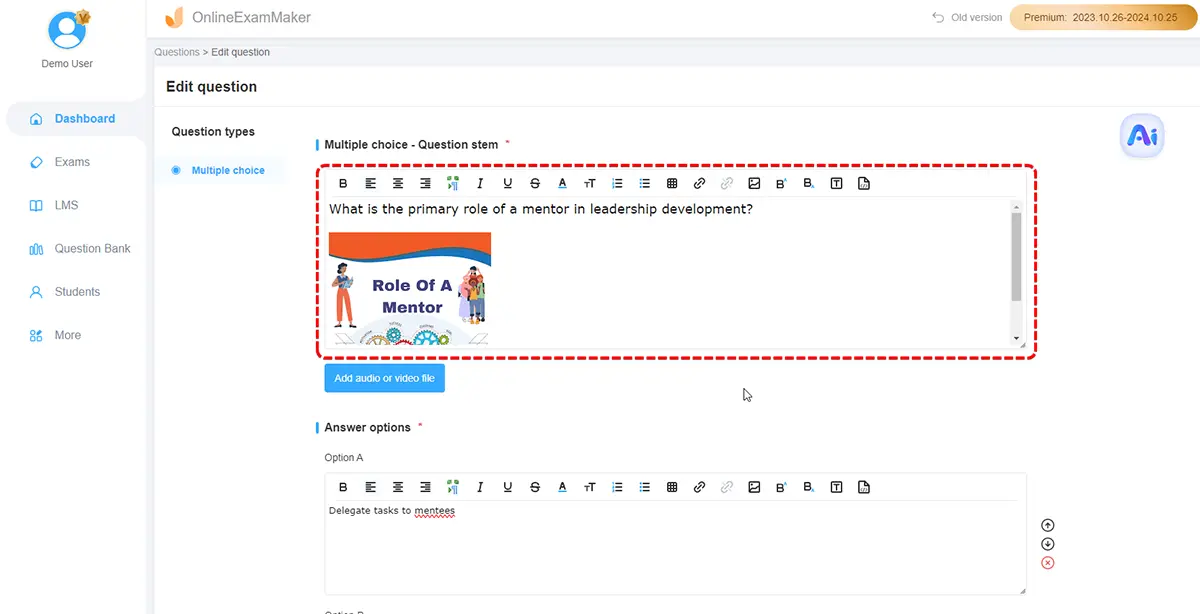
Here’s where it gets fun. You can:
- Manually Add Questions: Type them out one by one, choosing from multiple question types.
- Import Questions: Upload a spreadsheet or document with pre-written questions.
- Use AI Generation: Upload your training materials or course content, and let the AI generate questions for you. It’s not perfect, but it’s a massive time-saver.
Step 4: Configure Exam Settings
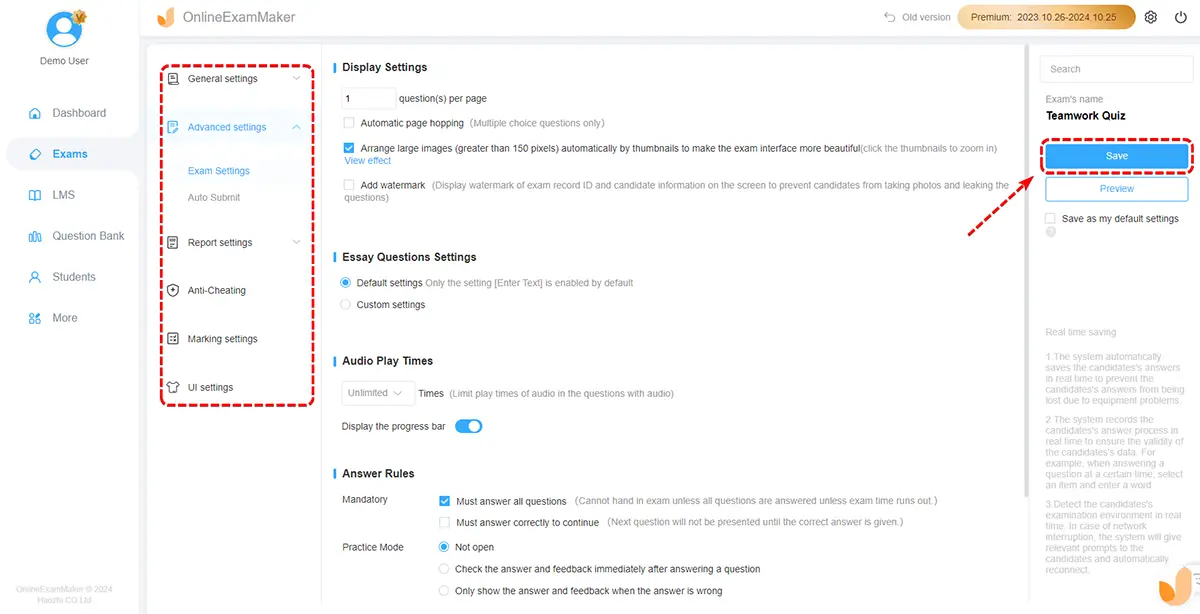
This is where OnlineExamMaker flexes its muscles. You can:
- Set time limits per question or for the entire exam
- Randomize question order to prevent cheating
- Enable or disable backtracking (can participants go back to previous questions?)
- Choose whether to show correct answers immediately or after submission
- Enable proctoring features if needed
Step 5: Customize the Look
Add your logo, choose color schemes, and customize the interface. If you’re using this for corporate training, you can make it look like it’s part of your company’s ecosystem.
Step 6: Publish and Share
Once you’re happy with everything, hit Publish. OnlineExamMaker will generate a link you can share, or you can embed the exam directly into your website or LMS.
Step 7: Monitor and Analyze
As people take the exam, you’ll see results roll in. The analytics dashboard shows individual performance, question difficulty, average scores, and more. You can export this data to CSV for deeper analysis.
Canva vs. OnlineExamMaker: Which Should You Choose?
Both tools have their place. Here’s how to decide.
| Use Case | Best Tool | Why |
|---|---|---|
| Quick audience engagement | Canva | Fast setup, beautiful design, minimal learning curve |
| Formal assessments | OnlineExamMaker | Advanced features, proctoring, detailed analytics |
| Brand-heavy presentations | Canva | Full design control, matches your visual identity |
| High-stakes exams | OnlineExamMaker | Security features, question randomization, proctoring |
| Large question banks | OnlineExamMaker | Built for managing thousands of questions |
| Social media polls | Canva | Shareable, visually appealing, easy to embed |
If you’re running a workshop and want to quickly gauge understanding, Canva is your friend. If you’re conducting employee certification exams or academic assessments, OnlineExamMaker is the better choice.
Final Thoughts
Creating interactive quizzes doesn’t have to be complicated. Canva brings simplicity and design elegance to the process, making it perfect for educators and trainers who want something that looks good and works well without a steep learning curve.
But if you’re dealing with serious assessments—certifications, compliance training, academic exams—then OnlineExamMaker’s advanced features are worth the investment. AI-generated questions, robust analytics, and proctoring capabilities turn it into a full-fledged examination platform rather than just a quiz tool.
The best part? You don’t have to choose just one. Use Canva for engaging your audience, gathering feedback, and creating visually stunning polls. Use OnlineExamMaker when the stakes are higher and you need more control.
Either way, your days of printing out paper quizzes and grading them by hand are officially over. And honestly? That’s a win for everyone.