Moodle is a widely used open-source Learning Management System (LMS) that provides educators with a powerful platform to create and manage online courses and assessments. Creating an online exam in Moodle offers numerous advantages, including flexibility, accessibility, and the ability to track and analyze student performance. In this comprehensive step-by-step guide, we will walk you through the process of designing and setting up an online exam in Moodle, ensuring a smooth and effective assessment experience for both instructors and students.

Types of online exams:
Multiple-Choice Exams: These exams present participants with a question and a list of possible answers, where they must select the correct choice. Multiple-choice exams are widely used due to their efficiency in assessing knowledge and content recall.
True/False Exams: Participants answer statements as either true or false. True/false exams are useful for assessing basic understanding and factual knowledge.
Fill-in-the-Blanks Exams: In this type of exam, participants are required to complete sentences or phrases by filling in the missing words. Fill-in-the-blanks exams assess participants’ understanding of concepts and ability to recall specific details.
Matching Exams: Matching exams ask participants to connect items from two different columns, correctly pairing related elements. These exams are effective in testing associations and relationships between concepts.
Essay Exams: Essay exams require participants to write detailed responses to open-ended questions. They assess critical thinking, analysis, and the ability to articulate ideas coherently.
In this article
- Part 1: Step-by-step guide: How to create an online exam in Moodle
- Part 2: Why OnlineExamMaker is the best alternative online exam software to Moodle
- Part 3: How to make an online exam in OnlineExamMaker
Step-by-step guide: How to create an online exam in Moodle
Step 1: Accessing Moodle and Navigating to the Course
1. Log in to your Moodle account as an instructor or administrator.
2. Navigate to the course where you want to create the online exam.
Step 2: Enabling the Quiz Module
1. If the Quiz module is not enabled in your Moodle course, you will need to enable it first.
2. Go to “Course Administration” > “Edit Settings.”
3. Under “Appearance,” locate the “Quiz” option and set it to “Show” or “Show on course page.”
Step 3: Creating a New Quiz
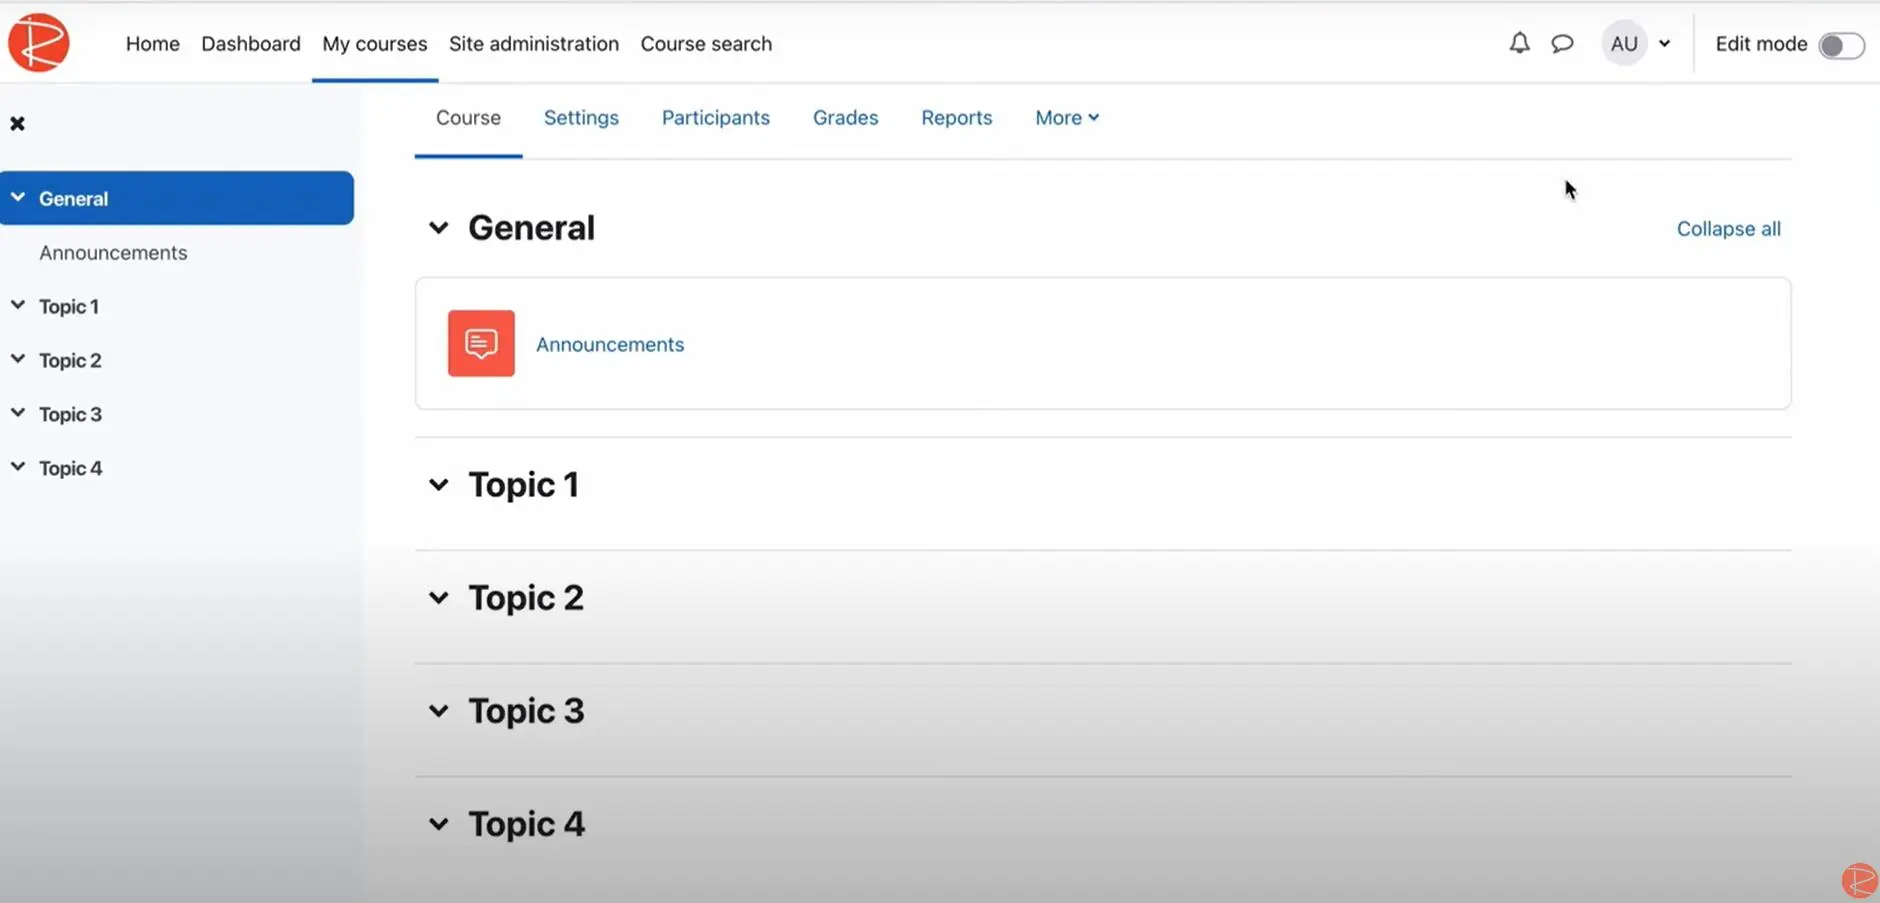
1. In the Moodle course, click on “Add an activity or resource.”
2. Select “Quiz” from the list of activities and click “Add.”
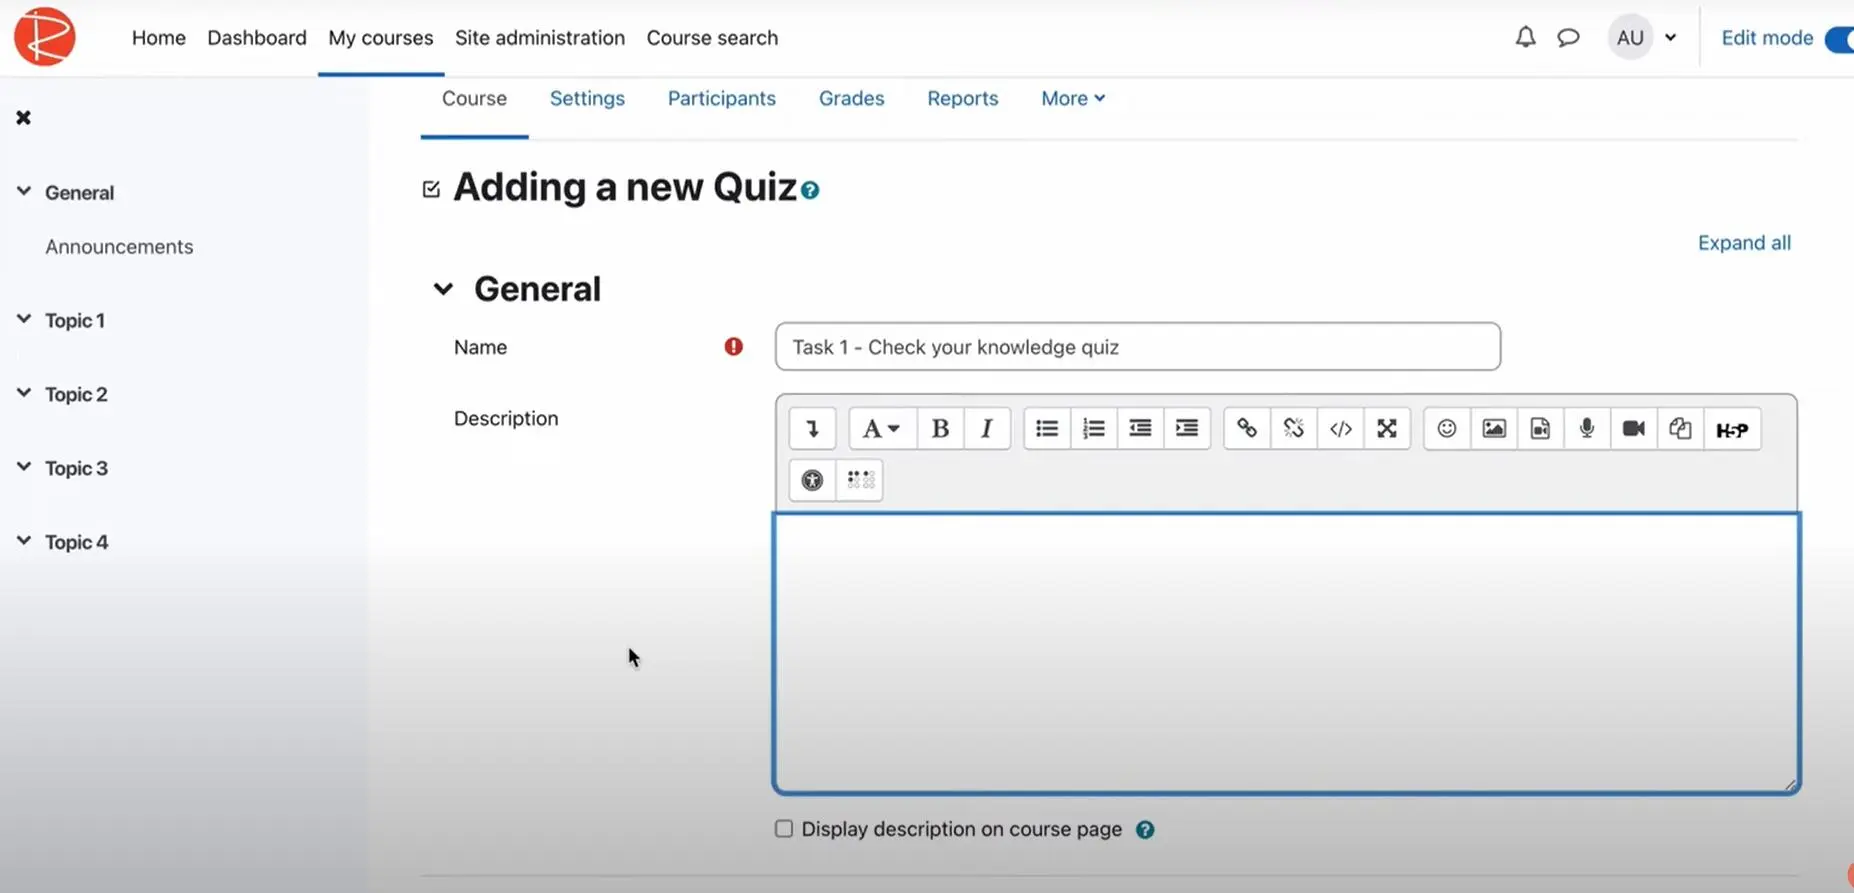
3. Provide a name and description for the quiz, and any additional instructions or guidelines for students.
Step 4: Configuring Quiz Settings
1. In the “Editing Quiz” page, navigate to the “Quiz Administration” block on the left-hand side and click on “Edit Settings.”
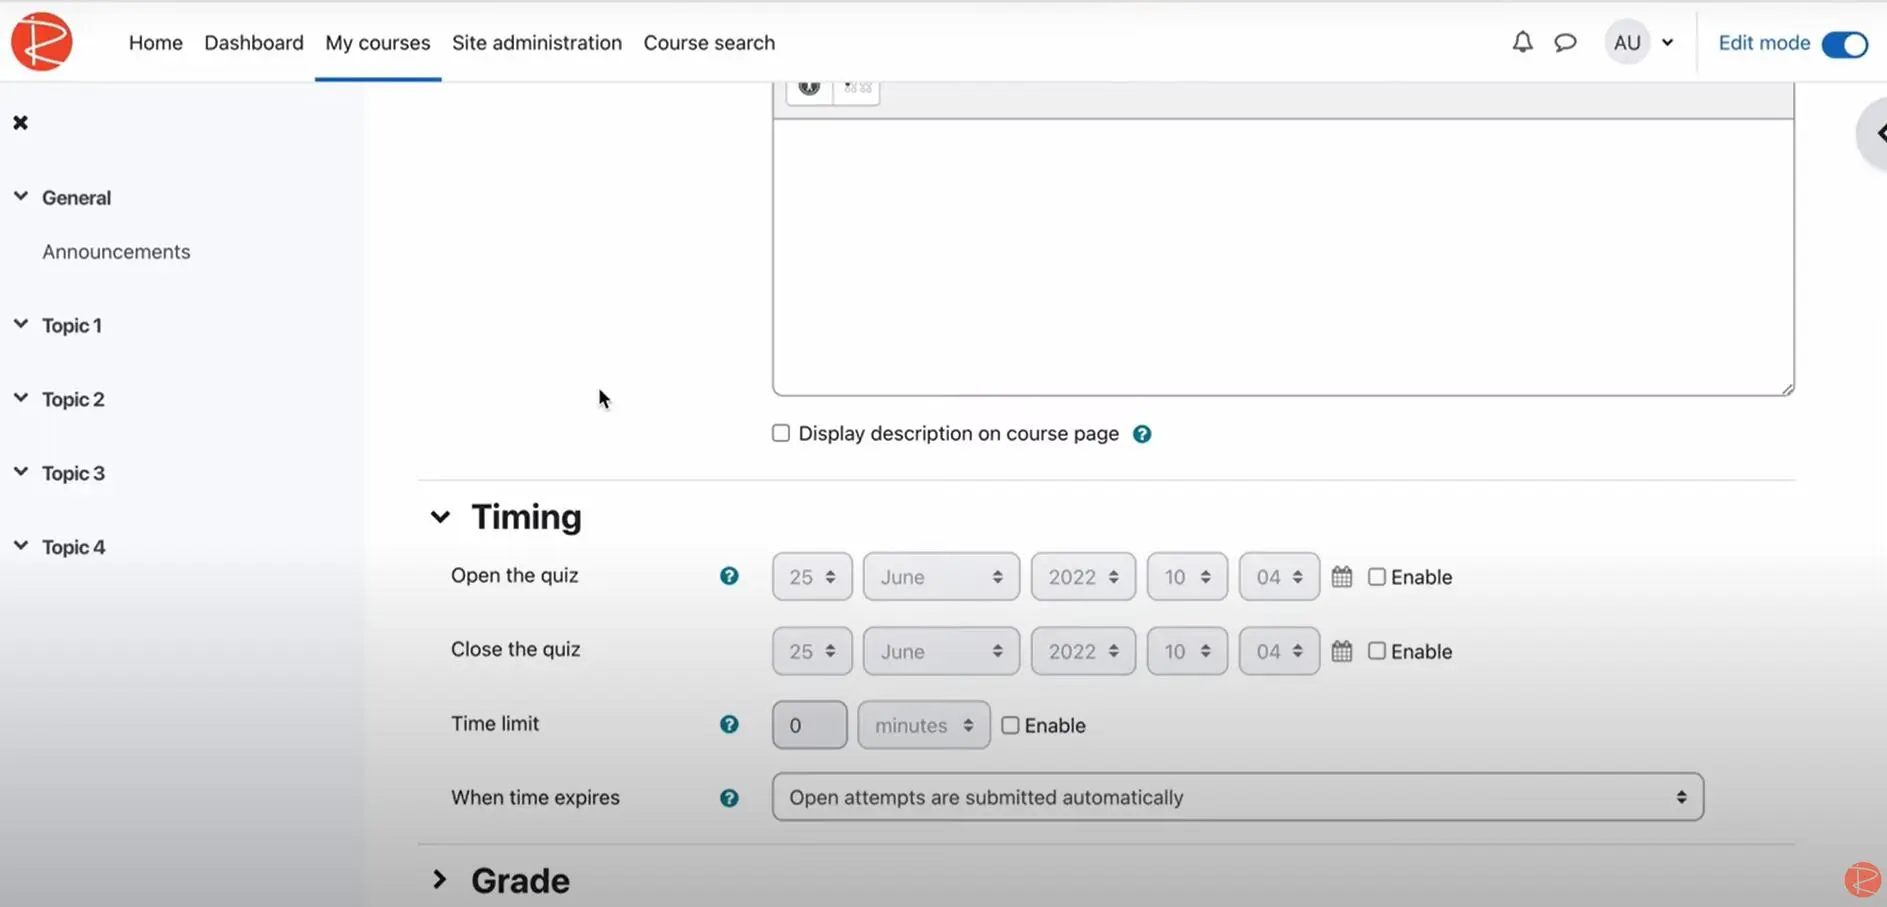
2. Configure the quiz settings, including:
a. Timing: Set the opening and closing dates and time limits for the exam.
b. Attempts: Choose the number of allowed attempts for the quiz.
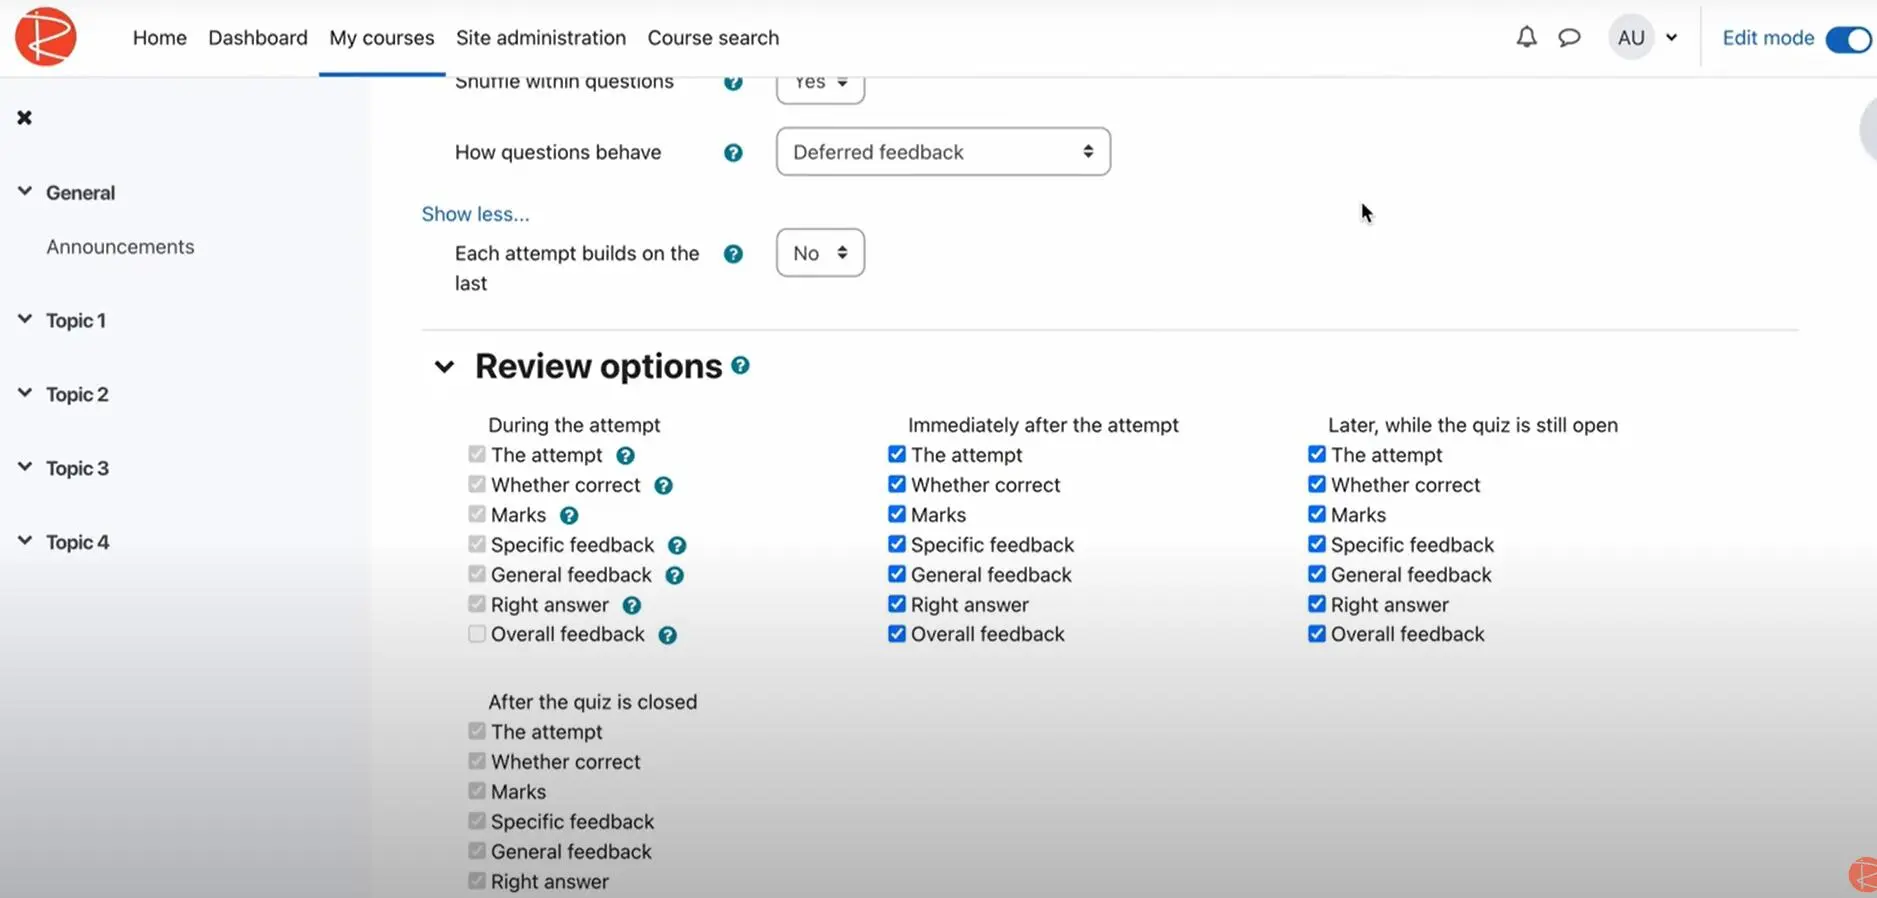
c. Review Options: Decide when and how students can review their quiz attempts and feedback.
d. Grade: Set the maximum grade for the quiz and decide how it will be calculated (e.g., sum of grades, highest attempt, or average grade).
e. Appearance: Customize the appearance of the quiz, such as page layout and navigation options.
f. Question behavior: Choose how questions are presented (e.g., all at once, one at a time) and how penalties for late submissions are applied.
g. Save your settings.
Step 5: Adding Questions to the Quiz
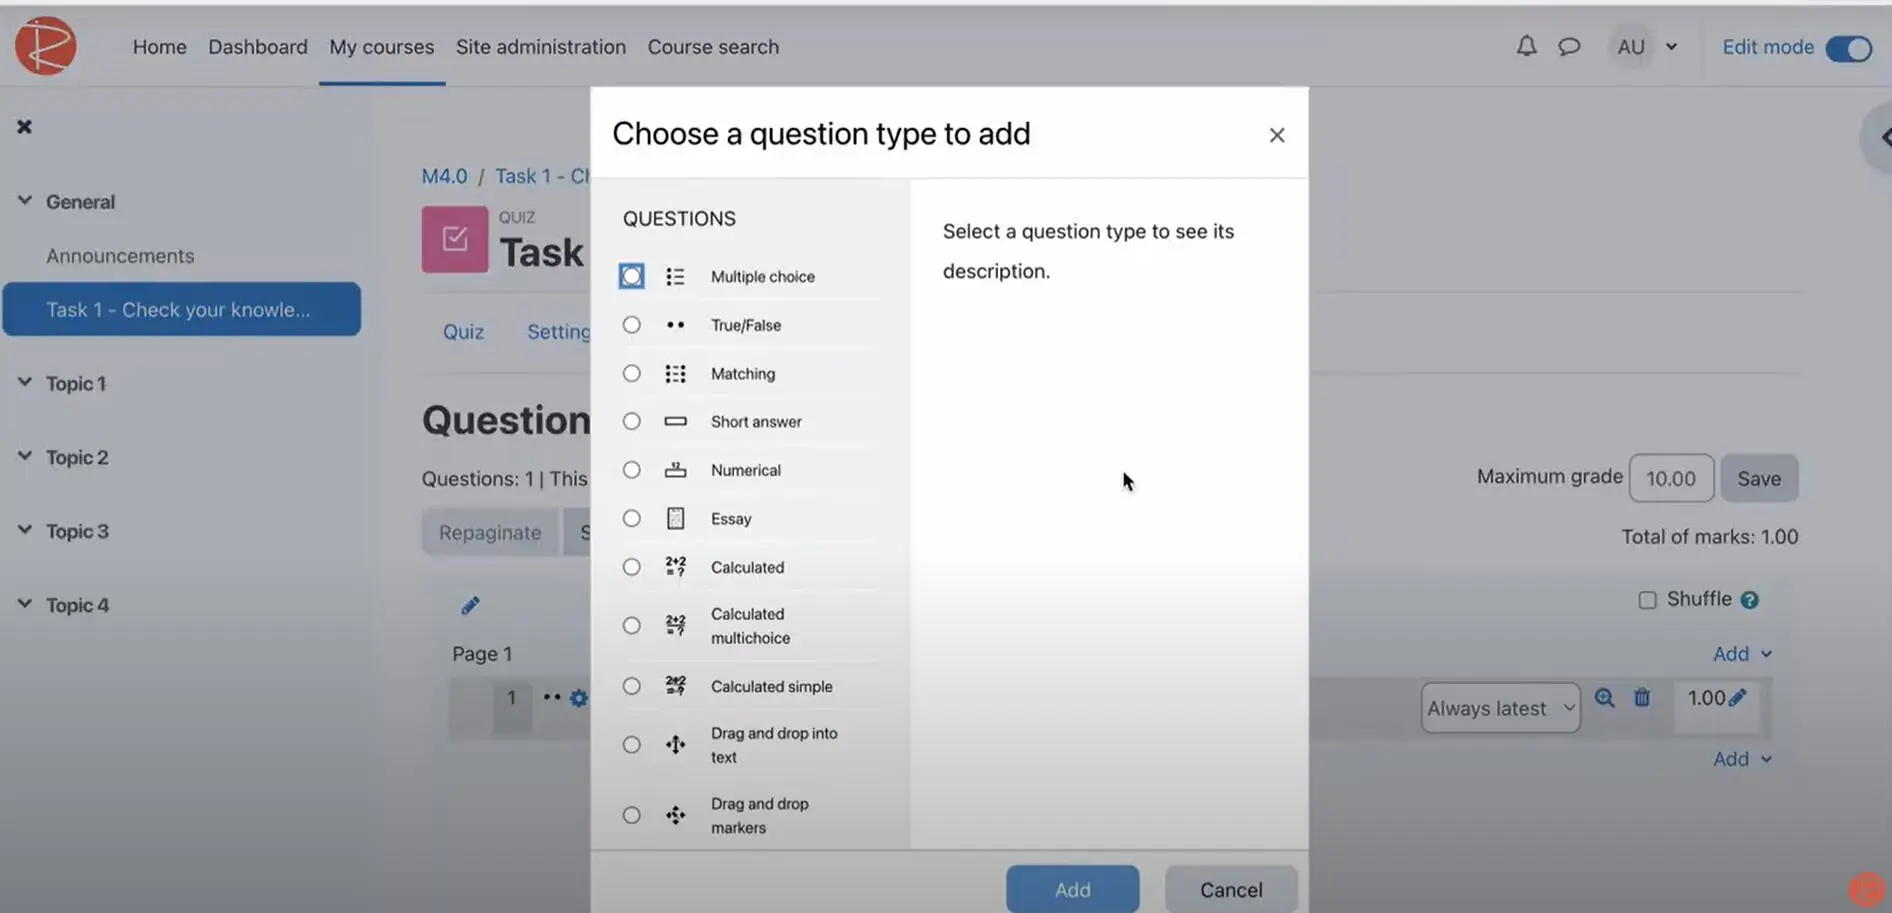
1. Return to the “Editing Quiz” page and click on “Add” or “Add a question” to include questions in the quiz.
2. Select the type of question you want to add (e.g., multiple-choice, true/false, short answer, essay).
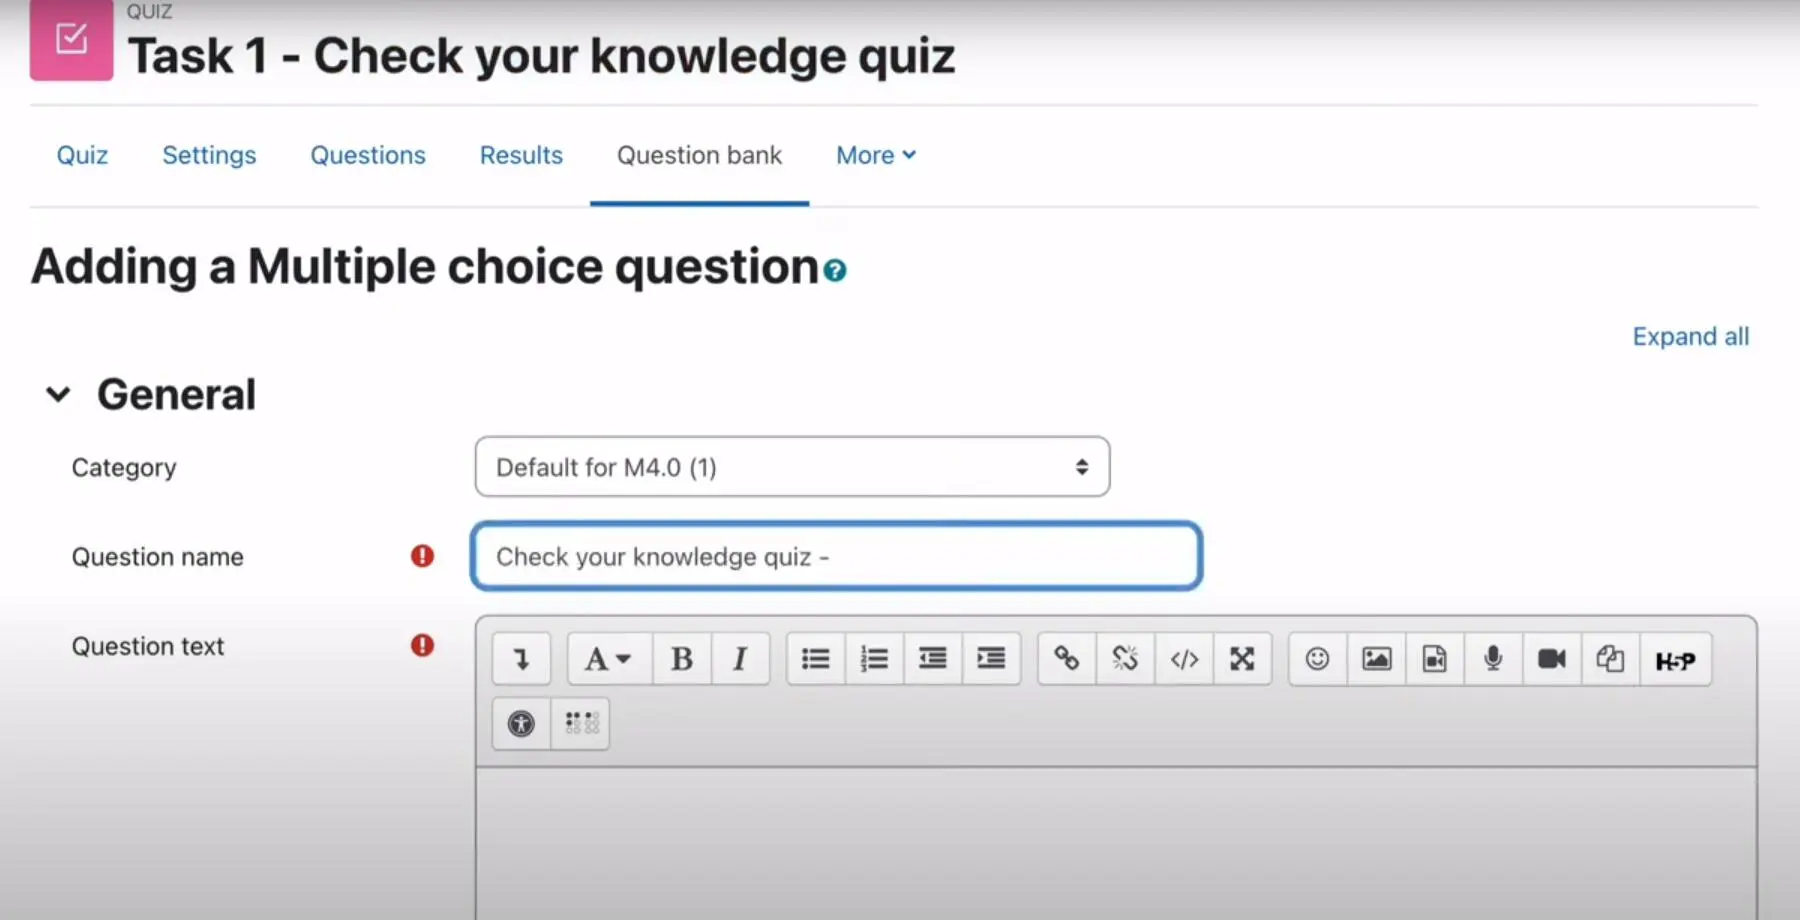
3. Enter the question text, options, and correct answer(s) (if applicable) for each question.
4. Adjust the marks for each question, and set any specific feedback for correct and incorrect answers.
5. Click “Save changes” for each question you add.
Step 6: Organizing Questions and Question Banks
1. To organize questions better, use question categories or create a question bank.
2. In the “Editing Quiz” page, click on “Question Bank” from the “Quiz Administration” block.
3. Create categories to group questions by topics or difficulty levels.
4. Add questions to the question bank or specific categories.
Step 7: Randomizing Questions and Question Order
1. To reduce the risk of cheating, consider using the “Random question” feature.
2. When adding questions to the quiz, select “Random question” from the “Add” menu.
3. Choose the question category or question bank you want to pull random questions from.
4. Set the number of random questions to be displayed in the quiz.
5. Moodle will automatically select questions from the specified category or bank when students attempt the quiz.
Step 8: Previewing the Quiz
1. Before making the quiz available to students, preview it to ensure everything appears as intended.
2. Click on “Preview” at the top-right corner of the quiz editing page to view the quiz from a student’s perspective.
3. Answer test questions to verify question correctness and formatting.
Step 9: Assigning the Quiz to Students
1. Once you are satisfied with the quiz setup, click “Save and display” to publish the quiz.
2. Notify students about the upcoming exam, providing details such as date, time, and any special instructions.
3. Students will now be able to access the quiz from the course page and attempt it based on the settings you configured.
Step 10: Grading and Reviewing Quiz Results
1. After students have completed the quiz, you can access their attempts and review the results.
2. Go to the quiz, click on “Results” in the “Quiz Administration” block, and select “Manual grading.”
3. Grade open-ended questions (if applicable) and provide feedback for each attempt.
4. Students can view their results and feedback based on the review options you set during the quiz configuration.
Part 2: Why OnlineExamMaker is the best alternative online exam software to Moodle
OnlineExamMaker is an innovative online exam and quiz platform designed to simplify the process of creating and delivering interactive quizzes, tests, and surveys. The all-in-one software empowers educators, trainers, and organizations to engage their audience and assess their knowledge effectively.
Whether you’re a teacher looking to evaluate student understanding, a corporate trainer seeking to gauge employee knowledge, or an event organizer wanting to gather feedback, OnlineExamMaker offers a versatile solution to meet your assessment needs.
Flexible Test Creation:
ThinkExam provides an extensive range of question types, allowing users to create diverse and engaging tests. It supports multimedia-rich questions, including images, audio, and video, enhancing the assessment experience.
Secure Online Proctoring:
With advanced anti-cheating measures, ThinkExam ensures the integrity of exams. It incorporates features such as live video monitoring, AI-based facial recognition, screen recording, and browser lockdown to prevent malpractices.
Automated Evaluation:
The platform automates the grading process, saving time and eliminating human errors. It supports various evaluation methods, including MCQs, descriptive answers, coding exercises, and more.
Create Your Next Quiz/Exam with OnlineExamMaker
Part 3: How to make a professional online exam in OnlineExamMaker
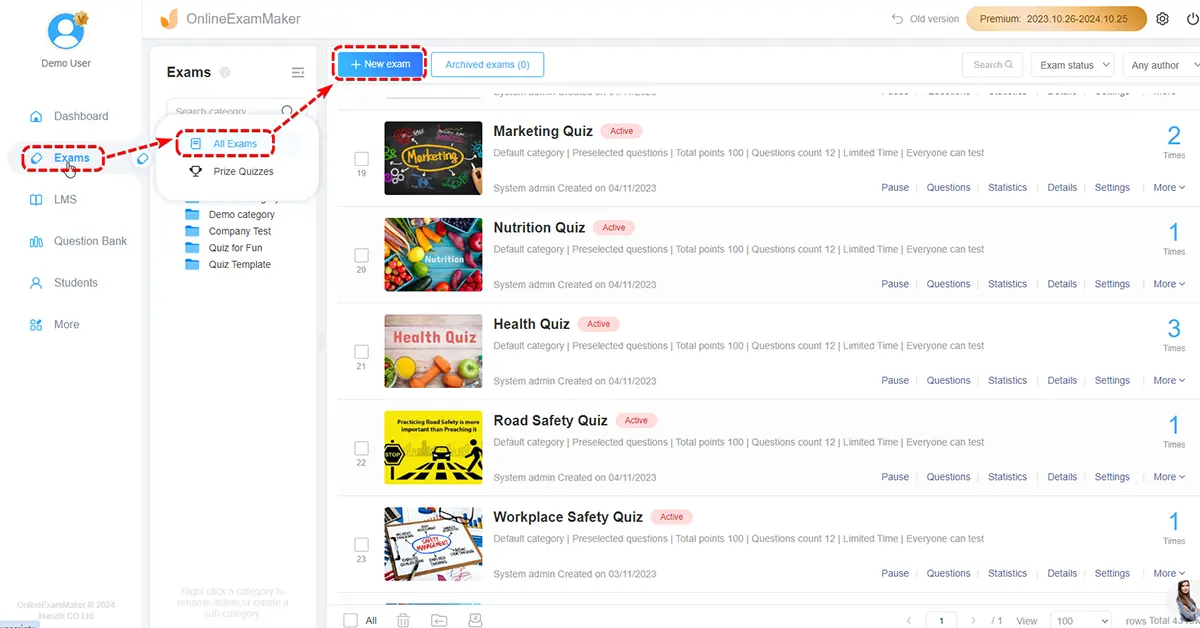
Step 1: Sign up in OnlineExamMaker, then create a new exam.
Step 2: Upload questions to OnlineExamMaker question bank, then add questions to exam.

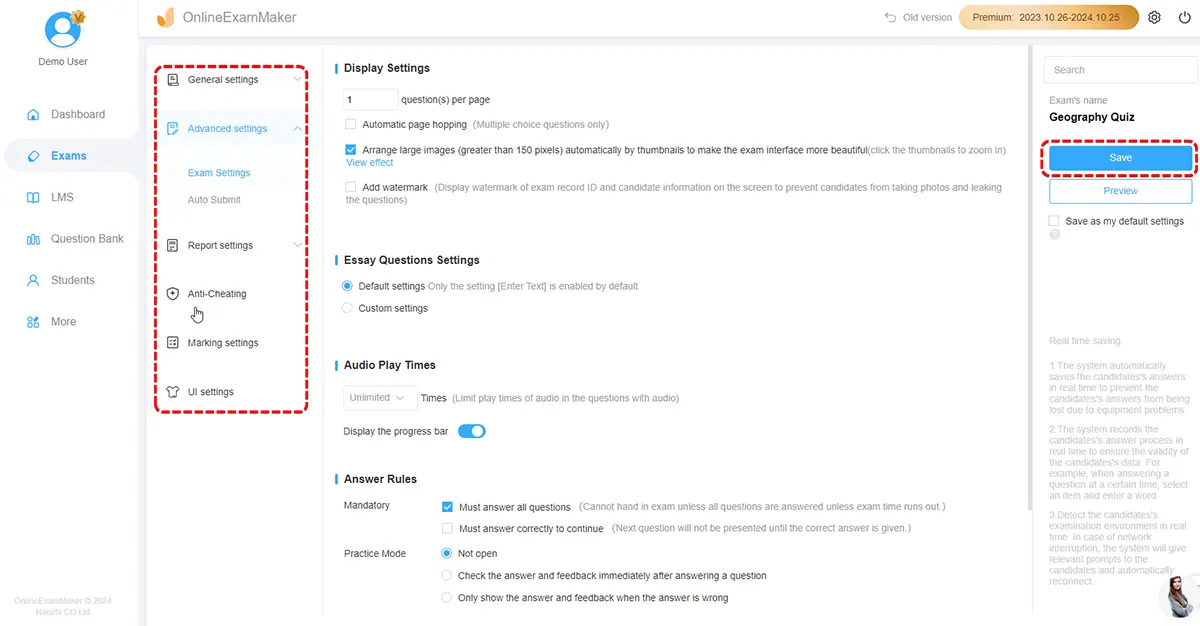
Step 3: Modify your online exam on your chosen setting
Step 4: Publish and share your online exam

Conclusion:
Creating an online exam in Moodle empowers educators with a flexible and efficient way to assess students’ knowledge and understanding. By following this comprehensive step-by-step guide, you can design and set up an engaging online exam in Moodle, customize settings, add questions, and ensure an effective assessment experience for both instructors and students. Moodle’s robust features and user-friendly interface make it an ideal platform for delivering interactive and dynamic quizzes, promoting active learning and enhancing the overall learning experience.