Mobile devices like phones and tablets are among the most used devices known to date. This is because of their mobile nature. It means that they can be brought anywhere and used at any time. Their mobility brings an advantage and edge, especially if you’re a teacher or a student. Teachers can utilize mobile phones or tablets to access their students. And the best way to do this is through online classrooms! Having a space for learning and distributing knowledge makes your work flexible and convenient.
This form of modern education technique gives you a portable choice for teaching. It provides you with seamless access to your class and students. At the same time, students can also access class materials and activities with ease! Learning and teaching can be executed on the go with the use of mobile devices. You can interact with students no matter where you are and whenever! Here are the best platforms that provide mobile versatility when it comes to online classrooms:
- How to Use Google Classroom on Mobile Phones or Tablets?
- OnlineExamMaker: An Alternative Way for Mobile Online Learning
- How to Create A Mobile Course in OnlineExamMaker?
How to Use Google Classroom on Mobile Phones or Tablets?
Step 1: Opening Google Classroom
Move to the right side of your screen and click the “+” symbol next to your user icon. After that, click ‘Create Class’ to begin!
Before creating a course, a new window will open. Read the notice and assess whether your class will cater to students, or not. After deciding, click ‘Continue’ to start making your mobile learning classroom.

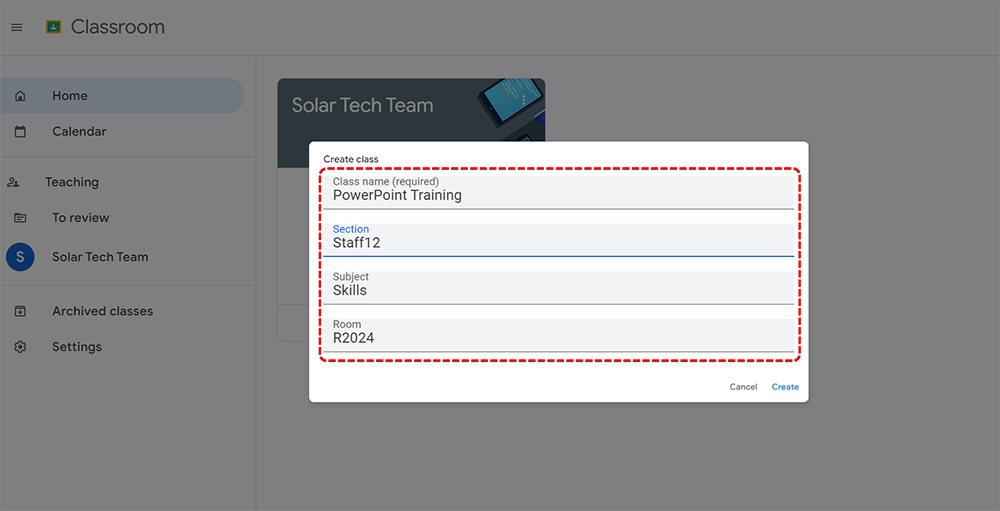
Step 2: Creating a Mobile Class
Label your class/course with a proper name that aligns with the subject. It will help you identify and organize your managed classes efficiently. Fill in the necessary details of the class, such as the section, subject, and room. After that, click ‘Create’ to finish making your Mobile Learning Classroom.
Step 3: Class Customization
In this step, you can personalize your Google Class/Course, however you want to. You can choose a template Stream Header and a Theme Color! Or you can pick an original header of your own making. Click ‘Save’ to apply the changes to your Mobile Class design.

Pro Tip
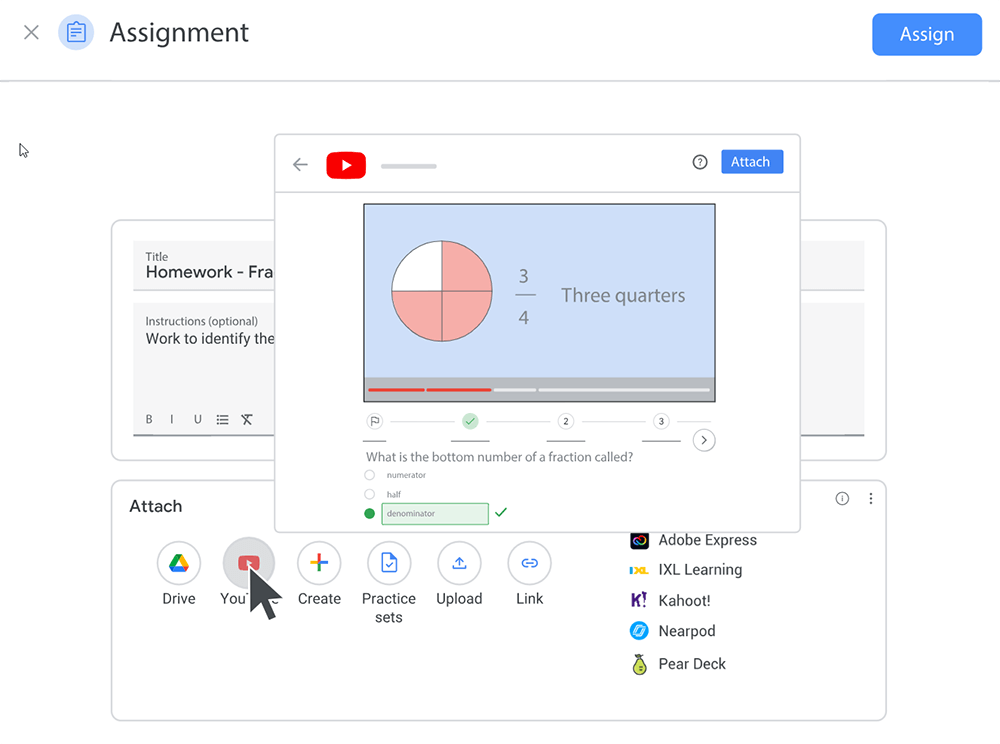
Want to assess your learners online? Create an online quiz for free!
Step 4: Modifying Stream Settings
Click the ‘Stream Settings’ button to modify your Class Details, General, and Grading Settings. You can edit the details of your course. Also, you can see the invite code settings. Adjust the stream and classwork on the stream settings, or manage your Google Meet link. You can also decide whether to show or hide your students’ overall grades and create categories for organizing grades!
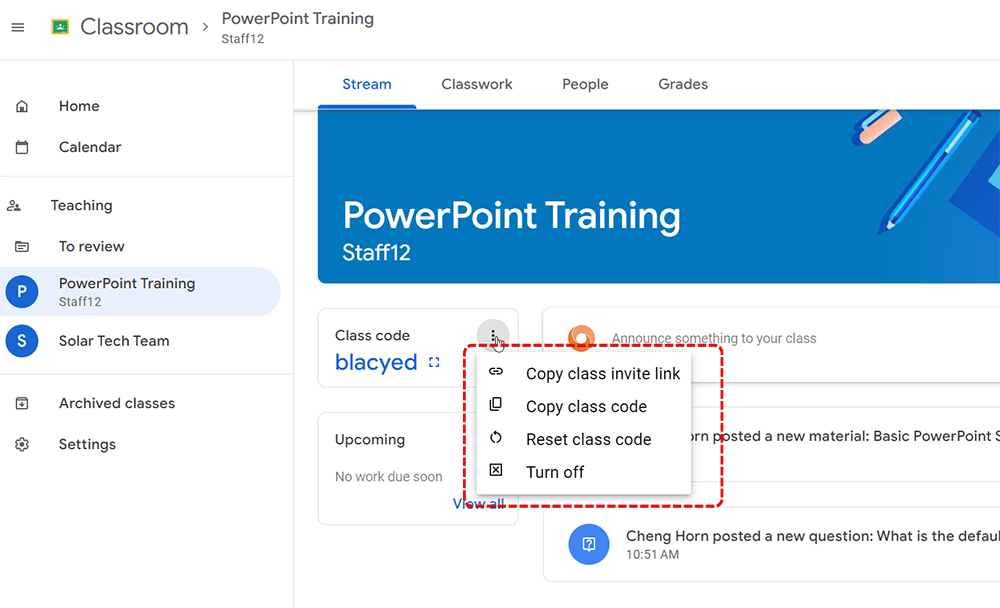
Step 5: Sharing the Course
Copy the class code or invite link for your class and send it to your students so they can enroll in your Mobile Learning Classroom!
OnlineExamMaker: An Alternative Way for Mobile Online Learning
If you want an alternative way to create online courses for mobile learning, OnlineExamMaker is a good option! This platform provides a secure and stable servers that will handle all security threats. You can upload vivid teaching materials including PPT, PDF, video, audio to make an interactive mobile course in minutes.
Not only that, this platform is also user-friendly and easy to navigate! You won’t find yourself lost and clicking unnecessary links that could cause breach.
Create Your Next Quiz/Exam with OnlineExamMaker
How to Create A Mobile Course in OnlineExamMaker?
Step 1: Create a New Course
Go to the left side of the new dashboard and hover over “LMS” and click “Courses”.
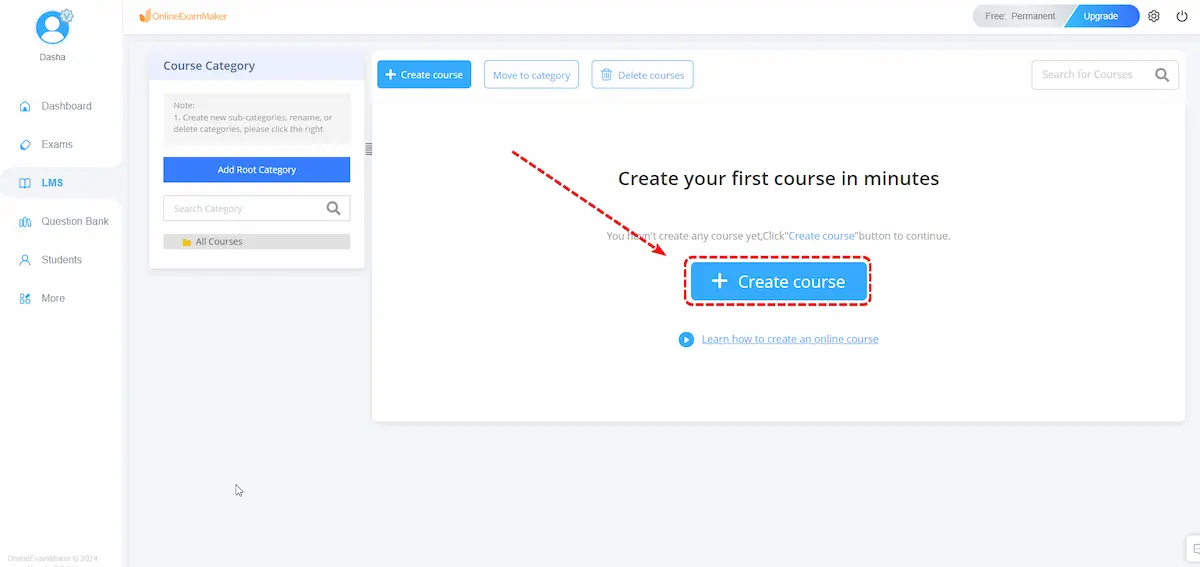
After that, click the “+ Create Course” button to start making your Mobile Learning Class
Step 2: Fill Course Details

In this step, you need to fill in the details of your Mobile Classroom. Choose a class title, add a short description or introduction, and select the category. You can choose a template cover or a cover of your own making for personalization!
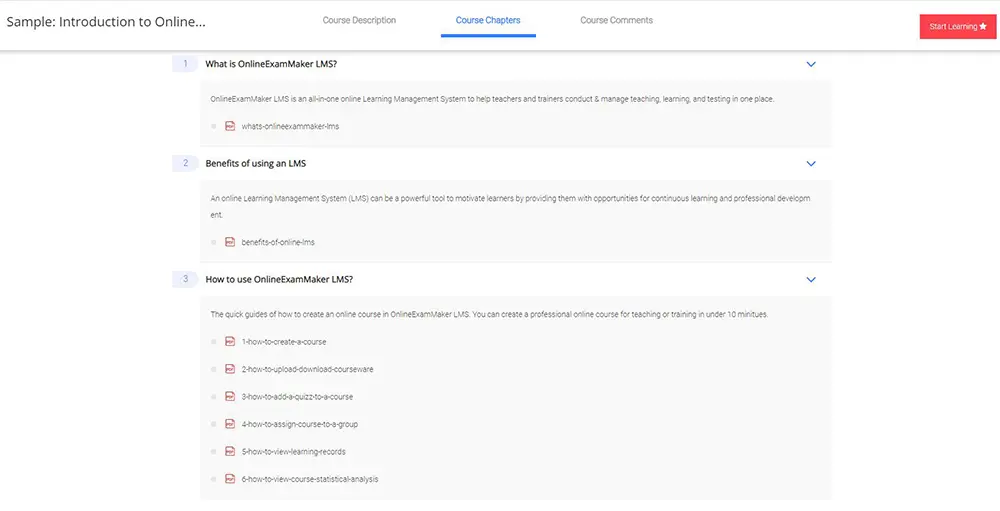
Step 3: Adding Chapters and Courseware
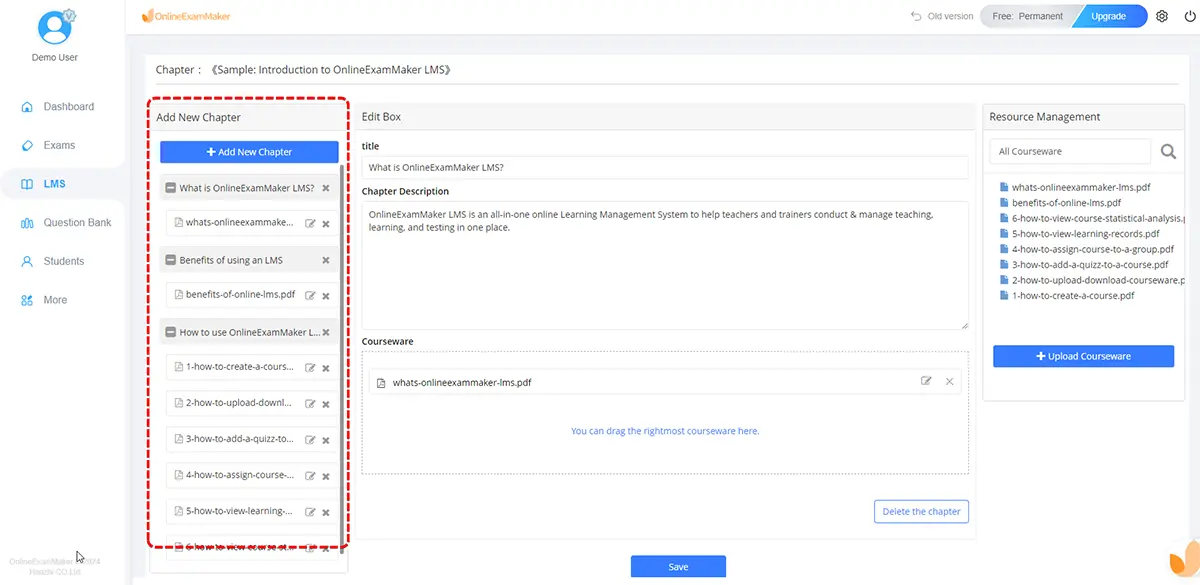
In this step, you can add lessons or course chapters of your choice to your class. You can also add additional courseware that you think is substantial. After creating the chapters and the courseware, drag and drop them on the right of each chapter to organize them.
Step 4: Customizing Class Settings
Modify the class settings and terms of your Mobile Learning Classroom. OnlineExamMaker provides different course settings such as class availability, labeling, learning permissions, difficulty levels, validity periods, anti-cheating measures, and more! Click ‘Finish’ to publish your Mobile Learning Class.
Step 5: Sharing Your Mobile Learning Classroom
After publishing the online class you made, you’re all set! Copy the custom-made link and QR Code for mobile sharing and convenience to your students!