The concept of online learning has changed over the past few years. Face-to-face methods of meetings and group meetings are now accessible online! Online group learning is a collaborative technique of meeting with peers, co-workers, and classmates! It can be used for different purposes, especially with large groups such as company members, employees, or students. It helps create a more comfortable space for training and learning. This type of learning technique is effective in fostering teamwork and new learning. Not only does it help engage students or co-workers, but it also makes meetings less of a hassle. Online group learning is effective for sharing and pitching ideas and for teaching and providing knowledge!

- How to Create A Google Classroom for Student Groups?
- OnlineExamMaker: A Space for Effective Group Learning
- How to Create An Online Course for Group Learning on OnlineExamMaker?
How to Create A Google Classroom for Student Groups?
Step 1: Opening Google Classroom
Move to the right side of your screen and click the “+” symbol next to your user icon. After that, click the ‘Create Class’ button.

Before creating a course, a new window will open. Read the notice and assess whether your course will cater to students, or not. After deciding, click ‘Continue’ to start making your Group Learning Classroom.

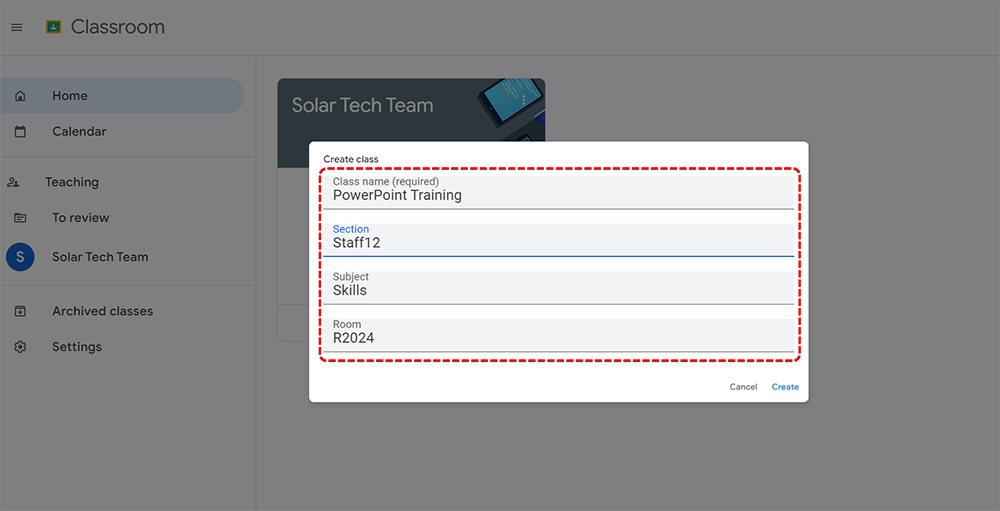
Step 2: Creating a Group Learning Classroom
Label your class with a suitable name for your group. It will help you identify and organize your managed classes better. Fill in the necessary details of the classroom, such as the section, subject, and room. After that, click ‘Create’ to finish making your Group Learning Classroom.
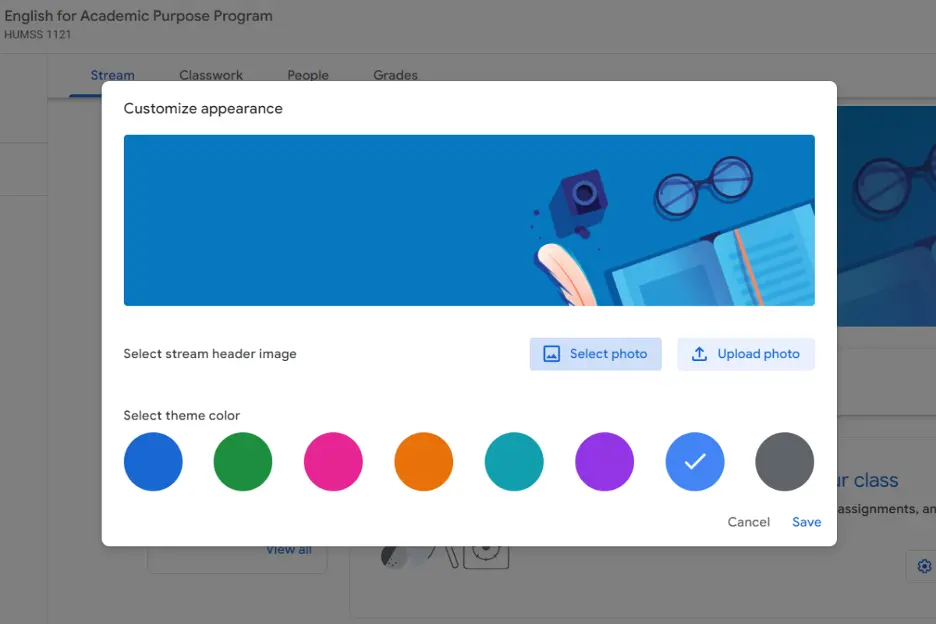
Step 3: Customization
In this step, you can personalize your Group Learning classroom, however you want. You can choose a template Stream Header and Theme Color! Or you can pick an original header of your own making. Click ‘Save’ to apply the changes to your class.
Step 4: Modifying Stream Settings
Click the ‘Stream Settings’ button to modify your Classroom’s Class Details, General, and Grading Settings.

You can edit the details of your class. Also, you can see the invite code settings. Adjust the stream and classwork on the stream settings, or manage your Google Meet link. You can also decide whether to show or hide results or grades and create categories for organizing graded outputs.
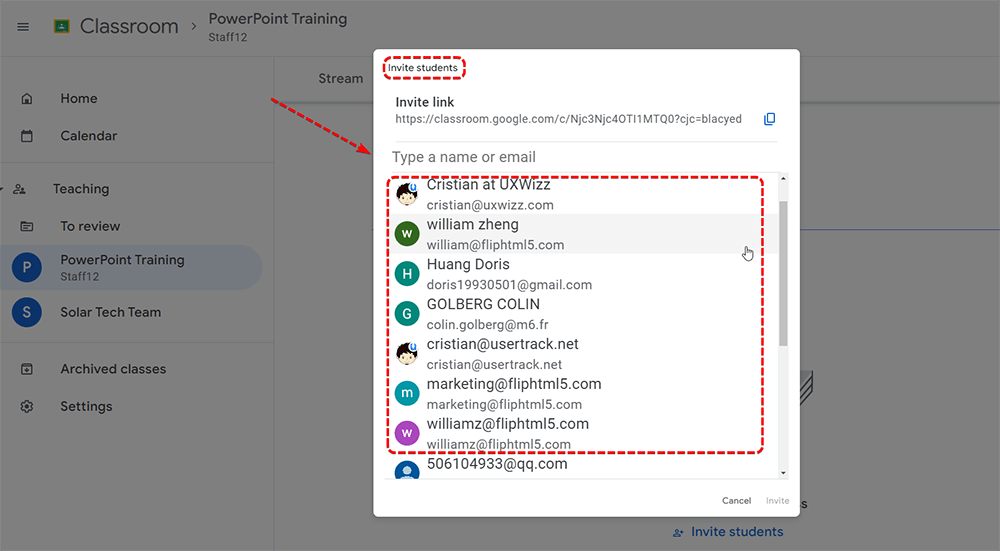
Step 5: Sharing the Group Learning Classroom
Copy the class code or invite link for your class course and send it to your co-workers, students, or employees so they can enroll in your Group Learning Classroom!
OnlineExamMaker: A Space for Effective Group Learning
OnlineExamMaker is the best option along with Google Classroom for creating collaborative classes. Its platform is stable and protected with AI-powered security. You can rest assured that your data remains safe and intact. Since it has steadfast and powerful servers, you won’t have to worry about errors or crashes.
OnlineExamMaker has built-in AI-powered anti-cheating software that helps detect cheating or abnormalities. Its design is flexible and easy to use! With OnlineExamMaker, you can foster a place for group learning and collaboration! It even has an automated grade checker that provides insightful class and test reports. This can help improve the individual performance and learning of your co-workers, employees, or students!
Create Your Next Quiz/Exam with OnlineExamMaker
How to Create An Online Course for Group Learning on OnlineExamMaker?
Step 1: Navigating the New Dashboard
Go to the left side of the new dashboard and hover over “LMS” and click “Courses”.
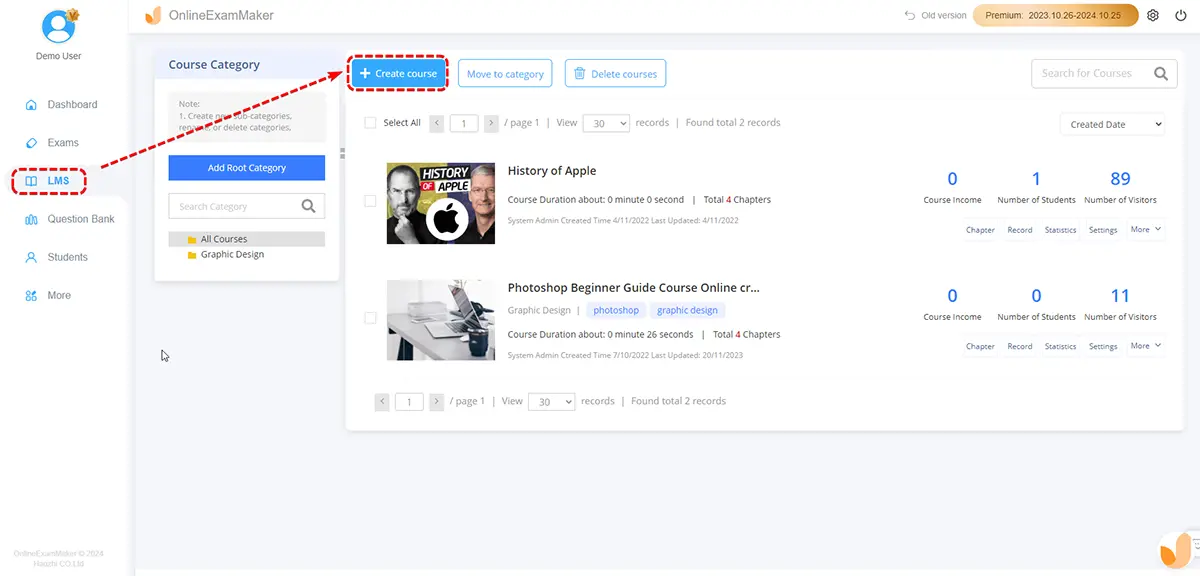
After that, click the “+ Create Course” button to start making your Classroom for Group Learning!
Step 2: Course Details
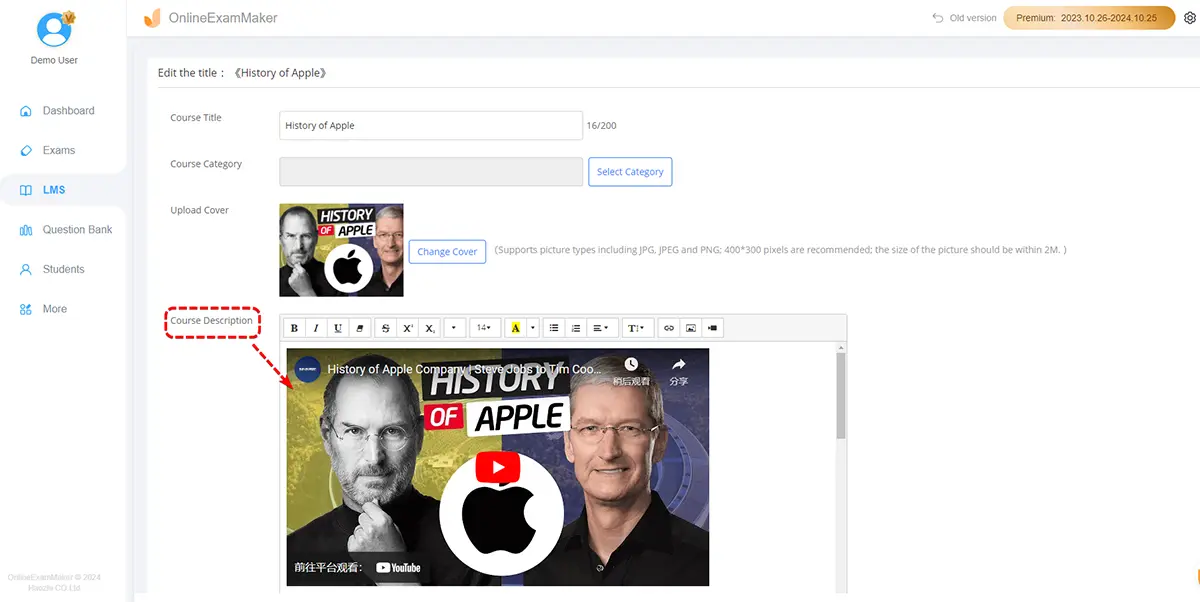
In this step, you need to fill in the important details of the Group Learning Class. Choose an appropriate Class title, add a short description or introduction, and select the category. You can choose a template cover or a cover of your own!
Step 3: Adding Chapters and Courseware
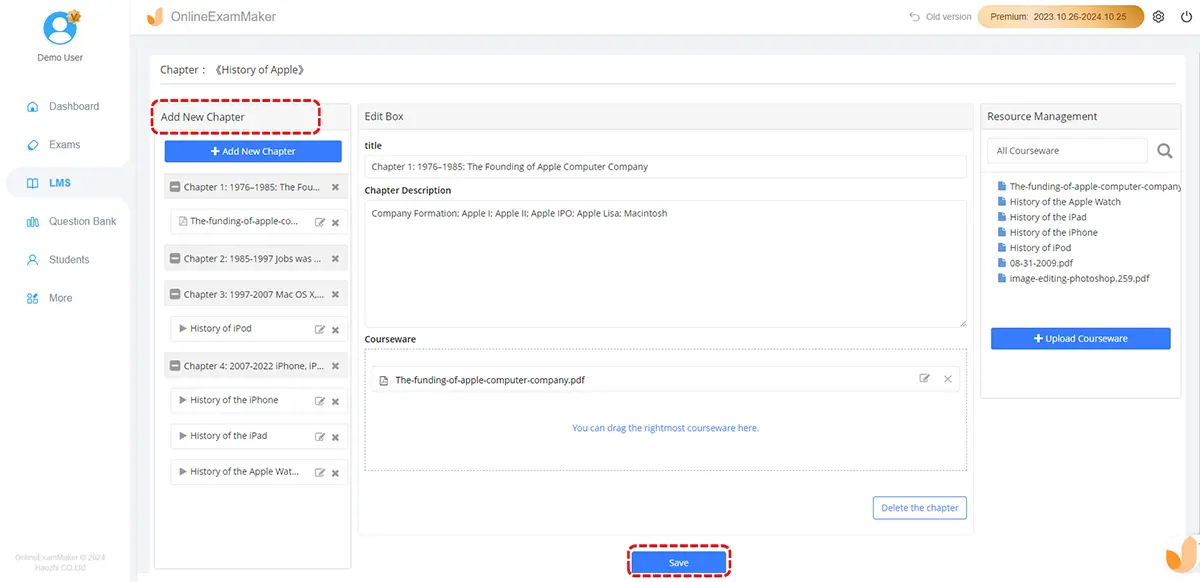
In this step, you can add resources, lessons, or class chapters to your course. You can also add different coursewares with ease. After creating the chapters and the courseware, drag and drop them on the right side of each chapter to organize them.
Step 4: Customizing Class Settings

Modify the class settings and terms. OnlineExamMaker provides different class settings such as class availability, labeling, learning permissions, difficulty levels, validity periods, anti-cheating measures, and more! Click ‘Finish’ to employ your Group Learning Class.
Step 5: Sharing Your Class
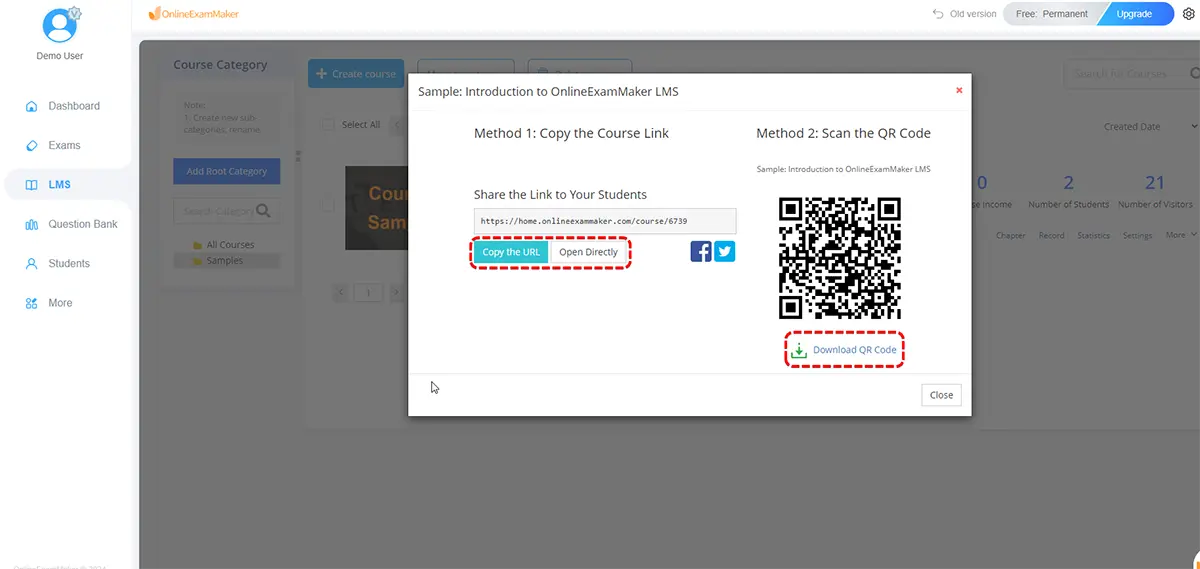
After publishing the class you made, you can copy the custom-made link and QR Code for easy sharing. You can share them with your students, co-workers, or employees to start the collaborative learning journey!