Remote learning is known for its adaptive learning nature. It offers benefits and a range of benefits for teaching and learning! Also, this means that not only does it benefit the teachers, but it also benefits students. It helps bridge the distance between students and teachers through online means. Remote learning helps teachers provide knowledge for students with flexible facilities and techniques. Remote learning helps empower both learner and teacher through a customized space for learning. It allows teachers to monitor their students in one space, too! The remote feature of this learning technique helps students relax and ease into the online setup.

- How to Create An Online Classroom in Google Classroom?
- OnlineExamMaker: An Alternative LMS for Remote Learning
- How to Create A Classroom for Remote Learning on OnlineExamMaker?
How to Create An Online Classroom in Google Classroom?
Here are the best options for setting up the best remote learning classrooms:
Step 1: Opening Google Classroom
Move to the right side of your screen and click the “+” symbol next to your user icon and click the ‘Create Class’ button.
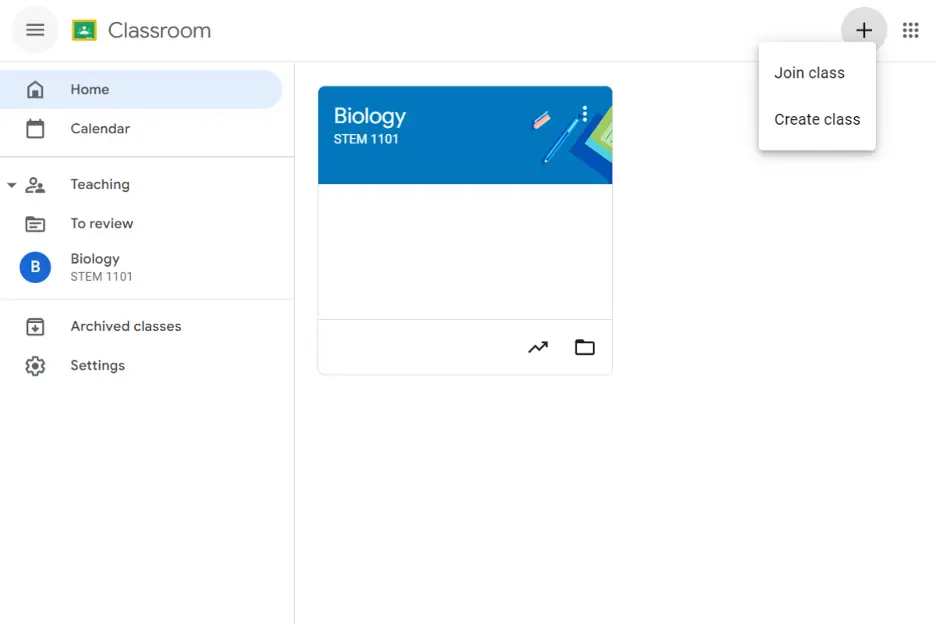
Before creating a class, a new window will open. Read the notice and assess whether your course will cater to students, or not. After deciding, click ‘Continue’ to start making your Remote Learning Classroom.

Step 2: Creating a Course
Label your class/course with a suitable name for your subject. It will help you identify and organize your managed Classes better. Fill in the necessary details of the class, such as the section, subject, and room. After that, click ‘Create’ to finish making your Remote Learning Classroom.
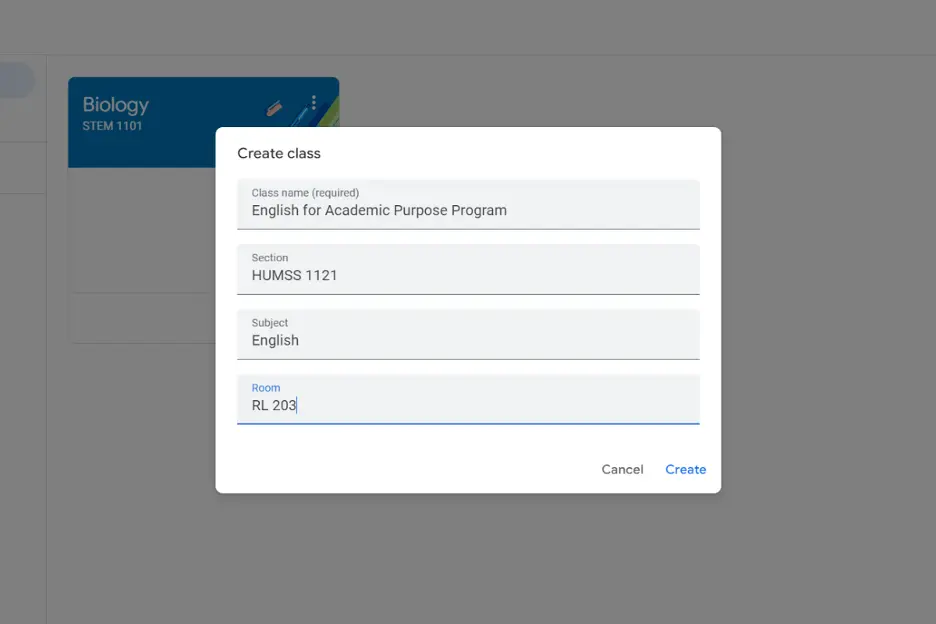
Step 3: Customization
In this step, you can modify your Remote Learning Class, however you want. You can choose a template Stream Header and Theme Color! Or you can pick an original header of your own making. Click ‘Save’ to apply the changes.
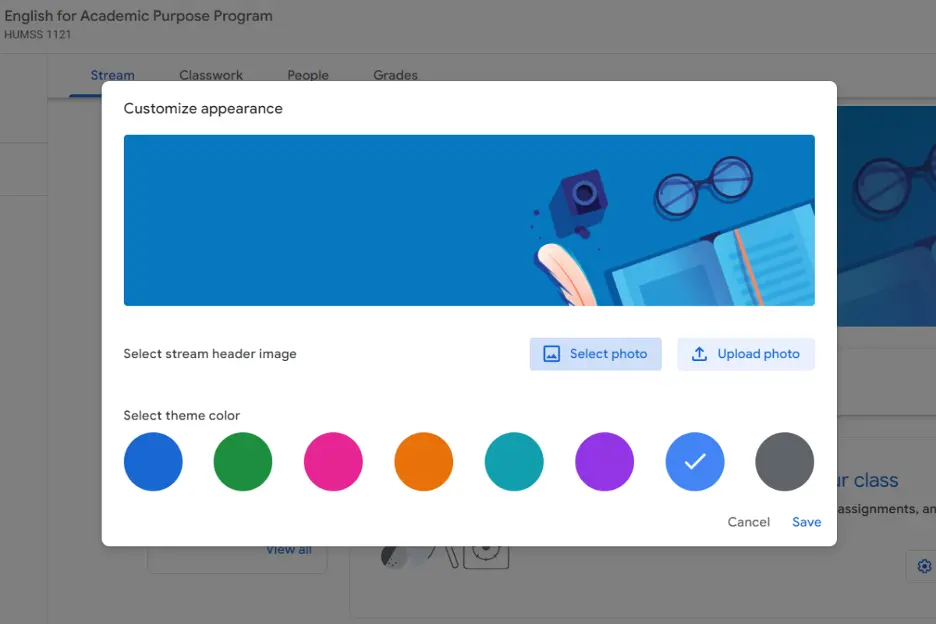
Step 4: Modifying Stream Settings
Click the ‘Stream Settings’ button to modify your Remote Learning Class Details, General, and Grading Settings.

You can edit the details of your class, too! Also, you can see the invite code settings. Adjust the stream and classwork on the stream settings, or manage your Google Meet link. You can also decide whether to show or hide your students’ grades and create categories for organizing grades.

Pro Tip
Want to assess your learners online? Create an online quiz for free!
Step 5: Sharing the Class
Copy the class code or invite link for your class and send it to your students so they can enroll in your Remote Learning Class!

OnlineExamMaker: An Alternative LMS for Remote Learning
The best alternative for creating a Remote Learning Classroom is OnlineExamMaker. This software has the remote proctoring feature that you need! It’s an all-in-one platform that can be a Class Maker, LMS, Quiz Maker, and more! It has stable and secured servers that can handle multiple classes and students. You can manage your work all in one place with its neat LMS feature!
It has built-in AI-powered anti-cheating software that helps detect malicious activities. Also, it has a new user-friendly interface that is simple and direct! With OnlineExamMaker, you can remotely manage your class, give assignments, make classwork, and help your students!
Create Your Next Quiz/Exam with OnlineExamMaker
How to Create A Classroom for Remote Learning on OnlineExamMaker?
Here’s how you can create a classroom for remote learning with OnlineExamMaker:
Step 1: Go to OnlineExamMaker LMS
Go to the left side of the new dashboard and hover over “LMS” and click “Courses”.
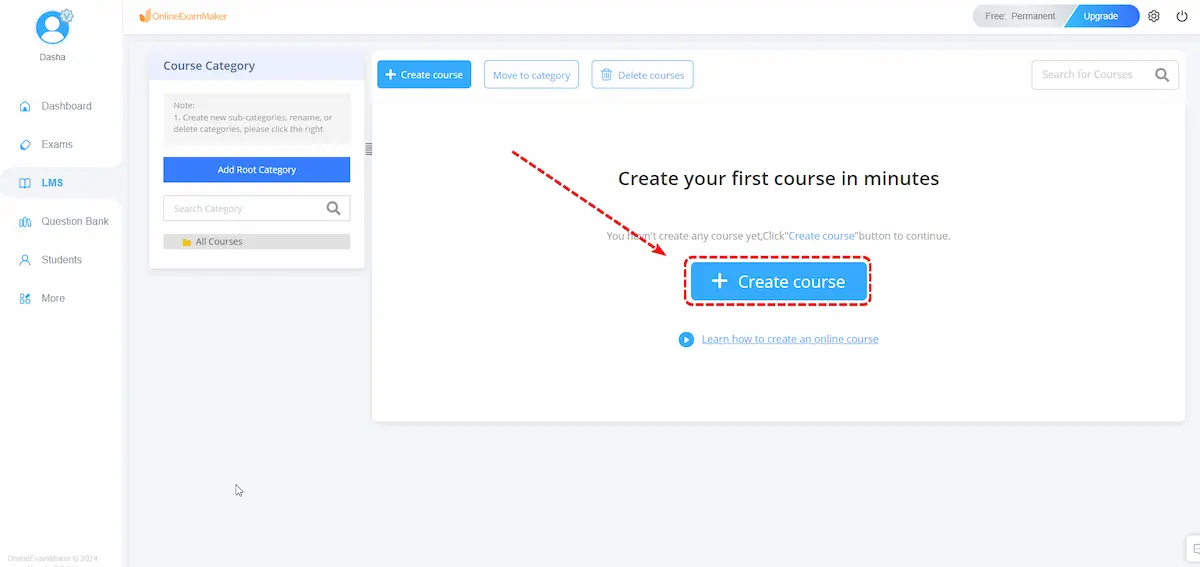
After that, click the “+ Create Course” button to start making your Remote Learning Class.
Step 2: Edit Class Details

In this step, you need to fill in the important details of the Remote Learning Class. Choose a class name, add a short description or introduction, and select the category. You can choose a template cover or a course cover of your own making.
Step 3: Adding Chapters and Resources
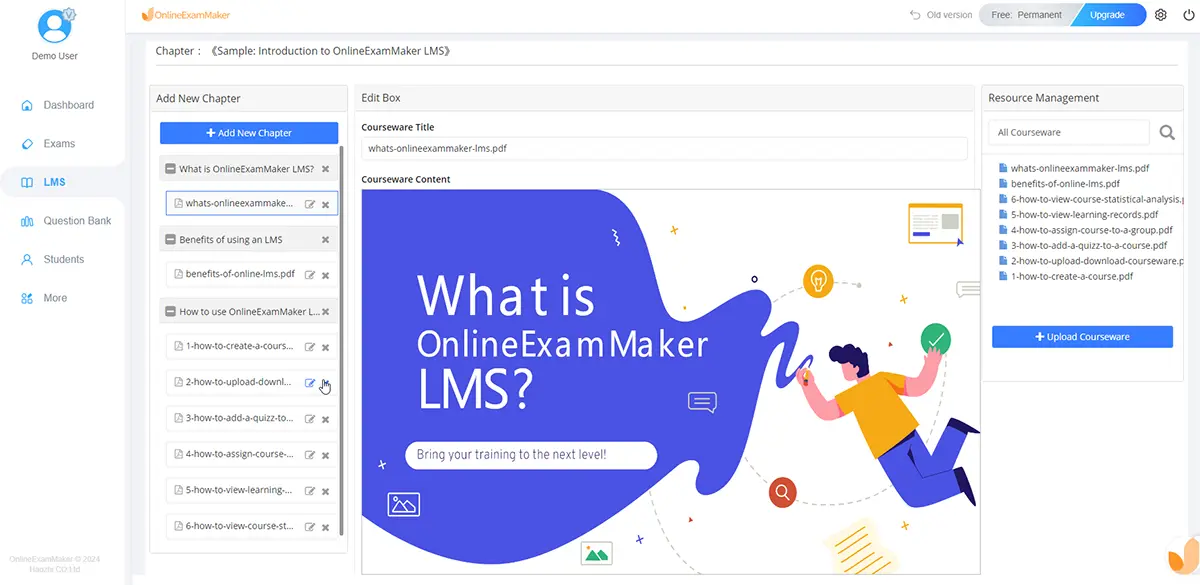
In this step, you can add lessons or chapters for your Remote Learning Class. You can add courseware and activities of your choosing. After creating the chapters and the courseware, just drag and drop them on the right of each chapter.
Step 4: Customizing Class Settings

Modify the class settings and terms. OnlineExamMaker provides different class settings such as class availability, labeling, learning permissions, difficulty levels, validity periods, anti-cheating measures, and more! Click ‘Finish’ to publish your Remote Learning Class.
Step 5: Sharing Your Remote Learning Class
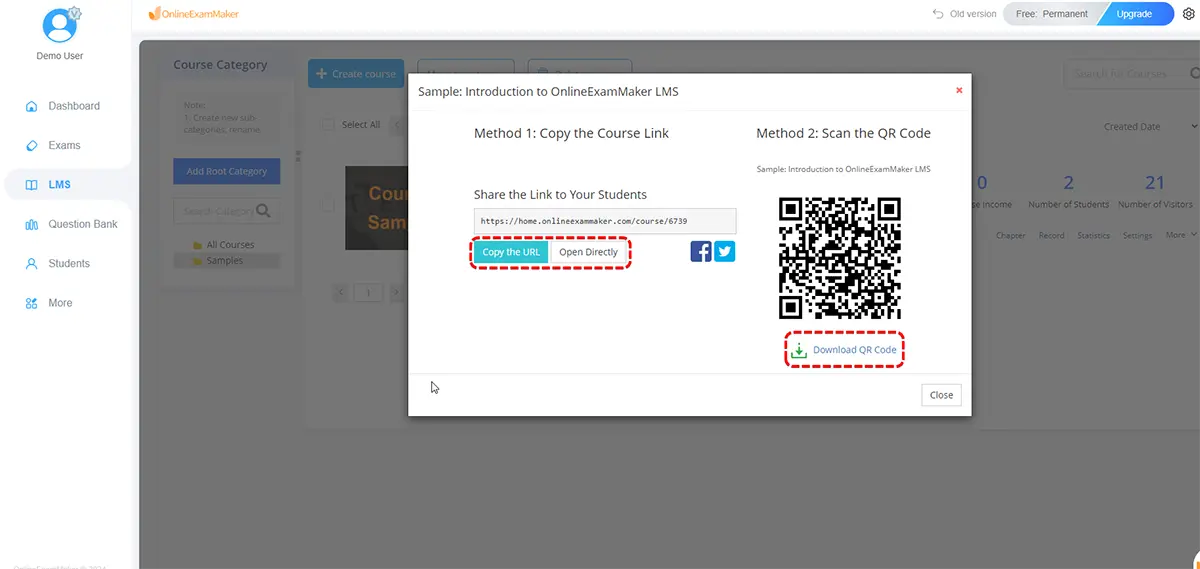
After publishing the course you made, you can copy the custom-made link and QR Code for easy sharing. You can share them with your students to start the remote learning process!