Creating a quiz with a timer in PowerPoint isn’t just about adding bells and whistles to your presentation. It’s about transforming passive learning into an active experience that keeps participants on their toes. Whether you’re a teacher trying to make exam prep less painful, a trainer looking to boost workshop engagement, or an HR manager conducting interactive onboarding sessions, a well-designed timed quiz can be your secret weapon.
- Why Add a Timer to Your PowerPoint Quiz?
- Planning Your Quiz Structure
- Method 1: Creating a Simple Countdown Bar (No Coding Required)
- Method 2: Advanced Quiz with Points and Scoring System
- Adding Interactive Zoom Features for Question Selection
- The Smarter Alternative: OnlineExamMaker for Professional Timed Quizzes
- Tips for Making Your Quiz More Engaging
- Frequently Asked Questions
Why Add a Timer to Your PowerPoint Quiz?
Let’s be honest—time pressure changes everything. Without a timer, quiz participants can overthink every answer, glance at their notes, or simply zone out between questions. A countdown creates urgency, mimics real exam conditions, and—here’s the kicker—makes the whole experience feel more like a game than a test.
Research shows that timed assessments improve focus and retention by creating what psychologists call “desirable difficulty.” Your brain works harder under time constraints, which means information sticks better. Plus, there’s something oddly satisfying about watching that timer bar shrink or those numbers count down. It taps into the same psychology that makes us binge-watch shows or chase achievement badges in games.
But timers aren’t just about pressure. They also help you manage your session better. Got 45 minutes for a training module? Set each question to 30 seconds, and you’ll breeze through 20 questions with time to spare for discussion. No more awkward moments where one participant takes five minutes on a single question while everyone else fidgets.
Planning Your Quiz Structure
Before you dive into PowerPoint’s animation panes and hyperlink settings, take a breath. The biggest mistake people make is jumping straight into building without a blueprint. Trust me, you don’t want to be three-quarters done only to realize you’ve set up your navigation wrong and need to start over.
Questions to Ask Yourself:
How many questions do you need? Five quick questions for a warm-up activity? Twenty for a comprehensive review? The number matters because it affects your timing strategy and file size.
What question format works best? Multiple choice is easiest to set up with clickable answer boxes. True/false is even simpler. If you’re feeling ambitious, you could do fill-in-the-blank, but that requires manual checking rather than automatic feedback.
How long should each timer run? Simple recall questions might need 10-15 seconds. Problem-solving questions could warrant 30-60 seconds. Match your timer to your question complexity, or you’ll either bore participants with too much time or frustrate them with too little.
What happens when time runs out? Should the quiz automatically advance to the next question? Display a “Time’s Up” message? Reveal the answer immediately? Each approach has its merits depending on your teaching goals.
Here’s a pro tip: sketch your quiz flow on paper first. Draw boxes for each slide, arrows showing where clicks lead, and notes about timing. It feels old-school, but it saves hours of digital backtracking.
Method 1: Creating a Simple Countdown Bar (No Coding Required)
This is your entry point—the method that requires zero programming knowledge and works on any recent version of PowerPoint. If you’ve ever added an animation to make text fly in during a presentation, you already have the skills for this.
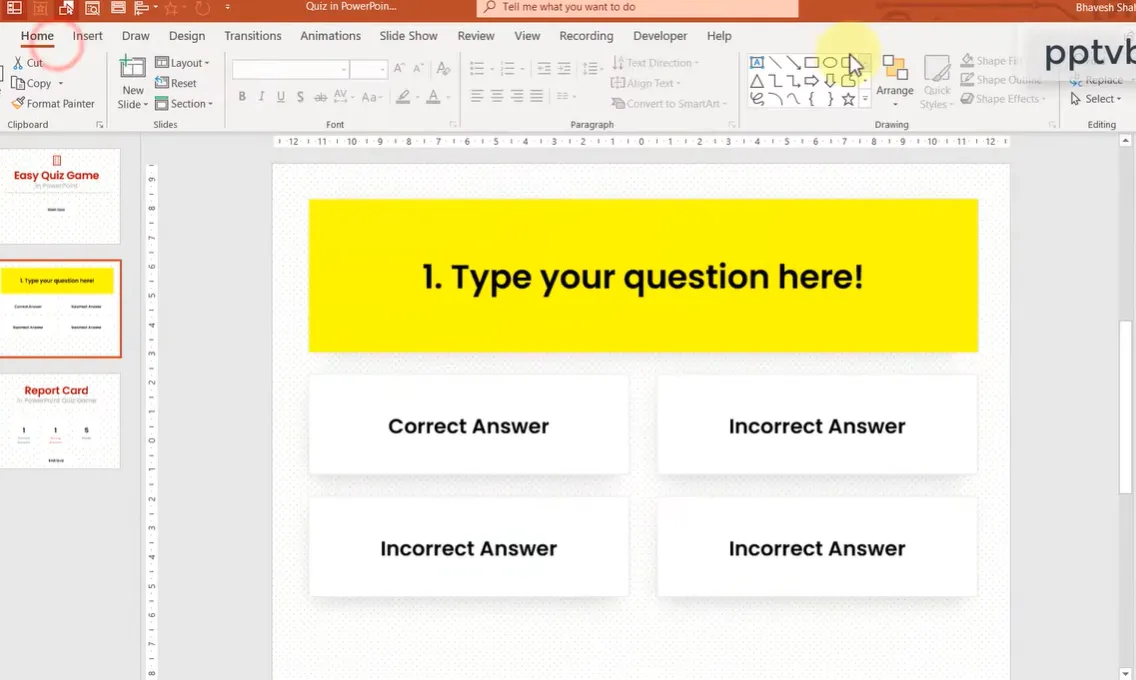
Step 1: Set Up Your Question Slide
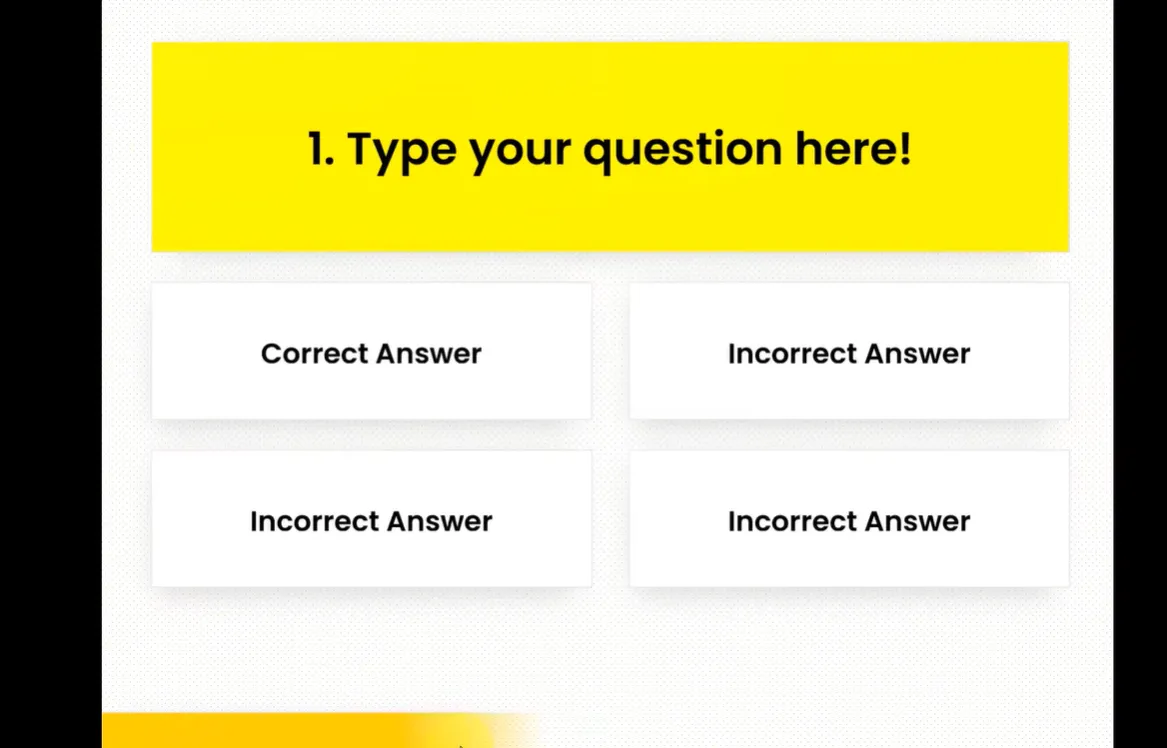
Start with a blank slide. Delete those default text boxes that PowerPoint insists on including—you won’t need them. Add your own text box for the question, something like “What year did the Berlin Wall fall?” Position it prominently at the top or center of the slide.
Now create your answer choices. You can use text boxes, shapes, or a combination. Personally, I like using rounded rectangles with the answers inside—they look cleaner and are easier to click during the actual quiz. Arrange them however feels right: vertically down the left side, in a grid pattern, or the classic A/B/C/D column.
![]()
Step 2: Create Your Countdown Bar
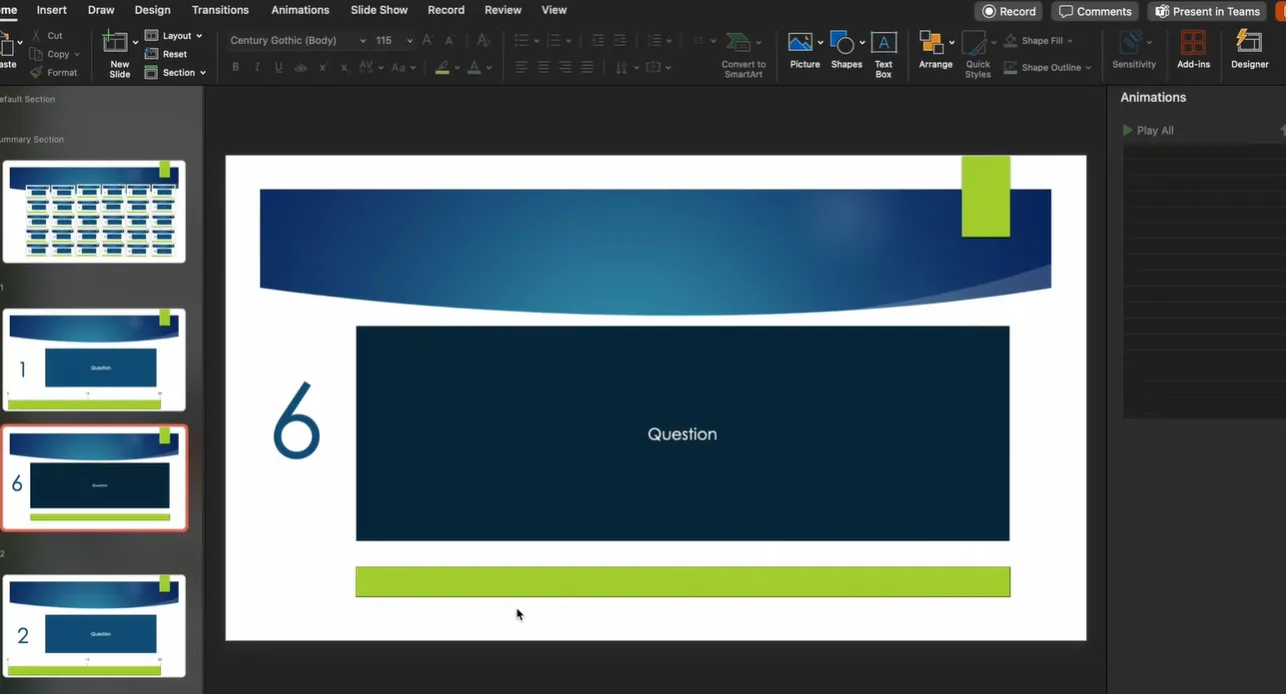
Here’s where the magic happens. Insert a rectangle shape and stretch it across the bottom of your slide—or along the top if you prefer. This is your timer bar. Choose a color that stands out; red or orange creates that sense of urgency, while green feels calmer (pick based on how much pressure you want to apply).
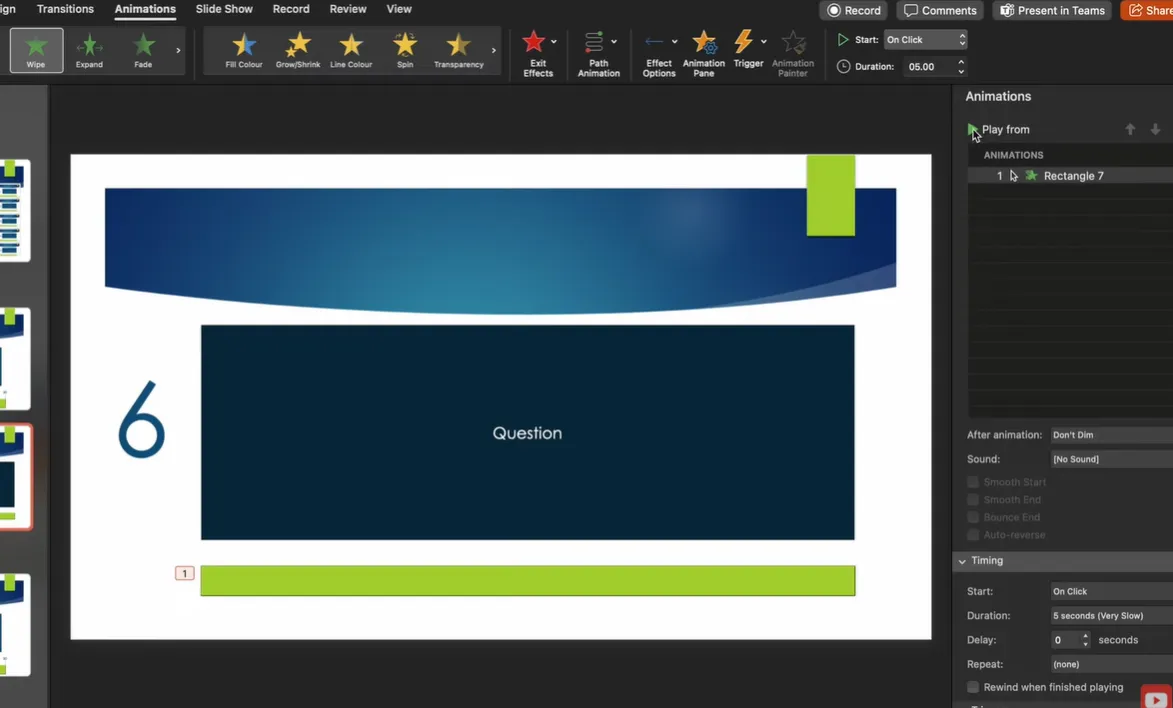
With your rectangle selected, navigate to the Animations tab. Click “Add Animation” and scroll down to the Exit effects section. Choose Wipe. This makes your bar disappear gradually rather than vanishing all at once.
Now for the crucial settings: Under “Effect Options,” set the direction to From Right. This creates that classic countdown bar effect where the color drains away from right to left. In the duration field, enter your time limit—let’s say 10 seconds for now. You can always adjust this later.
One more detail: Change the animation start to With Previous. This means the timer starts automatically when the slide appears, rather than waiting for a
click.
Step 3: Set Up Automatic Advancement
You could stop here and have a functional timer, but let’s make it truly automatic. Go to the Transitions tab. Uncheck “On Mouse Click” and enable “After.” Set this to match your timer duration—if your bar animation runs for 10 seconds, set the transition to advance after 10 seconds.
What this does is brilliant: When your countdown bar finishes its exit animation, the slide automatically moves to the next one. You can make that next slide show the answer, display “Time’s Up,” or jump to the following question. The choice is yours.
Step 4: Add Interactivity to Your Answers
Right-click each answer choice shape and select “Link” or “Hyperlink.” For the correct answer, link it to a slide that says “Correct!” with celebratory colors. For wrong answers, link them to a “Try Again” slide. When participants click an answer, they instantly see if they got it right—no waiting, no ambiguity.
Here’s a neat trick: You can have wrong answers loop back to the same question so participants can try again, while correct answers advance to the next question. This creates a self-paced learning experience within your timed framework.
Step 5: Duplicate and Customize
Once you’ve perfected one question slide with its timer and hyperlinks, don’t rebuild from scratch for question two. Right-click your slide in the thumbnail panel and choose “Duplicate Slide.” Your timer animations and transition settings carry over automatically.
Now you just swap out the question text, change the answer choices, and update your hyperlink destinations. Repeat this process for however many questions you need. A 20-question quiz that might take hours to build from scratch? You’ll finish it in 30 minutes using this duplication method.
Method 2: Advanced Quiz with Points and Scoring System
Ready to level up? This method adds automatic score tracking, a report card at the end, and those satisfying “points earned” animations that make quizzes feel like video games. Fair warning: This requires enabling PowerPoint’s Developer tab and working with some VBA code. But don’t let that scare you—it’s mostly copy-paste work.
Setting Up the Developer Tab and VBA Code
First, you need to enable PowerPoint’s hidden Developer tab. Right-click anywhere on your ribbon, select “Customize the Ribbon,” and check the box next to “Developer.” Click OK, and you’ll see a new tab appear.
Now visit the resource mentioned in the video transcript and find the “Scoring Points” section. Copy the entire VBA code block. Back in PowerPoint, go to Developer → Visual Basic. In the window that opens, right-click in the left panel, choose Insert → Module, and paste the code you copied.
What does this code do? It tracks three variables: number of correct answers, number of wrong answers, and total points. Every time participants click an answer, the code updates these counters in the background. At the end, it generates a report card showing their performance.
Creating Your Report Card Slide
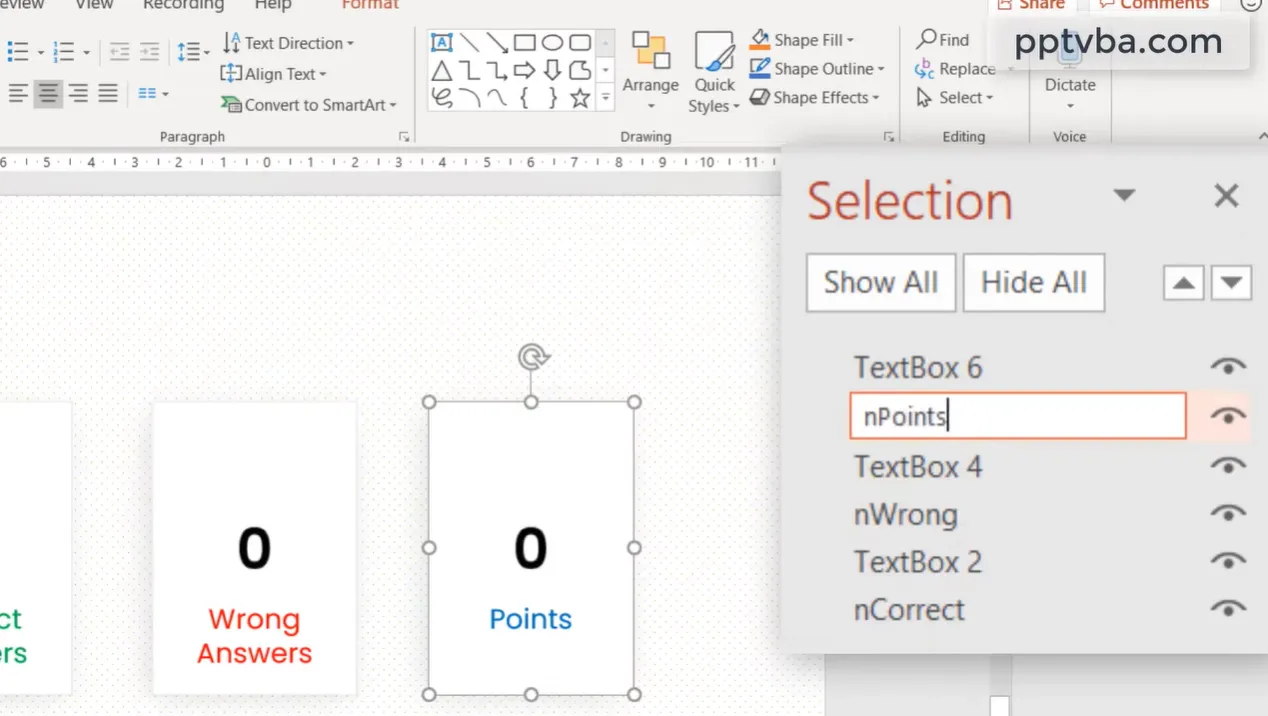
Add a new slide at the beginning of your quiz. This becomes your scoreboard template. Draw three rectangles and label them: “Correct Answers,” “Wrong Answers,” and “Total Points.” Make them visually distinct—green for correct, red for wrong, blue for points.
Here’s the crucial step: Open the Selection Pane (Home → Select → Selection Pane) and rename these shapes. The correct answers rectangle should be named exactly “nCorrect,” the wrong answers one “nWrong,” and points “nPoints.” The code looks for these specific names to update the scores.
Inside each rectangle, type “0” as the starting value. As the quiz runs, these numbers will update automatically based on participant performance.
Linking Answers to the Scoring System
For each answer choice in your questions, right-click the shape and go to Insert → Action. Instead of a hyperlink this time, choose “Run macro.” For correct answers, select the “CorrectAnswer” macro. For incorrect answers, select “WrongAnswer.”
You’ll also want to remove PowerPoint’s default click sounds since the macro has its own audio feedback. Select each shape, go to Animations, and set the sound to “No Sound.”
One creative touch: You can assign different point values to different questions. In the VBA code, you’ll see a variable for points. Change the number to make harder questions worth more—say, 10 points for a tough question versus 5 for an easy one. This adds strategy to your quiz.
Adding the Timer to Your Advanced Quiz
You’ll combine the countdown bar method from earlier with this scoring system. Insert your rectangle timer bar on each question slide, set up the Wipe animation (remember: From Right, duration matching your time limit), and ensure it starts With Previous.
Here’s where it gets clever: Set your answer shapes to appear after a brief delay. This gives participants a moment to read the question before the timer starts. Stagger your animations—question appears, one-second pause, then timer and answers appear simultaneously. It creates better flow than everything hitting at once.
Creating the End Screen
Copy your “Start Quiz” button to create an “End Quiz” button on your final question slide. Link this button to your report card slide using a hyperlink (not a macro). When participants finish, they’ll see their scores tallied: X correct, Y wrong, Z total points.
Make this slide visually appealing—add some congratulatory graphics, maybe a motivational message. If you’re feeling extra, you could add conditional messages based on score ranges, though that requires additional VBA customization.
Don’t forget the critical final step: Save your file as a PowerPoint Macro-Enabled Presentation (.pptm) or PowerPoint Macro-Enabled Show (.ppsm). Regular .pptx files strip out macro functionality, rendering your scoring system useless.
OnlineExamMaker: Create a Timed Quiz Using AI for Free
Unlike PowerPoint, where you’re manually setting animation timers and hoping participants don’t accidentally press Escape, OnlineExamMaker has built-in exam time controls. You simply specify how long the entire quiz should last, and the system handles everything—countdown display, automatic submission when time expires, time warnings when participants are running low.
Features PowerPoint Simply Can’t Match
Automatic grading? Check. Detailed analytics showing which questions most participants got wrong? Check. Anti-cheating features like question randomization, browser lockdown, and webcam monitoring? Check, check, and check.
You can deliver quizzes online where participants access them via a link, or generate printable versions for in-person testing. Results sync to a gradebook automatically.
Participants can review their answers afterward with correct answers highlighted and explanations provided. No VBA code required, no broken hyperlinks to troubleshoot, no corrupted files because someone opened it in Google Slides.
For HR managers conducting employee assessments or compliance training, OnlineExamMaker offers certificate generation. Employees who pass automatically receive a completion certificate via email. Try doing that in PowerPoint without manually creating and sending documents.
Create Your Next Quiz/Exam Using AI in OnlineExamMaker
How to Make Timed Quizzes in OnlineExamMaker?
You can absolutely create functional, engaging timed quizzes in PowerPoint. But here’s the thing—you’re essentially hacking presentation software to do something it wasn’t really designed for. It’s like using a hammer to tighten screws. Sure, you can make it work, but wouldn’t a screwdriver be better?
Step 1: Get Started with OnlineExamMaker
Enter OnlineExamMaker, a dedicated quiz and exam creation platform with AI-powered features. If you’re a teacher, trainer, or HR professional who creates quizzes regularly, this tool eliminates the PowerPoint workarounds and gives you purpose-built functionality.
Step 2: Create A Quiz
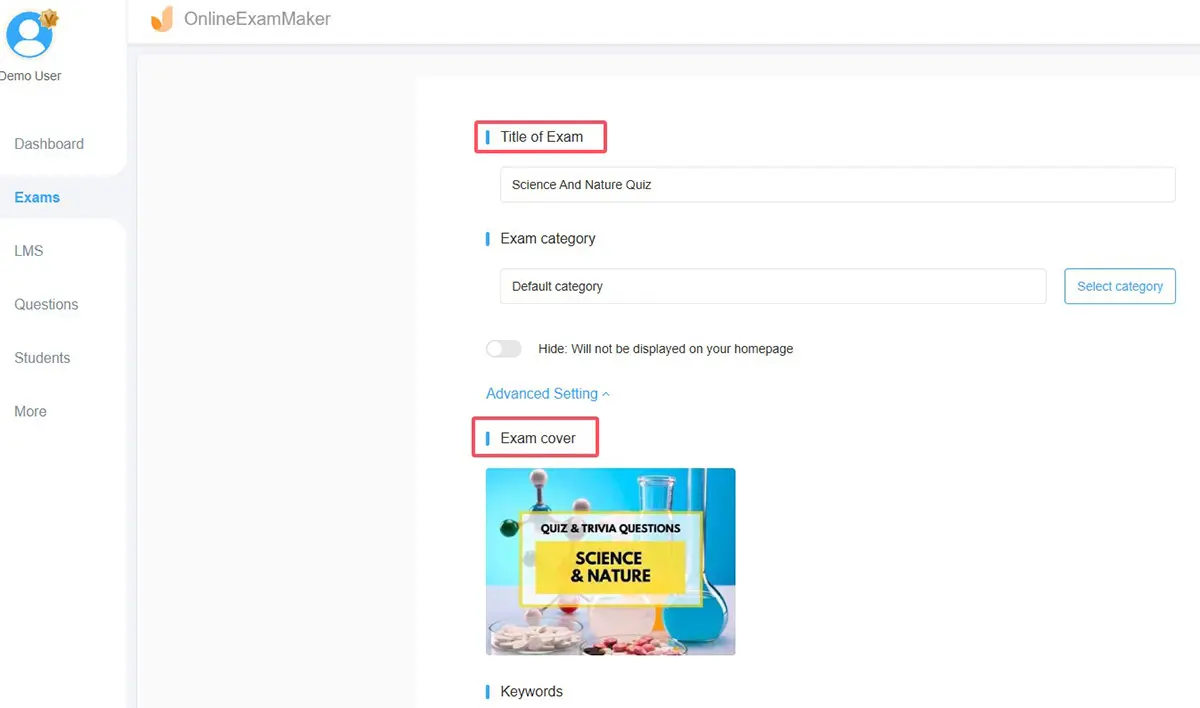
Click “New exam” button to make a new assessment. You can try OnlineExamMaker AI Question Generator to generate questions and add them to the exam directly. OnlineExamMaker’s AI scans the content and generates relevant multiple-choice, true/false, and short-answer questions. It’s like having an assistant teacher who never sleeps.
Step 3: Configure Exam Time Setting
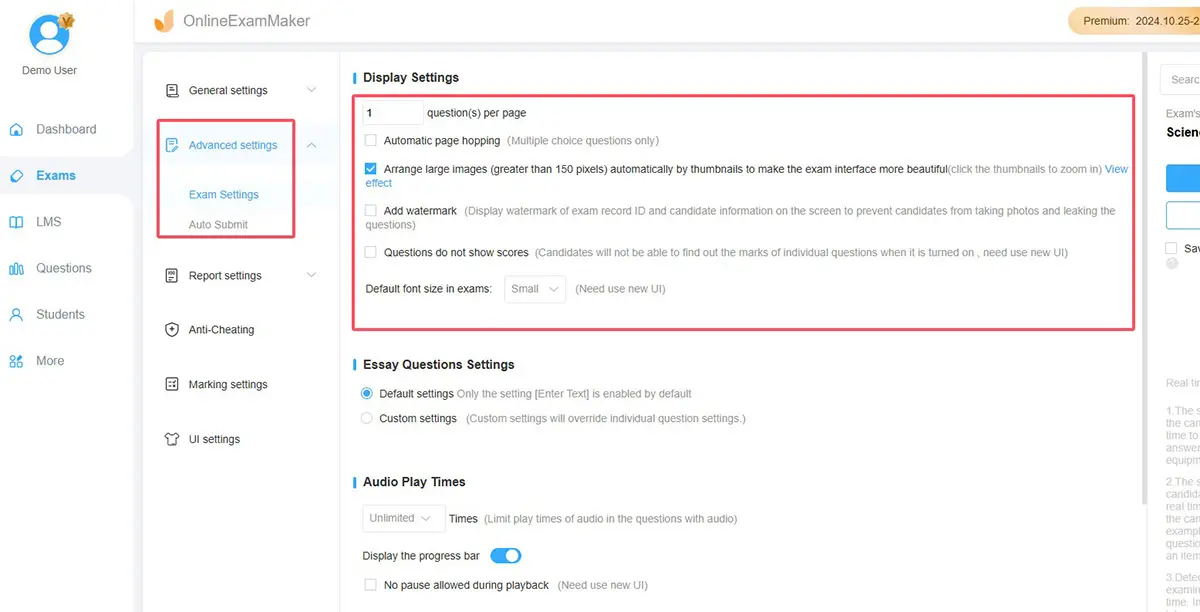
According to the platform’s time setting guide, you can set answer time limits in multiple ways:
- Total exam duration – Give participants 30 minutes to complete all questions
- Per-question timing – Allocate specific time limits for individual questions
- Time warnings – Alert participants when they have 5 minutes remaining
- Strict timing modes – Prevent participants from pausing or resuming once started
Step 4: Publish and Share the Quiz
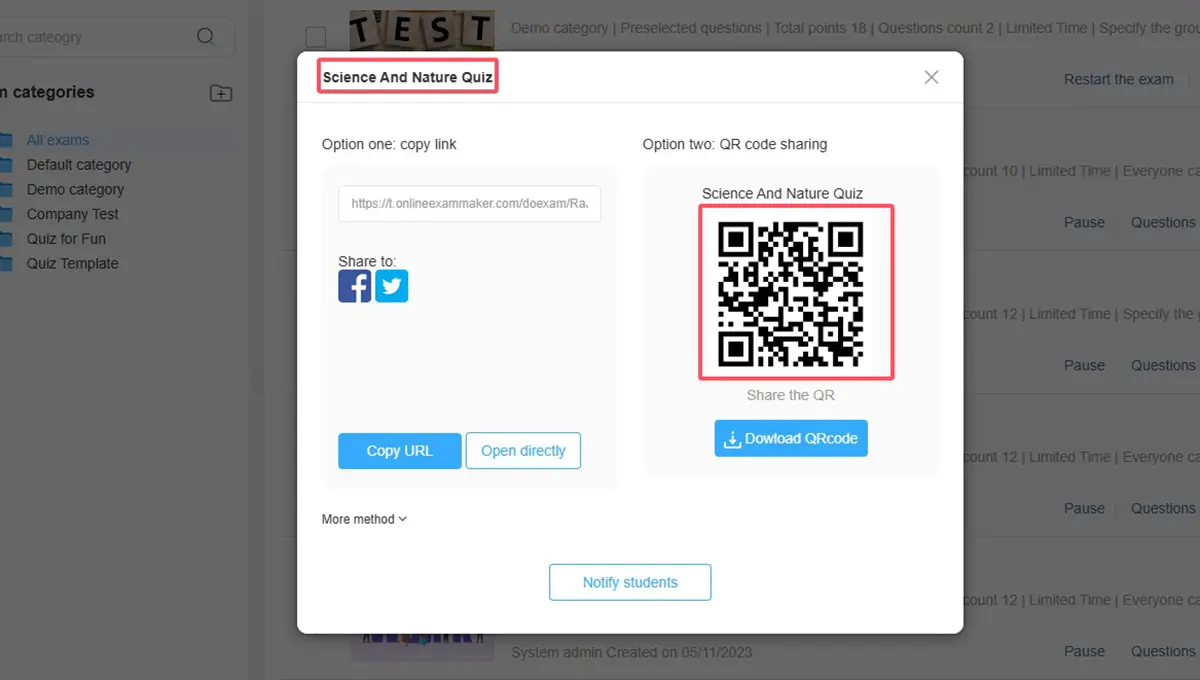
You can preview the exam in your own computer, and save the settings after you are satisfied with it. Then you can click the “Publish” button to release the exam.
When PowerPoint Still Makes Sense
Don’t get me wrong—PowerPoint has its place. If you’re creating a one-time quiz for a single classroom session, and you’re already comfortable with PowerPoint animations, go for it. The methods I’ve outlined work beautifully for casual use.
PowerPoint also wins when you need complete control over visual design and branding. OnlineExamMaker has themes and customization options, but PowerPoint lets you design literally anything. For a highly branded corporate training where every pixel matters, PowerPoint’s flexibility might be worth the extra setup work.
But if you’re creating quizzes regularly, need robust analytics, want anti-cheating safeguards, or simply don’t want to fiddle with VBA macros and animation panes every time, a dedicated quiz platform saves enormous time and headaches.
Tips for Making Your timed Quiz More Engaging
You’ve got the technical know-how now. Let’s talk about the softer skills—the design choices and psychological touches that transform a functional quiz into an engaging experience.
Use Sound Effects (But Not Too Many)
A satisfying “ding” when someone gets an answer right? Gold. A sad “bonk” for wrong answers? Effective. Sound effects provide instant emotional feedback. But resist the urge to add whooshes and zaps to every animation. One sound per interaction is plenty; more becomes annoying fast.
Color Psychology Matters
Red timers create urgency and pressure—great for exam prep. Green timers feel friendlier—better for low-stakes review games. Blue conveys professionalism. Yellow grabs attention but can strain eyes. Match your color choices to your quiz’s purpose and your audience’s stress tolerance.
Vary Your Question Difficulty
Start with easy questions to build confidence, sprinkle in medium-difficulty ones to maintain interest, and save the challenging questions for the middle or end. This creates a satisfying difficulty curve rather than overwhelming participants immediately or boring them throughout.
Include Explanations, Not Just Right/Wrong
When someone gets an answer wrong, don’t just say “Incorrect.” Briefly explain why. “Incorrect. The Berlin Wall fell in 1989, not 1985.” This transforms your quiz from an assessment tool into a learning opportunity. Even quick explanations help cement correct information.
Test Your Quiz Multiple Times
I cannot stress this enough: Run through your entire quiz at least three times before presenting it. Click every answer choice to verify hyperlinks work. Let timers run their full duration to ensure transitions happen correctly. Nothing kills engagement faster than technical glitches during a live session.
Frequently Asked Questions
Can I create a quiz with a timer in PowerPoint Online?
Partially. You can create basic countdown bar timers using animations, but you cannot use VBA macros for scoring or the Zoom feature for question selection. For full functionality, you need the desktop version of PowerPoint.
How do I add a numeric countdown (10, 9, 8…)?
The simplest method without coding is creating separate slides for each number and having them advance automatically every second. Alternatively, you can use VBA macros or insert a countdown timer video. For most purposes, the countdown bar method is simpler and looks professional enough.
Can participants pause the timer?
Not with the methods described here. PowerPoint animations run automatically once started. If participants press Escape to exit the slideshow, they can resume, but the timer won’t pick up where it left off—it restarts. For controlled, pause-able timers, you need a dedicated quiz platform like OnlineExamMaker.
What if I want different time limits for different questions?
Easy. Each question slide has its own timer animation. Just set different durations when you’re setting up the Wipe animation. Question 1 might be 15 seconds, Question 2 might be 30 seconds, and so on.
How many questions can I realistically include?
PowerPoint handles up to 200-300 slides without significant performance issues, so technically you could create massive quizzes. Practically, consider your audience’s attention span. Most effective quiz sessions are 10-30 questions. Beyond that, split into multiple quizzes.
Can I export my PowerPoint quiz for online use?
You can save PowerPoint files as videos or upload them to platforms like SlideShare, but interactivity (clicking answers, scores tracking) won’t work. If you need online delivery with full functionality, either host a live session where you screen-share your PowerPoint, or build your quiz in a web-based platform from the start.
What’s the best way to prevent cheating in a PowerPoint quiz?
PowerPoint offers limited anti-cheating options. You can randomize question order by manually rearranging slides for different sessions. You can display questions in full-screen mode to make it harder to navigate away. But ultimately, PowerPoint isn’t designed for secure testing. For high-stakes assessments where cheating is a concern, use dedicated exam software with proctoring features.
Can I add images or videos to my quiz questions?
Absolutely. Insert images directly onto your question slides using Insert → Pictures. For videos, use Insert → Video. Just remember that videos increase your file size significantly, and they can sometimes cause playback issues when moving the file between computers. Test thoroughly if you’re incorporating multimedia.
Creating a timed quiz in PowerPoint is entirely doable with some patience and attention to detail. You’ve got the countdown bars for basic timing, the VBA macros for scoring, and the Zoom features for professional navigation. These tools transform PowerPoint from a simple presentation creator into an interactive learning platform.
That said, know when to use the right tool for the job. For occasional classroom quizzes where you control the environment, PowerPoint works great. For regular assessments, professional training programs, or anything requiring detailed analytics and anti-cheating measures, platforms like OnlineExamMaker save time and reduce technical headaches.
Whatever route you choose, remember this: The best quiz isn’t the one with the fanciest animations or most complex scoring system. It’s the one that keeps participants engaged, reinforces learning effectively, and runs smoothly without technical hitches. Master the basics, test thoroughly, and focus on creating questions that actually assess understanding rather than just recall. Do that, and your timed quizzes—whether in PowerPoint or dedicated software—will hit the mark every time.
Now go forth and create some quizzes that make learning feel less like a chore and more like a challenge worth conquering. Your students, trainees, or employees will thank you for it.