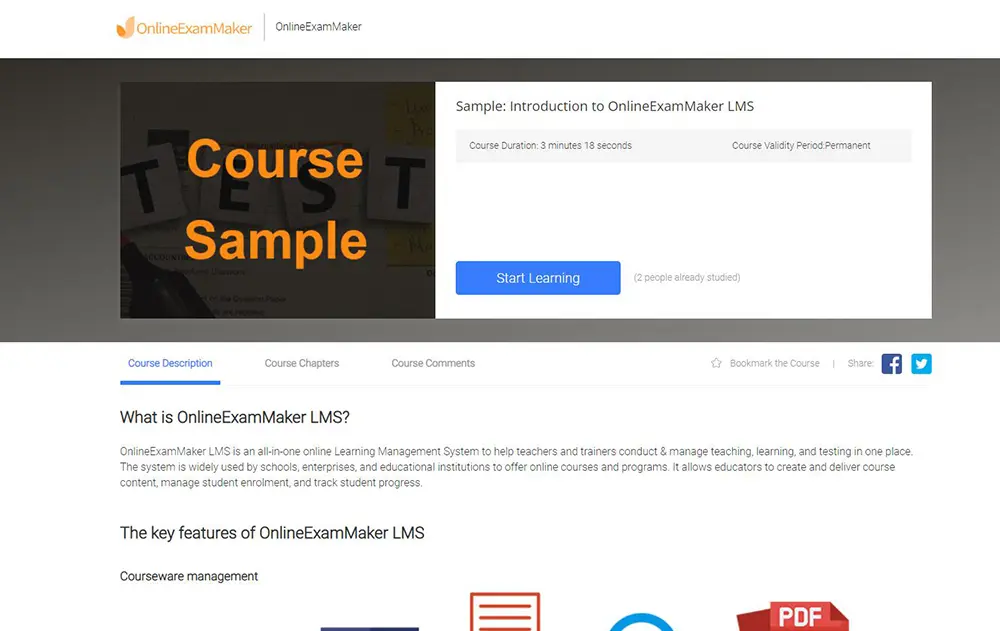
Canvas is a leading Learning Management System (LMS) that offers a variety of features and benefits tailored to both educators and students. Its tools and integrations for student management provide advantages across various dimensions of the educational experience.
Table of content
- Part 1: How can you enroll students into a course in Canvas LMS?
- Part 2: A free alternative learning management software with student management system
- Part 2: How to create an engaging course with OnlineExamMaker
Here are some benefits of Canvas LMS when it comes to student management:
1. Ease of Use:
• Canvas has an intuitive interface that’s relatively easy for both educators and students to navigate, making the enrollment, coursework submission, and communication processes smoother.
2. Integration with Other Systems:
• Canvas seamlessly integrates with a multitude of third-party applications and systems like Google Drive, Turnitin, and various Student Information Systems (SIS).
3. Centralized Course Management:
• Instructors can organize course content, assignments, quizzes, and grades all in one place. This centralization helps streamline the process of student management and tracking.
4. Automated Enrollment:
• Depending on the institution’s settings and integration, Canvas can automatically enroll students based on their registration in the student information system, reducing manual data entry.
5. Robust Communication Tools:
• Canvas offers multiple ways for educators to communicate with students, including announcements, messaging, discussion boards, and video conferences.
6. Real-time Analytics and Reporting:
• Educators can track student progress and participation using the analytics tools provided by Canvas. This feature can be invaluable for early detection of students who might be struggling.
7. Mobile Access:
• Canvas offers mobile apps for both instructors and students, allowing course content and communication to be accessed on-the-go.
8. Collaborative Tools:
• Canvas supports collaborative work through shared documents, group assignments, and discussion forums, helping students to work together more effectively.
9. Customizable Notification Settings:
• Both students and instructors can customize how and when they receive notifications about course activities, ensuring timely responses and engagement.
10. Peer Review Capabilities:
• Instructors can set up assignments to include peer reviews, facilitating student engagement and collaborative learning.
11. Cloud-Based System:
• Being cloud-based means there’s no software for institutions to install or maintain, and students and instructors can access their courses from anywhere with an internet connection.
12. Scalability and Reliability:
• Canvas can support institutions of varying sizes, from small schools to large universities, and offers high uptime, ensuring course materials and tools are available when needed.
How can you enroll students into a course in Canvas LMS?
If you’re looking to enroll students into your Canvas course, follow these steps.
Log in to Canvas:
Open your web browser and navigate to your institution’s Canvas URL.
Log in with your username and password.
Navigate to Your Course:
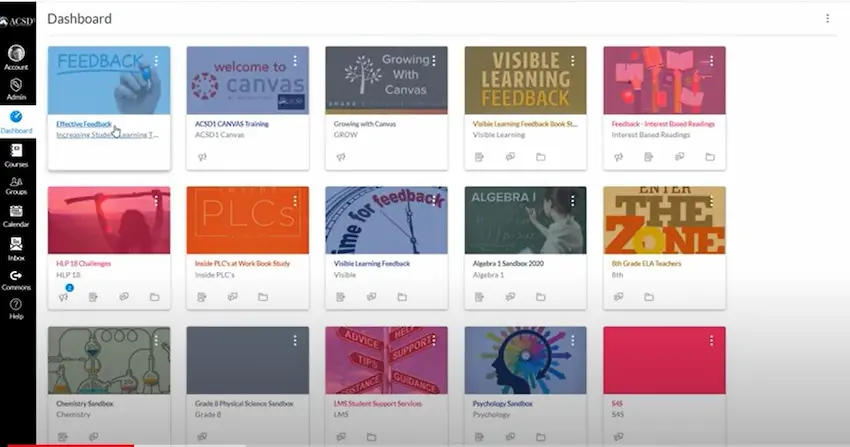
Once you’re logged in, you should see a “Dashboard” with tiles representing each of your courses. Click on the course in which you want to enroll students.
Open the “People” Section:
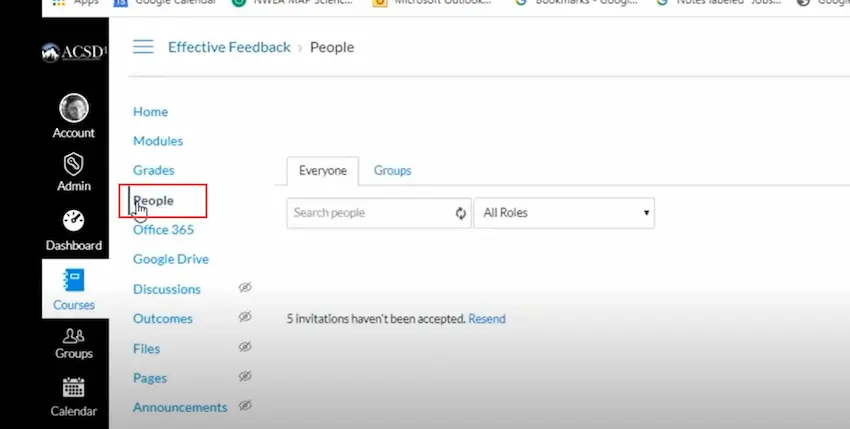
On the left-hand course navigation menu, click on the “People” link. This is where you manage everyone associated with your course: students, TAs, and other roles.
Add People:
Click on the “+ People” button, typically found towards the upper-right corner of the “People” page.
Choose Enrollment Type:
Using the dropdown menu, select the role you want for the people you’re adding (usually “Student”).
Enter Student Information:
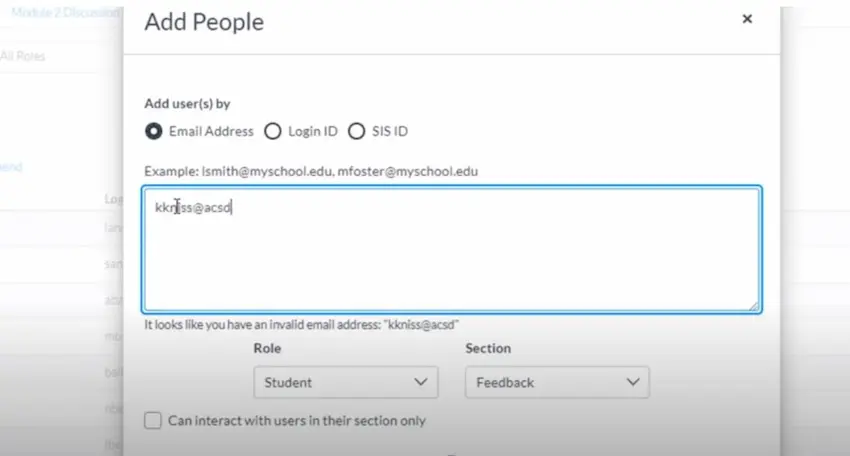
You can add students using their email addresses, Canvas user IDs, or depending on your institution’s setup, other identifiers.
If you’re enrolling multiple students, separate each entry with a comma.
Send Invitations (if needed):
Some Canvas configurations will require that an invitation be sent to users to join the course. If prompted, you can choose to send an invitation.
Finalize the Enrollment:
After entering the student information, click the “Next” button.
Canvas will confirm the users you’re about to enroll. Check to make sure everything is accurate.
If everything looks right, click the “Add Users” button.
Verify Enrollment:
Once you’ve completed the enrollment process, stay in the “People” section and ensure that the students’ names now appear in the list with the correct role.
A free alternative learning management software with student management system
OnlineExamMaker is a leading eLearning platform that empowers organizations worldwide to transform their workforce through innovative and effective learning solutions. OnlineExamMaker provids user-friendly and engaging learning experiences for teachers and students. The platform offers a wide range of customizable and interactive courses that cater to diverse learning needs, ensuring learners stay motivated and retain knowledge effectively.
OnlineExamMaker’s Candidate management features
Bulk Import Candidates: The exam organizers are able to import multiple candidates from their computers to a group using the import excel feature.
Candidates Categories: Group & segment your candidates effectively, create the right course for a group, and assign the right quiz to the right candidates.
Group Testing: Easily assign the created exam to a group containing multiple candidates to assess particular learners directly.
Create Your Next Quiz/Exam with OnlineExamMaker
How to create an engaging course with OnlineExamMaker
Step 1: Get started with OnlineExamMaker
Step 2: Create a new course
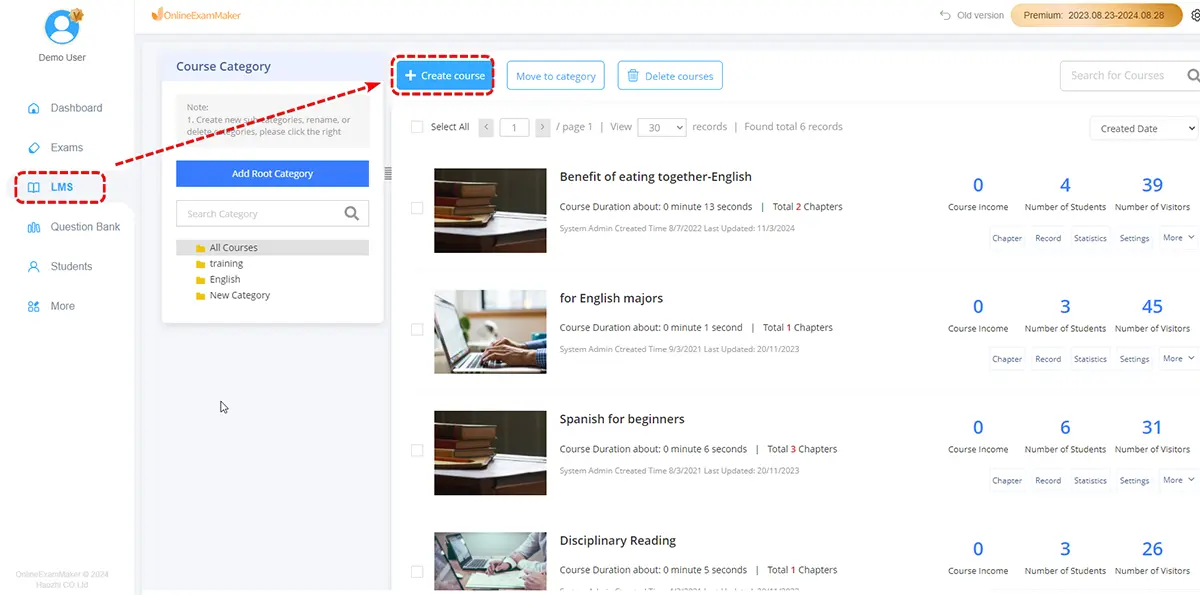
Set up a new course, fulfill course information, then upload high-quality course materials, including videos, presentations, quizzes, downloadable resources, and interactive elements.
Step 3: Publish & distribute your course
