Ever wondered if you’re “The Visionary” or “The Analyst”? Personality quizzes aren’t just for online magazines anymore. Teachers, trainers, and HR managers are discovering that these interactive assessments make learning stick, spark conversations, and help people understand themselves better.
Here’s the kicker: you don’t need fancy software or coding skills. PowerPoint—yes, the same tool you’ve been using for presentations since forever—can create fully interactive personality quizzes that feel surprisingly professional. And honestly? It’s simpler than you think.
- What Makes a Personality Quiz Different?
- Planning Your Quiz: The Blueprint
- Building the Foundation in PowerPoint
- Making It Interactive with Hyperlinks
- Designing for That “Quiz” Feel
- Advanced Option: Using ClassPoint for Real-Time Interaction
- Creating Personality Quizzes with AI: OnlineExamMaker
- Final Touches and Testing
What Makes a Personality Quiz Different?
Before diving into PowerPoint mechanics, let’s get clear on what we’re building. A personality quiz isn’t about right or wrong answers—it’s about self-discovery.
Unlike traditional quizzes that test knowledge, personality assessments reveal patterns. “Do you plan things in advance or jump in and figure it out?” Neither answer is correct. Both reveal something about how someone operates. The magic happens when participants see themselves reflected in the results: “Oh wow, that’s totally me!”
This distinction matters because it shapes everything—your question phrasing, answer options, and result descriptions. You’re not grading; you’re guiding people toward insight.
Planning Your Quiz: The Blueprint
Grab a notepad. Before touching PowerPoint, answer these questions:
How many personality types will you have?
Start with 3-4 types. More than that gets overwhelming to build and harder for participants to distinguish. Think of classic frameworks: introverts vs. extroverts, planners vs. improvisers, thinkers vs. feelers.
For workplace training, you might use: The Collaborator, The Innovator, The Organizer, and The Strategist. For a teaching workshop: The Guide, The Motivator, The Specialist, The Mentor.
How many questions do you need?
Five to eight questions hit the sweet spot. Too few and the results feel arbitrary. Too many and people lose interest. Each question should clearly lean toward one personality type.
What’s your scoring method?
Here’s where PowerPoint shows its limits—and its strengths. You have two paths:
| Method | How It Works | Best For |
|---|---|---|
| Manual Tracking | Participants note their letter choices (A, B, C, D) and tally them at the end | Classroom settings, workshops, self-paced learning |
| Branching Logic | Each answer hyperlinks to the next question or final result | Quick quizzes, icebreakers, automated experiences |
Most educators prefer manual tracking because it’s transparent—participants see the logic—and it encourages reflection as they notice patterns in their choices.
Building the Foundation in PowerPoint
Now the fun begins. Open PowerPoint and start with a blank presentation.
Create Your Structure Slides
Slide 1: Title Slide
Make it inviting. Something like “Discover Your Leadership Style” with a subtitle: “Answer 6 questions to reveal your unique approach.” Keep it simple but intriguing.
Slide 2: Instructions
This slide prevents confusion later. Include:
- How many questions they’ll answer
- How to track their responses (write down letters, click to advance, etc.)
- What happens at the end
Example: “You’ll answer 6 questions. Write down the letter of each answer you choose (A, B, C, or D). At the end, we’ll reveal what your letters mean!”
Slides 3-6: Result Slides (One Per Personality Type)
Each personality type gets its own slide. Insert a new slide and add:
- The personality name as the title: “Type A – The Planner”
- 3-5 descriptive bullet points: “You thrive on structure,” “You anticipate challenges before they arise”
- An icon or image that captures the vibe (a calendar for planners, a compass for explorers)
Pro tip: Name these slides clearly in the slide sorter view—”Result A,” “Result B,” etc. You’ll thank yourself later when adding hyperlinks.
Build Your Question Slides
For each question, insert a new slide. Start with one, perfect it, then duplicate.
Step 1: Add the question
In a text box at the top, type your question. Make it conversational: “When facing a problem at work, you typically…” rather than “Problem-solving approach:”
Step 2: Create answer buttons
Go to Insert → Shapes → Rounded Rectangle. Create one shape per answer option (typically A, B, C, D).
Inside each shape, type the full answer:
- “A: Analyze the situation carefully before acting”
- “B: Brainstorm creative solutions with others”
- “C: Break it into manageable steps”
- “D: Trust your instinct and move quickly”
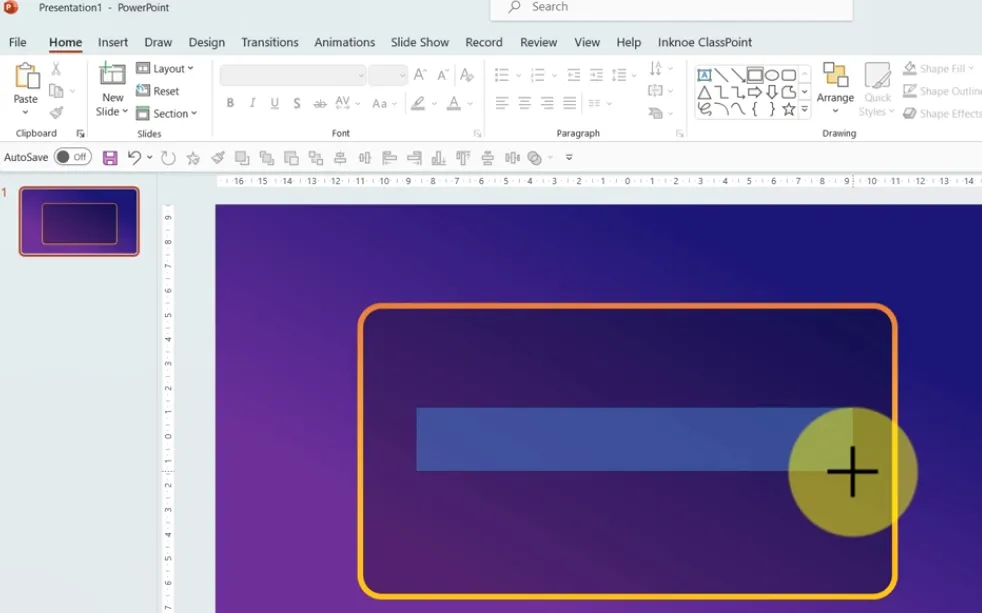
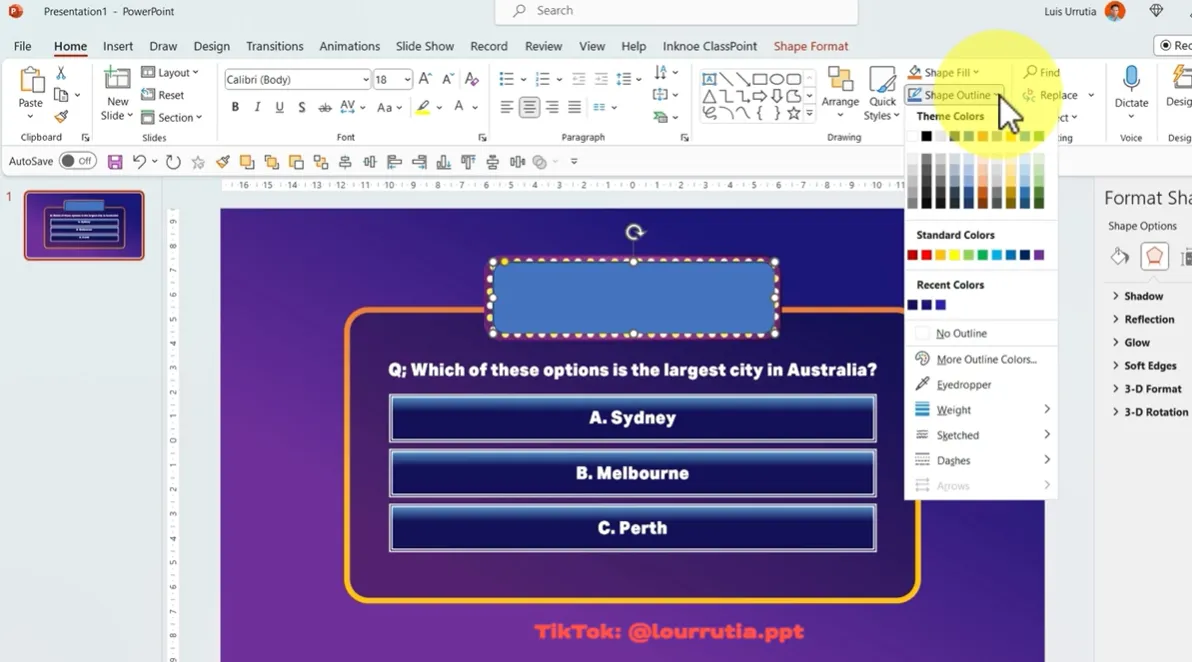
Step 3: Format for clarity
Make these shapes look clickable:
- Choose a fill color (solid or subtle gradient)
- Remove the outline or make it very thin
- Increase font size (18-24pt works well)
- Align them vertically with even spacing (select all shapes → Arrange → Align → Distribute Vertically)
Step 4: Duplicate and modify
Once your first question looks good, right-click the slide in the sidebar and select “Duplicate Slide.” Change only the question text and answer wording. This keeps your design consistent and saves tremendous time.
Making It Interactive with Hyperlinks
This is where PowerPoint transforms from static slides into an interactive experience.
Option A: Manual Tracking (Recommended for Most Users)
With this method, participants write down their letter choices throughout the quiz. Your slides simply advance in order—no complex hyperlinking needed.
After the final question, add a “Results Key” slide:
List the personality types with their letter combinations:
- “Mostly A’s: The Planner – Detail-oriented and strategic”
- “Mostly B’s: The Collaborator – People-focused and creative”
- “Mostly C’s: The Organizer – Efficient and systematic”
- “Mostly D’s: The Innovator – Bold and adaptive”
Now add hyperlinks to each line:
- Select the text “The Planner”
- Right-click → Hyperlink
- Choose “Place in This Document”
- Select the “Result A” slide
- Click OK
Repeat for each personality type. Participants can then click their result to see the full description.
Option B: Branching Logic (Advanced)
Want each answer to automatically jump somewhere? You’ll hyperlink individual answer buttons.
For most questions, all answers should jump to the next question:
- Select answer shape A
- Right-click → Hyperlink → Place in This Document
- Choose “Question 2” slide
- Repeat for shapes B, C, and D
On the final question, get creative. Each answer can jump directly to a result:
- Final Q, Answer A → Result A slide
- Final Q, Answer B → Result B slide
- And so on…
This works beautifully for short quizzes where each answer clearly maps to one outcome. For nuanced personality assessments with mixed responses, manual tracking makes more sense.
Designing for That “Quiz” Feel
What separates a professional personality quiz from a basic slideshow? Thoughtful design details.
Establish a Visual Identity
Assign a color to each personality type and use it consistently:
- Blue for The Planner
- Orange for The Innovator
- Green for The Collaborator
- Purple for The Organizer
Use these colors in the letter badges on answer buttons and as accent colors on result slides. This creates subconscious associations—by question three, participants start recognizing “that’s a blue answer” even before reading it.
Choose Meaningful Icons
PowerPoint’s built-in icon library (Insert → Icons) offers thousands of options. Match icons to personality traits:
- Lightbulb for innovative thinkers
- Checklist for organized types
- Connected nodes for collaborators
- Target for strategic planners
Place icons near titles or as watermarks on result slides. They add polish without overwhelming the content.
Write Like a Personality Quiz
Language matters enormously here. Compare these result descriptions:
Boring: “You prefer structured environments and detailed planning.”
Engaging: “You’re The Architect—you don’t just build plans, you craft blueprints for success. While others wing it, you’ve already anticipated the obstacles and mapped three different routes to your goal. Your superpower? Turning chaos into clarity.”
See the difference? The second version uses vivid language, speaks directly to the participant, and frames traits as strengths. It reads like insight, not diagnosis.
Keep Questions Conversational
Instead of: “Communication style preference:”
Try: “In meetings, you’re most likely to…”
Instead of: “Decision-making approach:”
Try: “When the team can’t agree, you usually…”
Personality quizzes should feel like a conversation with a perceptive friend, not a corporate assessment form.
Advanced Option: Using ClassPoint for Real-Time Interaction
Want to take your PowerPoint quiz from good to “whoa, that’s actually impressive”? Enter ClassPoint—a free PowerPoint add-in that turns your presentation into a live, interactive experience.
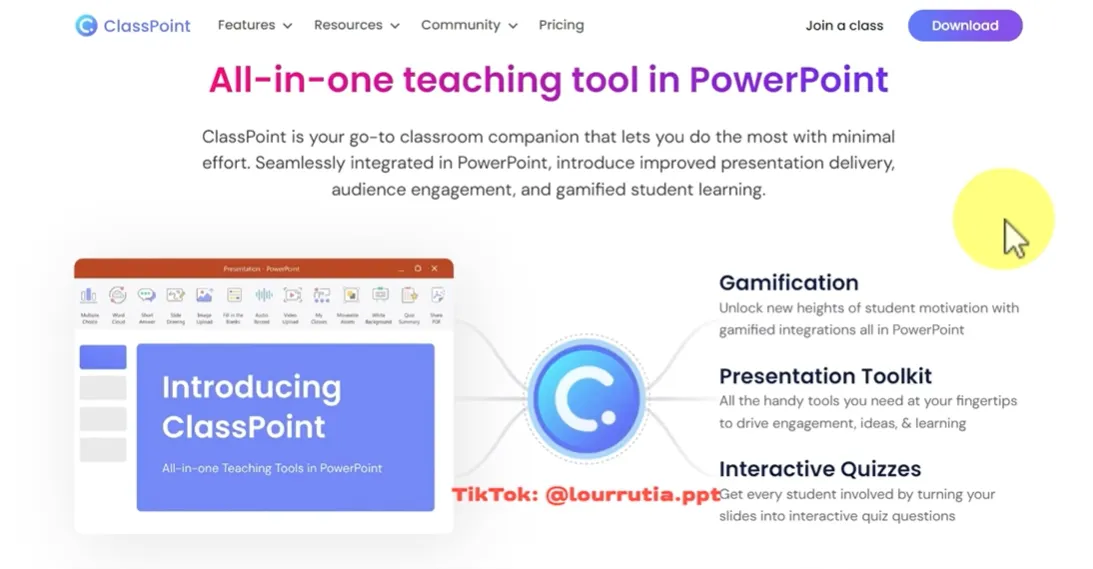
What ClassPoint Does
ClassPoint transforms PowerPoint into an interactive platform where participants join from their phones, tablets, or computers. They see questions on the big screen but submit answers through their devices. You see responses in real-time.
For personality quizzes, this means:
- No manual tracking needed
- Instant visual feedback (bar charts showing answer distribution)
- Gamification elements (points, stars, leaderboards)
- Saved results for later analysis
Setting It Up
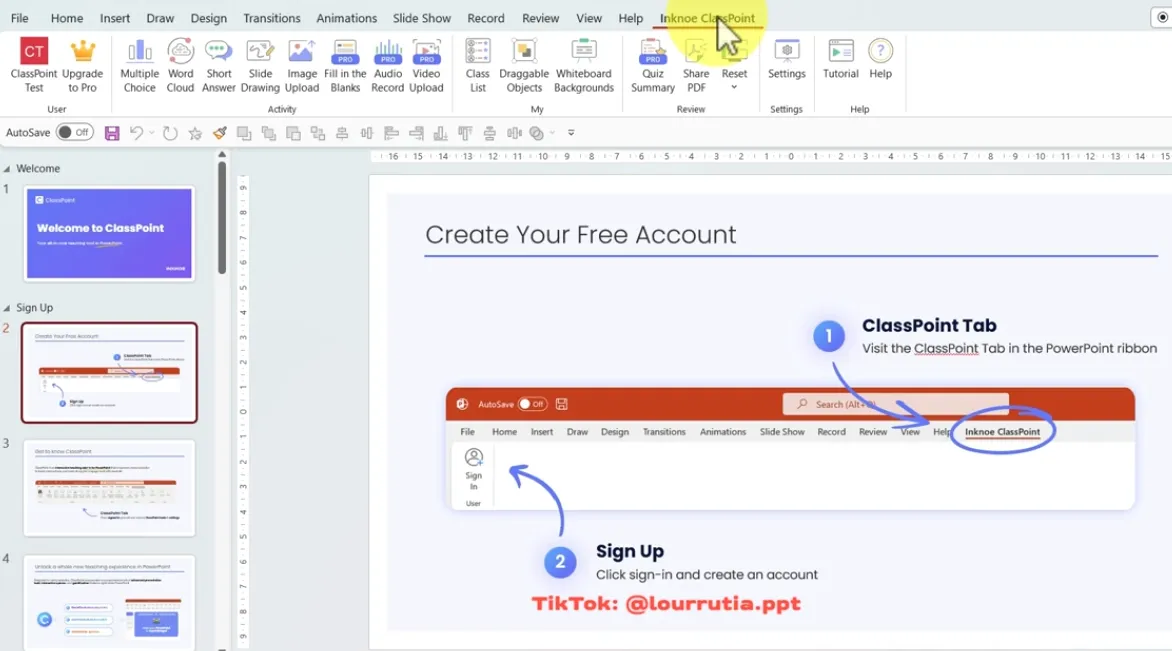
Step 1: Download and Install
Visit classpoint.io and download the free add-in. Run the installer—it takes about two minutes. When you reopen PowerPoint, you’ll see a new “ClassPoint” tab in the ribbon.
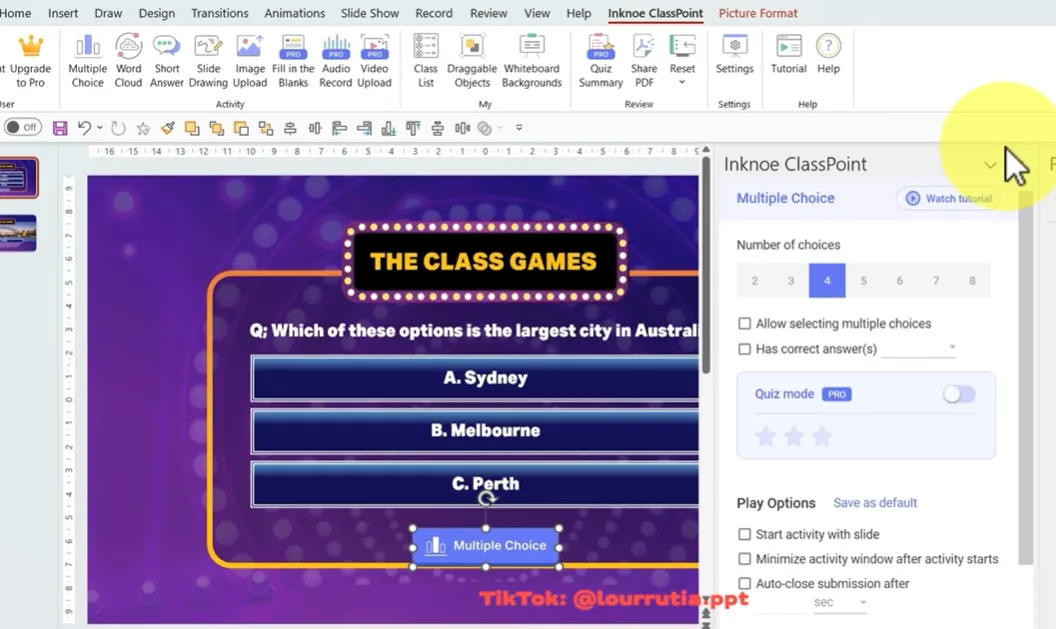
Step 2: Add Interactive Questions
On any question slide, click the ClassPoint tab, then “Multiple Choice.” A button appears on your slide.
A settings panel opens on the right. Configure:
- Number of answer choices (3, 4, 5, etc.)
- Correct answer (for traditional quizzes—skip this for personality assessments)
- Time limits (optional)
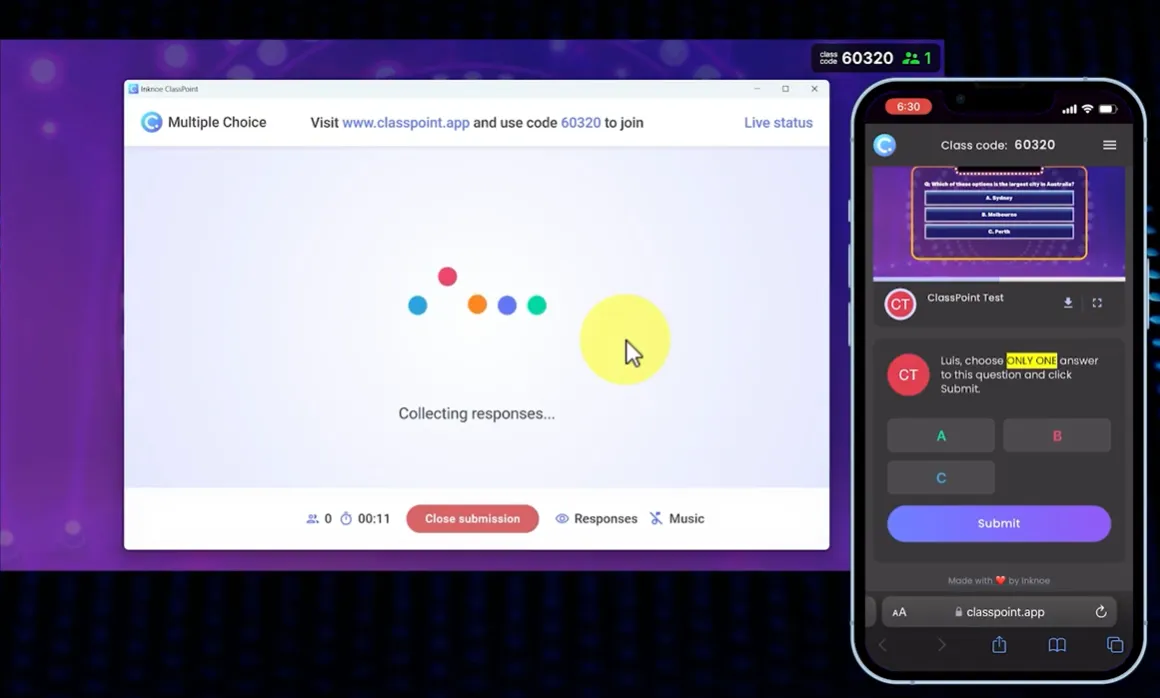
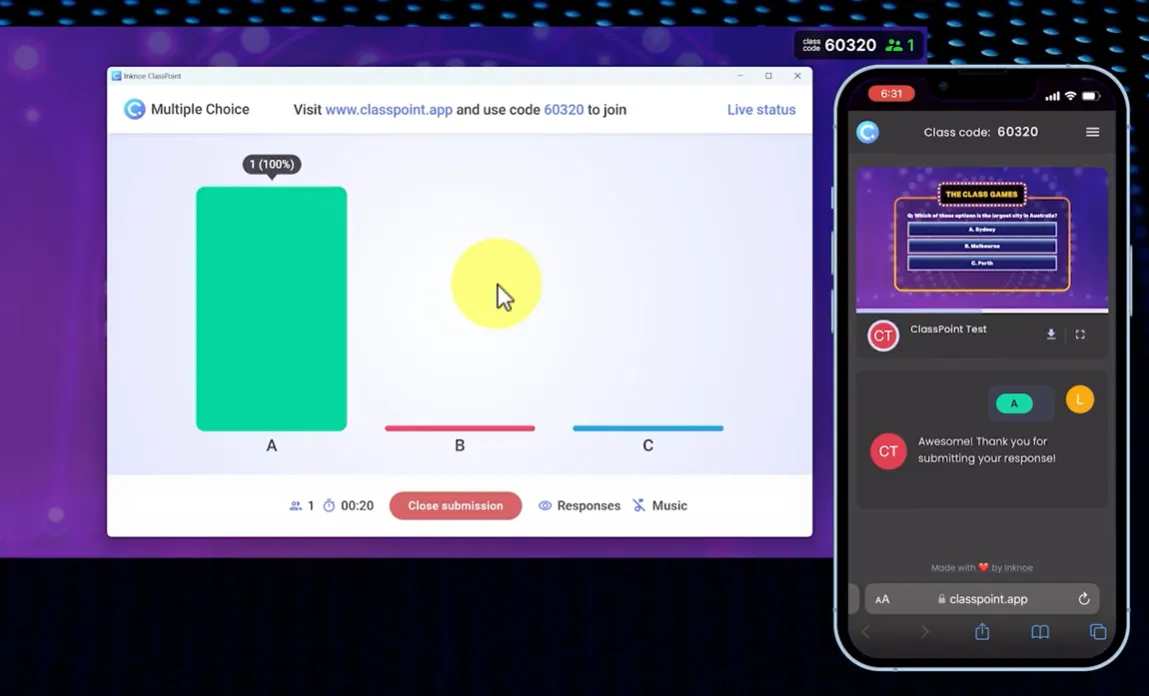
Step 3: Run the Quiz
Enter slideshow mode. A unique code appears on screen (something like “ABC123”).
Participants go to classpoint.app on their devices, enter the code, and create a display name. You see everyone who joins in a sidebar panel.
When you click the ClassPoint button on a question slide, participants see answer choices on their screens. They tap their choice. You watch responses roll in live.
After everyone responds (or time runs out), click “Show Results” to display a bar chart of answer distribution.
Why This Works for Personality Quizzes
ClassPoint isn’t just for right/wrong quizzes. For personality assessments:
You can see trends instantly. If 80% of your team chose “jump in and figure it out,” that reveals something about your organizational culture worth discussing.
It sparks conversation. “Interesting—most of us lean toward collaboration. What does that mean for how we handle independent work?”
Participants stay engaged. Using their own devices feels more personal than raising hands or shouting answers.
Beyond Basic Questions
ClassPoint offers other interactive elements useful for personality quizzes:
- Word Cloud: “Describe your ideal work environment in one word.” Participants type responses; common words appear larger on screen.
- Draggable Objects: “Rank these values from most to least important to you.” Participants drag items on their screens.
- Drawing Tools: Annotate slides during discussion. Circle key results, draw connections between ideas.
After the session, ClassPoint saves all responses. Export them to review patterns, track changes over time, or customize follow-up activities based on results.
Creating Personality Quizzes with AI: OnlineExamMaker
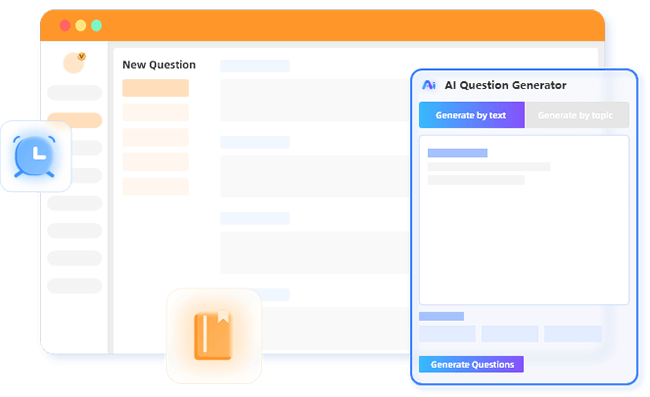
While PowerPoint gives you complete creative control, sometimes you need speed. That’s where OnlineExamMaker comes in—an AI-powered platform that generates personality quizzes in minutes, not hours.
OnlineExamMaker is a comprehensive exam and quiz creation platform with built-in AI capabilities. Unlike PowerPoint, which requires manual construction of every slide and hyperlink, OnlineExamMaker uses artificial intelligence to:
- Generate relevant personality quiz questions based on your topic
- Create balanced answer options that map to different personality types
- Write engaging result descriptions automatically
- Handle all scoring and branching logic behind the scenes
Think of it as having a quiz-design assistant who does the heavy lifting while you focus on customization and delivery.
Create Your Next Quiz/Exam Using AI in OnlineExamMaker
Building a Personality Quiz with OnlineExamMaker AI
Step 1: Sign up and choose “Personality Quiz”
Create a free account at OnlineExamMaker.com. From the dashboard, click “Create New Quiz” to set up a new quiz. This tells the AI to focus on self-discovery rather than right/wrong answers.
The AI uses these as anchors for question generation.
Step 2: Let AI generate questions
Describe your quiz’s purpose in a brief prompt: “Create a personality quiz to help teachers identify their dominant teaching style, focusing on classroom management, student interaction, and content delivery approaches.”
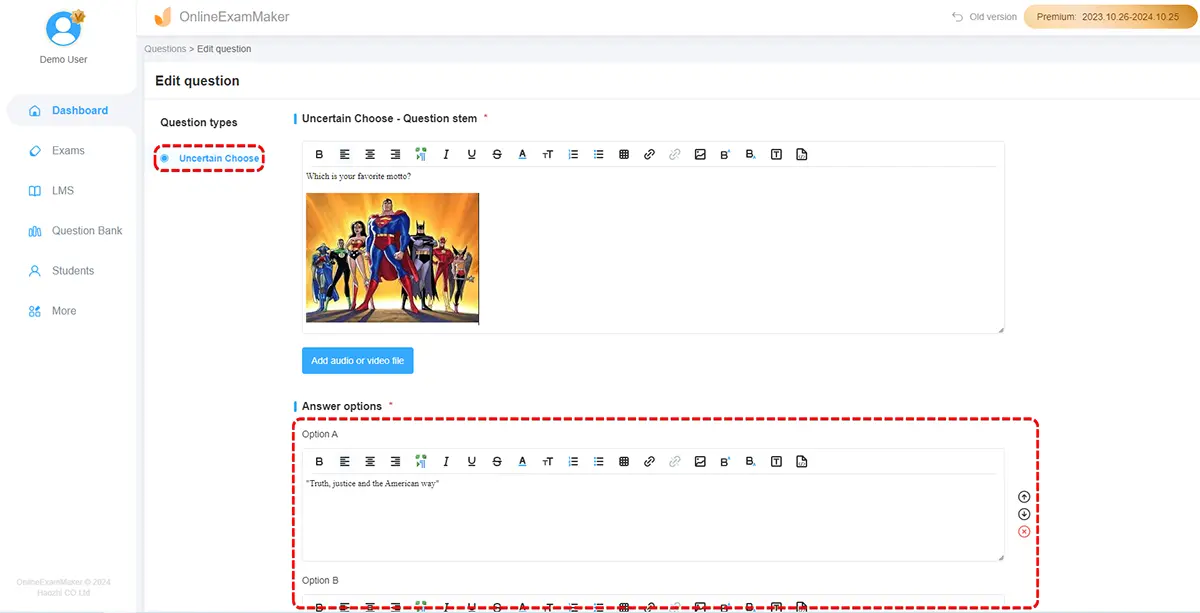
The AI generates 8-12 questions, each with 4 answer options mapped to your personality types. You’ll see questions like:
“When a student struggles with a concept, you’re most likely to…”
- A: Rephrase the explanation in multiple ways (The Lecturer)
- B: Ask guiding questions until they discover the answer (The Facilitator)
- C: Schedule one-on-one time to understand their specific confusion (The Mentor)
- D: Find a creative analogy or hands-on activity (The Innovator)
Step 3: Review and customize
AI gets you 80% there, but your expertise makes it 100% relevant. Edit questions for:
- Industry-specific language (classroom vs. boardroom)
- Cultural appropriateness
- Balance across personality types (ensure each type gets equal representation)
Step 4: Set up scoring logic
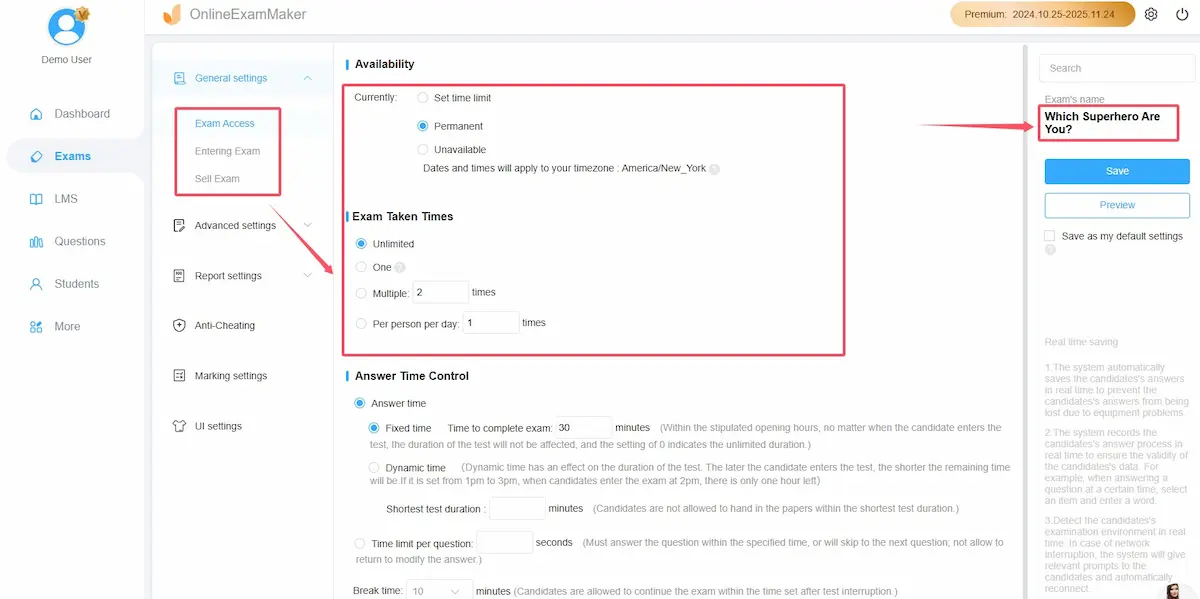
The platform automatically tallies responses and displays the dominant personality type. You can adjust thresholds if needed—for instance, requiring 60% of answers in one category versus a simple plurality.
Step 5: Share and track
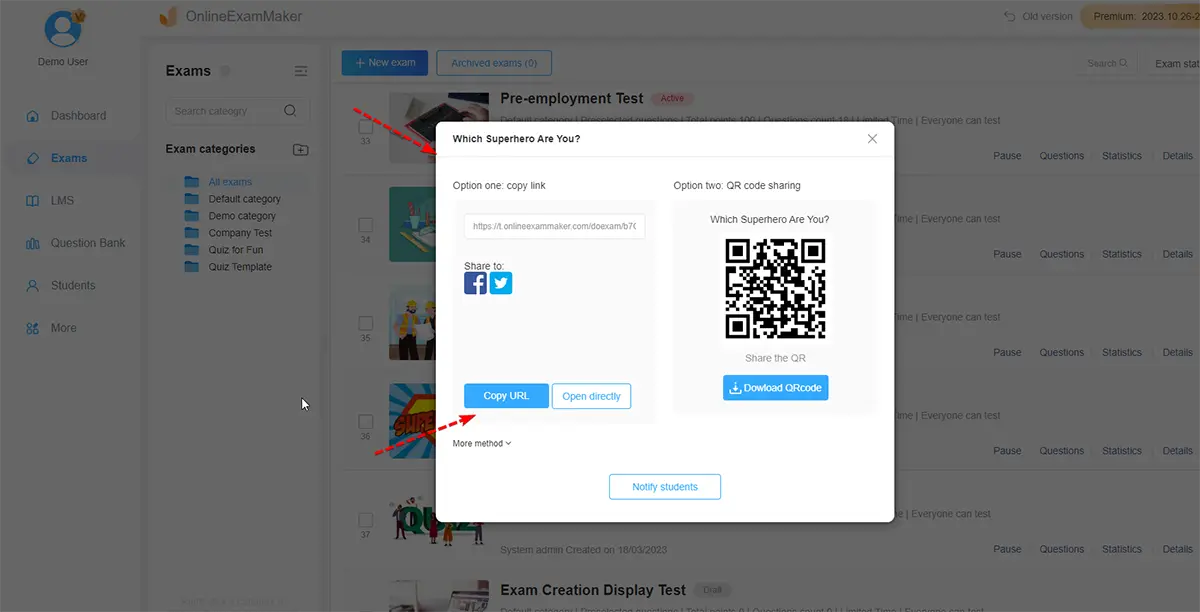
OnlineExamMaker generates a unique URL for your quiz. Share it via:
- Email (individual or bulk send)
- QR code (print for in-person workshops)
- Embedded widget (place on your website or learning management system)
Unlike PowerPoint, which requires in-person facilitation, OnlineExamMaker quizzes run independently. Participants take them on their own time, and you receive completion notifications with results data.
When to Use OnlineExamMaker vs. PowerPoint
Choose PowerPoint when:
- You need complete design control
- The quiz is part of a larger presentation
- You’re facilitating in person and want screen interaction
- You prefer participants to write down answers for reflection
Choose OnlineExamMaker when:
- You need a quiz quickly (minutes instead of hours)
- Participants will take it remotely or asynchronously
- You want automatic data collection and reporting
- You need AI assistance generating balanced questions
Many educators use both: OnlineExamMaker for pre-workshop assessments (participants complete before attending), then PowerPoint with ClassPoint for live discussion of results during the session.
Final Touches and Testing
Before unleashing your quiz on actual humans, test it yourself. Click through every hyperlink. Read every result description aloud—if it sounds wooden or generic, rewrite it.
Add Subtle Animations (Optional)
A little movement adds polish without distraction. Select answer buttons and add a “Fade” entrance animation (Animations tab → Fade). Set them to appear “After Previous” with 0.2-second delays between each.
This creates a smooth reveal: question appears, then answers fade in one by one. It looks intentional rather than static.
Warning: Avoid complex animations like “Fly In” or “Spin.” They break hyperlinks sometimes and slow down the experience. Stick with Fade, Appear, or Wipe.
Test on Different Devices
If using ClassPoint, have a friend join from their phone while you present. Check:
- Can they read answer text clearly?
- Do buttons respond quickly?
- Does the join code display prominently?
For standard PowerPoint quizzes, try it on a projector or large screen. Ensure text is readable from the back of the room.
Prepare Discussion Questions
The quiz itself is just the conversation starter. After revealing results, facilitate reflection:
- “Looking at your result, what surprised you?”
- “How might your personality type influence [relevant scenario]?”
- “What strengths from other types could you develop?”
This transforms a fun activity into genuine learning.
Save as a Template
Once you’ve built one personality quiz, future ones take a fraction of the time. In PowerPoint, go to File → Save As → PowerPoint Template (.potx). Your design, animations, and slide structure save as a reusable starting point.
Next time, just open the template, swap out questions and personality descriptions, and you’re done.
PowerPoint personality quizzes work because they combine structure with flexibility. You control the design, pacing, and depth. Whether you build from scratch, enhance with ClassPoint’s interactivity, or accelerate creation with OnlineExamMaker’s AI, you’re creating moments where people pause and think: “Huh. That’s actually true about me.”
And isn’t that the point? Not to label people but to give them language for self-understanding. Start simple—five questions, three personality types. Test it with a small group. Refine based on reactions. Before you know it, you’ll have a tool that transforms workshops from forgettable to memorable.
Because when people discover something real about themselves—even in a PowerPoint presentation—they remember it.