Hackers, spammers, and trollers are not new to the online setting. However, they can become threats and a hassle when it comes to teaching online. They can infiltrate and sabotage your class at any given time. So, the best way to avoid them and protect yourself from data breaches is by making your class passcode!
Creating a passcode for your online Google Classroom is significant in keeping and managing students. Not only that, but it helps you avoid any unwanted people joining. Also, it’s a good way to keep your class exclusive by providing an extra layer of security. A personal and regularly changed class code helps in safeguarding sensitive student data. It protects both your and your students’ integrity. Here are the best platforms where you can create private and exclusive classes:
- How to Create A Google Classroom Class Code?
- OnlineExamMaker: An Alternative Way to Secure Online Classrooms
- How to Create & Share An Online Course with OnlineExamMaker?
How to Create A Google Classroom Class Code?
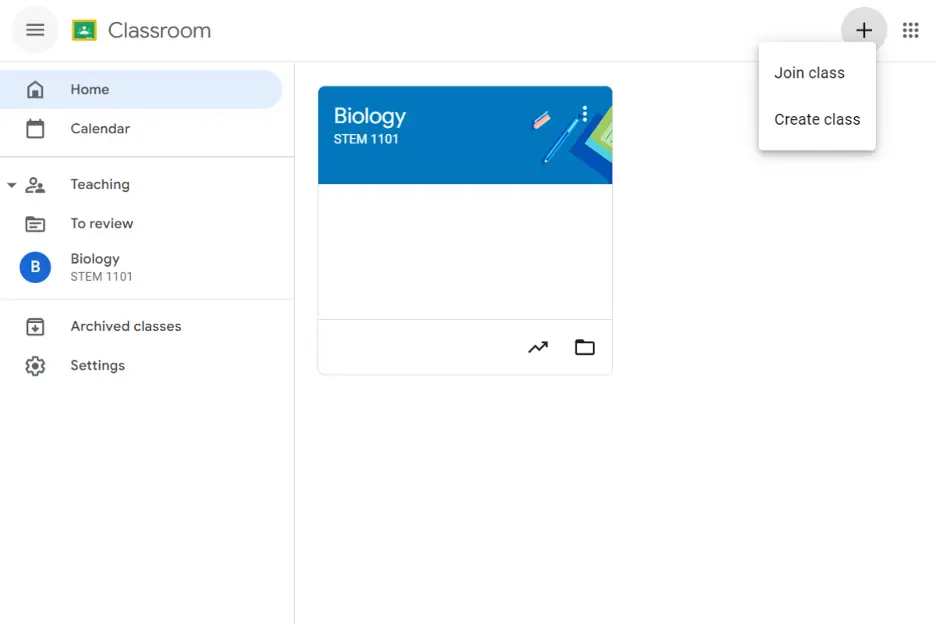
Step 1: Opening Google Classroom
Move to the right side of your screen and click the “+” symbol next to your user icon. After that, click ‘Create Class’ to start!
Before creating a class, a new window will open. Read the notice and assess whether your course will cater to students, or not. After deciding, click ‘Continue’ to start making your private and secure online classroom!
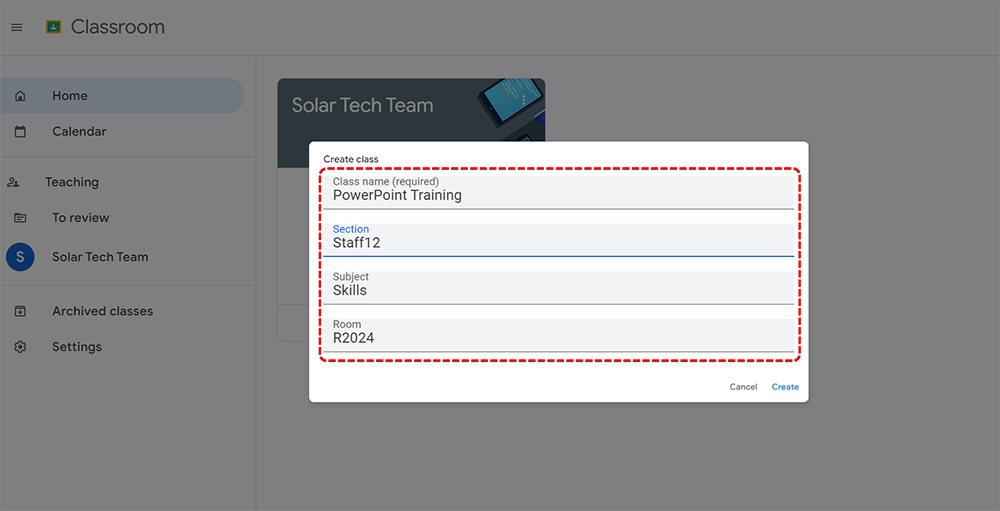
Step 2: Creating a Secured Online Classroom
Label your class/course with a fitting name for your chosen subject. It will help you identify and organize your classes better. Fill in the necessary details of the class, such as the section, subject, and room. After that, click ‘Create’ to finish making your Secured Online Classroom
Step 3: Classroom Customization
In this step, you can modify your class design however you want. You can choose a template Stream Header and Theme Color! Or you can pick an original header of your own making. Click ‘Save’ to apply the changes.

Just so you know
With OnlineExamMaker quiz software, anyone can create & share professional online assessments easily.
Step 4: Modifying Security Settings
Click the ‘Stream Settings’ button to modify your Class Details. You can access the General Settings and Grading Settings. You can edit the details of your class, too! Adjust the stream and classwork on the stream settings, or manage your Google Meet link. You can also decide whether to show or hide your students’ grades and create categories for organizing grades.
Also, you can see the invite code settings where you can change the class passcode as you see fit.
Step 5: Sharing the Class to Students
Copy the private and secured class code or invite link for your class and send it to your students so they can enroll. You can also turn off the class code once your students are complete!

OnlineExamMaker: An Alternative Way to Secure Online Classrooms
OnlineExamMaker is an all-in-one platform that can be a course maker, LMS, Quiz Maker, and more! This platform has stable and secured servers that can handle any security threats. You can manage your courses and classes all at once. And you won’t have to worry about your servers crashing.
OnlineExamMaker is secure and steadfast in terms of security and data privacy. Its design is user-friendly and easy to use! With OnlineExamMaker, you can host secure quizzes and assignments. You can create the secured class code for your class with the help of OnlineExamMaker!
Create Your Next Quiz/Exam with OnlineExamMaker
How to Create & Share An Online Course with OnlineExamMaker?
Step 1: Create A Course on OnlineExamMaker LMS
Go to the left side of the new dashboard and hover over “LMS” and click “Courses”.
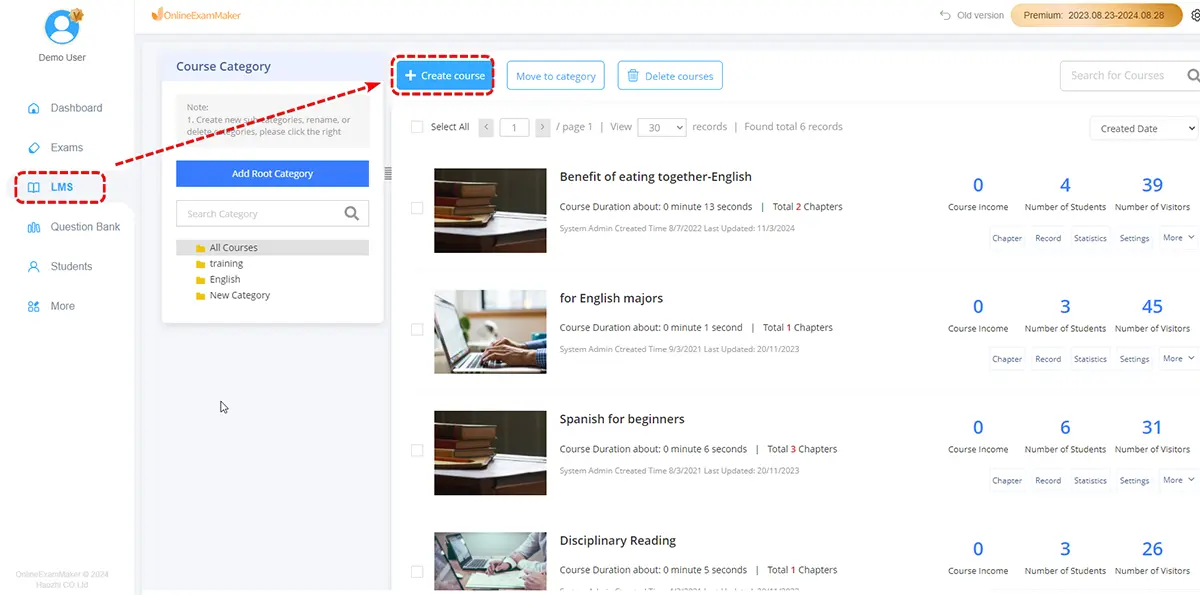
After that, click the “+ Create Course” button to start making your exclusive and private online class.
Step 2: Fill Class Details

In this step, you need to fill in the important details of the Private Class. Choose a class title, add a short description or introduction, and select the category. You can choose a template cover or a class banner of your own making.
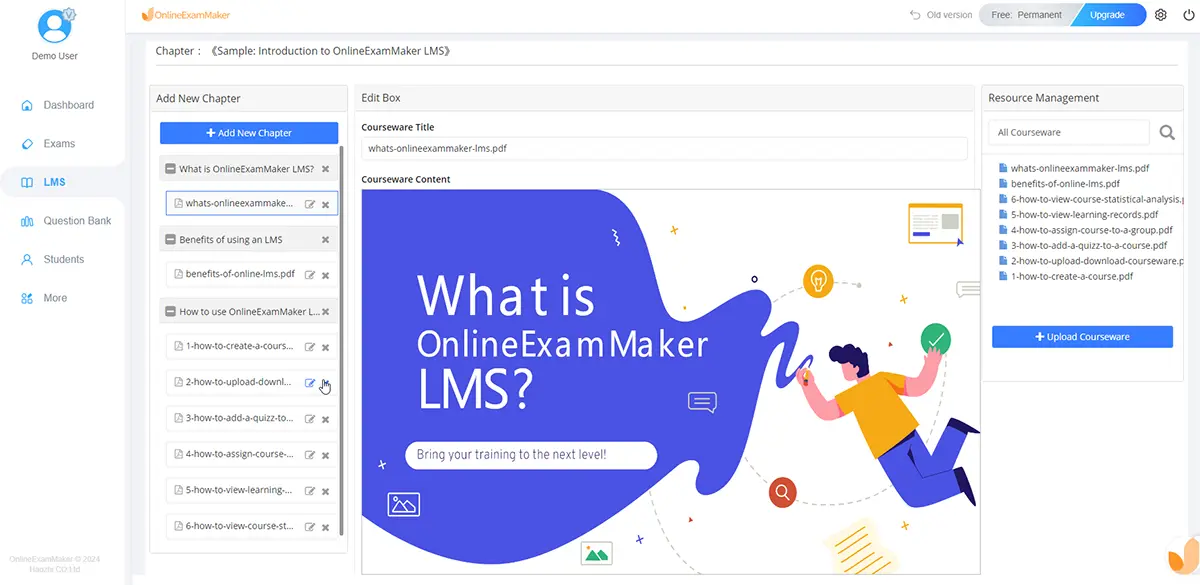
Step 3: Adding Chapters and Courseware

In this step, you can add lessons or course chapters to your course. It could be slides, PDF files, and other documents. After creating the chapters and the courseware, just drag and drop them on the right of each chapter.
Step 4: Customizing Course Settings
Modify the Private Class settings and terms to ensure maximum security. OnlineExamMaker provides different course settings such as class availability, labeling, learning permissions, difficulty levels, validity periods, anti-cheating measures, and more! Click ‘Finish’ to publish your Private Class.
Step 5: Sharing Your Course Link
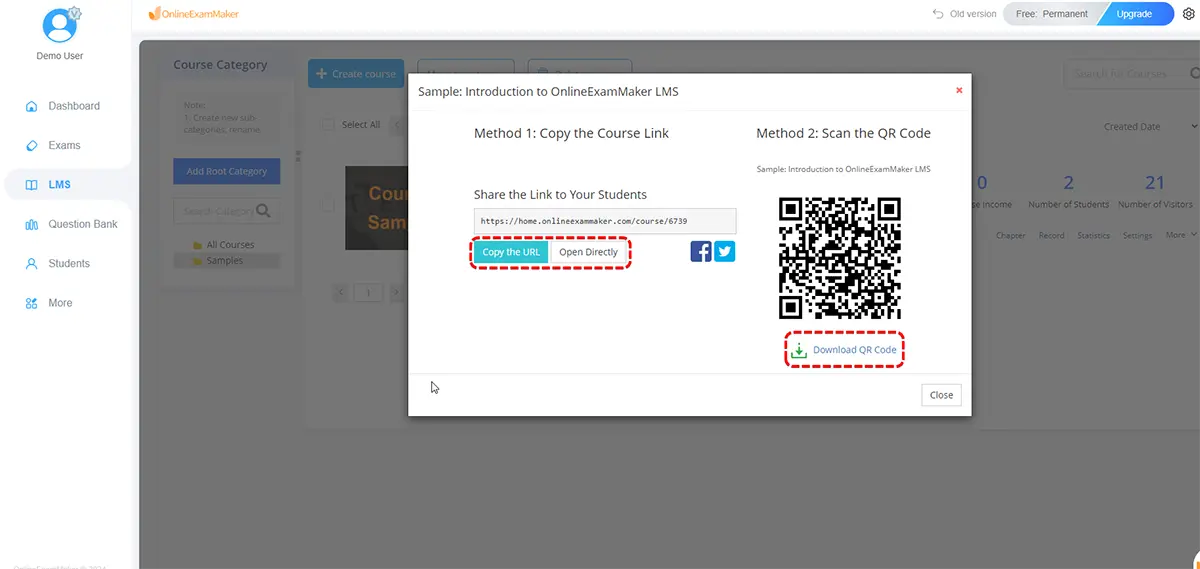
After publishing the class you made, you can copy the custom-made link and QR Code for easy sharing. You can share them directly with your students to ensure that the class remains exclusive and private!