- Why PowerPoint Quizzes Still Matter in 2026?
- Building Your Basic Quiz Template
- The No-Code Color-Change Method
- The VBA Approach for Advanced Scoring
- Beyond PowerPoint: OnlineExamMaker’s AI Solution
- FAQs about Self Grading Assessment in PowerPoint
Why PowerPoint Quizzes Still Matter in 2026?
The beauty of self-grading quizzes in PowerPoint isn’t just convenience—it’s about meeting students where they already are. No new platform to learn. No login headaches. Just pure, straightforward assessment that works whether you’re in a classroom, running a training session, or facilitating a remote workshop.
Think of it this way: while other educators wrestle with clunky quiz platforms that require seventeen passwords and a minor in computer science, you’ll be creating engaging assessments in the software you already know. That’s not lazy—that’s smart.
Building Your Basic Quiz Template
Let’s start with the foundation. Every great quiz begins with solid structure, and thankfully, PowerPoint makes this remarkably painless.
Setting Up Your Question Slides
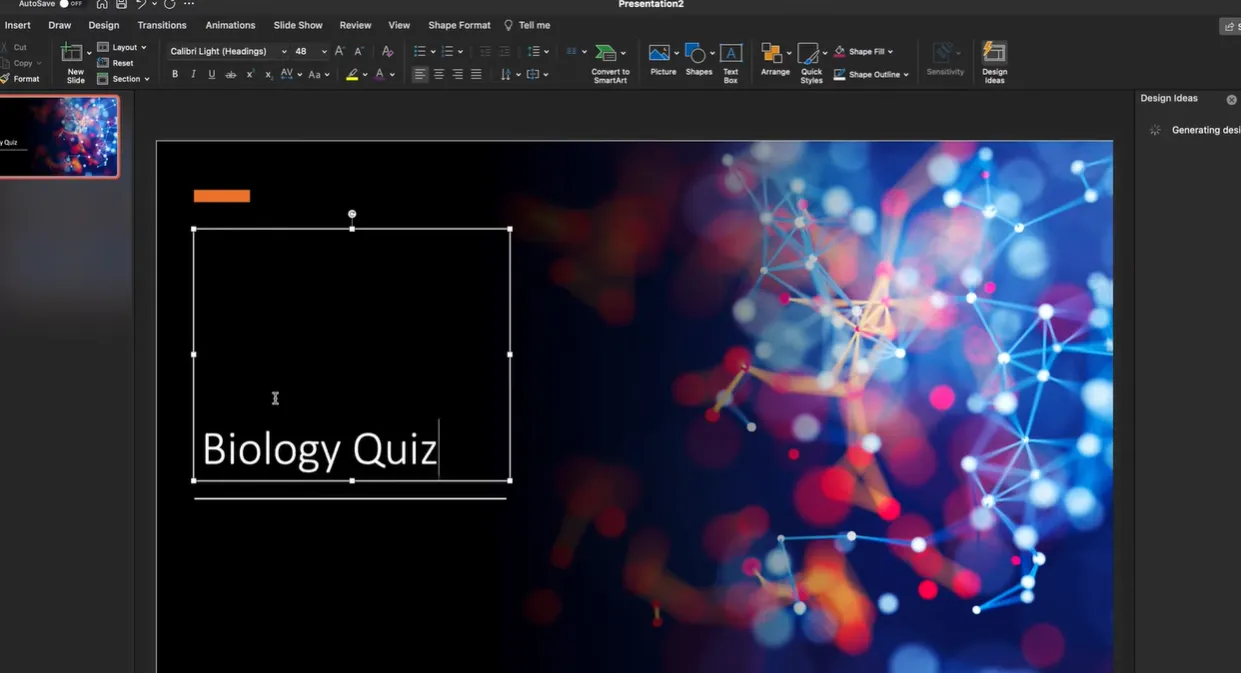
First things first: decide your quiz length and question type. Multiple choice works beautifully here because it’s clean, quick, and easy to automate. Start with a title slide—something simple like “Biology Quiz” or “Marketing Fundamentals Test”—then create individual question slides.
Here’s where design meets function. For each question slide, you’ll need:
The question text at the top – Keep it clear and concise. Nobody wants to read a paragraph when they’re trying to focus on answering correctly.
Answer option shapes – Create 3-5 separate shapes (rectangles work great, rounded rectangles look even better) for your answer choices. Insert these through the Insert menu, then select Shapes.
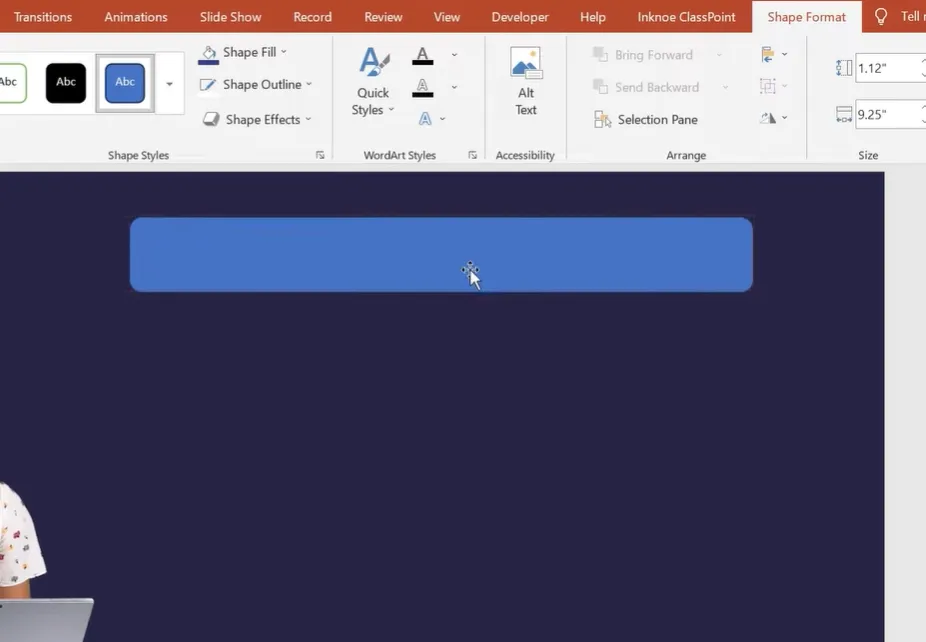
Pro tip: format your background first to match your theme or brand colors. It takes thirty seconds and makes everything look exponentially more professional. Then duplicate your shapes by pressing Ctrl+D rather than creating each one individually—your future self will thank you.
Creating Feedback Slides
Every question needs two companion slides: one for correct answers, one for incorrect ones. This is where the “self-grading” magic happens.
Your “Correct!” slide should include encouraging text, maybe a brief explanation of why that answer is right, and a “Next Question” button. The “Incorrect” slide? Similar setup, but with gentler language—nobody likes feeling dumb, even when they’re wrong.
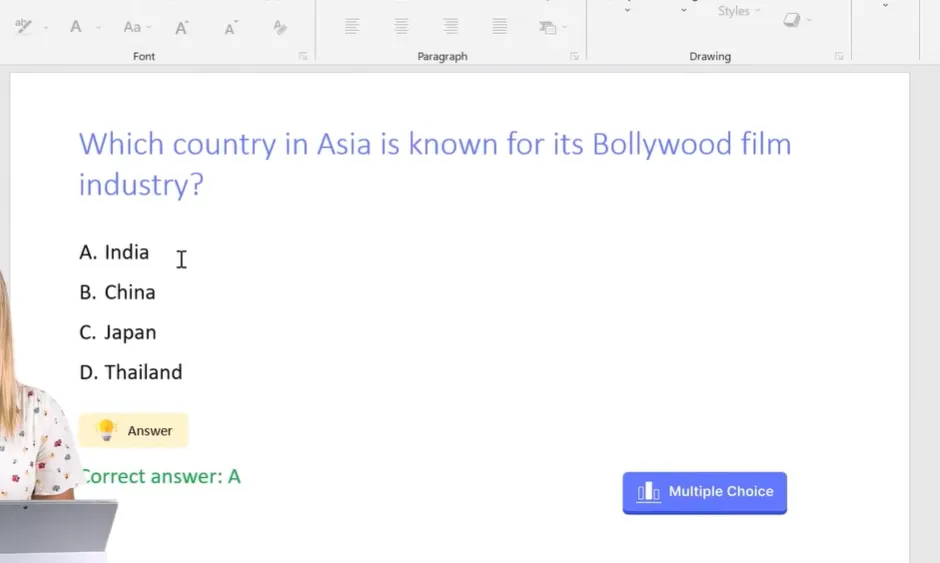
The brilliant part: you’ll use hyperlinks to branch students to the appropriate feedback slide based on what they click. It’s like choose-your-own-adventure, except with learning outcomes.
The No-Code Color-Change Method
Want something visual and immediate? The color-change method is absurdly satisfying.
Here’s how it works: you’ll use PowerPoint’s animation features to make answer buttons change color when clicked. Green for correct, red for incorrect. It’s intuitive, it’s instant, and students love it.
Setting Up the Animations
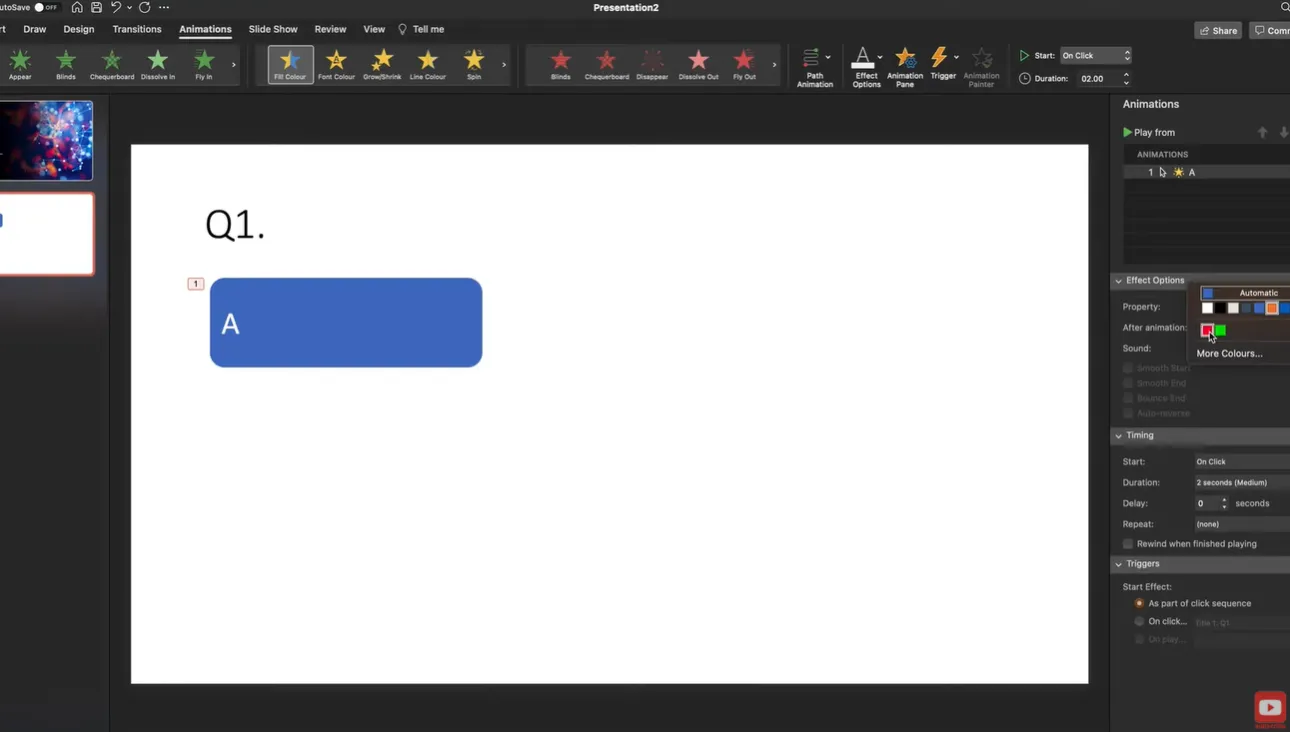
Select your first answer button. Go to the Animations tab, then click “Animation Pane” to open the side panel. Now here’s the trick: look for the “Fill Color” effect in the animation options. Click it, and you’ll see a little star icon with a cog—that’s your gateway to customization.
For the correct answer, choose green. Set it to trigger “On Click” so it happens immediately when students select that option. For incorrect answers, you guessed it—red.
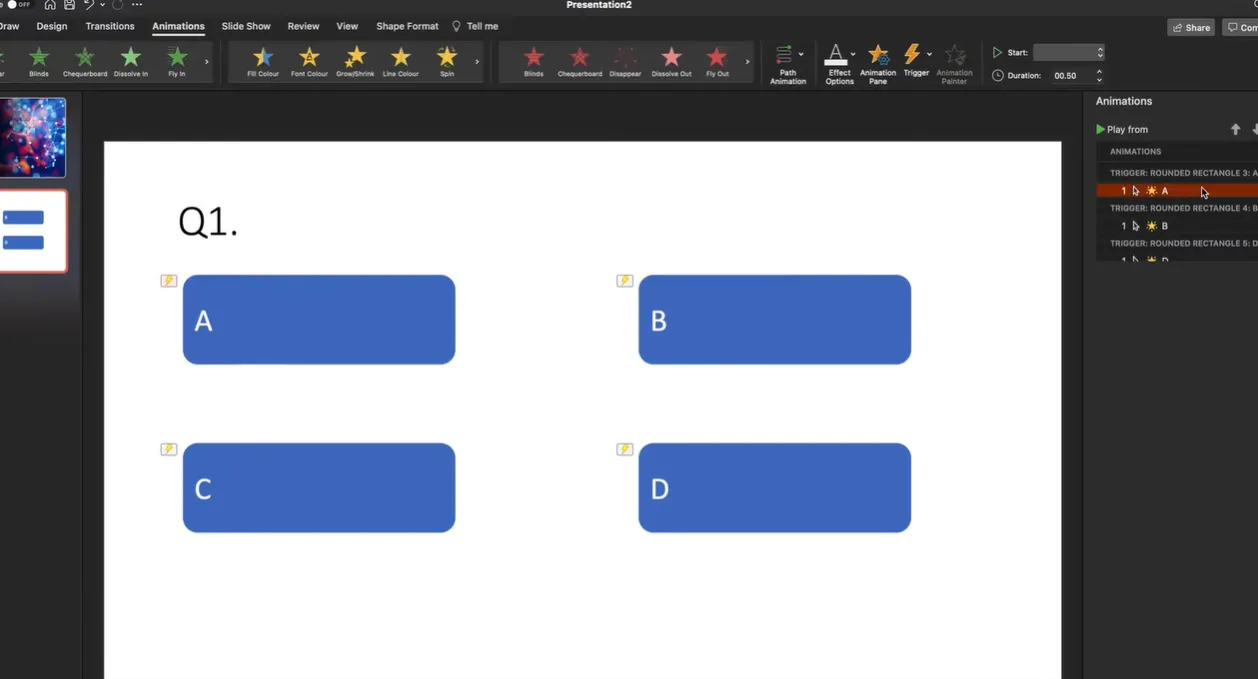
The genius here is simplicity. No complex branching, no hidden slides—just clear visual feedback that works instantly. Copy your animated button, paste it three more times, change the text for options B, C, and D, and adjust the colors for each button based on whether they’re correct or incorrect.
Adding Audio Elements
Want to take it up a notch? Record audio for your questions. Go to Insert > Audio > Record Audio. This works wonders for accessibility, younger students, or simply adding personality to your quiz.
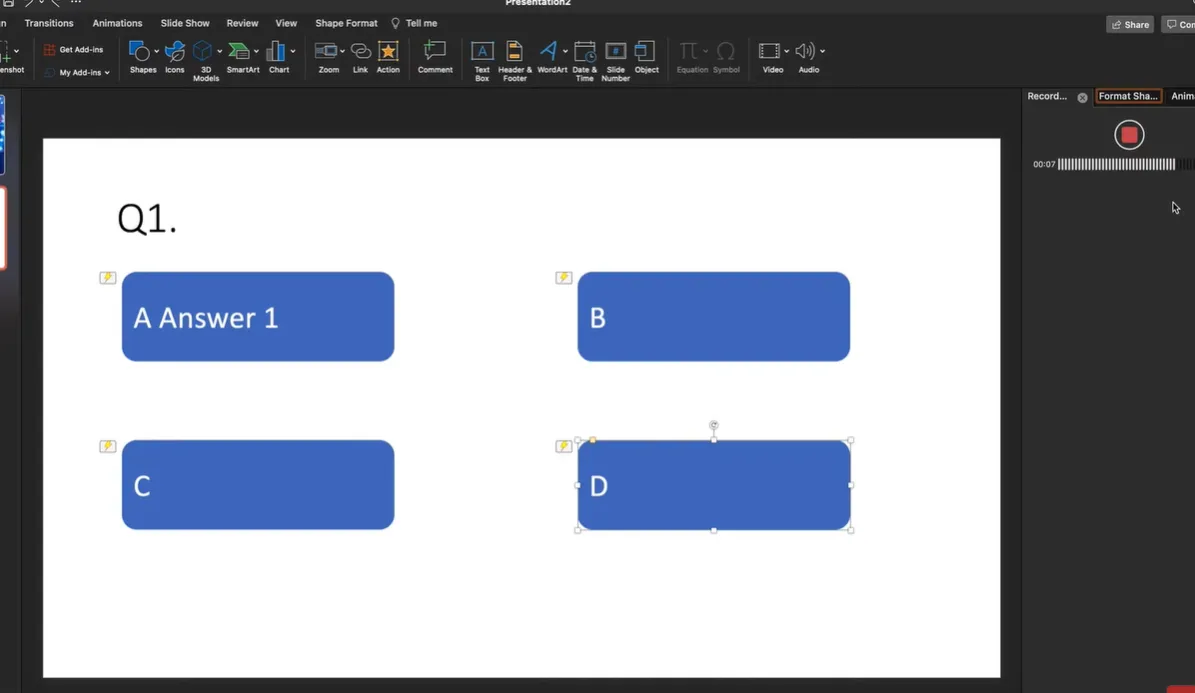
Record your question, click Insert, and boom—you’ve got a speaker icon on your slide. Students can click to hear the question read aloud. Simple. Effective. Actually inclusive.
The VBA Approach for Advanced Scoring
For those who want complete automation without internet connectivity or third-party tools, Visual Basic for Applications (VBA) offers a powerful solution. Fair warning: this requires macros, so check if they’re allowed in your environment first.
Setting Up the Macro-Enabled File
Save your presentation as a PowerPoint Macro-Enabled Presentation (.pptm) file. Go to File > Save As and select that format from the dropdown.
Press Alt+F11 to open the VBA editor. In the Project pane, double-click “ThisPresentation” and paste this code:
Public Score As Integer

Sub ResetScore()
    Score = 0
End Sub

Sub CorrectAnswer()
    Score = Score + 1
End Sub
This creates a score variable and two macros: one to reset the score to zero at quiz start, another to add a point for each correct answer.
Connecting Macros to Buttons
On your title slide, create a “Start Quiz” button. With it selected, go to Insert > Action > Run Macro, choose ResetScore, then add a hyperlink to your first question slide.
For each question’s correct answer button, set it to run the CorrectAnswer macro (Insert > Action > Run Macro) and link to your “Correct!” feedback slide. Incorrect answers just get hyperlinks to the “Incorrect” slide—no macro needed.
Displaying the Final Score
Create a Results slide with a text box saying something like “Your score: X / 10”. Name this text box “txtScore” using the Selection Pane (Home > Arrange > Selection Pane).
Back in the VBA editor, add this code:
Sub ShowFinalScore()
    Dim sld As Slide
    Set sld = ActivePresentation.Slides("Results")
    sld.Shapes("txtScore").TextFrame.TextRange.Text = "Your score: " & Score & " / 10"
End Sub
On your last feedback slide, add a “See Results” button that runs ShowFinalScore and links to your Results slide. When clicked, it displays the accumulated score.
Beyond PowerPoint: OnlineExamMaker’s AI Solution
Let’s be honest: PowerPoint is fantastic for quick quizzes and classroom engagement, but what if you need something more robust? What if you’re managing hundreds of students, need detailed analytics, or simply want to save hours of setup time?
Enter OnlineExamMaker, a dedicated exam platform that takes the automation concept and runs with it—straight into the future.
Create Your Next Quiz/Exam Using AI in OnlineExamMaker
AI-Powered Automatic Grading
Here’s what makes OnlineExamMaker compelling: its AI doesn’t just grade multiple choice questions (PowerPoint can handle that). It grades essay questions, short answers, and complex responses with remarkable accuracy. We’re talking about technology that understands context, evaluates reasoning, and provides meaningful feedback—all automatically.
According to recent education technology research, AI-powered grading systems can reduce instructor grading time by up to 75% while maintaining consistent evaluation standards. That’s not just convenience—that’s transformative.
Features That Actually Save Time
OnlineExamMaker’s AI question generator creates exam content from your uploaded materials—textbooks, lecture notes, even existing PowerPoints. Upload a document, specify the question types and difficulty levels you want, and watch it generate a complete exam in minutes.
The automatic grading extends beyond simple right-or-wrong answers. The platform evaluates partial credit, identifies common mistakes, and even provides personalized feedback to students based on their specific errors. It’s like having a teaching assistant who actually read the rubric and understands nuance.
For exam organizers and HR managers running assessments at scale, the time savings compound rapidly. One university reported reducing their exam grading workload from 200+ hours per semester to less than 50 hours—and that’s with more detailed feedback to students.
When to Choose Each Tool
PowerPoint excels for: quick classroom checks, presentation-integrated assessments, offline environments, simple multiple-choice quizzes, and situations where you already have PowerPoint content ready.
OnlineExamMaker shines when you need: comprehensive exam management, advanced analytics and reporting, essay and short-answer grading, large-scale assessments across multiple classes or departments, and detailed tracking of student progress over time.
Think of PowerPoint as your everyday tactical tool and OnlineExamMaker as your strategic weapon. Both have their place in your assessment arsenal.
FAQs about Self Grading Assessment in PowerPoint
Can I use these quizzes offline?
The color-change method and VBA approach work completely offline. ClassPoint requires internet connection for the live participation features, but you can still use its AI question generator offline if you’ve already downloaded the add-in.
How do I prevent students from seeing the VBA code and answers?
In the VBA editor, right-click your project, select VBAProject Properties, go to the Protection tab, check “Lock project for viewing,” and set a password. This prevents students from accessing the code to see answers or modify scores.
What if I have more than four answer choices?
Simply duplicate additional answer buttons and arrange them on your slide. The techniques work with any number of options—five, six, even eight if your question demands it. Just make sure buttons are large enough to click easily.
Can I mix question types in one quiz?
Absolutely. You could have multiple-choice questions alongside true/false questions, image-based questions, or even short-answer questions (though those would require manual grading unless you’re using a platform like OnlineExamMaker). Just maintain consistent navigation and visual design.
How do I share these quizzes with students?
For in-person classes, just present the slides on a screen or interactive whiteboard. For remote learning, share your screen via Zoom or Teams. If students need independent access, save the file to OneDrive or Google Drive and share a link, or embed it on your learning management system.
Will this work on Mac or just Windows?
The basic color-change method works on both Mac and Windows. VBA functionality is available on both platforms but may have slight differences—test thoroughly on your specific system. ClassPoint works on both operating systems as well.
How long does it take to create a 10-question quiz?
Once you’ve built your template slides (about 15-20 minutes for your first quiz), adding questions is quick—maybe 2-3 minutes per question if you’re typing them yourself, faster if you’re using AI generation. So figure about 45 minutes total for your first quiz, then 20-30 minutes for subsequent quizzes using the same template.
Can students retake the quiz?
In the basic PowerPoint versions, yes—just restart the presentation. With ClassPoint, you can generate a new class code for a retake session. For the VBA version, make sure your ResetScore macro runs when students restart.