Remember when teaching was as simple as walking into a classroom with a stack of papers and a piece of chalk? Yeah, those days feel like ancient history now. Today’s classroom stretches beyond four walls—it lives in the cloud, bounces between Chrome profiles, and occasionally refuses to cooperate when you need it most. Welcome to the beautiful chaos of digital education.
If you’re a teacher, trainer, or HR manager trying to wrangle Schoology, Zoom, and a dozen different student profiles into something resembling organized learning, you’ve landed in the right place. This isn’t going to be some robotic instruction manual that puts you to sleep. We’re going to walk through this together, the way a colleague would explain it over coffee—complete with the quirks, the gotchas, and the “oh THAT’S why it wasn’t working” moments.
- The Profile Problem: Why Your Students Keep Getting Lost
- The Mystery of the Missing Bookmarks
- Zoom: The Other Piece of the Puzzle
- Schoology: Where Learning Actually Happens
- The Google Drive Connection: Don’t Skip This Step
- Working Through Assignments (Without Losing Your Mind)
- How OnlineExamMaker Enhances Your Teaching Toolkit?
The Profile Problem: Why Your Students Keep Getting Lost
Here’s the thing about Chrome profiles that nobody tells you upfront: they’re both a blessing and a curse. On one hand, multiple people can use the same device. On the other hand, your students are accidentally living in three different digital universes at once.
Think about this: Little Timmy tries to access his science class. But instead of signing in with his school account, he’s using his personal Gmail—the one he created to watch Minecraft videos. Suddenly, none of his bookmarks appear. His Schoology courses vanish into thin air. Zoom asks him to sign in like they’ve never met. You get a panicked email at 10 PM. Sound familiar?
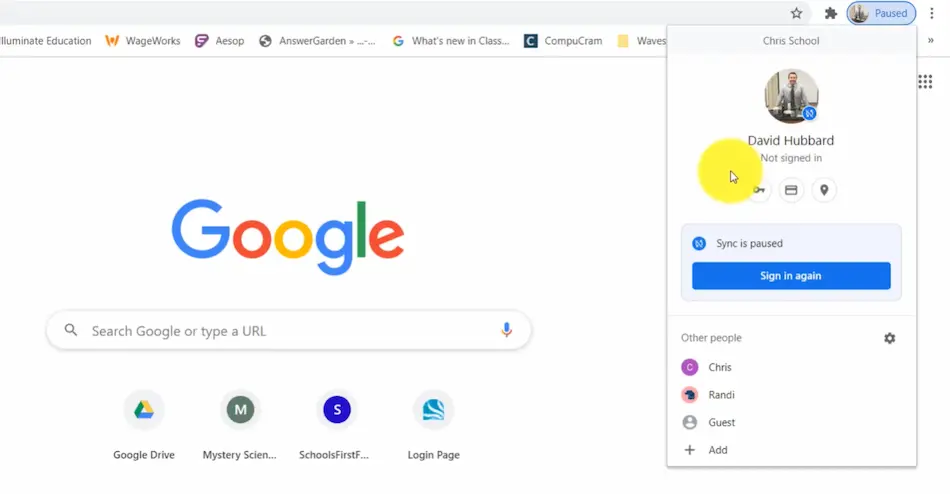
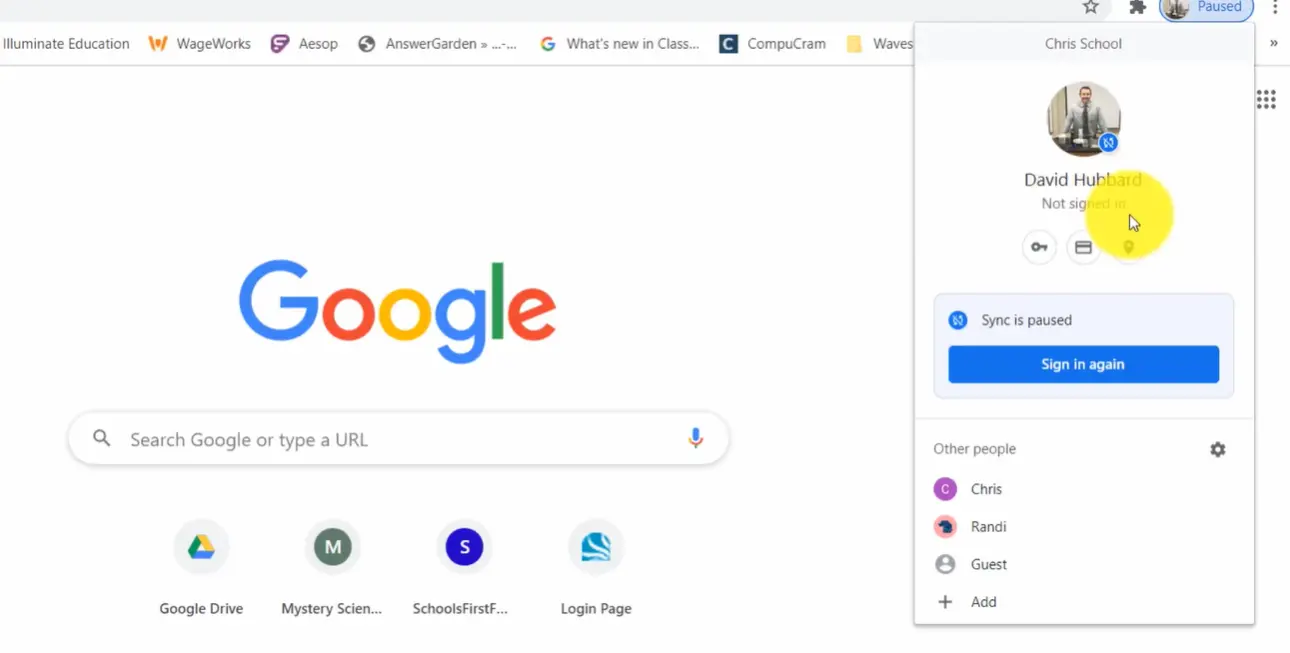
The solution starts with something deceptively simple: checking which profile you’re actually using. Look at the upper right corner of Chrome. See that little circular icon? That’s your profile picture. If it’s showing a generic silhouette or their personal photo instead of their school district picture, Houston, we have a profile problem.
Getting Into The Right Profile (And Staying There)
When a student clicks that profile icon and it prompts them to sign in, they need to authenticate with their district credentials. Not their personal email. Not their parent’s account. Their actual school-issued email address.
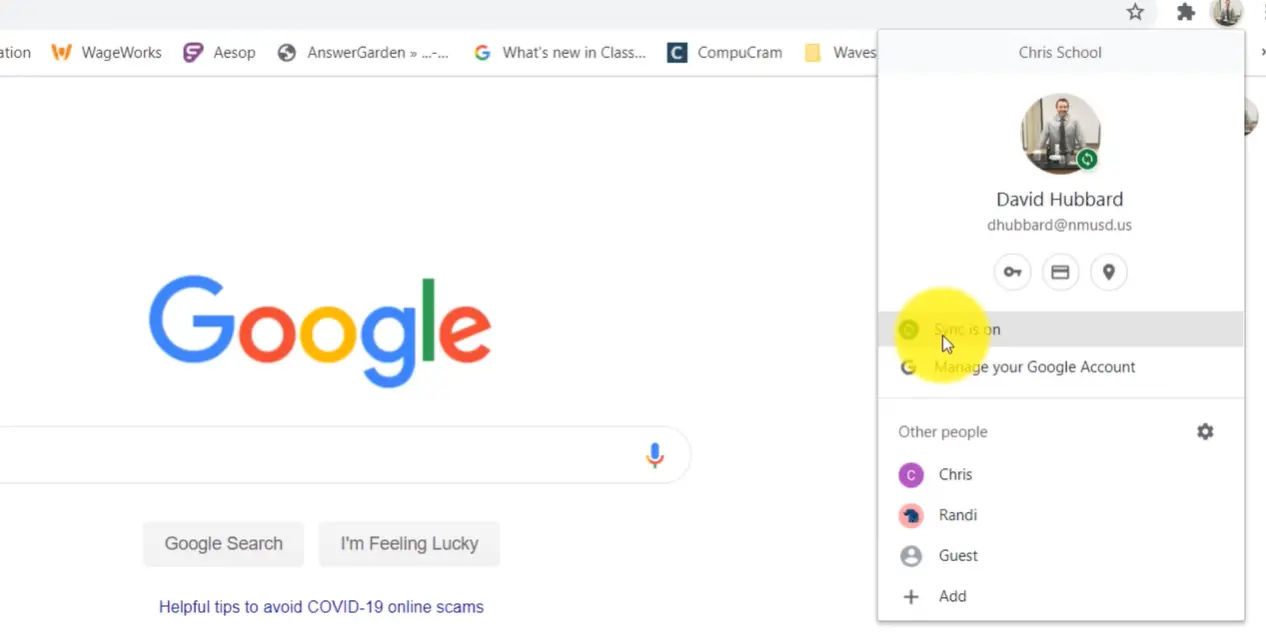
Once they’re signed in properly, Chrome will remember them—but only if sync is turned on. And here’s where it gets interesting. Many students have sync disabled without realizing it, which means all those carefully curated district bookmarks you’re relying on? They’re invisible.
The Mystery of the Missing Bookmarks
Let’s talk about those district bookmarks for a moment. They’re supposed to be the golden pathway to everything students need—Schoology, Zoom, all their learning tools lined up like helpful little soldiers. But what happens when they’re just… not there?
First, confirm the obvious: Is the student signed into their district profile? Check. Is sync enabled? If the answer to both is yes and the bookmarks still haven’t appeared, there’s one more culprit: the bookmarks bar itself might be hidden.
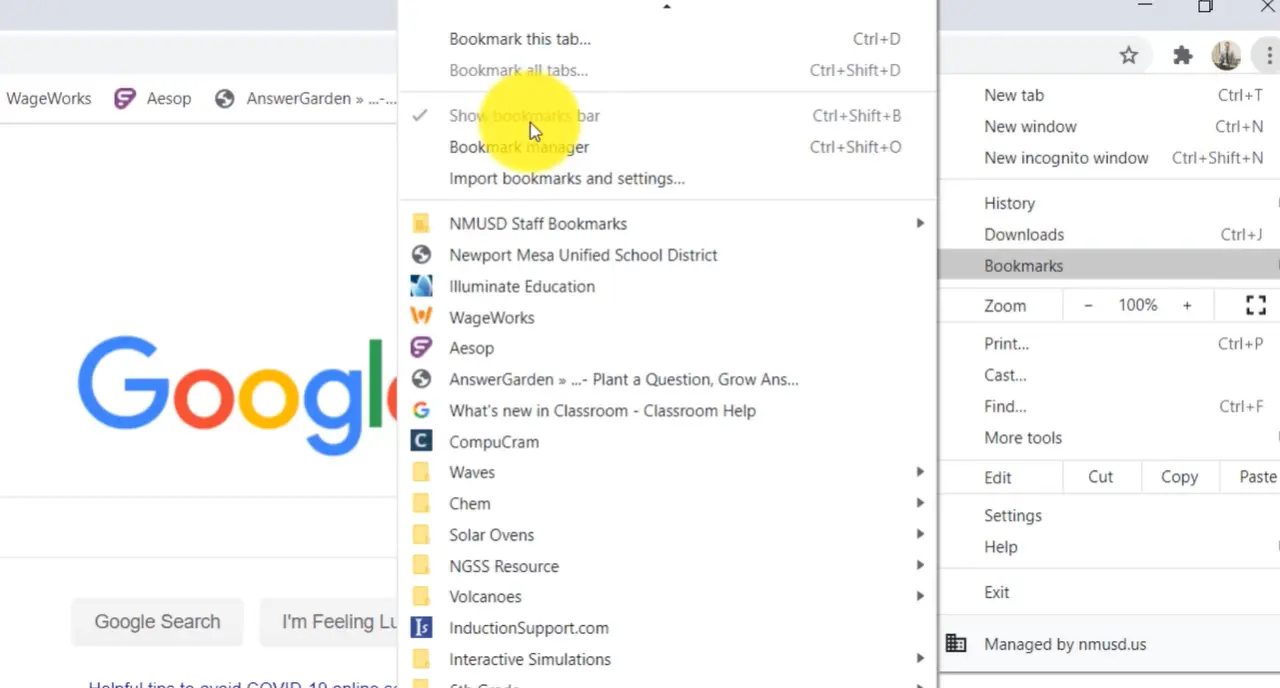
Here’s the fix: Click those three vertical dots in the upper right corner (you know the ones—they’re Chrome’s way of saying “more stuff lives here”). Navigate to Bookmarks, then look for “Show bookmarks bar.” If that option isn’t checked, click it. Watch the magic happen as all those missing shortcuts suddenly materialize.
Why does this matter so much? Because these bookmarks aren’t just convenient shortcuts—they’re authentication pathways. When students click the Schoology bookmark from the district folder, they’re taken to a URL that prompts proper sign-in. When they Google “Schoology” and click a random link? All bets are off.
Pro tip: Teach students to use the bookmarks religiously. It’s like teaching them to use the front door instead of climbing through windows. Sure, they might get inside either way, but one method causes significantly fewer problems.
Zoom: The Other Piece of the Puzzle
So your students have their profiles sorted and their bookmarks visible. Excellent. Now let’s talk about actually joining a Zoom meeting without requiring a computer science degree.
Even if a student is signed into Chrome with their district account, they need to authenticate separately in Zoom. Think of it like having keys to the building but still needing a separate key for your classroom. When students navigate to Zoom through their district bookmarks, they’ll see a “Sign in” prompt.
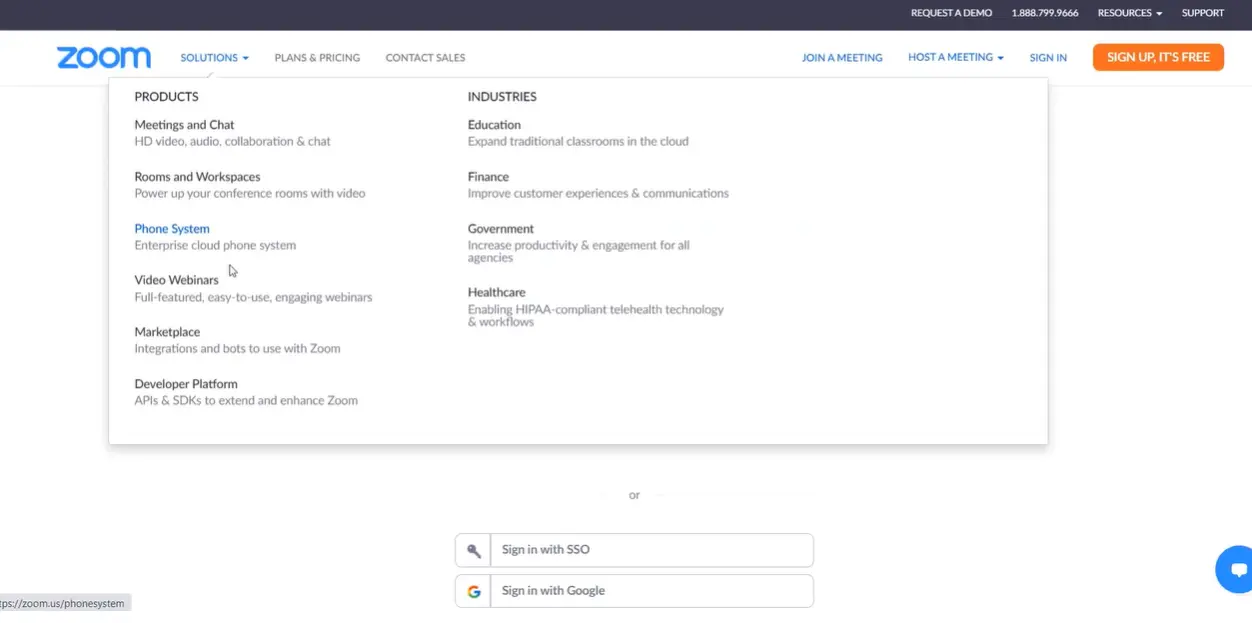
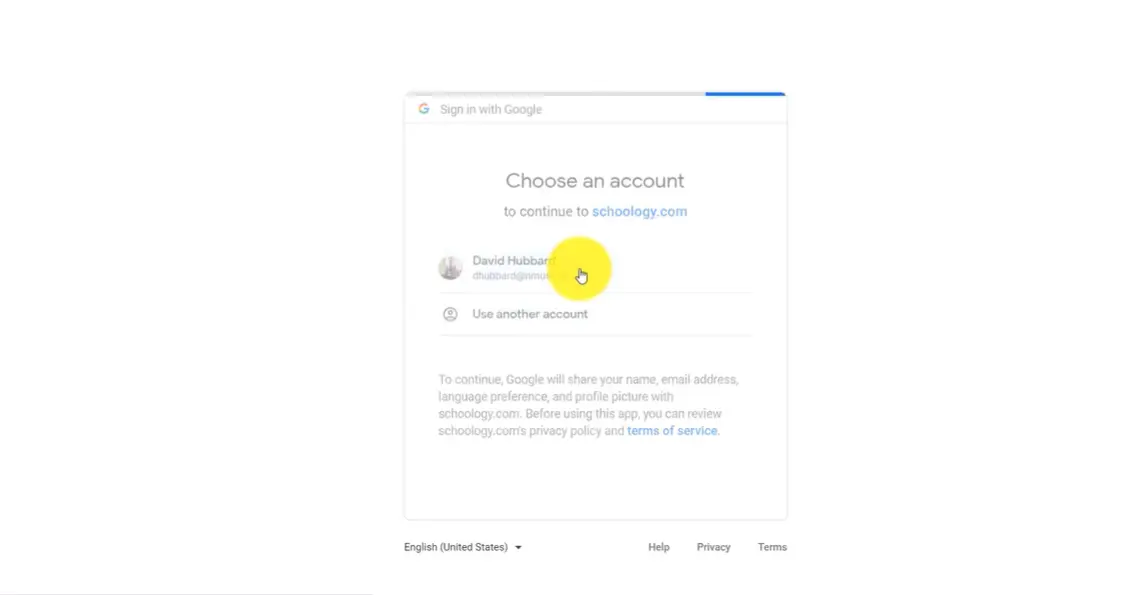
The golden words they’re looking for: “Sign in with Google.” Click that button, confirm they’re using their district account, and suddenly they’re looking at their schedule of upcoming meetings. No random meeting IDs to memorize. No passwords to forget. Just clean, simple access to their classes.
Schoology: Where Learning Actually Happens
Alright, profiles are set. Bookmarks are showing. Zoom is authenticated. Now comes the main event: getting students into Schoology and keeping them there.
Every student in your district has a Schoology account. It was created automatically by your IT department, which is both convenient and slightly creepy when you think about it. But when students first visit Schoology, they need to—you guessed it—authenticate again.
The Course Conundrum: Join vs. Auto-Enroll
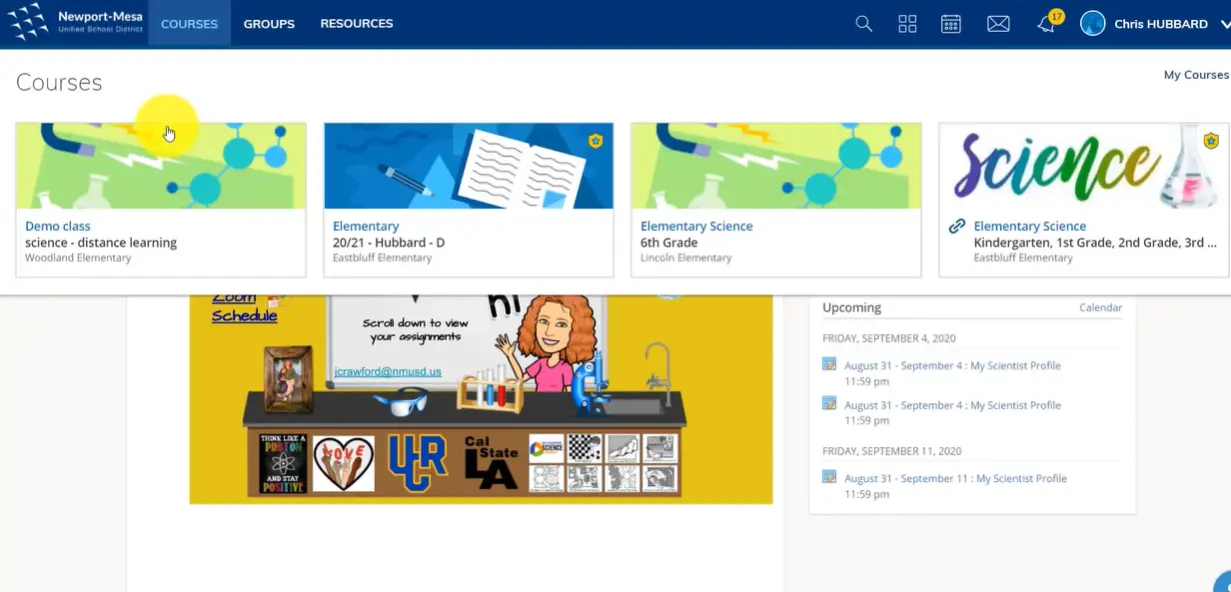
Here’s where teachers have different approaches, and it matters. Some teachers (particularly those working with younger students) have pre-enrolled their entire class roster. When these students log into Schoology, their courses magically appear under the “Courses” dropdown menu. It’s like finding presents under the tree—you don’t question how they got there, you just enjoy them.
Other teachers (often those with older students) provide a course access code instead. Think of it as the difference between being on a VIP list versus having a ticket you need to scan at the door. Both get you in, but the process differs.
Joining a Course Manually
For students who need to join a course themselves, the process goes like this:
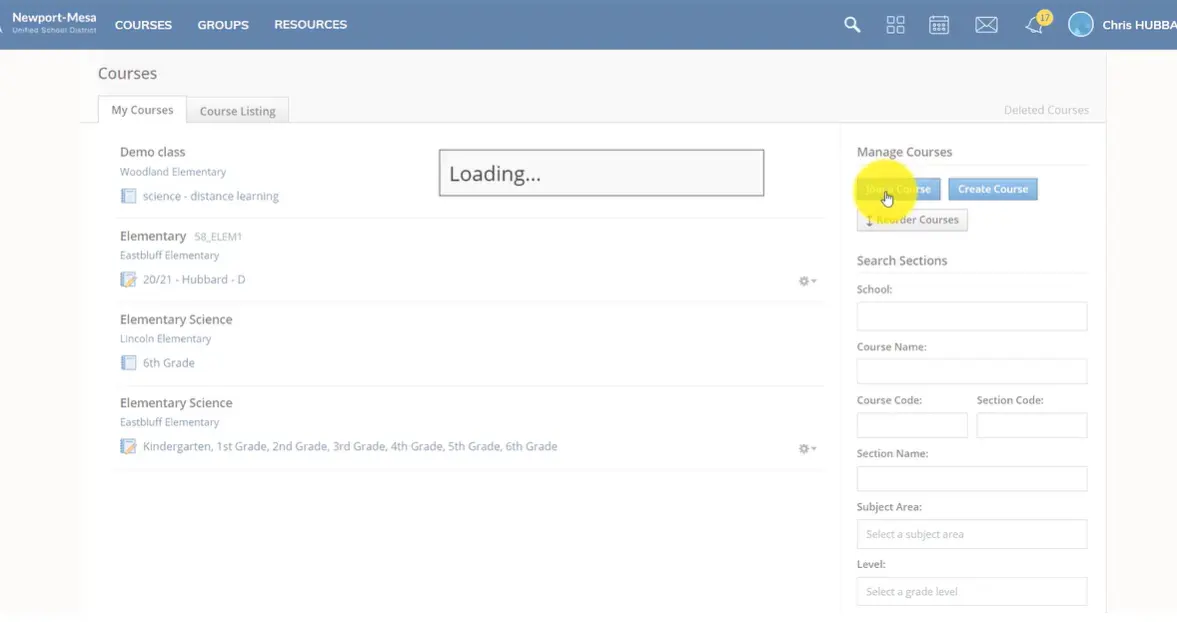
- Click on “My Courses” in the navigation
- Select “Join a Course” (not “Create”—that’s for teachers, and leads to an awkward conversation with IT)
- Enter the access code provided by the teacher
- Click “Join” and wait for confirmation
Once they’re in, the course appears in their list. But—and this is crucial—they’re not quite ready to access materials yet. There’s one more setup step that trips up approximately 147% of students on their first attempt.
The Google Drive Connection: Don’t Skip This Step
Remember how everything in education now connects to everything else? Your Schoology doesn’t just exist in a vacuum—it needs to shake hands with Google Drive to share materials, collect assignments, and generally function like a 21st-century learning platform should.
Here’s what students need to do, and it’s non-negotiable:
- Open their Schoology course
- Click on “Resources” in the navigation tabs
- Find “Apps” in the left sidebar
- Look for “Google Drive Resource App”
- Click “Approve” when prompted
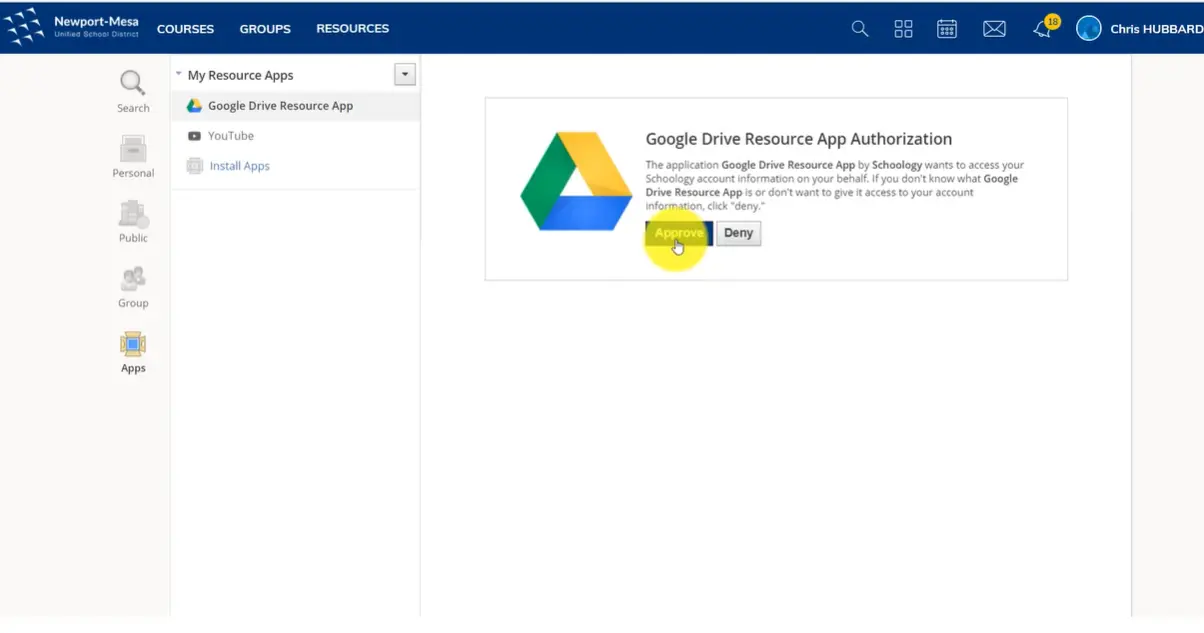
Without this connection, students will see assignments listed but won’t be able to open the actual documents. It’s like being invited to dinner but not being given silverware. Technically you’re there, but you can’t actually participate.
After approving the connection, Chrome will take a moment to sync. This isn’t a good time for impatient clicking. Let it think. Let it populate those folders and files. Grab a coffee. Pet your dog. When you come back, everything should be connected.
Working Through Assignments (Without Losing Your Mind)
Alright, we’re authenticated everywhere. Bookmarks are showing. Google Drive is connected. Now comes the actual learning part—completing and submitting assignments.
When a student clicks on an assignment in Schoology, they’ll see a description, a due date, and instructions. If there’s a document attached, clicking it opens that document in a new tab. Here’s where the Google Drive connection proves its worth—students can type directly into the document, add images, answer questions, all without downloading anything or switching between seventeen different apps.
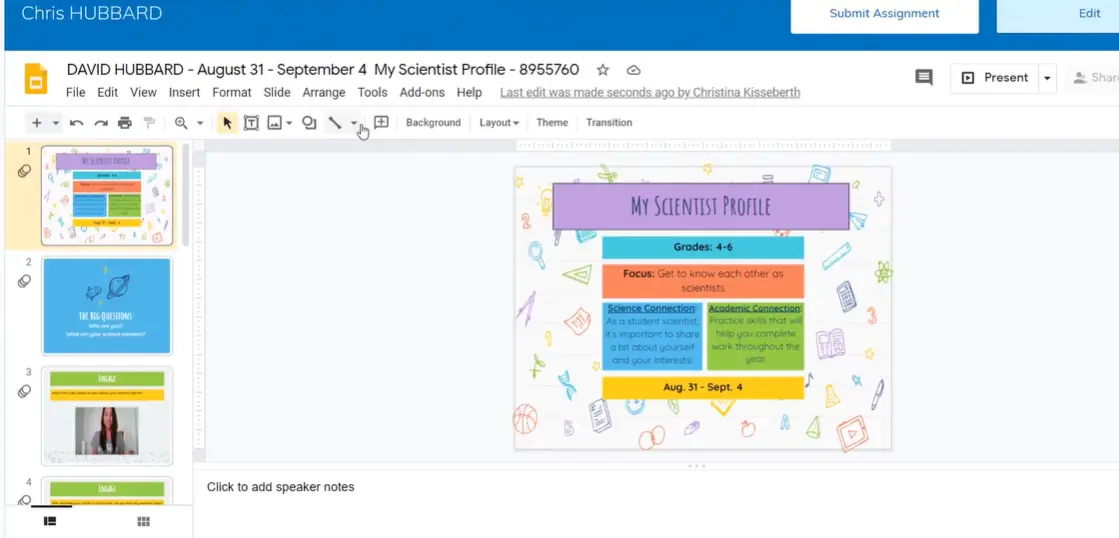
The Submit Button: Don’t Forget It Exists
Here’s a painful truth every teacher learns: students will spend forty-five minutes completing a beautiful assignment, close their laptop, and wonder why they got a zero. The answer? They forgot to click “Submit Assignment.”
It seems obvious until you remember that teenagers’ brains are still developing the part that handles task completion. So we remind them. Again. And again. Put it in the instructions. Mention it in the Zoom call. Send a carrier pigeon if necessary.
When they do click submit, Schoology asks for confirmation. This double-check has probably saved thousands of accidental submissions, but it also means students need to click “Yes” one more time. Then—and only then—does their work actually reach the teacher.
The beauty of this system? Students can unsubmit if they realize they made a mistake. As long as the assignment hasn’t been graded, they can pull it back, fix their error, and resubmit. It’s the digital equivalent of erasing before your teacher collects the papers.
How OnlineExamMaker Enhances Your Teaching Toolkit?
While Schoology and Zoom handle the basics of course delivery and video conferencing, teachers often need more robust assessment tools. That’s where platforms like OnlineExamMaker come into play—and honestly, it’s about time someone made exams less painful for everyone involved.
Think about traditional exam creation for a moment. You’re building questions from scratch, formatting everything perfectly, printing copies, manually grading each one, entering scores into a gradebook, analyzing results to see which concepts students struggled with. It’s exhausting, and it eats up time you could spend actually teaching.
What Makes OnlineExamMaker Different
OnlineExamMaker offers AI-powered question generation, intelligent remote proctoring with facial recognition and webcam monitoring, automatic grading, and an integrated learning management system that brings assessment and instruction into one platform. For teachers juggling multiple classes, trainers managing employee development, or HR managers conducting certification programs, it’s like having a teaching assistant who never sleeps and never makes grading errors.
The AI exam grader particularly stands out. The platform can automatically grade exams after students submit them and generate insights to optimize teaching. Instead of spending your Sunday afternoon with a red pen and a growing headache, you’re reviewing analytics that show exactly which questions stumped your class and which concepts need reteaching.
Create Your Next Quiz/Exam with OnlineExamMaker
Preventing Cheating Without Becoming Big Brother
Let’s address the elephant in the virtual room: online exam integrity. When students take tests at home, how do you know they’re not Googling answers or texting their genius friend for help?
OnlineExamMaker includes advanced online proctoring features with AI-powered video monitoring, facial recognition, and screen sharing analysis to maintain assessment credibility. The system can detect suspicious behaviors—looking away from the screen repeatedly, multiple faces appearing in the webcam, attempts to switch browser tabs—without requiring you to personally watch 30 simultaneous video feeds like some sort of security guard.
But here’s the thing: this isn’t about surveillance for surveillance’s sake. It’s about maintaining the value of assessments while keeping the experience reasonable for students. The goal is fair testing, not paranoia.
Creating Assessments That Don’t Make You Want to Cry
Teachers can import multiple questions in bulk via Excel or Word documents and add video, audio, and photos to exam questions using the rich text question editor. This flexibility means creating a multimedia quiz doesn’t require a degree in graphic design or seventeen hours of your weekend.
The question bank feature deserves special mention. Build a library of questions organized by topic, difficulty level, and learning objective. Next semester, instead of starting from scratch, you’re remixing and refining. The system can even randomize questions for different students, reducing the chances that everyone’s comparing answers.
Troubleshooting Common Issues
The “I Can’t See My Course” Problem
Student claims they’re logged in but can’t see their science course? Nine times out of ten, they’re in the wrong profile or haven’t completed the joining process. Have them check that upper right corner profile icon again. Wrong account? Sign out and sign back in with the correct one.
The “My Document Won’t Open” Problem
If documents won’t load after clicking an assignment, the Google Drive connection probably didn’t complete. Send them back to Resources → Apps → Google Drive, and have them approve the connection again. Sometimes Chrome needs that permission reminded to it more than once.
Occasionally, students will see another prompt to connect Google Drive even after they’ve already done it. It’s annoying, but not broken. Just approve it again. Technology sometimes has short-term memory loss.
The “I Submitted But It Says I Didn’t” Problem
This one’s usually user error masked as technical failure. The student completed the assignment but forgot to click Submit. Or they clicked Submit but didn’t confirm when Schoology asked “Are you sure?” Have them look at the assignment again. If there’s still a Submit button visible, it never actually went through.
Final Thoughts: Making Digital Learning Less Digital-Feeling
Here’s the truth about Schoology, Zoom, and all these other platforms: they’re tools, not replacements for actual teaching. The technology enables connection and learning, but it can’t create engagement or understanding by itself. That still requires a human being who cares, plans thoughtfully, and shows up—even when “showing up” means clicking a Zoom link instead of unlocking a classroom door.
The authentication headaches, the profile confusion, the forgotten Submit buttons—they’re all temporary frustrations in service of something bigger. You’re preparing students for a world where digital literacy isn’t optional, where being able to navigate multiple platforms and manage online credentials is as fundamental as reading and arithmetic.
So yes, remind them about bookmarks again. Yes, send that email about checking their profiles for the hundredth time. Yes, follow up with the kid who still hasn’t connected their Google Drive. It’s worth it.
And when everything finally clicks—when students are logging in smoothly, accessing materials independently, submitting work without prompting—take a moment to appreciate what you’ve built. You’ve created a functional digital classroom out of chrome profiles, web apps, and sheer determination.
That’s not nothing. That’s actually pretty remarkable.
Now go forth and teach. Your students are waiting—probably in the wrong Chrome profile, but we’ll get them sorted out.