Schoology lets you manage multiple students from one parent account. It’s like having a universal remote for your kids’ education—one login, multiple channels. Let’s walk through exactly how to set this up, because nobody has time to remember three different passwords.
- Why This Matters More Than You Think?
- The Simple Setup: Adding Your Students
- Navigating Between Your Students
- How Modern Tools Like OnlineExamMaker Support This Workflow?
- Common Questions of Using Schoology
Why This Matters More Than You Think?
Think about it. Your middle schooler has a science project due Tuesday. Your elementary kid forgot to mention the permission slip. Your high schooler is mysteriously “caught up” on everything (translation: probably not). How do you keep track without setting up camp in three different accounts?
One unified parent account means you can toggle between your students faster than they can say “I don’t have homework.” You see everything—assignments, grades, announcements—from a single dashboard. It’s efficiency meets sanity.
The Simple Setup: Adding Your Students
Alright, let’s get practical. You’ve already created your initial parent account using that first 12-digit code (if you haven’t, do that first—it takes about two minutes). Now you’re ready to add your other kids.
Step 1: Log Into Your Existing Account
Head to www.schoology.com and sign in with the parent account you’ve already set up. You’ll land on your dashboard, and you’ll notice something in the top right corner—your name with a little dropdown menu next to it.
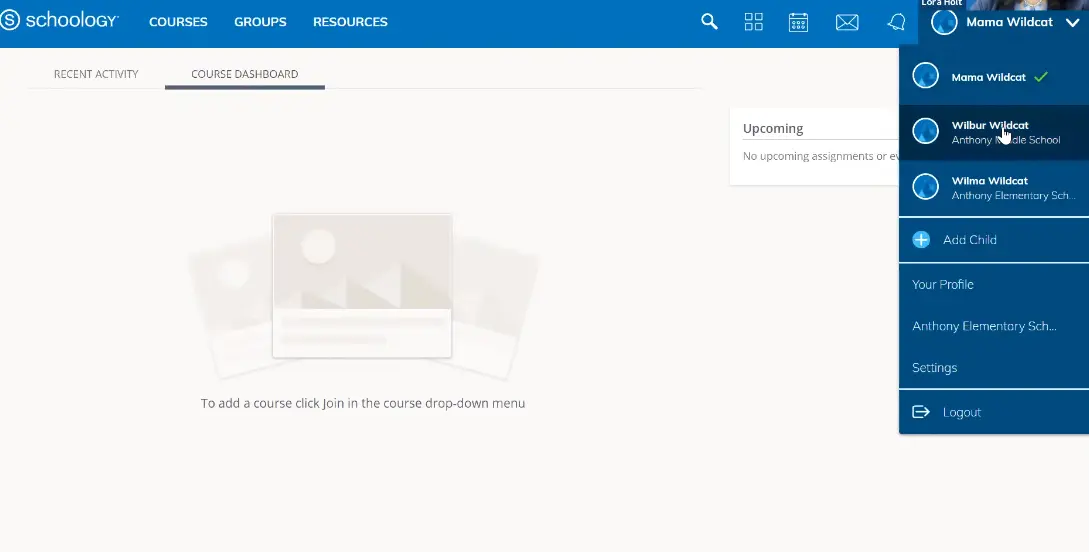
That dropdown? That’s your control center. It shows which students you’re currently monitoring. Right now, maybe you see just one name there. We’re about to change that.
Step 2: Find the “Add Child” Option
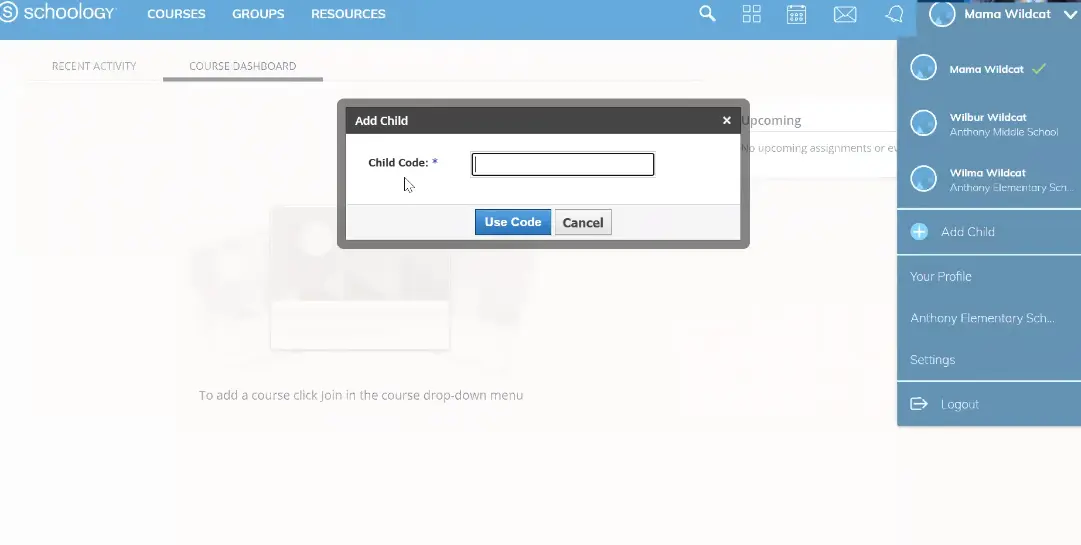
Click on that dropdown menu. You’ll see an option that says “Add Child.” Click it. Simple as that.
A box will pop up asking for a “child code.” This is where you’ll enter that second (or third, or fourth) 12-digit code you received from the school.
Step 3: Enter the Code and Confirm
Type in the 12-digit access code exactly as it appears—no spaces, just numbers. Then click the blue “Use Code” button.
Here’s where the magic happens. Within seconds, that student gets added to your account. Go back to your dropdown menu, and boom—there’s your second student’s name, ready to toggle.
Pro Tip: Got codes for multiple kids? You don’t have to do them all at once. Add them as you get them. Schoology doesn’t judge your organizational skills.
Navigating Between Your Students
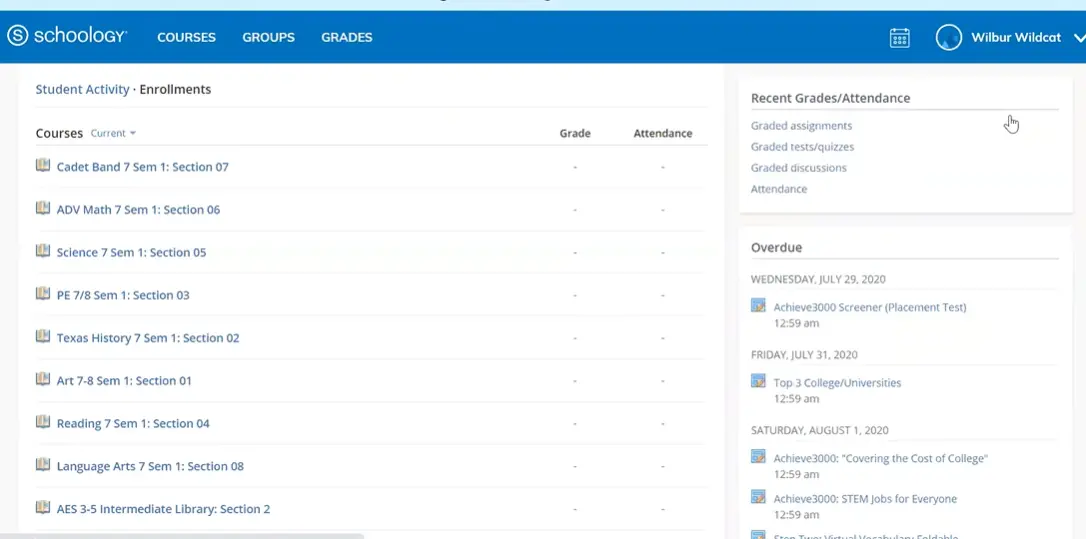
Now that you’ve added multiple students, here’s the fun part: switching between their accounts is ridiculously easy. Just click on the dropdown menu with your name, select which student you want to check on, and their dashboard loads instantly.
You can see Wilbur’s middle school algebra assignments, then flip over to Wilma’s elementary reading log, then check if William actually turned in that history essay. All without logging out, reopening tabs, or doing that thing where you forget which browser window is which student.
How Modern Tools Like OnlineExamMaker Support This Workflow?
While Schoology handles the learning management side beautifully, teachers are increasingly turning to AI-powered tools like OnlineExamMaker to streamline assessment creation. Why does this matter to you as a parent?
Because when teachers use efficient exam-making software, they can create better assessments faster—which means more meaningful feedback for your students. OnlineExamMaker’s AI capabilities help educators generate quiz questions, customize tests for different learning levels, and even auto-grade responses. This frees up teachers to focus on what really matters: actually teaching your kids, not drowning in paperwork.
For trainers and HR managers using Schoology for professional development, the same principle applies. OnlineExamMaker lets you create training assessments that adapt to learner needs, track progress across multiple team members, and generate insights without manual data crunching. It’s the kind of behind-the-scenes efficiency that makes platforms like Schoology even more valuable.
Create Your Next Quiz/Exam with OnlineExamMaker
Common Questions of Using Schoology
What if I lose one of the access codes? Contact your school’s instructional technology coordinator. They can regenerate codes faster than you can say “I checked the junk folder.”
Can my spouse create their own parent account, or do we share one? You can each have separate accounts if you prefer, but sharing one keeps communication centralized. Your call.
What if my student is at a different school or district? As long as both schools use Schoology, you can add students from different institutions to the same parent account. Your dashboard becomes your educational command center, district boundaries be damned.
The Bottom Line
Managing multiple students doesn’t have to mean managing multiple headaches. One parent account, multiple student connections, zero excuses for missing that field trip permission slip. Because let’s be honest—you’ve got enough to remember.
Schoology’s multi-student setup takes about 60 seconds per child. That’s less time than it takes to find matching socks. And with tools like OnlineExamMaker helping teachers create better assessments more efficiently, the whole ecosystem works smoother. Your kids get better instruction, you get better visibility, and everyone wins.