Do you know that making a fun Microsoft Forms quiz is a great way to get your friends involved and learn new ways to make a quiz? With just a few easy steps, you can make a quiz that is super fun and interactive plus you can also add designs from the quiz and this will surely help everyone learn. You better check this out!
What are the benefits of creating an interactive Microsoft Forms Quiz?
● It can help students understand the quiz because of its interactive features easily.
● It can save more time for discussion since it has a picture or we can also add a video. So that, there will be less time to discuss the quiz.
● It has so many interactive ways to create and answer that would be loved by many.
- How to Create An Interactive Quiz with Microsoft Form?
- What is OnlineExamMaker? A Best Alternative Interactive Quiz Making Tool
- How to Create An Interactive Quiz with Video?
How to Create An Interactive Quiz with Microsoft Form?
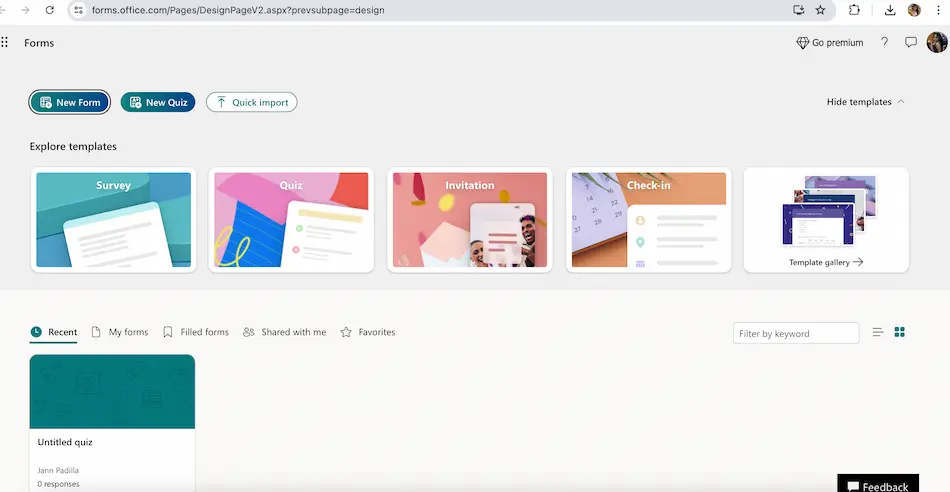
Step 1:
To begin, go to the Microsoft Forms website and sign in with your Microsoft account. After that, press the “New Form” button to start making your quiz.
Step 2:
Next step, you can start by creating a title for your chosen quiz and add a note to the description box saying something about the quiz.
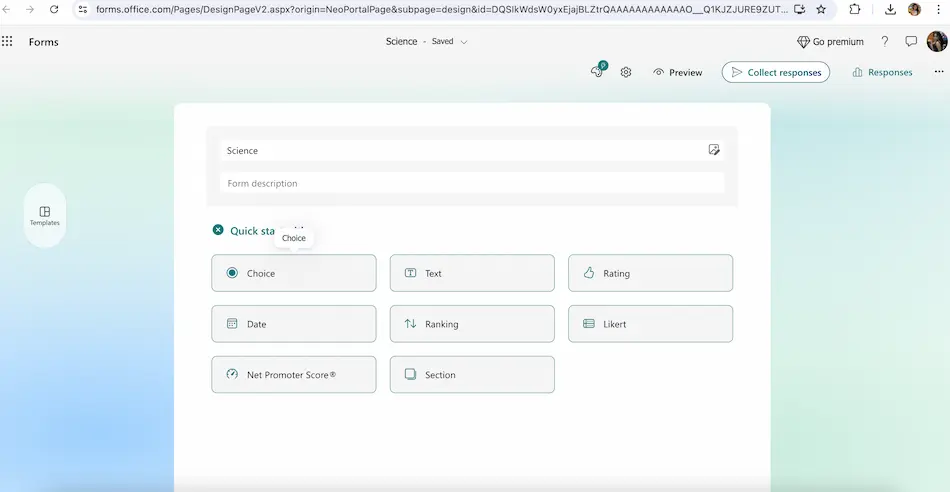
Step 3:
After adding the title and description box, you can choose if you want to create a multiple choice quiz, text type quiz, or other types of quiz if you click the arrow on the corner part.
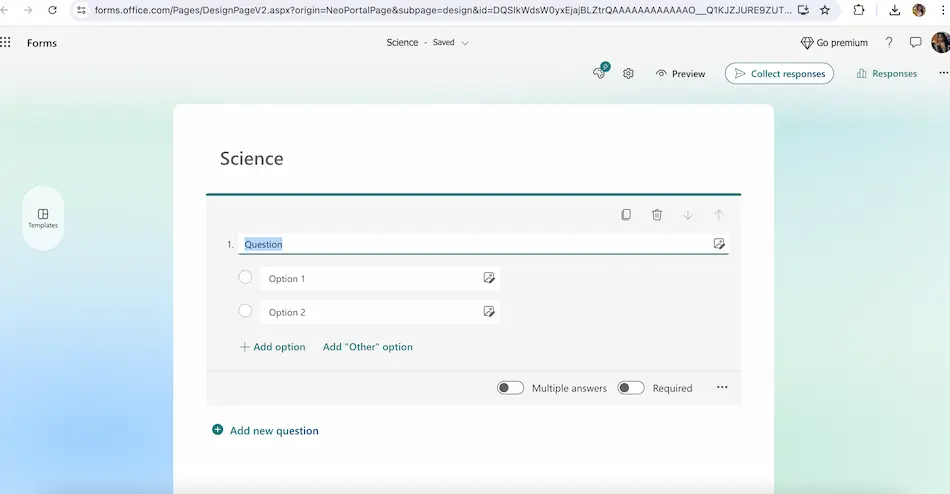
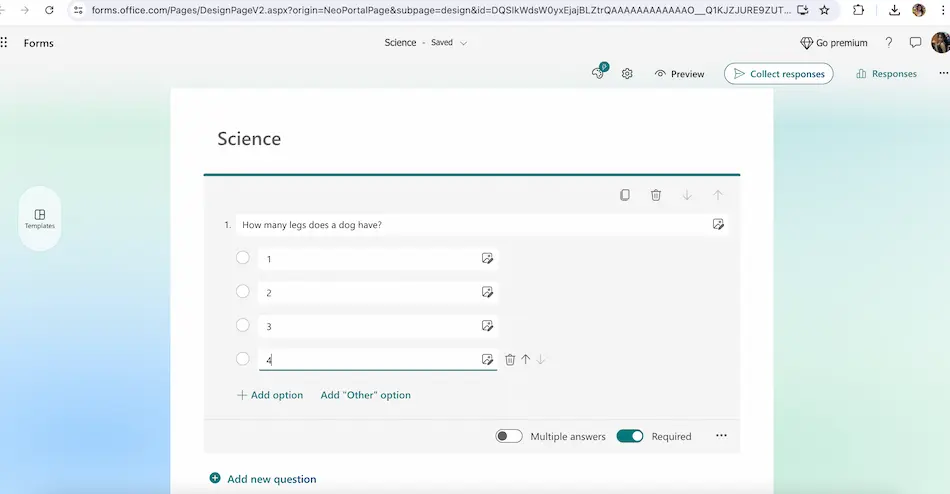
Step 4:
Next part, you can start adding the questions and answers below, and do not forget to put a check on the correct answer. You can also put pictures in the question same goes with the answers.
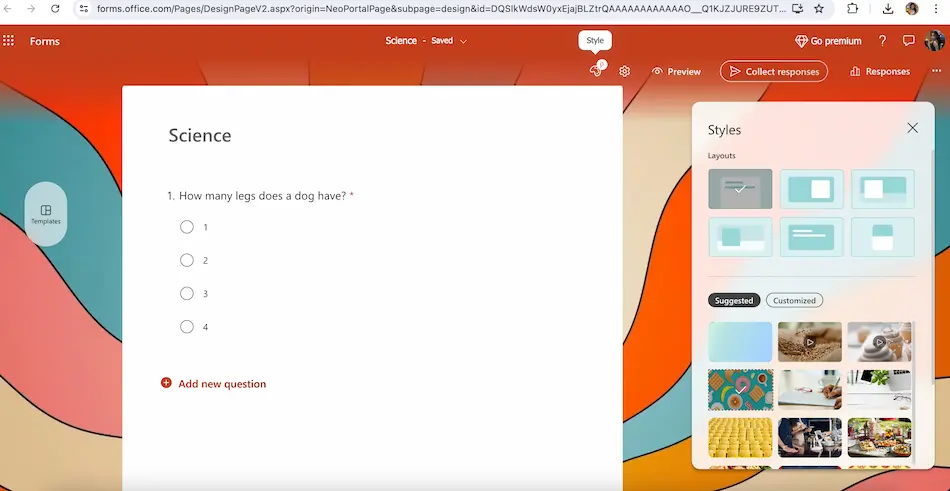
Step 5:
You can also add design to your presentation by clicking the style on the upper icon of Microsoft Forms. Here, you can add background pictures, colors, and music of your choice.
Another special feature for this is you could also add a video to help the examinees answer the quiz more efficiently and fun!
Creating quizzes like this can also be more fun and much easier. Onlineexammaker is the best choice for making quizzes and tests. It’s so easy to use! You can pick from different types of questions like multiple choice, true/false, and short answers to make your quiz special. You can also choose from many design options to make it look just right for your brand or theme!
What is OnlineExamMaker? A Best Alternative Interactive Quiz Making Tool

OnlineExamMaker has a fun feature in its quiz that helps you make quizzes, organize them, and give grades. It’s great for business people who need to test employees and also for teachers who want to make quizzes for students. You can also use this tool to have a great time and bonding with friends to ask them questions and have a deep connection with them.
Create Your Next Quiz/Exam with OnlineExamMaker
How to Create An Interactive Quiz with Video?
Steps in Making Online Quiz in OnlineExamMaker:
Step 1: Sign in or Register An Account
Login to OnlineExamMaker dashboard. If you are new to OnlineExamMaker, you can create an account using your email account.
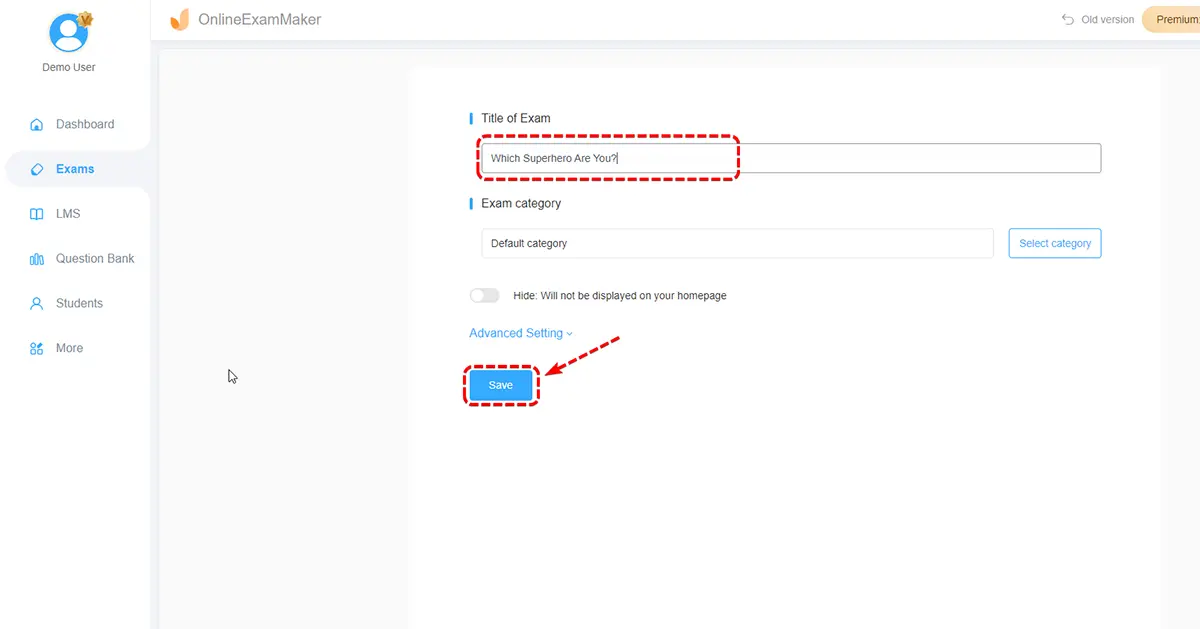
Step 2: Create A New Quiz
First, log in to your OnlineExamMaker profile. Go to the left side and tap on “Tests” and then press “+New test”. After that, pick a name for your quiz, write a brief explanation to inform the participants about the test’s goal, and then click on next. Lastly, click on the “Save” option.
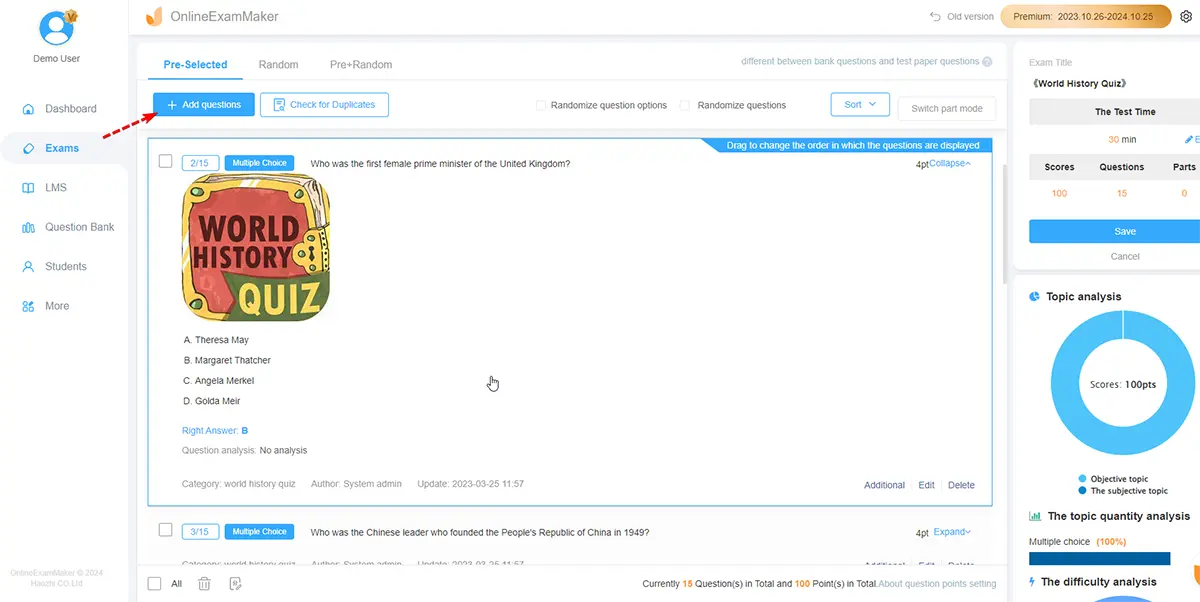
Step 3: Edit Quiz Questions
Next, start adding questions by selecting from various question types like multiple choice, true/false, or short answer. You can also set time limits and difficulty levels for each question to challenge your participants.
You will have all the possibilities to customize your online quiz with OnlineExamMaker.
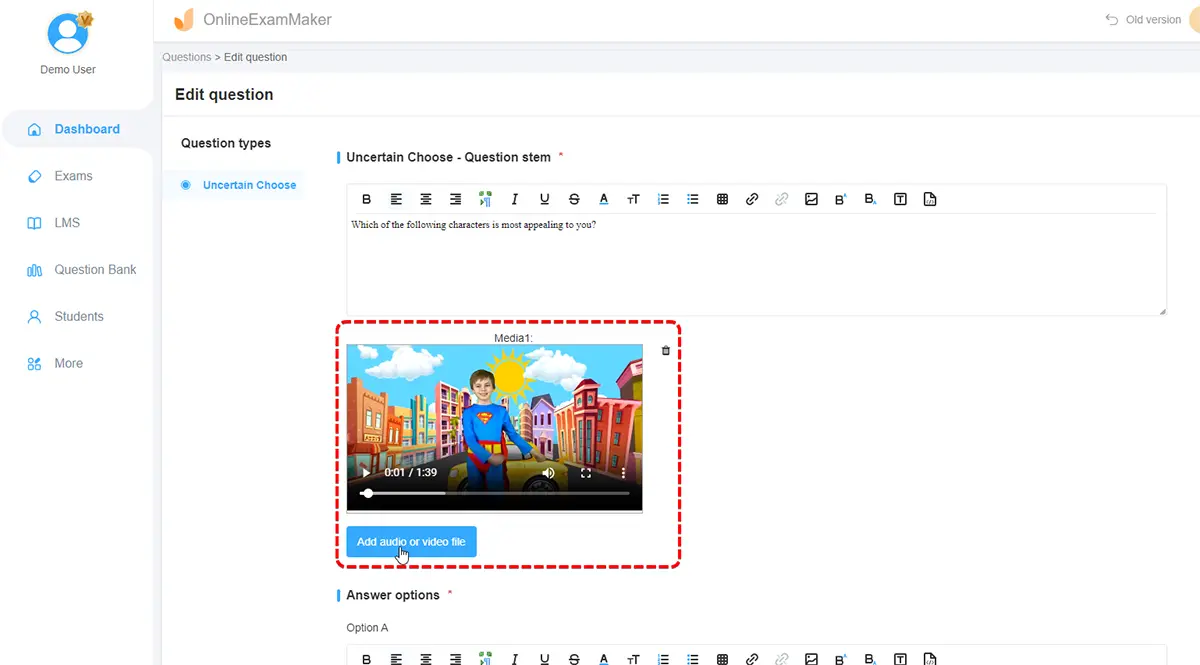
Step 4: Enrich Your Quiz Questions
You can also put additional images, videos, or audio clips to complement your questions and provide a richer experience for participants. Visual aids can help clarify complex concepts, while videos can bring scenarios to life.
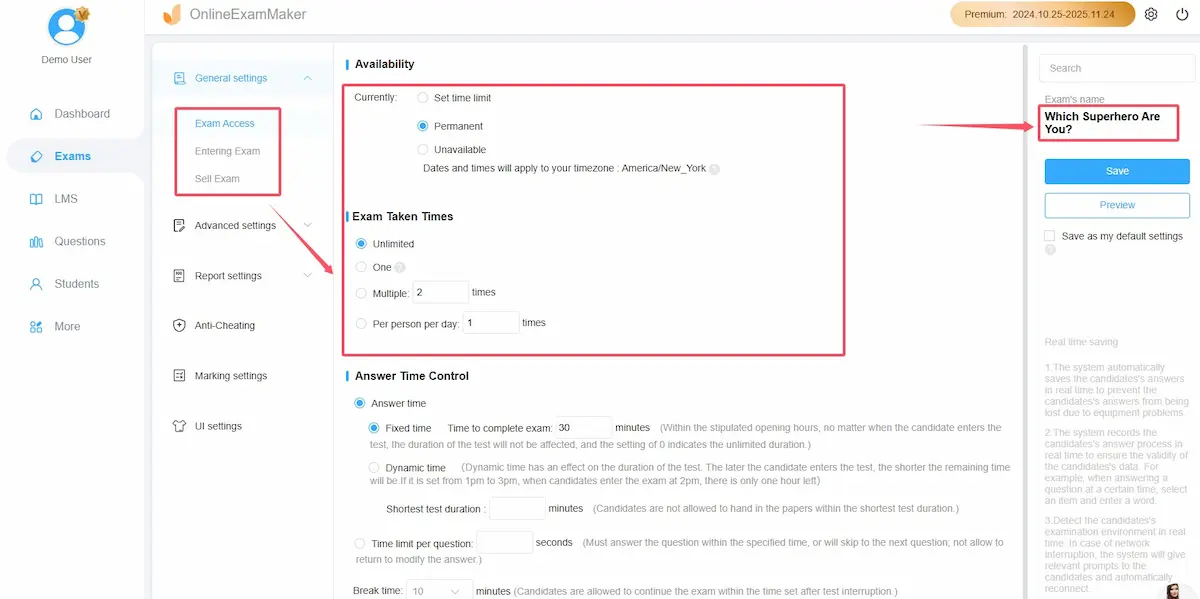
Step 5: Personalized Quiz Settings
Once you put in all the questions, you can change the quiz settings like making the questions random or letting everyone see their results right away. Don’t forget to add instructions for clarity then click on “Save” on the sidebar afterward!
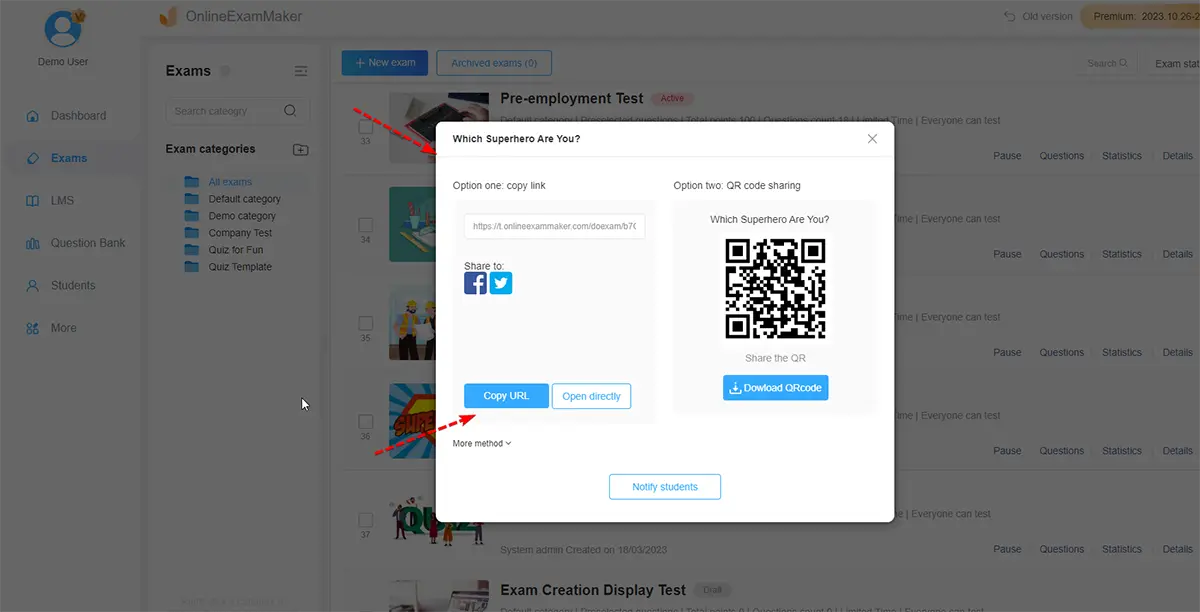
Step 6: Publish The QUiz
Check your quiz before publishing it online. Then you can publish the quiz and share the quiz link or QR code to candidates easily. Making an online quiz is super easy with OnlineExamMaker’s user-friendly tools!
Create Your Next Quiz/Exam with OnlineExamMaker
The platform offers customizable grading options, allowing you to assign different weights to questions based on their difficulty.
Are you ready to try something new? Check out Onlineexammaker now and discover how it can change the way you teach. Improve your tests, interact with your students, and simplify your schoolwork.
Learn the secrets to making exceptional assessments for your classroom by visiting OnlineExamMaker today! Click here to learn more!
We can’t wait to hear from you! Tell us what you think after using the OnlineExamMaker website! Try it out now and see how it helps you learn better!