In today’s trend of online tests and questionnaires, one has to gather and evaluate the answers quickly to unlock meaningful information. The Export feature from Microsoft Forms to Excel is thus an easy way to organize your data, it doesn’t matter if you’re a business manager collecting client feedback or a teacher tracking students’ development. This guide describes how you can use your data to make every response count toward knowing, and therefore, well-informed decision-making. Know how to easily turn feedback into actionable intelligence ready for use.
- How Can Exam Organizers Export Microsoft Forms Quiz Responses to Excel?
- OnlineExamMaker: Create Interactive Online Quizzes with Excel Exports
- How to Export Quiz Responses Using OnlineExamMaker?
How Can Exam Organizers Export Microsoft Forms Quiz Responses to Excel?
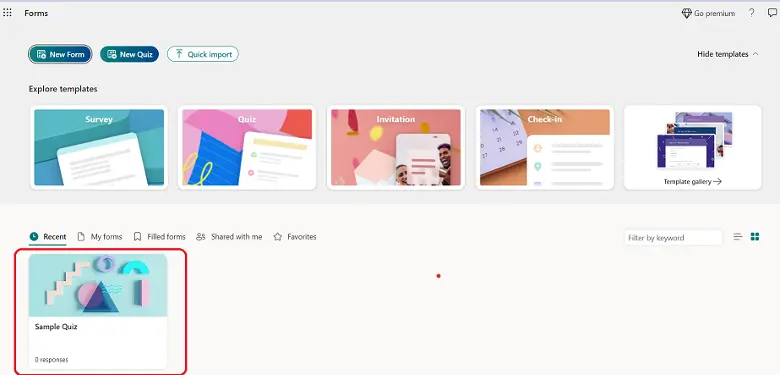
Step 1: Opening Microsoft Forms
Open your favorite web browser and access Microsoft Forms online to open the forms. You will log in using the login details for your Microsoft account. If you don’t have a Microsoft account, you can sign up for one by following the steps in the login window.
Step 2: Opening your quiz
Log in to your account, and you will have a dashboard from which all forms and quizzes you have generated can be viewed. Scroll down the list and find the specific quiz for which you want the answers exported.
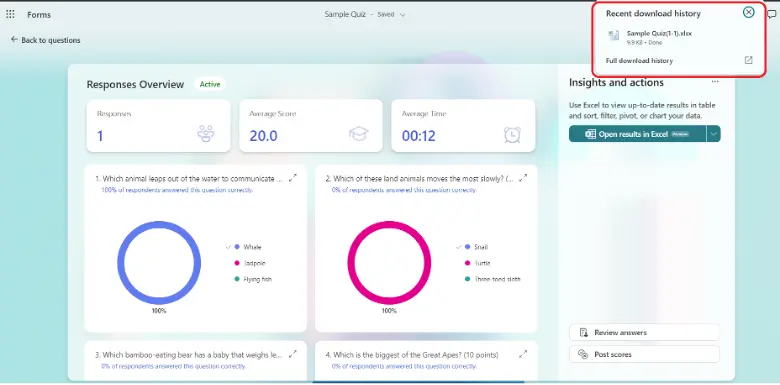
Step 3: Head to the Responses Tab
Once the quiz opens, you will then be taken to a page where you have the option to update the quiz questions. On top of this page, you have two tabs: “Questions” and “Responses “. Click on the “Responses” tab. This tab contains all the answers gathered from those who took your quiz.
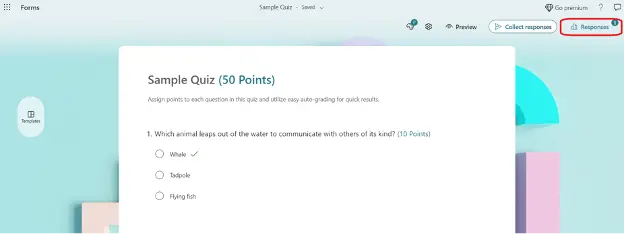
Step 4: Excel export
This button is at the top right of the “Responses” page. It is labeled as “Open in Excel”. Click this button. Once you’ve done this every single quiz response is now in an Excel file.
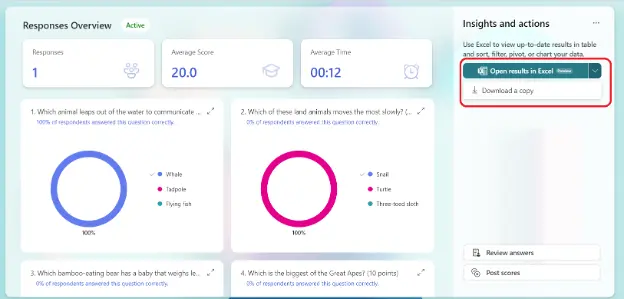
Step 5: Download and open the Excel file
Either select “Open in Excel” to download the file instantly, or choose one of the locations on your computer to save the file to. Then open it using Microsoft Excel or another program.
Step 6: Verify whether all data are consistent
The quiz result is exported into Excel, with lines representing individual responses and columns representing questions. Check the data for accuracy. Excel offers filtering, sorting, and analysis capabilities.
OnlineExamMaker: Create Interactive Online Quizzes with Excel Exports

Reliable tools for creating and analyzing exams are highly needed by current educational practice. OnlineExamMaker offers a versatile framework to industry professionals and educators. Integration is smooth and the UI is user-friendly in OnlineExamMaker, which makes the creation of exams an easy process and with features such as exporting directly to Excel, one can get to the point of robust export. Feel the ease with which one can develop evaluations, where data-driven insight is possible and leads to wise decisions. Learn how OnlineExamMaker is going to revolutionize exam management and set new standards for efficacy and efficiency.
Create Your Next Quiz/Exam with OnlineExamMaker
How to Export Quiz Responses Using OnlineExamMaker?
Step 1: Open OnlineExamMaker and login
Open your web browser and log in to your account on the OnlineExamMaker website with the same credentials used during registration.

Step 2: Select a targeted quiz
After logging in, you will be taken either to your dashboard or a listing of the quizzes you have produced. Find the specific quiz from which you want to export the answers, then click on the title to open its info.
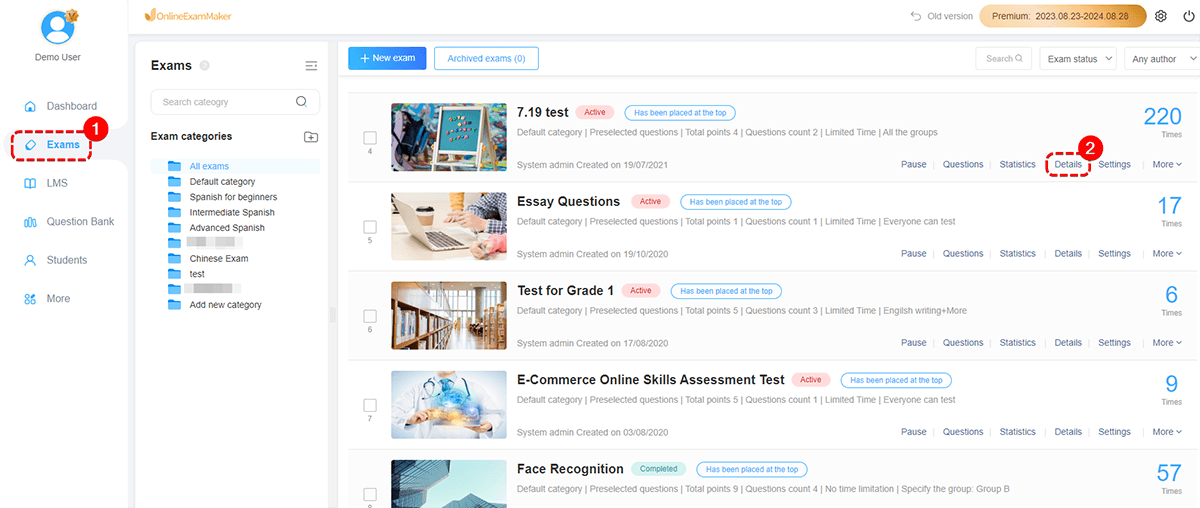
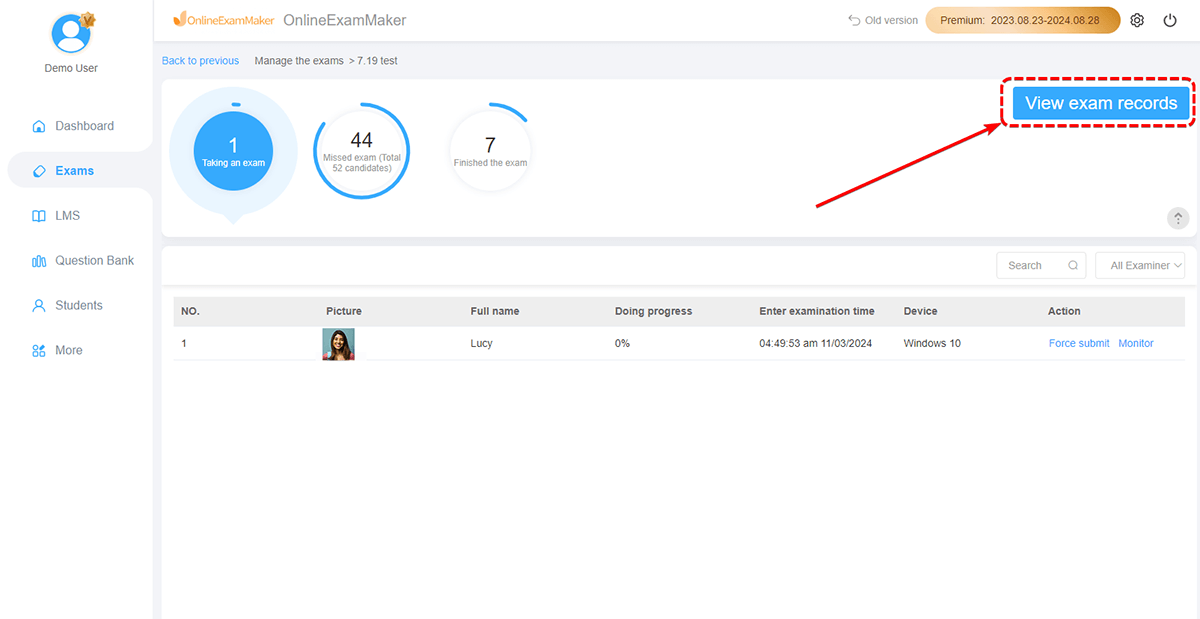
Step 3: Access the exam records
After selecting the test or exam you want to export into Excel, you can press the “view exam records” which is located at the top right of the screen. The button will also let you access numerous information about the exam.
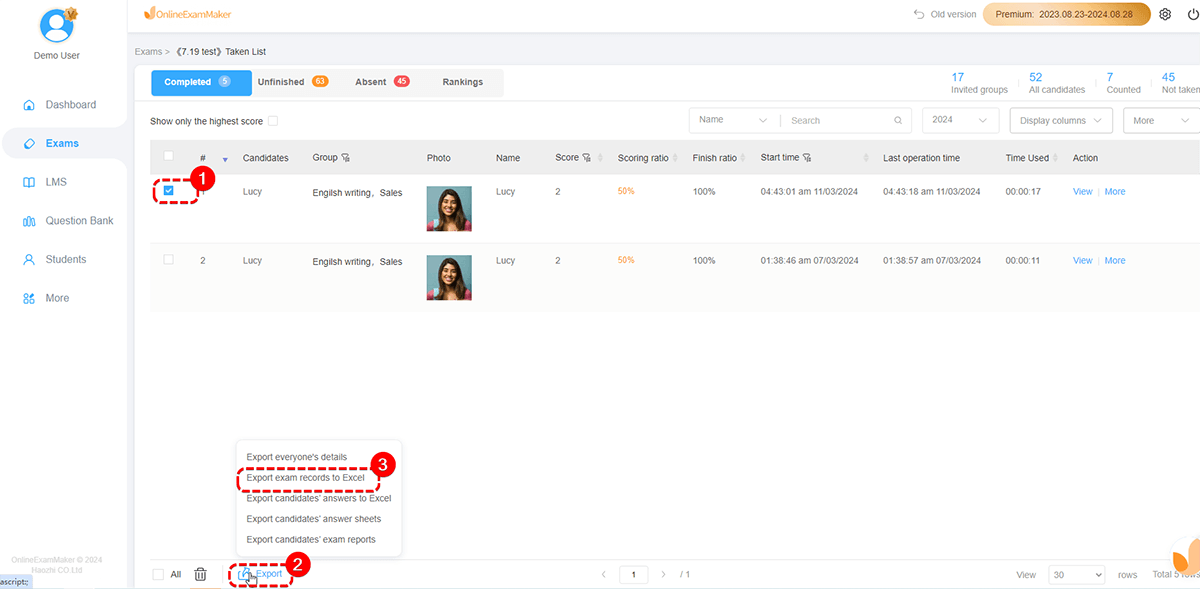
Step 4: Select the records to export
OnlineExamMaker features a selective export which will let you export only a selected number of records to the exam, you may select individually or all by clicking the check button at the left of the record.
Step 5: Export the exam records!
When you are done selecting the records you want to export into Excel, you may now proceed to export the records. Do this by clicking the “Export” button located at the bottom of the screen. Then select “exam records to Excel” which will start downloading into an Excel file.
Step 6: Open and verify the Excel file
Once the download is complete you may open the Excel file which holds the exported exam record. Check the data if it’s correct with the exported file then proceed on using Excel for its filtering and sorting capabilities and use its data visualization needs.
Create Your Next Quiz/Exam with OnlineExamMaker