Ever spent hours manually compiling quiz results from PowerPoint presentations? You’re clicking through slides, squinting at scores, and transcribing data into Excel like it’s 1995. There’s got to be a better way, right?
Well, buckle up. Whether you’re a teacher drowning in student assessments, a trainer tracking employee progress, or an HR manager evaluating onboarding quizzes, this guide will transform your workflow from tedious to automatic.
- Why Automate PowerPoint Quiz Exports?
- Method 1: VBA Macros for Direct Excel Export
- Method 2: Microsoft Forms Integration
- Method 3: OnlineExamMaker AI Exam Software
- Comparing Your Options in Exam Grading
- Best Practices for Quiz Data Management
- Frequently Asked Questions
Why Automate PowerPoint Quiz Exports?
Let’s be honest: manual data entry is the productivity killer nobody talks about. You finish delivering a brilliant training session, participants ace your quiz, and then… you’re stuck copying names and scores one by one into a spreadsheet. The irony isn’t lost on anyone.
Here’s what automation gives you:
- Time savings: What takes 30 minutes manually happens in 3 seconds
- Accuracy: No more typos or transposition errors
- Instant insights: Data analysis begins immediately, not tomorrow
- Scalability: Handle 10 participants or 1,000 with the same effort
- Professional polish: Impress stakeholders with real-time reporting
Think of it this way: would you rather be the person frantically scribbling notes, or the one who already has beautiful charts ready while everyone’s still packing up? Yeah, thought so.
Method 1: VBA Macros for Direct Excel Export
VBA (Visual Basic for Applications) is PowerPoint’s secret superpower. It’s like having a tiny robot assistant living inside your presentation, ready to execute your commands. Is it intimidating at first? Absolutely. Is it worth learning? For anyone serious about efficiency, yes.
Setting Up Your Macro-Enabled Presentation
First things first: save your PowerPoint as a .pptm file (the “m” stands for “macro-enabled”). Regular .pptx files are like decaf coffee—they look the part but lack the kick you need.
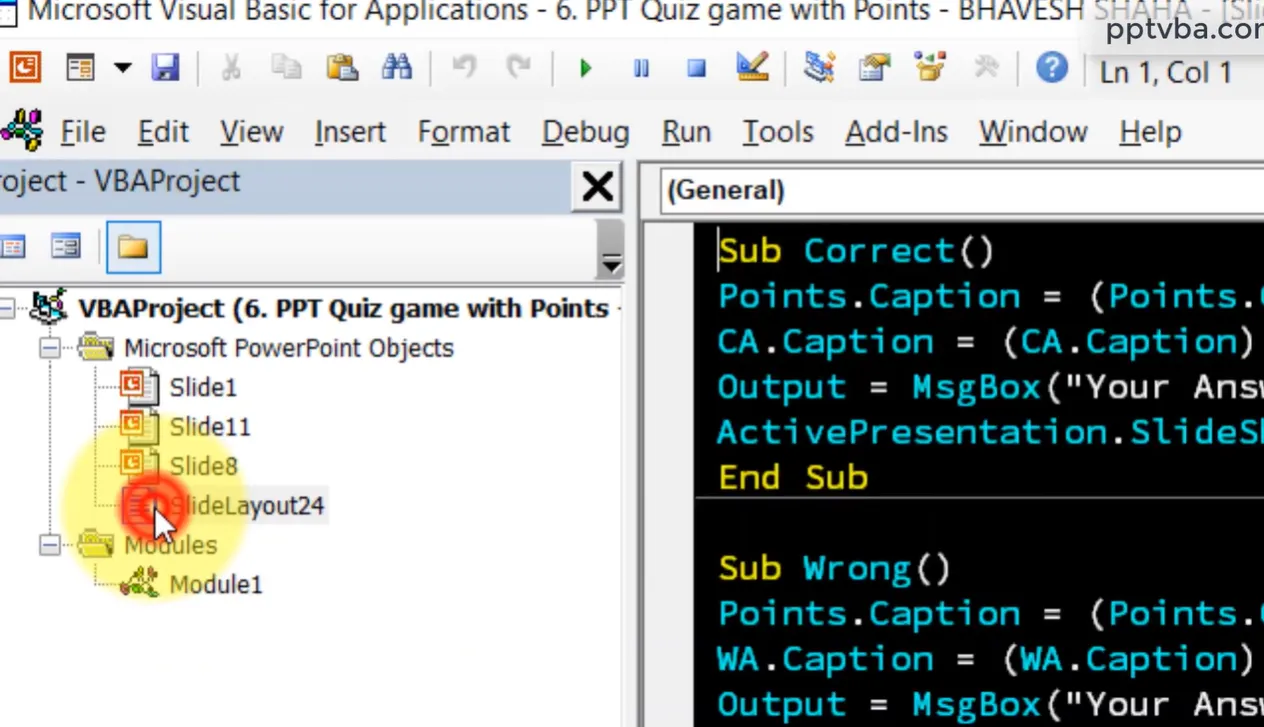
Step 1: Access the VBA Editor
Press Alt + F11 on Windows (or Option + F11 on Mac). Welcome to the matrix. Don’t panic—that intimidating code window is about to become your best friend.
Step 2: Declare Your Global Variables
Think of variables as labeled boxes where you’ll store information. At the top of your VBA module, add:
Public Score As Integer
Public UserName As String
Public QuizResults As String
Public QuestionAttempted As String
These variables will follow participants through your entire quiz, collecting data like a diligent note-taker who never gets tired.
Creating the Quiz Start Button
Your first slide needs a text box for the participant’s name and a “Start Quiz” button. Here’s the clever part: when they click “Start,” VBA captures their name and initializes the scoring system.
Sub StartQuiz()
    Score = 0
    UserName = ActivePresentation.Slides(1).Shapes("txtName").TextFrame.TextRange.Text
    QuizResults = UserName & vbCrLf
    ActivePresentation.SlideShowWindow.View.Next
End Sub
Pro tip: Name your text box “txtName” in PowerPoint’s Selection Pane (Home tab → Select → Selection Pane). This makes your code readable and saves you debugging headaches later.
Tracking Answers Throughout the Quiz
For each question slide, you’ll attach macros to answer buttons. When someone clicks the correct answer:
Sub CorrectAnswer()
    Score = Score + 1
    QuizResults = QuizResults & "Question 1: Correct" & vbCrLf
    ActivePresentation.SlideShowWindow.View.Next
End Sub
For incorrect answers, skip the score increment but still log the attempt. This granular tracking transforms your basic quiz into a diagnostic tool that shows exactly
where participants struggle.
The Magic: Automatic Excel Export
Here’s where things get exciting. On your final “Results” slide, add a “Submit Score” button with this macro:
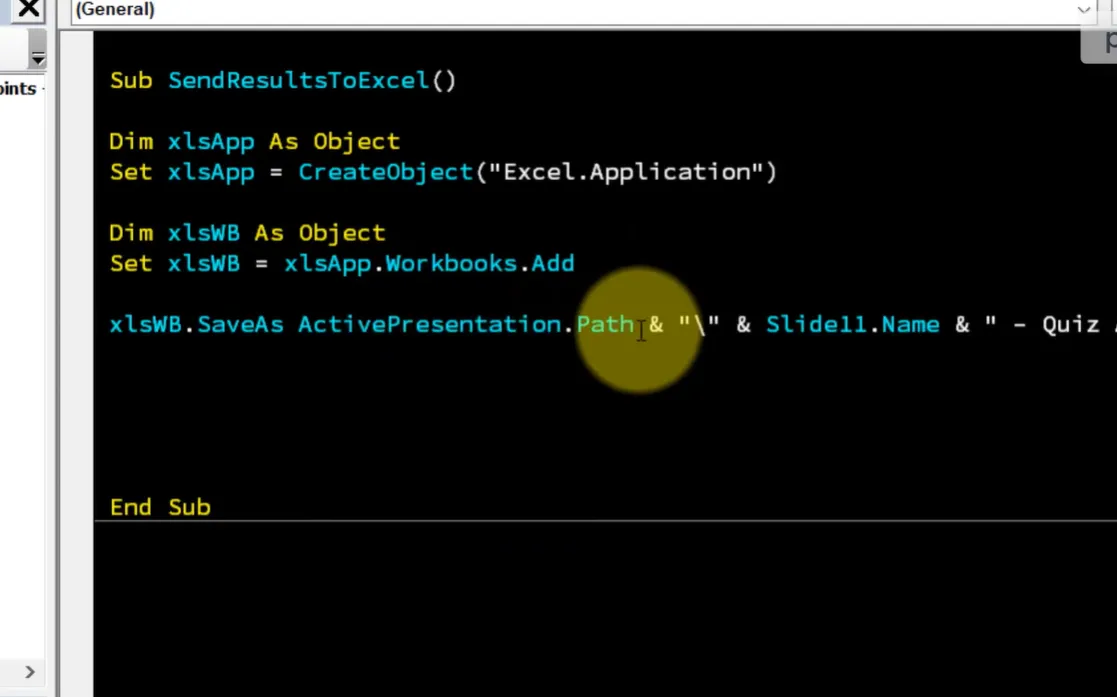
Sub ExportToExcel()
Dim xlApp As Object, xlWB As Object, xlWS As Object
' Create Excel application
Set xlApp = CreateObject("Excel.Application")
xlApp.Visible = True
' Check if results file exists
Dim filePath As String
filePath = ActivePresentation.Path & "\QuizResults.xlsx"
If Dir(filePath) <> "" Then
Set xlWB = xlApp.Workbooks.Open(filePath)
Else
Set xlWB = xlApp.Workbooks.Add
Set xlWS = xlWB.Sheets(1)
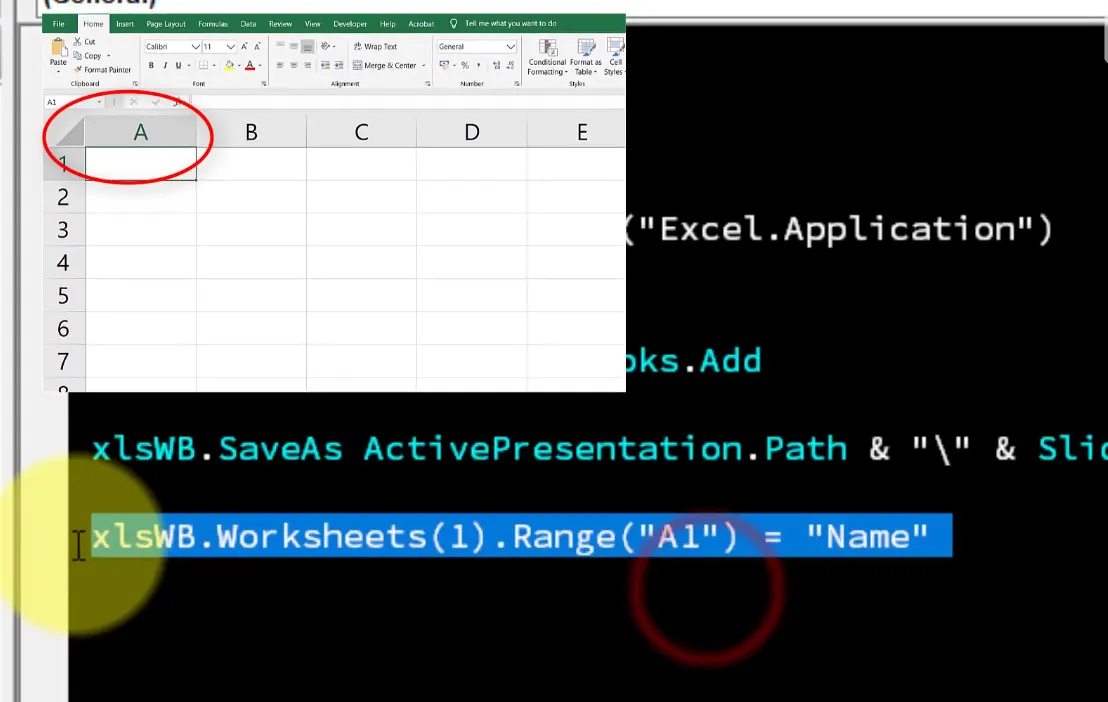
' Create headers
xlWS.Range("A1") = "Name"
xlWS.Range("B1") = "Score"
xlWS.Range("C1") = "Date"
xlWS.Range("D1") = "Location"
xlWS.Range("E1") = "Questions Attempted"
End If
Set xlWS = xlWB.Sheets(1)
' Find next empty row
Dim nextRow As Long
nextRow = xlWS.Cells(xlWS.Rows.Count, 1).End(-4162).Row + 1
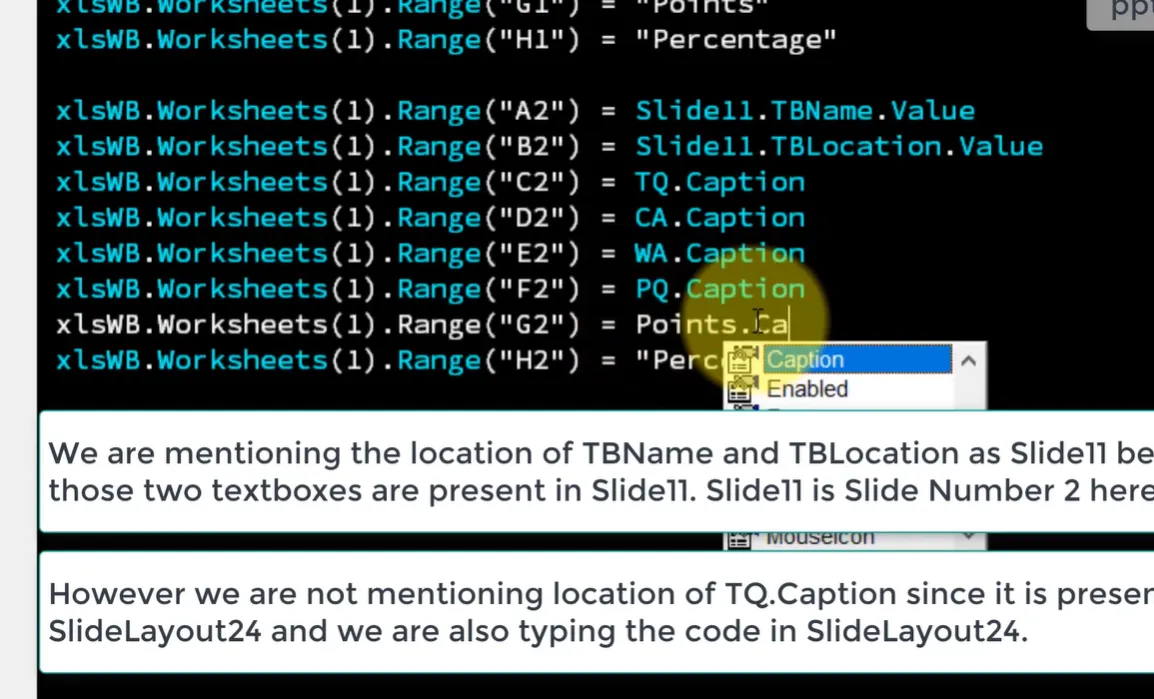
' Write data
xlWS.Cells(nextRow, 1) = UserName
xlWS.Cells(nextRow, 2) = Score
xlWS.Cells(nextRow, 3) = Now()
xlWS.Cells(nextRow, 4) = ActivePresentation.Path
xlWS.Cells(nextRow, 5) = QuizResults
xlWB.Save
MsgBox "Results saved successfully!", vbInformation
End SubWhat just happened? Your quiz data automatically populates an Excel file. If the file doesn’t exist, VBA creates it. If it does exist, it appends the new data. No manual intervention required.
Why This Method Rocks (and When It Doesn’t)
The Good:
- Works completely offline—no internet required
- Full control over data structure and formatting
- Instant export the moment participants finish
- Free (assuming you already have Office)
The Not-So-Good:
- Requires macro-enabled security settings (some organizations block these)
- Learning curve if you’re not familiar with VBA
- Manual updates needed for different quiz formats
- Limited remote/online capabilities
Method 2: Microsoft Forms Integration
If VBA feels like learning to fly a helicopter when you just need to cross the street, Microsoft Forms offers a gentler approach. It’s cloud-based, user-friendly, and integrates beautifully with PowerPoint presentations.
But here’s the catch: Microsoft hasn’t made this as straightforward as it should be, especially for PowerPoint quizzes. Let’s fix that.
The Right Way to Create Forms-Integrated Quizzes
Most people make this mistake: they create a PowerPoint quiz first, then try to connect it to Forms. Wrong order. Think of it like building a house—you need the foundation (Forms) before the structure (PowerPoint).
Step 1: Start in Excel Online
Yes, you read that right. Excel, not PowerPoint. Navigate to Excel Online, create a new workbook, and save it with a descriptive name like “Biology Quiz Results.”

Step 2: Insert a New Form from Excel
Click the Insert tab, then select Forms → New Form. This crucial step creates a direct pipeline between your form responses and this specific Excel workbook. Miss this step, and you’ll be manually downloading separate response files like it’s 2010.
Step 3: Name Your Form Strategically
Here’s a neat trick: if you’ve created similar quizzes before, name your new form identically. Microsoft Forms has a memory feature that suggests your previous questions. Type “More Crazy Animals Quiz” (matching an old quiz name), and watch it populate your question bank automatically.
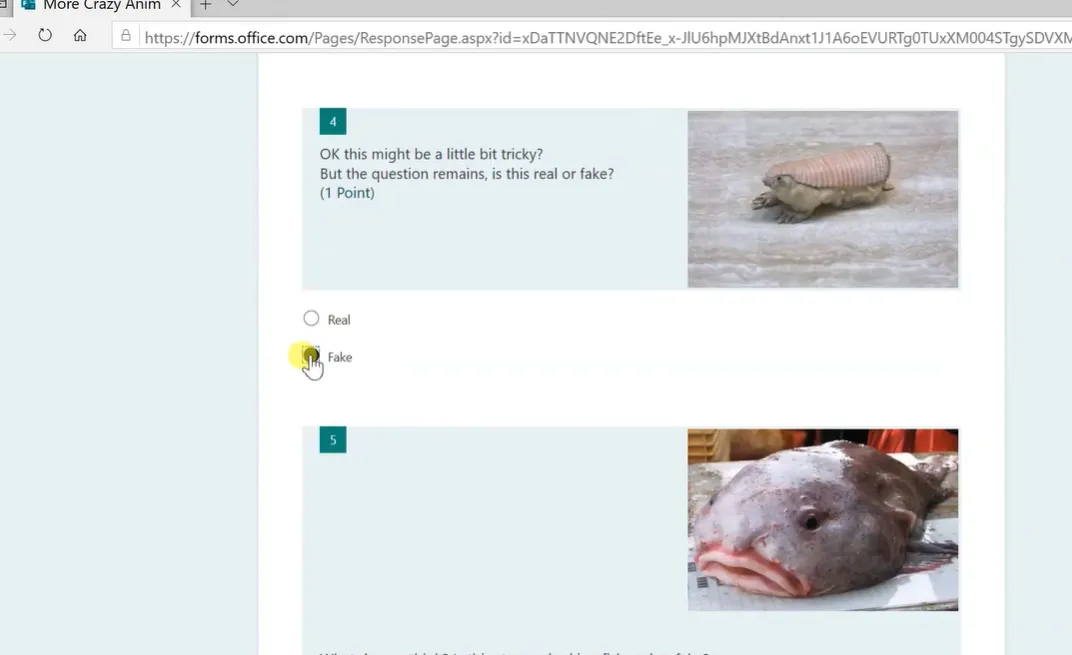
Step 4: Build Your Quiz Questions
Click “Add new” and select your question types. For each:
- Toggle on the “Quiz” setting (critical—this enables automatic grading)
- Mark correct answers
- Assign point values
- Add feedback for both correct and incorrect responses
Remember: Once you’ve quoted one source in a Forms quiz, rely on paraphrasing for additional content from that source to respect copyright.
Integrating Forms with PowerPoint
Now that your Form exists, embedding it in PowerPoint is simple:
- In Microsoft Forms, click the “Share” button
- Copy the embed code or link
- In PowerPoint, insert a new slide and add a hyperlink or embedded iframe
- Test thoroughly in presentation mode
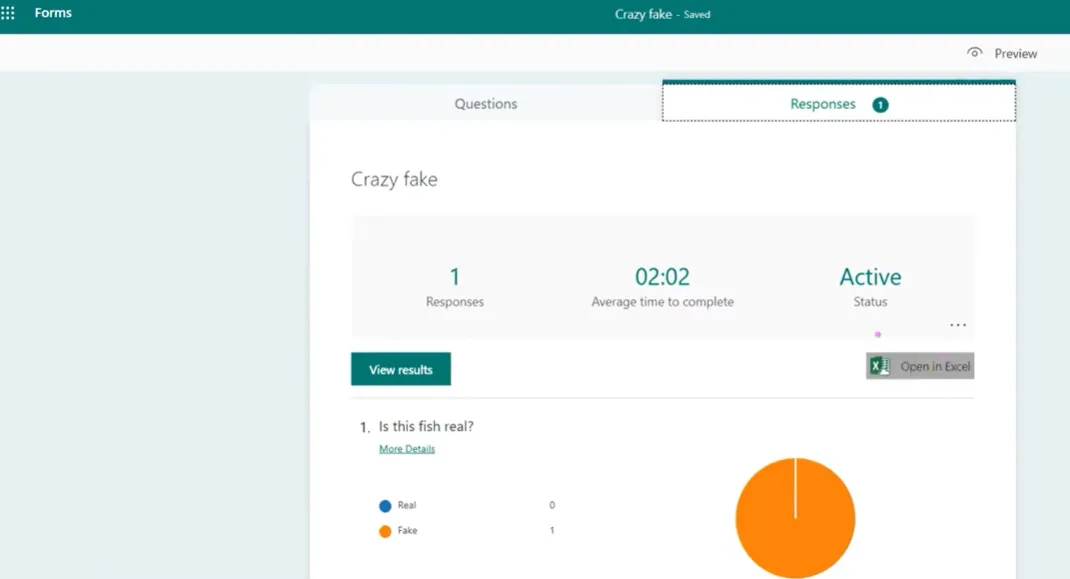
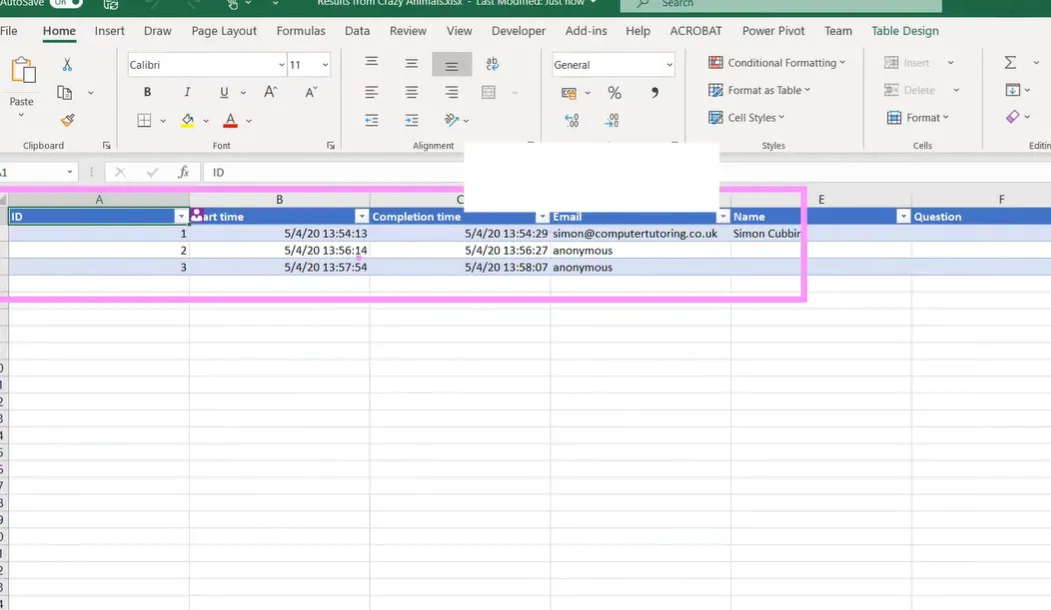
The Automatic Excel Magic
Here’s where things get beautiful. Every time someone completes your Forms quiz—whether from PowerPoint or a shared link—their responses automatically flow into your Excel workbook. No buttons to click. No files to download. It just… happens.
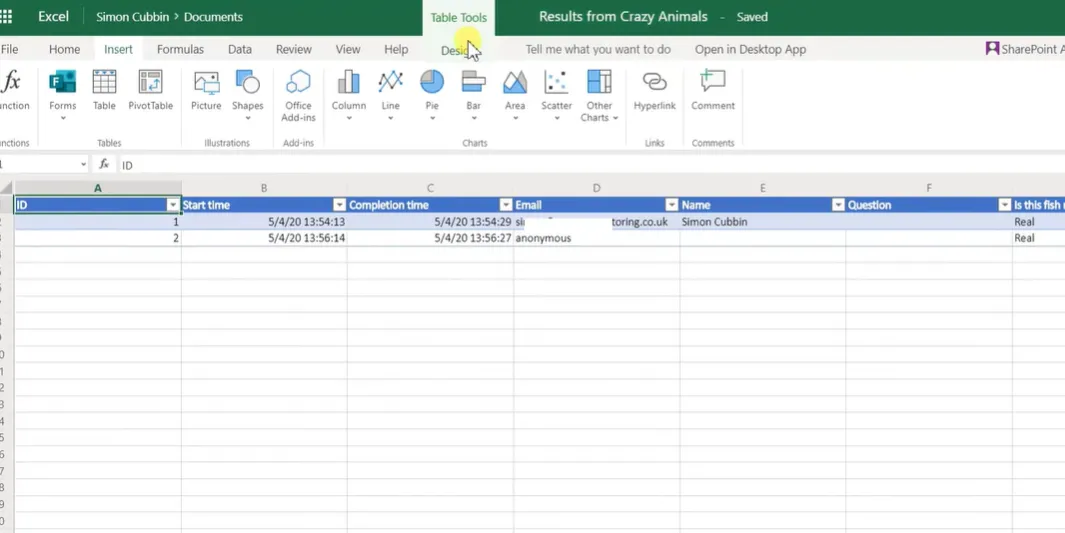
Watch your Excel spreadsheet come alive with data:
| Name | Completion Time | Score | Question 1 | Question 2 | |
|---|---|---|---|---|---|
| Sarah Johnson | [email protected] | 10:23 AM | 85% | Correct | Incorrect |
| Mike Chen | [email protected] | 10:27 AM | 92% | Correct | Correct |
Handling Anonymous Responses
If your quiz needs to reach people outside your organization (think open enrollment courses or public workshops), you’ll hit a snag: external responses show up as “Anonymous.”
The workaround? Add a text field question at the beginning: “Please enter your full name.” It’s old-school, but it works. Combine this with timestamp data for verification if needed.
When Microsoft Forms Wins
- You need cloud-based, anywhere-access solutions
- Multiple people need to access the same quiz results
- Your organization already uses Microsoft 365
- You want automatic organization-wide email collection
- Real-time collaboration on results matters
Method 3: OnlineExamMaker Auto-gading AI Exam Software
Now let’s talk about the purpose-built solution. OnlineExamMaker isn’t trying to retrofit quiz functionality into presentation software—it’s designed from the ground up for assessment, tracking, and reporting.
Think of it this way: you could use a Swiss Army knife to cut a steak, but wouldn’t you rather have a proper steak knife? That’s the difference between PowerPoint hacks and dedicated exam software.
What Makes OnlineExamMaker Different
AI-Powered Question Generation
Here’s where things get futuristic. Instead of manually typing every quiz question, OnlineExamMaker’s AI can generate questions based on your learning content. Upload a PDF of your training manual, and watch it create relevant multiple-choice, true/false, and fill-in-the-blank questions automatically.
Is it perfect? No AI is. But it’s phenomenal for creating first drafts that you can refine, saving hours of question writing.
Create Your Next Quiz/Exam Using AI in OnlineExamMaker
How to Creating a Quiz in OnlineExamMaker
Step 1: Set Up Your Exam

- Log into OnlineExamMaker (cloud-based, works on any device)
- Click “Create New Exam”
- Choose between manual question entry or AI generation
- Configure settings: time limits, question randomization, passing scores
Step 2: Design Your Questions
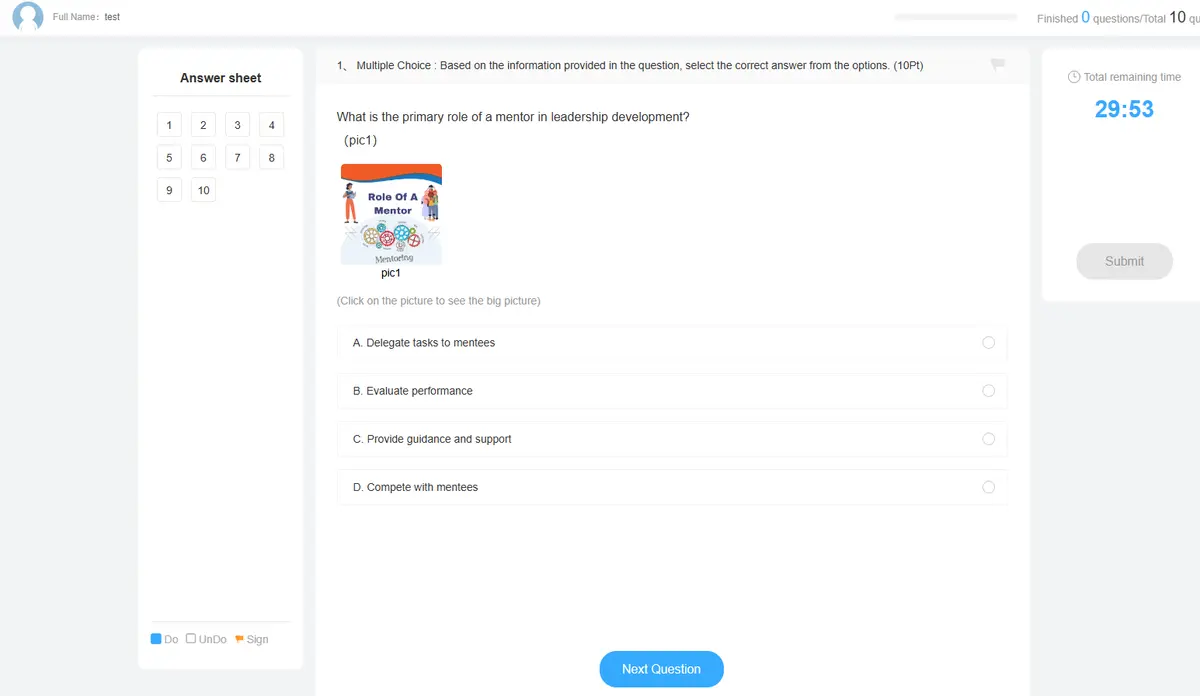
OnlineExamMaker supports richer question types than PowerPoint ever could:
- Multiple choice (single or multiple answers)
- True/False
- Fill in the blanks
- Essay questions with manual grading
- Image-based questions
- Audio/video questions
- Matching pairs
- Ordering/sequencing
Each question type includes customizable feedback, point values, and difficulty ratings. You can even create question pools that randomly select questions, ensuring each participant gets a unique quiz variant (great for preventing cheating).
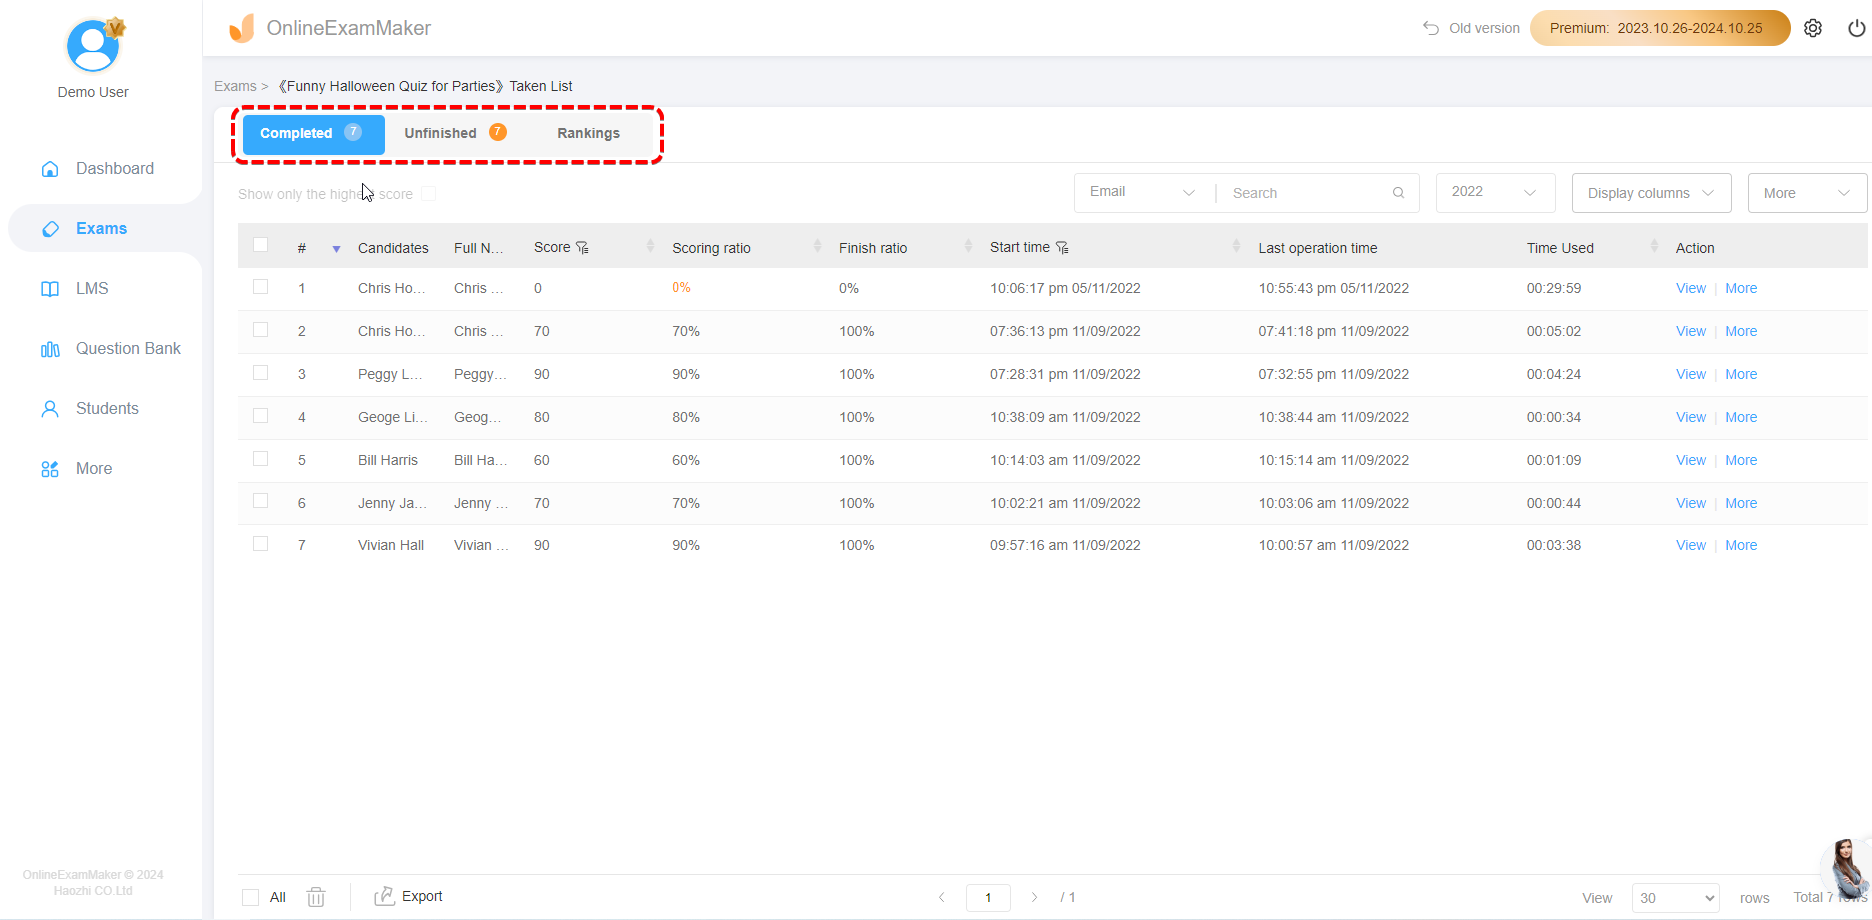
Instant Reporting and Insights
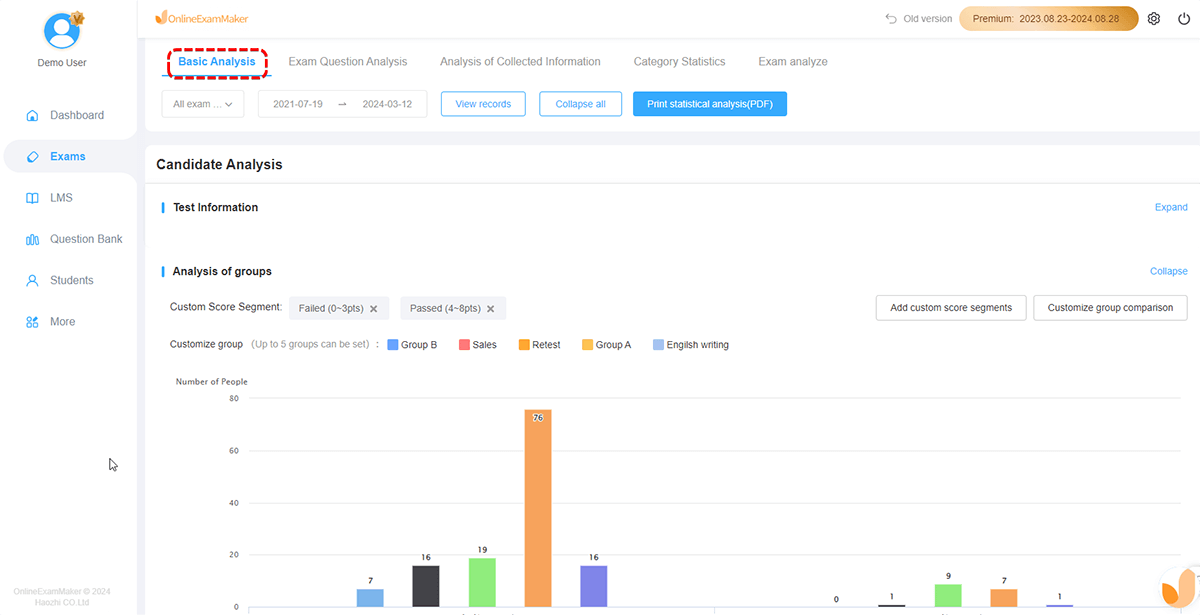
This is where OnlineExamMaker truly shines. The moment a participant clicks “Submit,” you get:
| Feature | What You See | Why It Matters |
|---|---|---|
| Individual Reports | Complete answer breakdown per person | Identify struggling learners immediately |
| Question Analytics | Success rate per question | Find poorly-worded or too-difficult questions |
| Time Tracking | How long each section took | Optimize quiz length and pacing |
| Comparative Stats | Percentile rankings, averages | Benchmark performance across groups |
| Export Options | Excel, PDF, CSV formats | Share with stakeholders in their preferred format |
Collecting and Analyzing Feedback
Beyond right/wrong answers, OnlineExamMaker lets you embed feedback collection:
- Post-quiz surveys: “How difficult was this exam?” “Was the time sufficient?”
- Confidence ratings: Participants rate how sure they are of each answer
- Topic mastery tracking: Tags questions by learning objective for granular analysis
This meta-data transforms your quiz from a simple test into a powerful learning diagnostic tool. You’ll know not just who struggled, but why they struggled and what content needs revision.
Real-Time Dashboard
Picture this: you’re delivering training to 50 people. They’re taking your quiz right now. Your OnlineExamMaker dashboard shows:
- Who’s finished, who’s still working
- Live average score updates
- Which questions are causing the most trouble
- Completion rates by time elapsed
It’s like having X-ray vision into your training effectiveness. No more waiting until tomorrow to know if your content landed.
The Excel Export Advantage
When you do need data in Excel (for custom analysis, board presentations, or integration with other systems), OnlineExamMaker provides one-click exports with:
- Clean, pre-formatted data (no cleanup required)
- Customizable column selection
- Filtered exports (e.g., “only participants who scored below 70%”)
- Scheduled automatic exports to email or cloud storage
When OnlineExamMaker Is Your Best Bet
- You conduct regular assessments (weekly, monthly, quarterly)
- Remote or hybrid training is your reality
- You need detailed analytics beyond simple scores
- Compliance and audit trails matter (HR, healthcare, finance)
- Multi-format questions are essential
- You want anti-cheating features (browser lockdown, question randomization)
Comparing Your Options in Exam Grading
Let’s cut through the noise. Here’s your decision matrix:
| Factor | VBA Macros | Microsoft Forms | OnlineExamMaker |
|---|---|---|---|
| Setup Complexity | High (coding required) | Medium (multi-step) | Low (wizard-driven) |
| Cost | Free (Office license) | Free (M365 license) | Freemium (paid tiers) |
| Offline Capability | Yes | No | No |
| Real-Time Analytics | No | Basic | Advanced |
| Question Variety | Limited | Good | Extensive |
| Scalability | Limited | Good | Excellent |
| Best For | Tech-savvy users, offline needs | M365 organizations, simple quizzes | Professional trainers, complex assessments |
My honest take? If you’re running one-off quizzes and already live in PowerPoint, start with VBA or Microsoft Forms. If assessments are a core part of your work—if you’re training people professionally—invest in purpose-built software like OnlineExamMaker. Your future self will thank you.
Best Practices for Quiz Data Management
Data Security and Privacy
Let’s talk about something unsexy but critical: protecting participant data. Whether you’re using PowerPoint, Forms, or dedicated software, follow these rules:
- Minimize collection: Only gather data you actually need. Do you really need home addresses for a product knowledge quiz?
- Secure storage: Use encrypted cloud storage or password-protected local files
- Retention policies: Delete old quiz data after it’s no longer needed (check local regulations—GDPR, CCPA, etc.)
- Access controls: Limit who can view raw responses vs. aggregated reports
Designing Better Quizzes
Automatic export is worthless if your quiz design is garbage. A few principles:
Questions should have one clear correct answer. Ambiguity frustrates participants and invalidates your data. If you find yourself writing explanations like “Well, technically both B and C could be correct depending on interpretation…”—rewrite the question.
Mix difficulty levels strategically. Start with confidence-building easy questions, ramp up to challenging ones, end with medium difficulty so participants don’t finish demoralized. This isn’t just kindness—it’s good measurement science.
Use data to improve. If 80% of participants miss the same question, that’s not a participant problem—it’s a teaching problem or a question problem. Your Excel data is a diagnostic tool pointing directly at content that needs revision.
Balance speed with thoughtfulness. Time limits create urgency, but overly tight constraints turn assessments into typing tests rather than knowledge checks. Analyze completion time data to find the sweet spot.
Making Your Data Actionable
Raw scores sitting in an Excel file help nobody. Here’s how to turn numbers into action:
Identify Patterns, Not Just Failures
Look beyond individual scores. Are morning sessions scoring higher than afternoon? Are certain question types consistently problematic? Is there a correlation between completion time and accuracy? These patterns reveal systemic issues worth addressing.
Create Intervention Triggers
Set up conditional formatting in Excel to flag scores below certain thresholds. Anyone below 70%? They get a follow-up email with additional resources. Below 50%? They’re enrolled in a remedial session. Automate compassion.
Build Longitudinal Tracking
Don’t just measure once. Track the same participants across multiple quizzes to measure actual learning progression. Did that employee who scored 65% in January improve to 85% by March? That’s the story worth sharing with leadership.
Documentation That Actually Helps
Future you will curse present you if you don’t document your setup. Create a simple guide covering:
- How to access quiz results
- What each column in the Excel file means
- Troubleshooting steps for common issues
- Contact info for technical support
- Version history (if you update quizzes)
Store this documentation with your quiz files. A README.txt in the same folder works wonders six months later when you’ve forgotten how everything connects.
Frequently Asked Questions
Can I use these methods on Mac?
VBA macros work on Mac Office, but with some limitations. Excel automation is slightly less reliable on macOS. Microsoft Forms works identically across platforms since it’s cloud-based. OnlineExamMaker is browser-based, so Mac/PC/Linux makes no difference.
What if my organization blocks macros for security?
Understandable policy. Your options: (1) Request IT to whitelist specific macro-enabled files, (2) Switch entirely to Microsoft Forms or OnlineExamMaker, or (3) Use macro-free alternatives like hyperlinked slides that manually direct users to external forms.
How do I prevent cheating with automated quizzes?
Tough question deserving honest answers. For VBA/PowerPoint: it’s challenging. People can screenshot questions. For Microsoft Forms: enable question shuffling and time limits. For OnlineExamMaker: use browser lockdown, webcam proctoring, and question pools. But remember: if the stakes are high enough, determined people will find workarounds. Design assessments
that test application and understanding, not just memorization.
Can multiple people take the same quiz simultaneously?
VBA method: No, each session creates separate Excel files (by design). Microsoft Forms: Absolutely, it’s built for this. OnlineExamMaker: Yes, with concurrent user limits depending on your subscription tier.
How long does it take to set up each method?
Realistic estimates for a 10-question quiz:
- VBA Macros: 2-4 hours for first-time setup, 30 minutes for subsequent quizzes
- Microsoft Forms: 1-2 hours including Excel integration
- OnlineExamMaker: 30-60 minutes (less if using AI generation)
What happens if Excel crashes during export?
VBA method: Data loss is possible. Add error handling in your code and consider backup mechanisms. Forms/OnlineExamMaker: Cloud-based, so Excel crashes are irrelevant—data is already saved.
Can I customize the Excel export format?
VBA: Completely—you write the code, you control everything. Forms: Limited—you get what Microsoft provides. OnlineExamMaker: Good flexibility—choose columns, apply filters, customize headers.