Modules in Canvas LMS allow instructors to organize content and streamline the instructional path for students. Modules can contain links to files, discussions, assignments, quizzes, and other learning materials.
In this article
- Part 1: How you can create and organize modules in Canvas
- Part 2: OnlineExamMaker – A free alternative way to create online courses
How you can create and organize modules in Canvas:
Creating a Module:
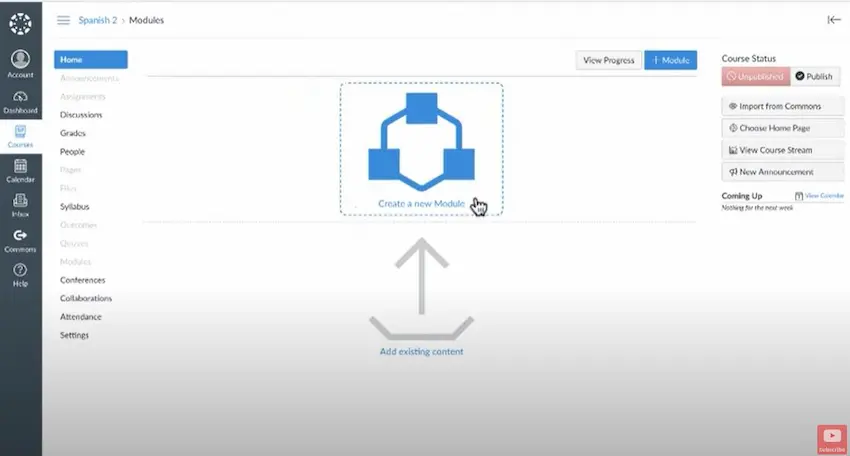
1. Log in to Canvas and navigate to your course.
2. In the course navigation menu on the left, click on “Modules.”
3. Click the “+ Module” button, typically located at the top right or top center of the Modules page.
4. Enter a name for your module. You can also:
• Lock the module until a specific date.
• Set prerequisites if you want students to complete another module before starting this one.
5. Click the “Add Module” button to create the module.
Adding Content to a Module:
1. Once you’ve created a module, you’ll see an “+ (Add)” icon next to its name. Click on it to add content.
2. A dropdown menu will appear with options like “Assignment,” “Quiz,” “File,” “Content Page,” and more. Select the type of content you want to add.
3. Depending on the content type, you’ll either choose from existing items or create a new item to add to the module.
4. You can also add “Text Headers” within a module to further segment and organize content.
5. For items like quizzes or assignments, you can also set requirements, such as a minimum score, to move on to the next module item.
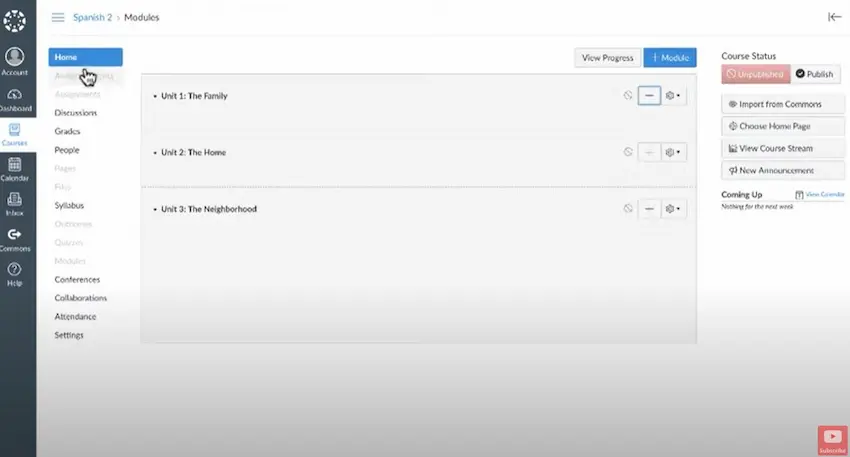
Organizing and Reordering Modules and Items:
1. To the left of each module and module item, you’ll notice a dotted grid icon. This is a drag handle.
2. Click and drag using this handle to reorder modules or individual items within a module.
3. If you have a lot of content and want to streamline the view, you can collapse or expand modules by clicking the triangle/arrow icon next to the module name.
Other Useful Tips:
• Locking Modules: If you want to control the pace of your course, you can lock entire modules until students meet certain criteria. This could be based on dates or completion of prior modules.
• Publishing Modules: Remember, students won’t see your modules or module items unless they are published. Look for the cloud icon next to each module and item. A green check indicates it’s published, while a grey cloud means it’s unpublished.
• Module Settings: By clicking the three dots (often referred to as the “kabob” icon) next to a module’s name, you can access additional settings, like editing, duplicating, or deleting a module.
By thoughtfully creating and organizing modules in Canvas, you can provide a structured, intuitive path for students to progress through your course content.
OnlineExamMaker – A free alternative way to create online courses
OnlineExamMaker is an innovative and comprehensive training management software designed to streamline and enhance the training processes within organizations. With its powerful tools, OnlineExamMaker enables efficient planning, delivery, and tracking of employee training programs.
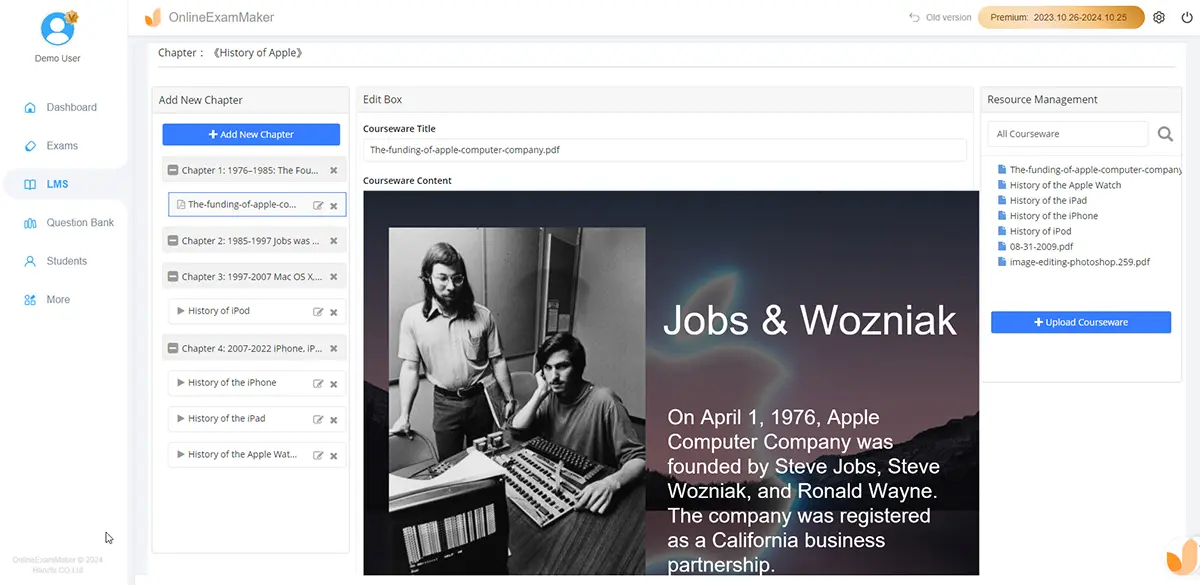
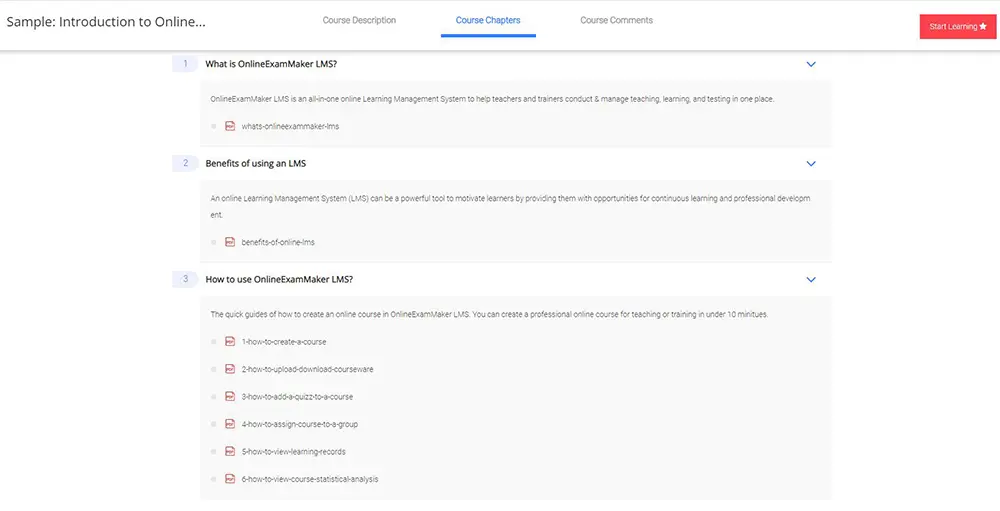
Course Creation and Management: OnlineExamMaker LMS provides an intuitive interface for instructors to create, organize, and manage course content effectively.
Multimedia-Rich Content: Educators can create engaging lessons using multimedia elements like videos, images, and interactive modules.
Collaborative Learning: OnlineExamMaker supports group projects, discussions, and peer feedback, fostering collaborative learning experiences.
Mobile Accessibility: Learners can access their coursework and engage in discussions from any device, enabling flexible and on-the-go learning.
Create Your Next Quiz/Exam with OnlineExamMaker
How to create a professional course in OnlineExamMaker LMS
Step 1: Log in to OnlineExamMaker
Step 2: Create a New Course:
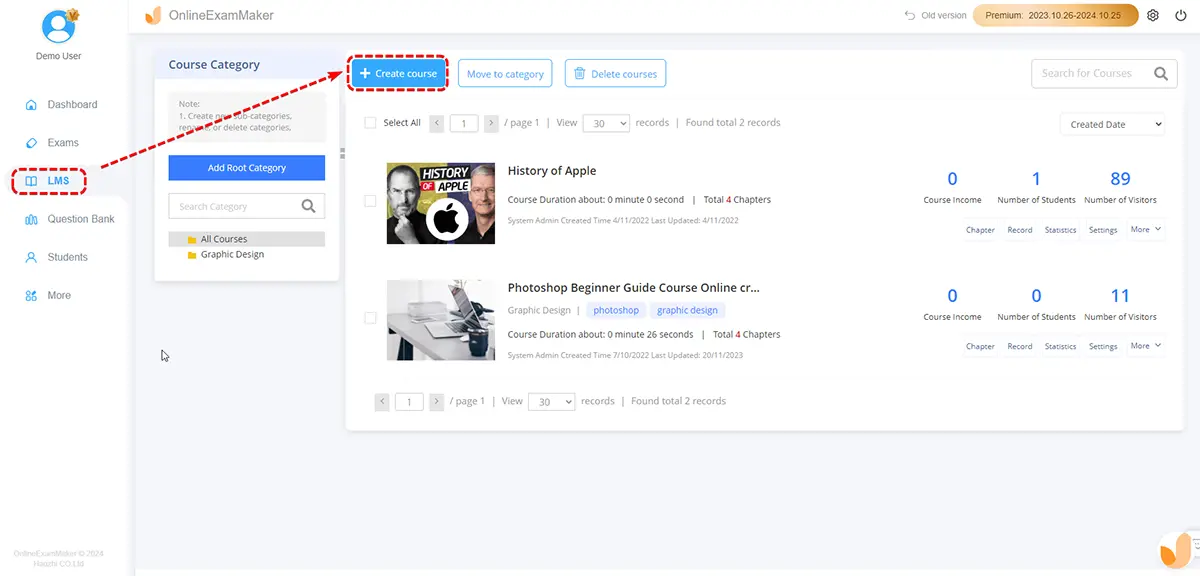
Click on “Create course” button, the ill out the necessary course details like Course Name, , Description
Step 3: Edit Course Structure:
You can create a custom structure based on your preference.
Step 4: Publish your course
Once your course is set up, continue to interact with your students, provide feedback, and make necessary updates based on the learning experience.