Google Forms has been quietly offering auto-grading features that many educators overlook or underutilize. Sure, it’s not perfect—we’ll be honest about that—but when used correctly, it can shave hours off your workload. And for those moments when Google Forms just doesn’t cut it, we’ll explore smarter alternatives that use AI to do the heavy lifting.
- Understanding Google Forms Auto-Grading Capabilities
- Setting Up Auto-Grading in Google Forms
- The Auto-Grading Process Explained
- Working Around Google Forms Limitations
- How to Create an Auto-Grading Quiz with OnlineExamMaker AI
- Best Practices for Auto-Grading Short Answers

Understanding Google Forms Auto-Grading Capabilities
First things first: what can Google Forms actually do when it comes to auto-grading?
The short answer? It’s a bit like using a sledgehammer when you need a scalpel. Google Forms operates on exact match logic, meaning student responses must match your predefined correct answers character-for-character. Miss a capital letter? Wrong. Add an extra space? Wrong. Write “colour” instead of “color”? You guessed it—wrong.
This makes Google Forms fantastic for simple, factual questions where there’s genuinely only one right answer. Think:
- Mathematical answers: “What is 7 × 8?” (Answer: 56)
- Single-word responses: “What is the capital of France?” (Answer: Paris)
- Specific terms: “What gas do plants absorb during photosynthesis?” (Answer: Carbon dioxide)
But here’s where it gets tricky. Ask something like “Explain why photosynthesis is important,” and you’ve entered the danger zone. One student writes “plants make oxygen,” another says “it creates oxygen for breathing,” and a third goes with “photosynthesis produces O2.” All correct. All potentially marked wrong by Google Forms unless you’ve anticipated every possible variation.
So why use it at all? Because for the right types of questions, it works beautifully. And combined with strategic quiz design, you can automate a significant chunk of your grading workload.
Setting Up Auto-Grading in Google Forms
Ready to transform your form into a grading machine? Here’s how to do it, step by step.
Step 1: Enable Quiz Mode
Open your Google Form and locate the gear icon (settings) in the top-right corner. Click it, then navigate to the “Quizzes” tab. You’ll see a toggle that says “Make this a quiz”—flip that switch to “on.”
Now here’s a pro move most people miss: under “Release grade,” select “Later, after manual review” if you’re planning to mix auto-graded questions with ones that need your human touch. This gives you control over when students see their scores, preventing the awkward scenario where they see their auto-graded results before you’ve reviewed their short answers.
Step 2: Create Your Answer Key
Here’s where the magic happens. When you add a short answer question to your quiz, you’ll notice a new option at the bottom: “Answer key.” Click it.
In the answer key interface, you can:
- Enter the correct response(s)
- Assign point values
- Add multiple acceptable variations of the same answer
Let’s say you’re asking “What planet is known as the Red Planet?” You might enter:
- Mars
- mars
- MARS

Yes, you need to manually add each variation. It’s tedious, but it’s better than grading 150 submissions by hand. Think of it as an upfront investment that pays dividends later.
There’s also a toggle for “Mark all other answers as wrong.” Leave this on unless you plan to manually review non-matching responses—which, let’s be real, defeats the purpose of auto-grading in the first place.
Step 3: Assign Point Values
Each question can have its own point value. A simple recall question might be worth 1 point, while a more complex short answer could be worth 3 or 5. The system is flexible—use it to reflect the weight you want each question to carry in the final score.
The Auto-Grading Process Explained
So what happens when students actually take your quiz?
As responses roll in, Google Forms compares each short answer against your predefined correct responses. If there’s an exact match, boom—full points awarded automatically. The student sees their score (if you’ve set grades to release immediately), and you see one less thing to manually grade.
But what about responses that don’t match? Here’s where things get interesting.
Non-matching answers show up as “Unanswered” in your Responses tab. Navigate to the “Question” view, and you’ll see all the responses that need your attention. From there, you can award full points, partial credit, or zero points on a case-by-case basis.
This hybrid approach—auto-grading what’s clear-cut and manually reviewing the rest—is actually pretty smart. You’re not locked into an all-or-nothing system. You’re using technology where it excels and applying human judgment where it matters.
Working Around Google Forms Limitations
Let’s address the elephant in the room: Google Forms’ exact matching system is… limiting. Frustratingly so, sometimes.
Student writes “H2O” instead of “water”? Wrong. “The mitochondria” instead of “mitochondria”? Wrong. “Because it’s important for life” instead of “It’s important for life”? Also wrong.
Thankfully, clever educators have found workarounds.
Solution 1: Use Add-Ons
Enter Flubaroo, a free Google Sheets add-on that brings fuzzy matching to the table. Instead of requiring exact matches, Flubaroo can recognize similar responses and group them for batch grading. You can review all variations of “mitochondria” at once and decide whether “the mitochondria,” “mitochondrion,” and “Mitochondria” all deserve full credit.
It’s an extra step—you’ll need to send your form responses to Google Sheets and run Flubaroo—but for larger classes or more nuanced questions, it’s a lifesaver.
Solution 2: Redesign Your Questions
Sometimes the best solution is prevention. If a question is genuinely important but has too many acceptable variations, consider converting it to multiple choice instead. Yes, you lose the open-ended nature of short answers, but you gain reliable auto-grading and eliminate ambiguity.
For example, instead of “What gas do plants produce during photosynthesis?” (answers could be oxygen, O2, O₂, Oxygen, etc.), try:
What gas do plants produce during photosynthesis?
- A) Carbon dioxide
- B) Nitrogen
- C) Oxygen
- D) Hydrogen
Less room for interpretation, guaranteed auto-grading, same learning objective assessed.
Solution 3: Accept the Manual Review
Here’s an uncomfortable truth: some questions just shouldn’t be auto-graded. “Explain the significance of the Battle of Gettysburg” or “Describe the water cycle in your own words” deserve thoughtful human evaluation. Auto-grading these would do your students a disservice.
The smart move? Use auto-grading for factual recall and save your energy for questions that require critical thinking, explanation, and synthesis. Your students get better feedback, and you’re not wasting time grading whether they spelled “photosynthesis” correctly.
How to Create an Auto-Grading Quiz with OnlineExamMaker AI?
Now, what if I told you there’s a platform that handles all this—and more—with artificial intelligence?
OnlineExamMaker takes auto-grading to the next level by using AI to understand meaning, not just exact text matches. A student writes “the powerhouse of the cell” instead of “mitochondria”? OnlineExamMaker’s AI can recognize that as correct (or at least flag it for quick review).
Create Your Next Quiz/Exam Using AI in OnlineExamMaker
Here’s how to set up an auto-grading quiz with OnlineExamMaker AI:
Step 1: Create Your Quiz
Log into OnlineExamMaker and click “New exam.” You’ll be guided through a straightforward interface where you can add questions, upload materials, and set parameters—all without needing a PhD in educational technology.
Step 2: Leverage AI Question Generation
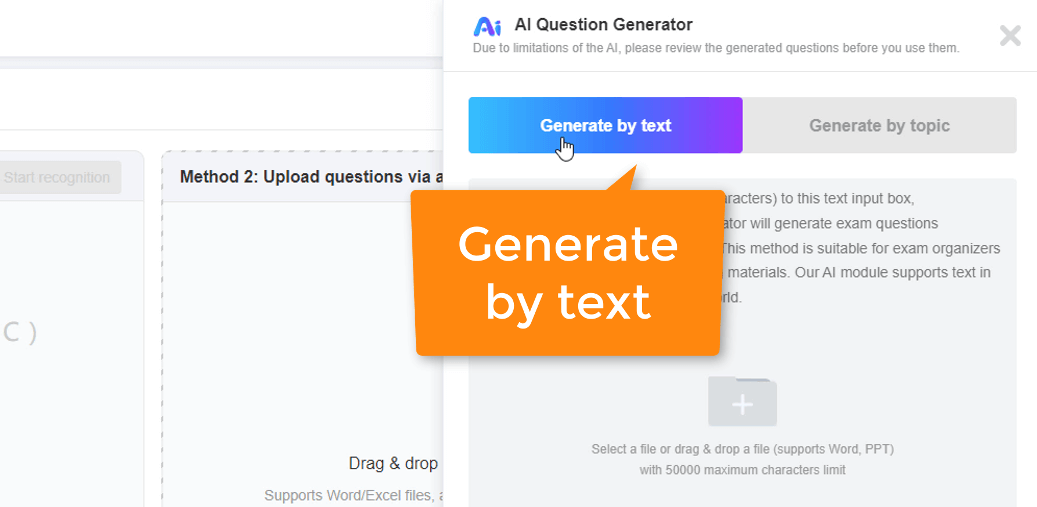
Here’s where things get cool. OnlineExamMaker can generate quiz questions automatically based on your course materials. Upload a PDF, paste in your lesson notes, or link to relevant content, and the AI will create multiple choice, true/false, and short answer questions that actually make sense.
No more staring at a blank screen wondering how to assess learning objective 3.2.4. The AI does the heavy lifting.
Step 3: Configure AI-Powered Auto-Grading
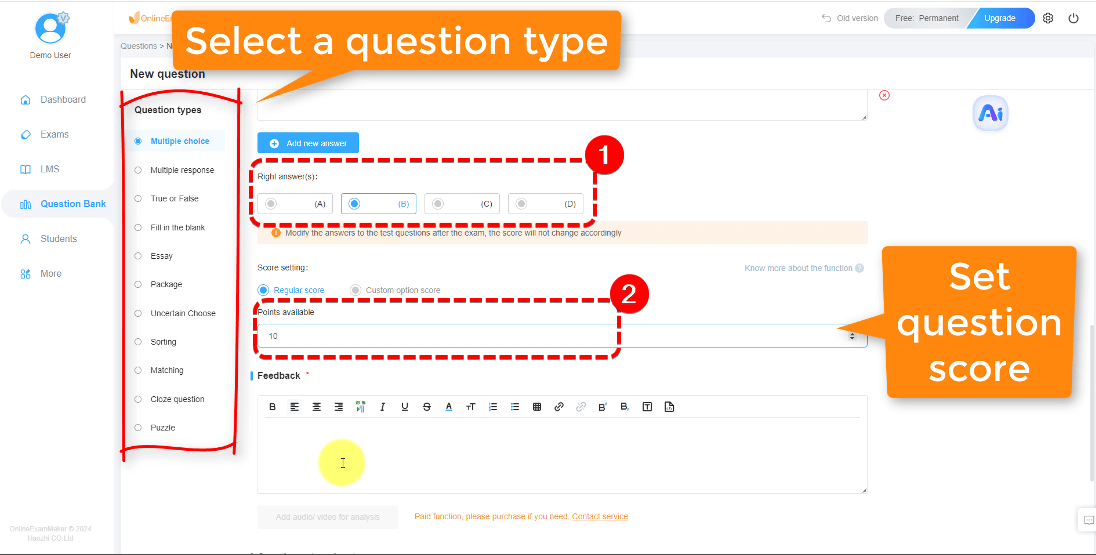
When setting up short answer questions, you’ll have the option to enable “AI-assisted grading.” The system uses natural language processing to evaluate responses based on meaning and context, not just exact wording.
You can set parameters like:
- Strictness level: How closely should responses match the model answer?
- Key concepts: What terms or ideas must be present for full credit?
- Partial credit thresholds: When should the AI award 50% vs. 75% credit?
The AI grades in seconds, and you retain the ability to review and override any score. It’s like having a teaching assistant who never sleeps, never complains, and doesn’t need coffee breaks.
Step 4: Review and Release Results
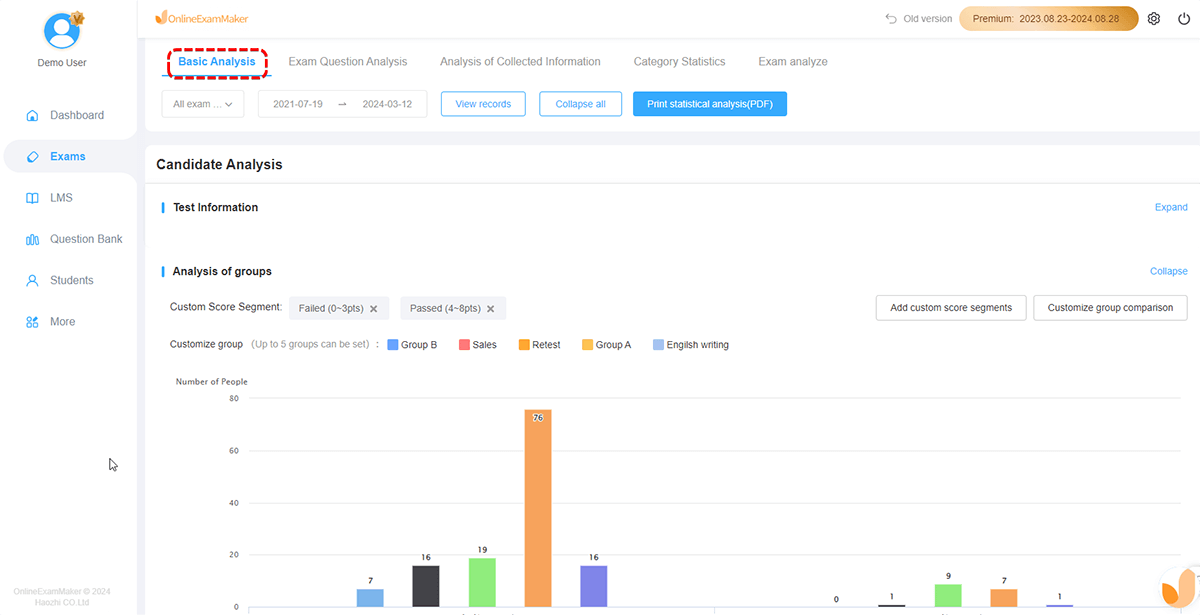
Once students complete the quiz, you’ll get a dashboard showing auto-graded results with any flagged responses that need your attention. Review questionable answers, apply your professional judgment, and release grades—all from one interface.
OnlineExamMaker also provides detailed analytics: which questions stumped students, where common misconceptions appear, and how individuals performed over time. It’s assessment data that actually informs your teaching instead of just filling a gradebook.
Best Practices for Auto-Grading Short Answers
Whether you’re using Google Forms or OnlineExamMaker, these principles will help you get the most out of auto-grading:
1. Match Question Type to Tool Capability
Use auto-grading for factual, single-answer questions. Save complex, interpretive questions for manual review or essay format. Square pegs, square holes—you know the drill.
2. Be Transparent with Students
Let students know which questions are auto-graded and which you’ll review personally. This manages expectations and reduces those “but I said the same thing!” emails.
3. Test Your Quiz First
Before unleashing your quiz on students, take it yourself using various answer formats. Write “H2O” when the answer is “water.” Capitalize randomly. Add extra spaces. You’ll quickly discover which answers need to be added to your acceptable variations list.
4. Use Auto-Grading to Free Up Time for What Matters
The goal isn’t to eliminate all grading—it’s to eliminate mindless grading. Auto-grade the routine stuff so you can spend quality time providing meaningful feedback on complex work.
5. Review Patterns in “Wrong” Answers
When multiple students give the same “incorrect” response, that’s valuable data. Maybe your question was unclear. Maybe there’s a common misconception you need to address. Use auto-grading reports to inform your teaching, not just your grade calculations.
6. Combine Methods Strategically
A quiz doesn’t have to be all auto-graded or all manual. Mix multiple choice (100% auto-gradable), short answer with exact matching (mostly auto-gradable), and open-ended questions (manual review needed). This balanced approach maximizes efficiency while maintaining academic rigor.
The Bottom Line
Auto-grading short answer questions isn’t about replacing teachers with robots—it’s about using technology intelligently to reclaim time for the work that truly requires human expertise. Google Forms offers a solid, free option for straightforward assessments with exact-match requirements. For more sophisticated needs—nuanced responses, AI-powered evaluation, and detailed analytics—platforms like OnlineExamMaker raise the bar considerably.
The question isn’t whether you should use auto-grading. In 2025, with class sizes growing and administrative demands multiplying, the question is: why wouldn’t you?
Start small. Auto-grade one quiz. See how it feels. Adjust your questions based on what works and what doesn’t. Before you know it, you’ll be spending Friday evenings doing literally anything else besides grading quizzes—and that’s a win in anyone’s book.