QR codes have become the silent heroes of our digital age. They bridge the gap between physical and digital spaces with elegant simplicity. For educators, trainers, and HR managers, creating a QR code for your Google Forms assessment isn’t just convenient—it’s practically essential in today’s mobile-first world.
- Why QR Codes Are Game-Changers for Assessments?
- Method 1: Using Google Chrome’s Built-in QR Code Generator
- Method 2: Using Free Online QR Code Generators
- Creating Assessments with QR Codes Using OnlineExamMaker
- Best Practices for QR Code Assessments
- Troubleshooting Common QR Code Issues
Why QR Codes Are Game-Changers for Assessments?
Before we dive into the how, let’s talk about the why. QR codes eliminate friction. Think about the last time you tried to share a complex URL with a group—the inevitable typos, the “I can’t find it” moments, the frustration mounting as precious time ticks away.
QR codes solve this instantly. One scan, and your respondents are exactly where they need to be. No typing, no confusion, no wasted time. For teachers managing classroom assessments, trainers conducting workshops, or HR managers distributing employee surveys, this simplicity translates to better participation rates and smoother operations.
The numbers speak for themselves: Mobile devices now account for over 60% of web traffic globally. Your audience is already holding the tool they need to access your assessment. A QR code simply makes that connection seamless.
Method 1: Using Google Chrome’s Built-in QR Code Generator
Here’s a secret many people don’t know: Google Chrome has a QR code generator hiding in plain sight. No downloads, no third-party tools, no hassle. It’s the digital equivalent of finding money in your coat pocket—surprisingly delightful and immediately useful.
Step-by-Step Instructions
- Open your Google Forms assessment in Google Chrome. Make sure you’re viewing the form you want to share, not the editing interface.
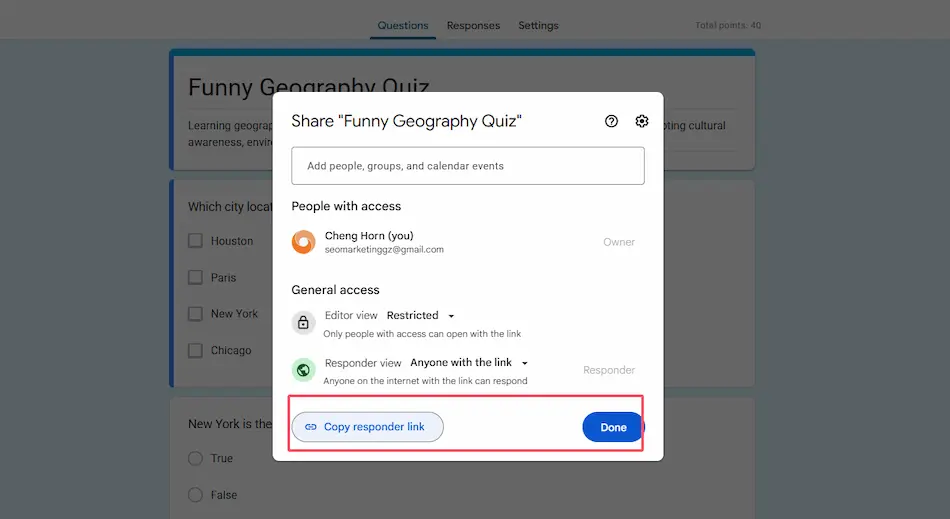
- Click the “Send” button located in the top right corner. This reveals your sharing options.
- Copy the shareable link and open it in a new browser tab. This ensures you’re generating a QR code for the public response page, not the editing view.
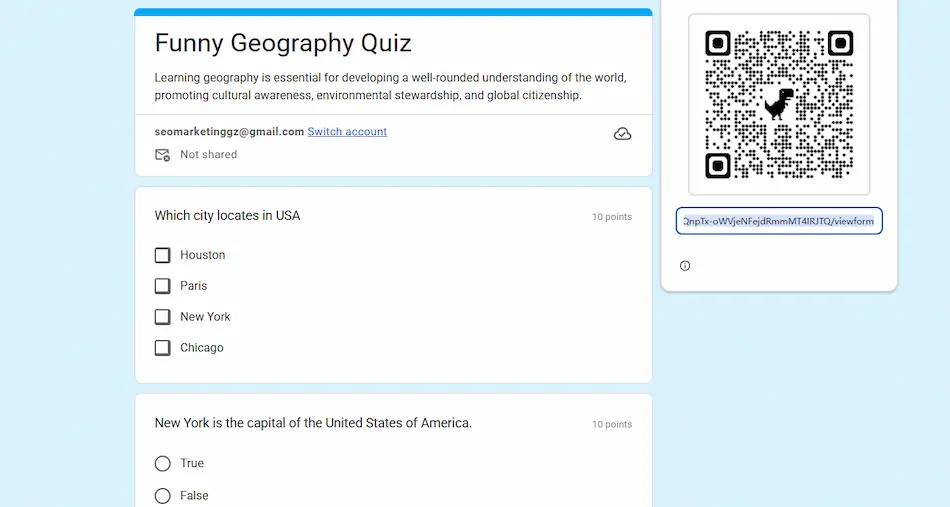
- Right-click anywhere on the page. Make sure you’re clicking on a blank area, not on an image, link, or form field.
- Select “Create QR code for this page” from the context menu that appears.
- Download or copy the QR code. Chrome displays the code in a small popup where you can save it as an image file.
1-getquiz-link.png
2-get-chrome-qrcode.png
The beauty of this approach lies in its simplicity. No account creation, no watermarks, no limitations. It’s Google’s way of making your life easier, and it takes literally seconds once you know where to look.
Method 2: Using Free Online QR Code Generators
Sometimes you need more than basic functionality. Maybe you want your QR code to match your brand colors, or perhaps you’d like to add your organization’s logo to make it instantly recognizable. This is where online QR code generators shine.
Popular Tools and How to Use Them
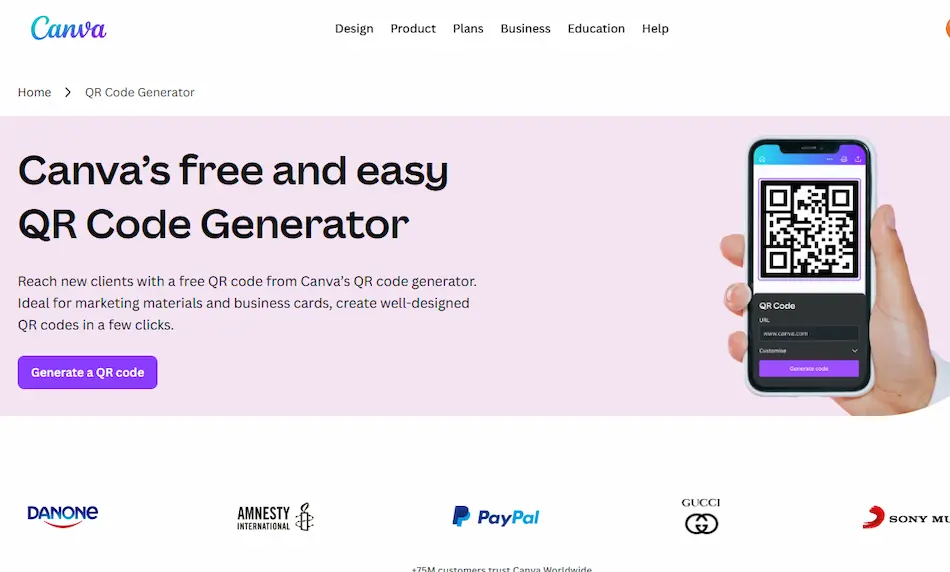
Several reliable platforms offer free QR code generation with customization options. Canva’s QR Code Generator and The-QRCode-Generator.com are particularly user-friendly for educators and professionals.
The Process
- Grab your Google Forms link. In Google Forms, click “Send” and ensure sharing is enabled for “anyone with the link.” Copy this URL—it’s the foundation of your QR code.
- Navigate to your chosen QR code generator website. Sites like Canva.com/qr-code-generator or the-qrcode-generator.com work across all browsers and devices.
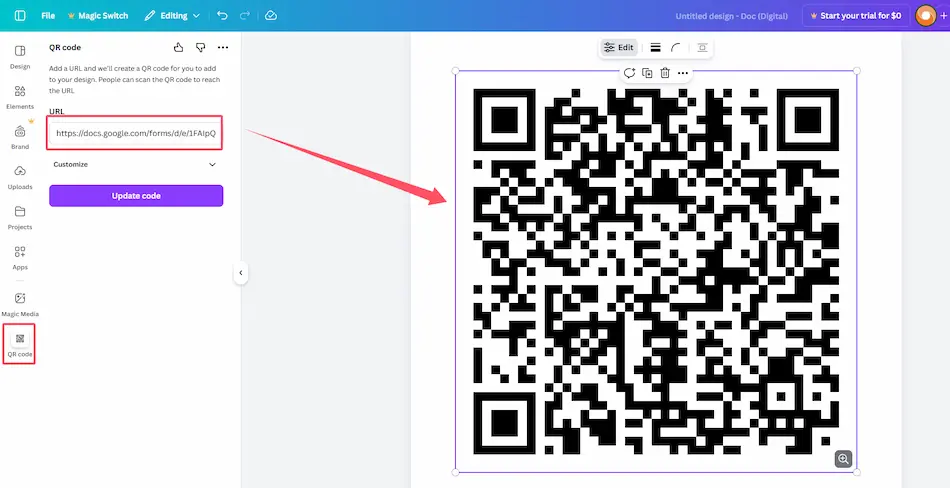
- Paste your Google Forms link into the URL field. The generator typically has a prominent input box waiting for your link.
- Customize your QR code (optional but fun). Add colors that match your institution’s branding, incorporate your logo in the center, or add a frame with text like “Scan to Start Quiz.”
- Generate and download. Most platforms offer PNG or SVG formats. PNG works great for most uses, while SVG maintains quality at any size—perfect for printed materials.
| Platform | Best For | Key Features |
|---|---|---|
| Canva QR Generator | Design-conscious users | Beautiful templates, easy branding integration |
| The-QRCode-Generator.com | Quick, no-frills creation | Fast, straightforward, multiple format options |
| ME-QR | Analytics enthusiasts | Scan tracking, detailed statistics |
| Jotform QR Generator | Frequent form creators | Direct form integration, advanced features |
The customization aspect isn’t just vanity—it’s practical. A branded QR code looks more professional and trustworthy, which can increase scan rates. When students or employees see your logo, they immediately recognize the source and feel confident scanning.
A Better Alternative: Creating Assessments with QR Codes Using OnlineExamMaker AI
Now, let’s talk about a tool that takes assessment creation to another level: OnlineExamMaker. This AI-powered exam making software isn’t just about creating quizzes—it’s about transforming how you approach assessments from conception to completion.
What Makes OnlineExamMaker Special?
OnlineExamMaker combines sophisticated assessment tools with user-friendly design. It’s built specifically for educators, trainers, and HR professionals who need more than what basic form builders offer. Think of it as the difference between a Swiss Army knife and a specialized toolkit—both useful, but one is designed precisely for your needs.
The platform offers AI-assisted question generation, automatic grading, detailed analytics, and yes—integrated QR code generation. Everything you need lives under one roof, eliminating the need to juggle multiple tools and export-import workflows.
Create Your Next Quiz/Exam Using AI in OnlineExamMaker
How to Create a Quiz with QR Code in OnlineExamMaker?
Creating an assessment with an embedded QR code in OnlineExamMaker is remarkably straightforward. Here’s how it works:
- Sign up and log into OnlineExamMaker. The platform offers a free tier that’s genuinely useful, not a limited trial that pressures you to upgrade.
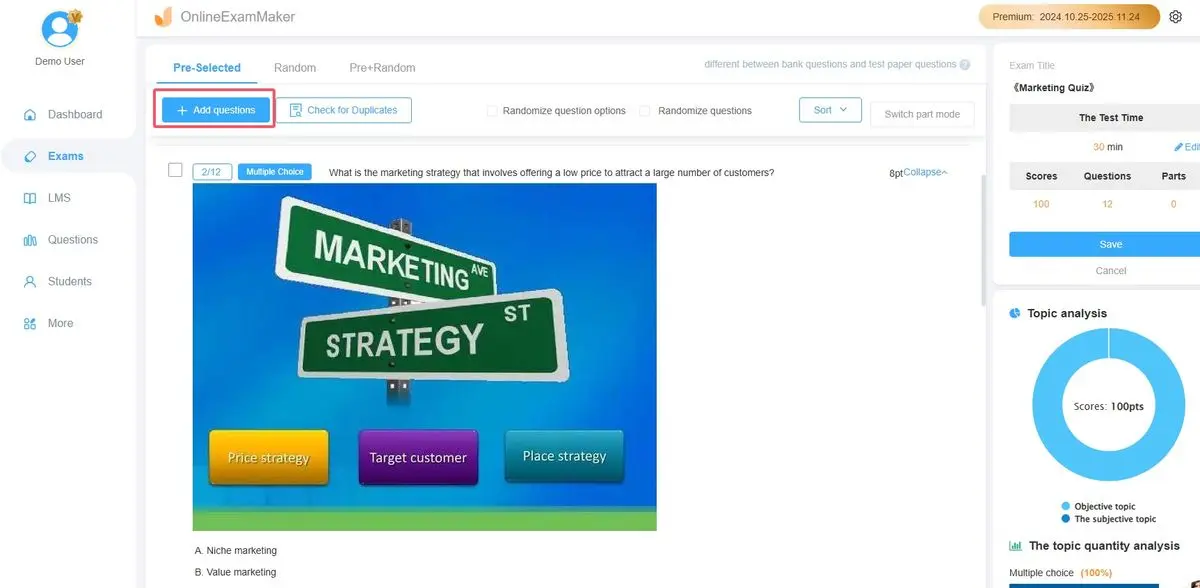
- Create your assessment. Use the intuitive question builder to add multiple choice, true/false, short answer, or essay questions. The AI assistant can even help generate questions based on your topic—just provide your subject matter and let the technology do the heavy lifting.
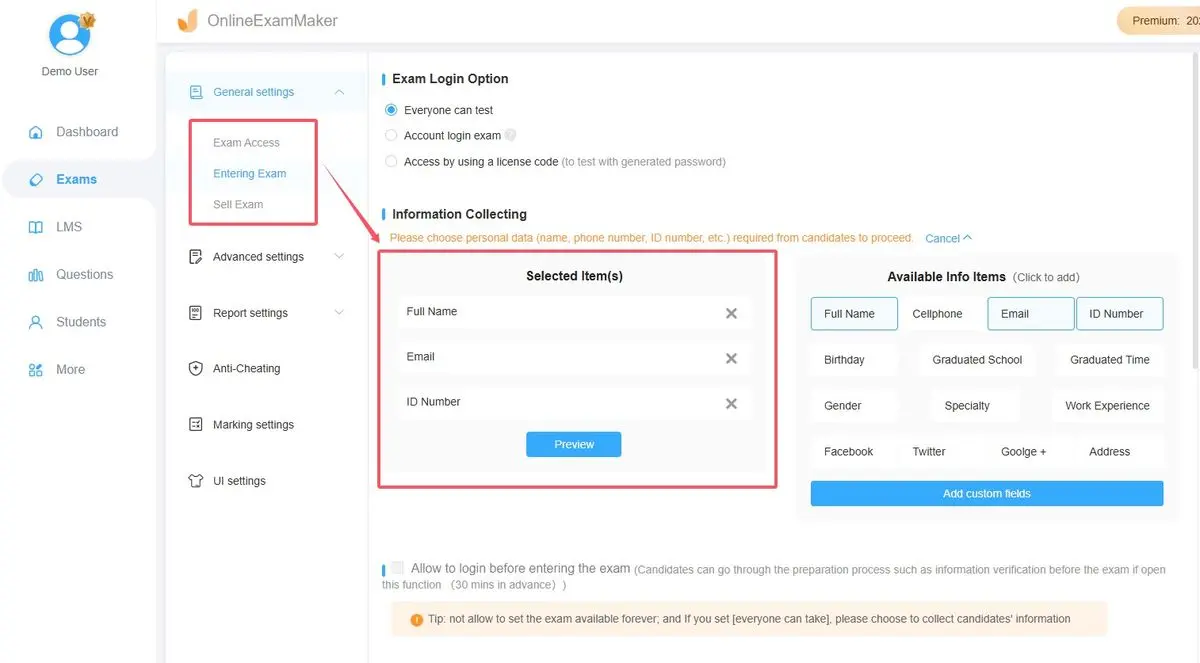
- Configure your quiz settings. Set time limits, randomize questions, enable proctoring features, or customize the passing score. OnlineExamMaker gives you granular control without overwhelming complexity.
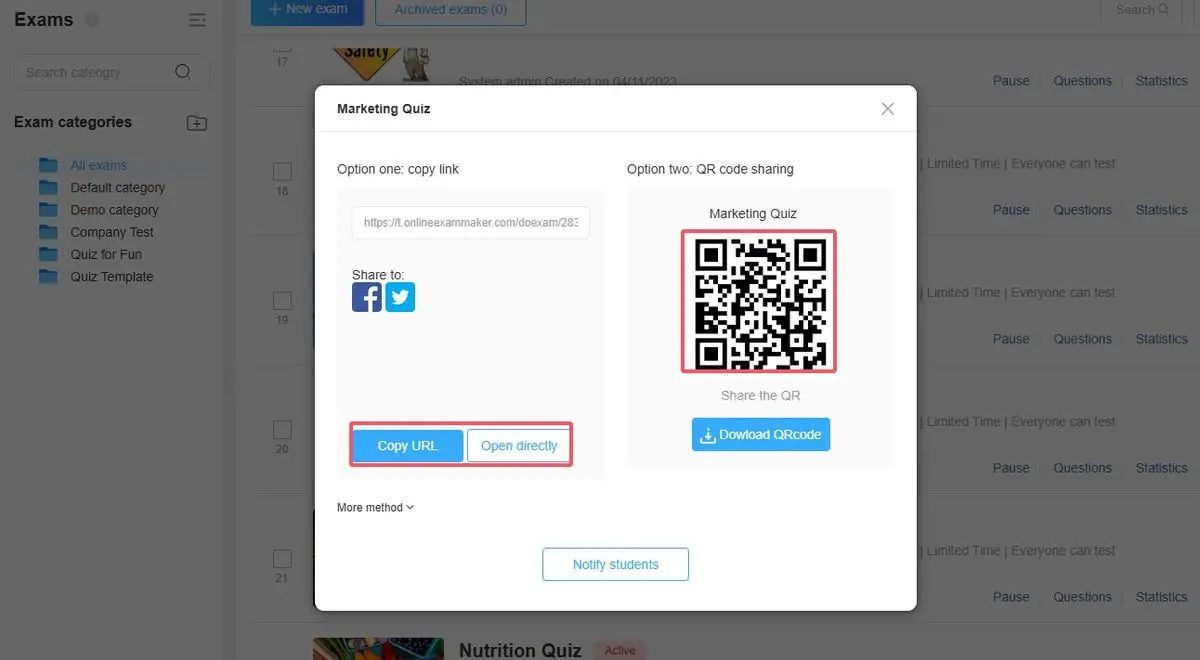
- Generate your QR code. Once your quiz is ready, navigate to the sharing options. OnlineExamMaker automatically generates a unique QR code for your assessment—no need for external tools or additional steps.
- Download and distribute. Save the QR code as an image file, embed it in presentations, print it on handouts, or display it on screens. The code links directly to your quiz, with all your settings intact.
Why This Matters: The integration is seamless. You’re not creating an assessment in one place, then generating a QR code elsewhere, then hoping everything connects properly. OnlineExamMaker handles the entire workflow, reducing errors and saving time.
Advanced Features That Make the Difference
OnlineExamMaker doesn’t stop at basic quiz creation. The platform includes features that address real-world assessment challenges:
- AI Question Bank: Generate questions automatically from your content or learning objectives. This is invaluable when you need to create multiple versions of an assessment or quickly build a practice quiz.
- Automatic Grading: For objective questions, grading happens instantly. Students receive immediate feedback, and you receive aggregated results without manual scoring.
- Detailed Analytics: See which questions caused the most difficulty, track completion rates, and identify knowledge gaps across your group.
- Mobile Optimization: Since respondents access via QR codes on mobile devices, OnlineExamMaker ensures the experience is smooth on any screen size.
- Security Features: Prevent cheating with options like question randomization, time limits, and browser lockdown for high-stakes assessments.
For HR managers conducting employee evaluations or compliance training, the platform’s reporting features prove especially valuable. You can demonstrate training completion, track progress over time, and export data for compliance documentation—all from one central system.
Best Practices for QR Code Assessments
Creating the QR code is just the beginning. Using it effectively requires some strategic thinking. Here are insights from real-world experience:
Test Before You Deploy
Always—and I mean always—test your QR code before distributing it widely. Scan it with multiple devices: an iPhone, an Android phone, maybe a tablet. Nothing erodes confidence faster than displaying a QR code that doesn’t work when your audience tries to scan it.
Check that the code opens your assessment correctly, not the editing interface. Verify that your form is set to “Collect responses” in Google Forms, or that your quiz is published in OnlineExamMaker. These simple checks prevent embarrassing moments and technical delays.
Size and Placement Matter
QR codes need sufficient size to scan reliably. For printed materials, aim for at least 2 x 2 inches (5 x 5 cm). For projected displays, ensure the code is large enough for people in the back row to scan from their seats—typically at least one-sixth of your slide.
Place your QR code where eyes naturally land: upper right corners, centered below headlines, or integrated into your content flow. Don’t hide it at the bottom of a crowded page where it competes with other elements.
Provide Context and Instructions
Don’t assume everyone knows how to scan a QR code. Brief instructions help: “Open your camera app and point it at this code” or “Use any QR scanner app to access the assessment.” This small courtesy increases participation, especially with audiences less familiar with the technology.
Include alternative access methods too. Print the short URL alongside the QR code for people who prefer typing or whose camera isn’t working. Redundancy ensures no one gets left behind.
Consider Your Environment
Where will people scan your QR code? In a bright conference room with Wi-Fi? At an outdoor training event with spotty cell service? Design your assessment with the environment in mind.
For areas with poor connectivity, keep your forms concise and avoid heavy media files that take time to load. For secure environments where phones aren’t allowed, QR codes obviously won’t work—have a backup plan.
Troubleshooting Common QR Code Issues
Even with careful preparation, issues occasionally arise. Here’s how to handle the most common problems:
QR Code Won’t Scan
Possible causes: Poor image quality, insufficient contrast, or the code is too small. Regenerate the code at a higher resolution and ensure there’s strong contrast between the code and its background—black on white is ideal.
Code Scans But Shows Wrong Content
This usually happens when you accidentally generated the QR code from your editing URL instead of the public response URL. Return to your form’s sharing settings, copy the correct public link, and generate a new code.
Respondents Can’t Access the Form
Check your sharing permissions. In Google Forms, ensure the form is set to “Anyone with the link” can respond. In OnlineExamMaker, verify your quiz is published and not still in draft mode. Permissions issues are the most common culprit for access problems.
QR Code Works But Assessment Doesn’t Display Properly
This typically indicates a mobile optimization issue. Test your form on different devices and screen sizes. Both Google Forms and OnlineExamMaker are mobile-friendly by default, but custom formatting or embedded elements can sometimes cause display problems.