Self-assessments are tools or processes where individuals evaluate their own skills, performance, behaviors, or progress against specific criteria or goals. They encourage reflection, self-awareness, and personal growth by allowing people to identify strengths, weaknesses, and areas for improvement. Google Forms is a versatile tool for creating self-assessment quizzes and surveys, offering features like self-grading, customizable question types, and data visualization.
Today’s digital landscape demands smarter, more efficient solutions. And Google Forms? It’s practically begging to transform your evaluation process from tedious to terrific.
- What Exactly Is a Self-Assessment (And Why Should You Care)?
- Why Google Forms Is Your New Best Friend for Assessments?
- Step-by-Step Guide: Creating Your First Self-Assessment Form
- Sharing Your Masterpiece: Distribution Strategies That Work
- Data Analysis: Making Sense of the Results
- OnlineExamMaker: An Alternative Tool to Create Auto Grading Self Assessments
What Exactly Is a Self-Assessment (And Why Should You Care)?
Before we dive into the nitty-gritty of Google Forms self-assessment templates, let’s get our bearings straight. A self-assessment is essentially a mirror – it reflects an individual’s understanding of their own performance, skills, or knowledge.
Think of it as that friend who’s brutally honest about your outfit choices, except this time, you’re both the friend and the person getting the feedback. Revolutionary, right?
Self-assessments serve multiple purposes:
- Promote reflection: They force participants to pause and genuinely think about their performance
- Identify gaps: Like a GPS for learning, they highlight where you are versus where you need to be
- Encourage ownership: Nothing beats the motivation that comes from self-discovery
- Save time: Let’s be honest – who doesn’t want to streamline their workload?

Why Google Forms Is Your New Best Friend for Assessments?
You might be wondering, “Why Google Forms specifically?” Fair question. After all, there are plenty of survey tools floating around the internet like confetti at a New Year’s party.
Here’s the deal: Google Forms for self-assessments offers a sweet spot of simplicity and functionality that’s hard to beat. It’s like finding the perfect pair of jeans – comfortable, versatile, and makes everything else easier.
The Perks That Matter
- Zero cost: Your budget will thank you
- Automatic data collection: Responses flow directly into Google Sheets
- Real-time collaboration: Perfect for team-based assessments
- Mobile-friendly: Works seamlessly on any device
- Integration magic: Plays nicely with other Google Workspace tools
Step-by-Step Guide: Creating Your First Self-Assessment Form
Ready to roll up your sleeves? Let’s walk through how to make a quiz in Google Forms that actually works. I’ll break this down so simply, your grandmother could follow along (and probably create a better form than most tech companies).
Step 1: Setting Up Your Foundation
First things, you can head over to Google Forms. You can either type “forms.google.com” directly into your browser or access it through your Google Drive.
- Click the “+” button to create a new form
- Give your form a compelling title (something like “Weekly Performance Self-Assessment” works better than “Form #47”)
- Add a brief description explaining the purpose and instructions
Step 2: Collecting Essential Information
Before diving into the assessment questions, you need to know who’s filling out your form. It’s like hosting a party and you want to know who showed up.

Create these foundational questions:
| Question Type | Question | Purpose |
|---|---|---|
| Short Answer | Full Name | Identification |
| Short Answer | Employee/Student ID | Verification (especially useful for large groups) |
| Short Answer | Department/Class | Categorization |
Make these fields required. Trust me, you don’t want anonymous responses when you’re trying to provide personalized feedback later.
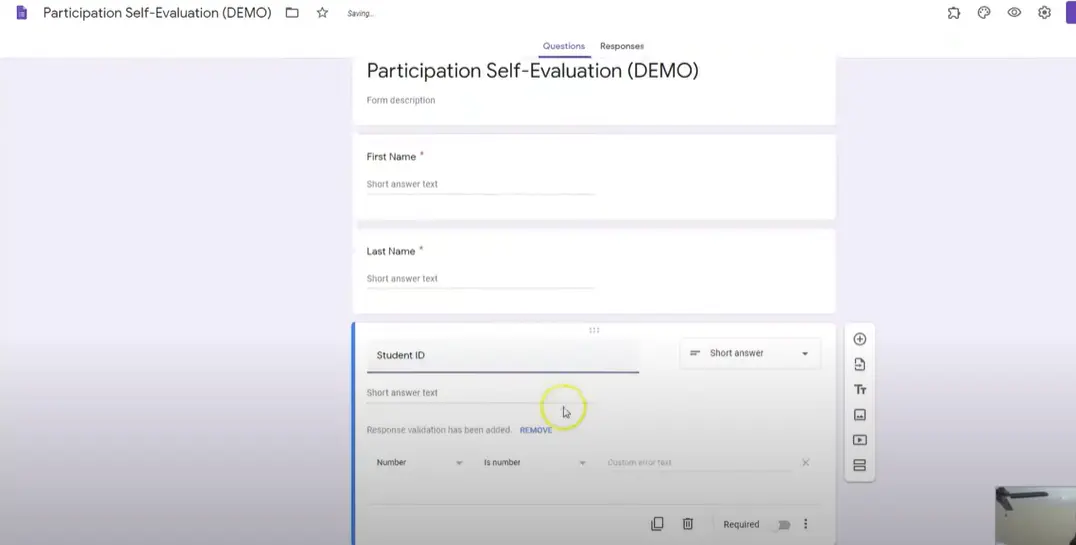
Step 3: Crafting Your Assessment Categories
Here’s where the magic happens. Setting up Google Forms for assessments requires thoughtful question design. Think of each question as a stepping stone toward understanding.
Category 1: Participation & Attendance
- Question type: Multiple choice
- Options: 0 points, 1 point, 1.5 points, 2 points
- Description: Rate your consistent attendance and active participation in class sessions
Category 2: Task Completion
- Question type: Multiple choice
- Scale: Same 0-2 point system
- Focus: Weekly activities, assignments, or project deliverables
Category 3: Quality of Work
- Question type: Linear scale (1-5) or Multiple choice
- Examples: Discussion post quality, report thoroughness, creative problem-solving
Category 4: Collaboration & Communication
- Question type: Multiple choice or checkboxes
- Focus: Teamwork, peer interactions, communication effectiveness
Step 4: Adding the Secret Sauce – Feedback Questions
Numbers tell one story, but narratives tell the whole story. Include open-ended questions that encourage reflection:
- “What’s one thing you’re proud of this week?”
- “Where do you see room for improvement?”
- “What support do you need to succeed?”
These questions transform your form from a mere data collection tool into a genuine reflection exercise.
Making Your Form Quiz-Ready: Answer Keys and Automatic Grading
Want to know how to create answer key Google Forms quiz? Here’s where things get interesting. Google Forms can automatically grade certain question types, which is like having a teaching assistant who never sleeps and never complains.
Converting to Quiz Mode
- Click the Settings gear icon
- Navigate to the “Quizzes” tab
- Toggle “Make this a quiz” to ON
- Choose when to release grades (immediately or after manual review)
Setting Up Answer Keys
For each question, click the answer key option and:
- Mark correct answers
- Assign point values
- Add answer feedback (optional but recommended)
Sharing Your Masterpiece: Distribution Strategies That Work
You’ve built it, but will they come? How to share Google Forms self-assessment effectively can make or break your evaluation process.
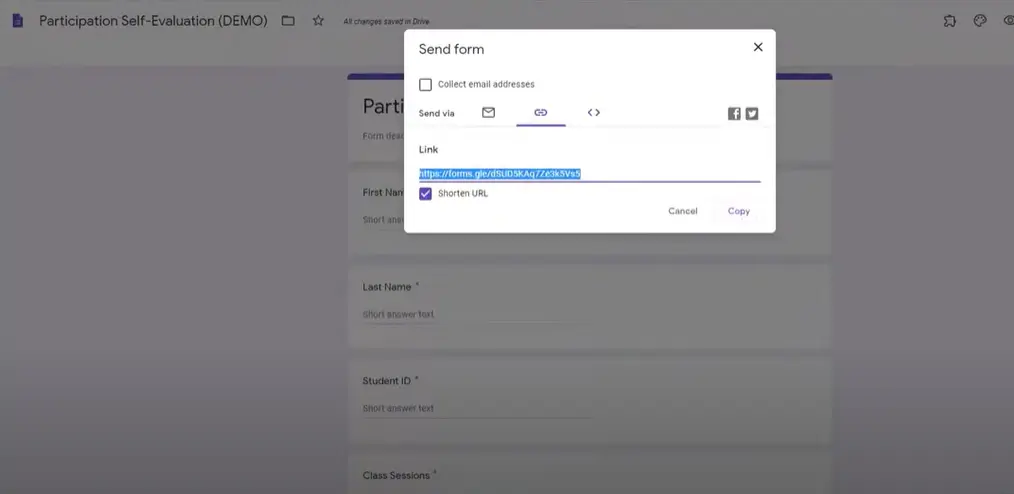
Method 1: Direct Link Sharing
Click the “Send” button and copy the link. You can shorten it for easier sharing – because nobody likes typing out URLs that look like they were created by a cat walking across a keyboard.
Method 2: Email Distribution
Google Forms can send invitations directly. Just enter email addresses, customize your message, and hit send. It’s like party invitations, but for learning.
Method 3: Embed in Learning Management Systems
Grab the HTML embed code and integrate your form into Moodle, Canvas, or your company’s intranet. Seamless integration equals higher completion rates.
Data Analysis: Making Sense of the Results
Raw data is like an unassembled IKEA furniture – potentially useful, but currently just a pile of parts. Analyzing Google Forms quiz results requires strategy.
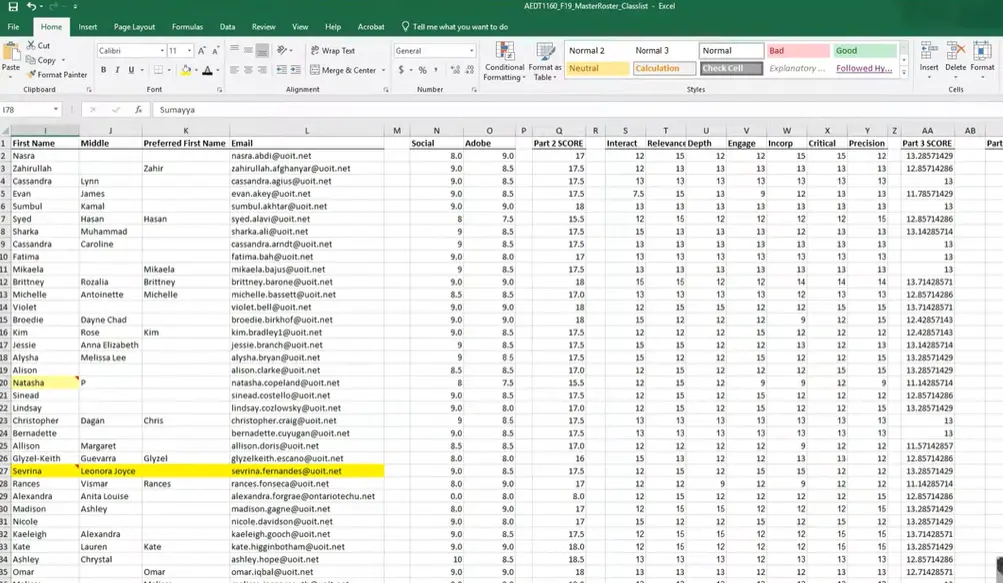
Automatic Spreadsheet Creation
Google Forms automatically creates a response spreadsheet. Access it by:
- Going to the “Responses” tab
- Clicking the spreadsheet icon
- Choosing “Create a new spreadsheet”
Data Organization Tips
- Sort by name or ID for easier grade book integration
- Use filters to identify trends or outliers
- Create pivot tables for deeper analysis
- Export to CSV for use in other grading systems
Best Practices: The Do’s and Don’ts of Self-Assessment Design
Creating effective self-assessments is part art, part science, and part common sense. Here are the guidelines that separate amateur hour from professional excellence:
The Golden Rules
DO:
- Keep questions clear and specific
- Use consistent rating scales
- Include both quantitative and qualitative measures
- Test your form before sharing
- Provide context for rating criteria
DON’T:
- Make forms unnecessarily long (attention spans aren’t what they used to be)
- Use ambiguous language
- Forget to make key questions required
- Neglect mobile optimization
- Skip the feedback questions
Question Types That Actually Work
| Question Type | Best For | Example |
|---|---|---|
| Multiple Choice | Objective self-rating | Rate your participation level |
| Linear Scale | Satisfaction measures | How confident are you in this skill? (1-5) |
| Paragraph Text | Reflective responses | Describe your biggest learning this week |
| Checkboxes | Multiple applicable options | Which goals did you achieve? |
Advanced Features: Taking Your Forms to the Next Level
Ready to show off? These advanced techniques will make your colleagues wonder if you’ve been secretly attending Google University.
Conditional Logic
Use section branching to create personalized assessment paths. If someone rates themselves low in a category, redirect them to additional reflection questions.
Response Validation
Set rules to ensure quality responses. For example, require a minimum number of characters for reflection questions.
Collaboration Features
Add colleagues as collaborators to review responses together or create peer-assessment versions of your form.
Troubleshooting Common Issues
Even the best-laid plans sometimes go awry. Here are solutions to the most frequent hiccups:
Problem: Low Response Rates
Solutions: Send reminder emails, make the form mobile-friendly, explain the benefits clearly, and consider incentives.
Problem: Inconsistent Self-Ratings
Solutions: Provide clearer criteria descriptions, use examples, and consider calibration exercises.
Problem: Technical Difficulties
Solutions: Test forms thoroughly, provide alternative access methods, and create simple instruction guides.
Real-World Examples and Templates
Sometimes seeing is believing. Here are proven self-assessment templates you can adapt:
For Educators
- Weekly Learning Reflection: Focus on comprehension, participation, and goal progress
- Project Self-Evaluation: Assess planning, execution, and collaboration
- Skill Development Tracker: Monitor progress on specific competencies
For HR Professionals
- Performance Review Prep: Annual or quarterly self-assessment
- Training Effectiveness: Post-workshop reflection forms
- Goal Setting Tracker: Quarterly progress check-ins
Measuring Success: How to Know If Your Self-Assessment Works
Creating the form is just the beginning. How do you know if it’s actually effective? Here are key metrics to track:
- Completion rates: Are people actually filling it out?
- Response quality: Are reflections thoughtful or just box-checking?
- Behavioral changes: Do you see improvement in areas people identified?
- Engagement levels: Are participants more self-aware and motivated?
You now have everything you need to create effective self-assessment forms in Google Forms. The question isn’t whether you can do it, it’s whether you will.
Start small. Pick one area where self-assessment could make a difference, create a simple form, and test it with a small group. Learn from the experience, refine your approach, and gradually expand.
Remember, the best self-assessment form is the one that actually gets used and provides valuable insights. Keep it simple, make it meaningful, and watch as reflection transforms into action.
OnlineExamMaker: An Alternative Tool to Create Auto Grading Self Assessments
OnlineExamMaker a powerful AI-based self assessment making tool that can save you time and efforts. With the Question Editor, you can create multiple-choice, open-ended, matching, sequencing and many other types of questions for your tests, exams and inventories. You are allowed to enhance quizzes with multimedia elements like images, audio, and video to make them more interactive and visually appealing.
Top features for Self Assessment:
● Create a question pool through the question bank and specify how many questions you want to be randomly selected among these questions.
● Allow the quiz taker to answer by uploading video or a Word document, adding an image, and recording an audio file.
● Display the feedback for correct or incorrect answers instantly after a question is answered.
● API: Private access for developers to extract your exam data back into your system automatically.
Create Your Next Quiz/Exam with OnlineExamMaker
How to make an amazing self assessment in OnlineExamMaker?
AI-powered exam generators like OnlineExamMaker can significantly simplify and enhance the creation of online self assessments. Below is the step by step tutorial you can follow.
Step 1: Access the OnlineExamMaker exam creation platform
Step 2: Create a self assessment

Navigate to the exam creation section, press “New exam” button to create a new self assessment.
Step 3: Generate self assessment questions

Instead of manually typing each question, you typically upload your source material, or input keywords in OnlineExamMaker AI Question Generator, then the AI tool can help you generate questions automatically.
Step 4: Configure exam settings
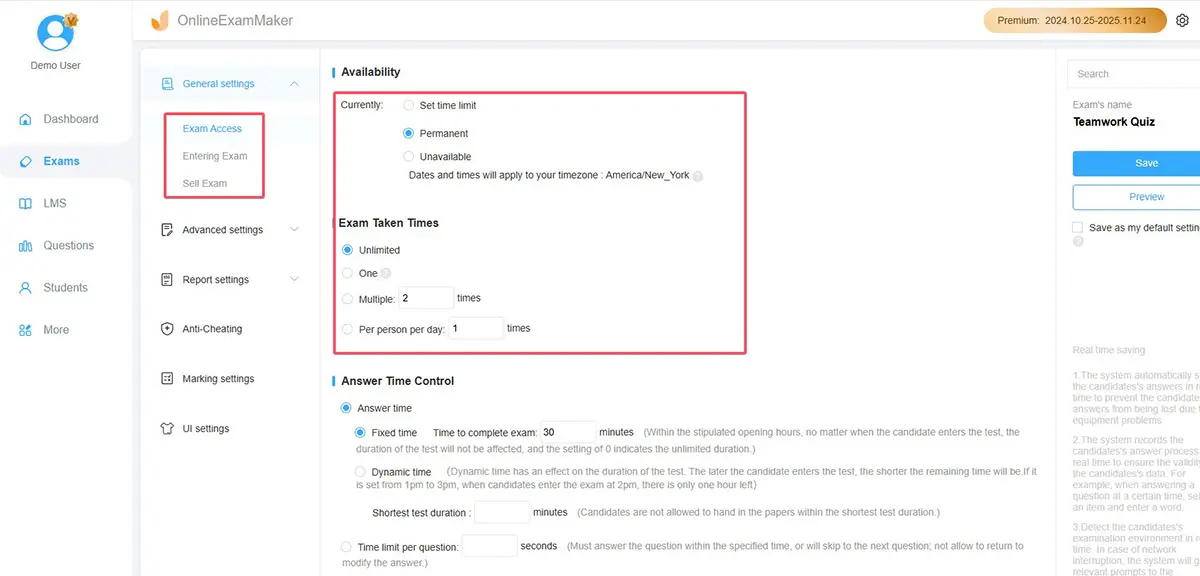
Time Limit: Define the total time allowed for the exam.
Access Control: Determine who can take the exam (e.g., password protection, specific student groups).
Randomization: Utilize features to randomize question order or present different question sets to each student from a question pool for enhanced security.
Step 5: Publish and share
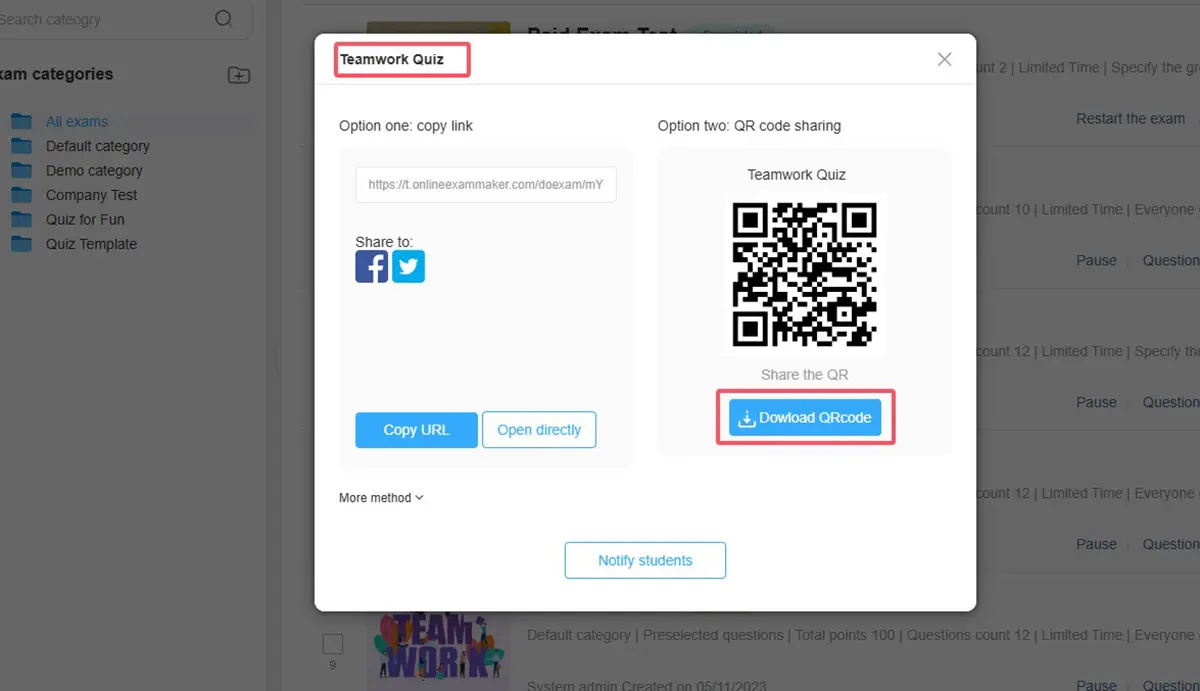
Share the unique exam link or distribute it through your learning management system (LMS).